The Gravel in Your Stew: A Tale of Culinary Woe
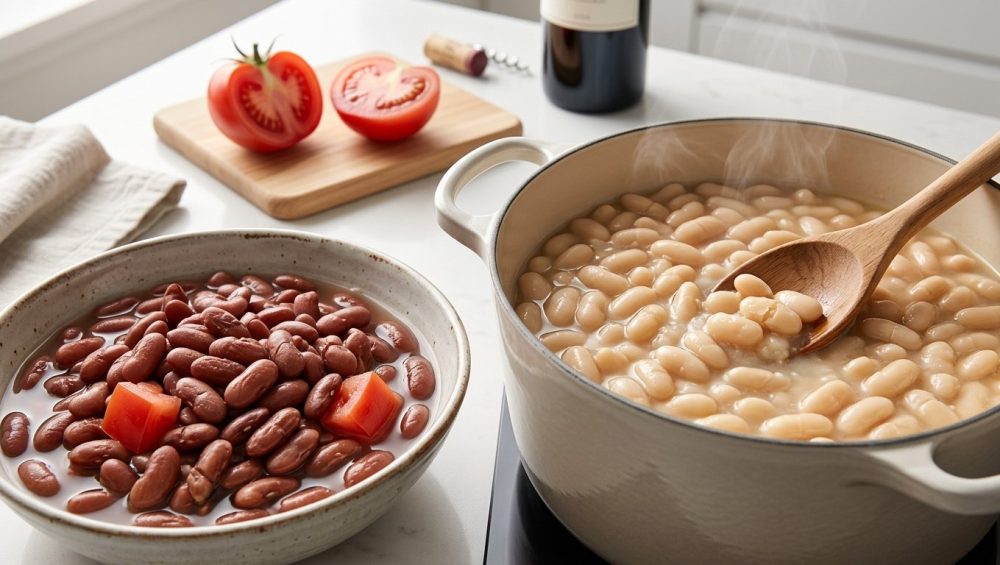
Listen, we need to have a serious, uninterrupted talk about your weekend chili. You know the exact pot I am referring to. You spent your entire Sunday morning meticulously chopping onions, mincing an absurd amount of garlic, and perfectly browning your ground beef. You cracked open a gorgeous, imported can of crushed San Marzano tomatoes, poured in a bag of dried kidney beans, and let the whole beautiful concoction simmer on the stove while you went about your day. Four hours later, you ladled yourself a steaming, fragrant bowl of comfort, took a massive bite, and nearly cracked a molar. The beans were crunchy. Not al dente. Not slightly firm. We are talking pure, unadulterated gravel.
If this scenario sounds painfully familiar, take a deep breath. You are not alone, and more importantly, you are not a bad cook. You simply fell victim to a fundamental, widespread misunderstanding of food chemistry. As a culinary blogger who has set off the smoke detector more times than I care to admit, I can assure you that perfectly creamy, melt-in-your-mouth beans do not require a culinary degree from a pretentious institute in Paris. They require a basic understanding of cellular biology and a strict adherence to the laws of thermodynamics. Today, we are going to tear down the intimidating chef-speak and dive deep into the analytical breakdown of why acidic environments inhibit the dissolution of hemicellulose and pectin in legume cell walls. In plain English: we are going to talk about why you absolutely must stop adding tomatoes to your beans too early.
The 2026 Home Cooking Renaissance
We are currently in the midst of a massive, unprecedented shift in how people approach their kitchens. According to the comprehensive 2025-2026 State of Home Cooking Report published by HelloFresh, the culinary landscape of the average household is undergoing a massive transformation. The data reveals that a staggering 93% of Americans expect to cook as much, if not more, over the next 12 months than they did the previous year. This isn’t just a fleeting hobby; it is a fundamental shift in how we approach our daily sustenance.
The primary driver behind this movement is stark economic reality. A full 85% of those who plan to cook more are doing so as a direct response to a tightening economy, with 83% of US consumers reporting that saving money is a bigger priority in 2025 and 2026 than it has been in decades. Dining out has transitioned from a casual convenience to a source of financial anxiety, with nearly half of adults (49%) admitting they feel guilty when ordering delivery instead of utilizing the groceries they already have at home. When you are finally committed to breaking your takeout habit, the last thing you want is a massive pot of crunchy legumes staring back at you.
The Tragic Irony of the Weekend Chili
But it is not just about the money. Health is a massive motivating factor for the modern weekend hobbyist. For 81% of consumers, a desire to eat healthier is the primary reason they are rolling up their sleeves and stepping up to the stove. An overwhelming 89% of Americans now firmly believe that cooking meals at home is a significantly healthier alternative to dining out. Furthermore, more than half of Americans are actively planning to prepare more meals at home to prioritize shared, consistent mealtimes, signaling a return to the dinner table as a place of genuine connection.
This massive influx of enthusiastic but perhaps inexperienced home cooks has led to a surge in batch-prepping and the utilization of pantry staples. Trending homemade foods heavily feature plant-based comfort foods, with a nearly 19% year-over-year increase in social conversations surrounding homemade, sustainable dishes like vegan mac and cheese, plant-based burgers, and hearty legume-based stews. People are buying dried beans in unprecedented volumes because they are cheap, packed with protein and fiber, and boast an indefinite shelf life. But here is the tragic irony: in an attempt to meal-prep a massive batch of healthy, budget-friendly soup, millions of well-intentioned home cooks are inadvertently creating pots of inedible despair because they do not understand the science of the seed coat.
The Microscopic Anatomy of a Bean
To understand why your beans are betraying you, we have to zoom in on their microscopic anatomy. A dried bean is essentially a tiny, dormant vault of nutrition, protected by a formidable fortress known as the seed coat. Beneath this tough exterior lies the cotyledon, which houses the starches and proteins that eventually transform into that creamy, luxurious texture we all crave. However, holding this entire structure together is a complex matrix of carbohydrates, primarily pectin and hemicellulose.
The Seed Coat and the Cotyledon
The pectic network within a bean is primarily composed of acidic rhamnogalacturonan and homogalacturonan, alongside neutral arabinan, galactan, and arabinogalactan polymers. Think of pectin as the biological mortar holding the bean’s cellular bricks together. For a bean to soften during cooking, depolymerization and solubilization of this pectin must occur, which loosens the tissues and allows for cellular separation. Ignorance of this cellular structure is one of the seven rookie kitchen mistakes that will inevitably ruin your weekend chili. If you do not actively encourage the breakdown of this middle lamella, the bean will remain perpetually hard, no matter how long you leave it simmering on the stove.
The Pectin Matrix and the Hard-To-Cook Phenomenon
The age of your beans plays a monumental role in this process. Dried beans typically have a moisture content of around 16% when they are relatively fresh. However, as they sit in a warehouse, on a grocery store shelf, or in the dark recesses of your pantry for months on end, that moisture slowly evaporates. This prolonged storage gives the pectin matrix ample time to age, harden, and form secondary interactions with other cell wall polymers.
This creates a highly frustrating situation where old beans can take up to twice as long to soften compared to freshly harvested ones. If you are buying bulk beans from a bin that doesn’t see a lot of turnover, you are already starting at a massive disadvantage. The structural integrity of the bean has essentially fossilized, leading to what food scientists officially refer to as the “hard-to-cook” (HTC) phenomenon. When you combine an inherently stubborn, aged bean with the wrong cooking environment, you are setting yourself up for guaranteed failure.
The Acid Trap: Why Tomatoes Are the Enemy of Soft Beans
This brings us to the ultimate villain of our culinary story: acid. Tomatoes, wine, vinegar, and citrus juices are all highly acidic ingredients. I constantly preach that your dinner actually needs acid to balance heavy, fatty flavors and bring a dish to life, but timing is absolutely everything. When you introduce a low-pH ingredient into the cooking liquid before the beans have fully softened, you trigger a catastrophic biochemical lockdown.
The Biochemical Sabotage of Low pH
Acids work by making the hemicelluloses in the cell wall of the bean seed significantly more stable and far less inclined to dissolve in water. When the pH of your cooking liquid drops, it actively strengthens the cellular walls. Furthermore, the acidic environment prevents the pectin from breaking down into the soluble forms necessary for a creamy texture. You are essentially embalming the bean in its current, rock-hard state.
The Pectin Methyl Esterase Problem
According to rigorous food science experiments, beans cooked in a heavily acidic environment (such as water spiked with citric acid) can take upwards of an hour and forty-five minutes just to become somewhat edible, compared to a mere 45 minutes in a neutral or alkaline environment. The acid halts the natural softening process in its tracks. If you dump a can of crushed tomatoes into your pot of chili while the kidney beans are still firm, those beans will remain firm until the end of time. You could simmer that pot for three consecutive days, and you would still be chewing on gravel. The acid acts as an impenetrable shield, preventing the boiling water from effectively gelatinizing the starches within the cotyledon.
The Hard Water Conspiracy: A Two-Front War
As if acidic tomatoes weren’t enough of a hurdle, many of you are unknowingly sabotaging your beans straight out of the tap. If you live in an area with hard water, you are fighting a two-front war against legume tenderness. Hard water is rich in dissolved minerals, specifically calcium and magnesium. When these alkaline earth metals interact with the pectin in the bean’s middle lamella, a disastrous chemical reaction occurs.
Calcium Pectate and Magnesium Pectate
During the cooking process, an enzyme called pectin methyl esterase (PME) hydrolyzes pectin into pectinic acid. This acid then binds rapidly with the calcium and magnesium in your tap water to form calcium pectate and magnesium pectate. These resultant compounds are incredibly stubborn, highly heat-resistant, and are not readily soluble in boiling water. This drastically reduces cellular separation and exacerbates the hard-to-cook phenomenon.
How to Combat Mineral-Rich Tap Water
Just like rinsing your grains to remove excess starch, you must actively manage the mineral content of your cooking liquid. If your tap water leaves crusty white calcium deposits on your showerhead, it is doing the exact same thing to the cellular walls of your pinto beans. The minerals cross-link with the pectin, creating a reinforced biological concrete. If you are dealing with both hard water AND an early addition of acidic tomatoes, your beans have absolutely zero chance of survival. To combat this, you may need to use filtered water for your soaking and boiling phases, or rely heavily on our next, highly effective scientific intervention.
The Alkalinity Hack: Baking Soda to the Rescue
If acid is the enemy of the home cook, then alkalinity is our knight in shining armor. Enter sodium bicarbonate, universally known in the culinary world as baking soda. Adding a tiny pinch of baking soda to your bean-cooking water is not some viral internet myth or an old wives’ tale; it is a rigorously validated, food-physics-optimized technique. In the same way you should actually boil them first when prepping certain tough mushrooms to improve their texture, a tiny pinch of baking soda in your bean water works absolute miracles.
The Science of Saponification
When you introduce baking soda to the soaking or cooking water, you elevate the pH to a slightly alkaline range, typically between 8.2 and 8.6. At this specific pH level, the ester bonds in the pectin methyl esters undergo a chemical process called saponification, which cleaves the cross-links and dramatically increases the porosity of the bean’s skin. This allows water to penetrate the cotyledon much faster. In fact, peer-reviewed studies show that an alkaline soak can accelerate water absorption by up to 3.2 times and reduce average stovetop cooking time by a staggering 25% to 40%. Some controlled kitchen experiments have even shown cooking times decreasing by nearly 75% when a baking soda brine is properly utilized.
Defeating the Oligosaccharides (And Saving Your Dignity)
But wait, the magic of baking soda gets even better. Baking soda doesn’t just save you precious time on a weeknight; it saves your dignity. The bicarbonate ions actively catalyze the hydrolysis of raffinose, stachyose, and verbascose. These are the exact indigestible trisaccharides and tetrasaccharides that ferment in your colon, courtesy of your gut bacteria, to produce hydrogen, methane, and carbon dioxide. Yes, baking soda scientifically degrades roughly 68% of the oligosaccharides responsible for flatulence. So, a pinch of baking soda yields a creamier texture, a faster cooking time, and a significantly more pleasant post-dinner experience for everyone involved.
The Exact Baking Soda Ratio for Perfection
Precision is key here. The ideal, scientifically validated ratio is 0.5% weight-by-weight sodium bicarbonate. In practical kitchen terms, this translates to roughly 1/4 to 1/2 teaspoon of baking soda per cup of dried beans, or about 1 teaspoon per 5.5 cups. Do not exceed this amount. If you use too much baking soda, the high alkalinity will degrade the essential amino acid lysine, accelerate Maillard browning too rapidly, and leave your beans with a distinctly soapy, bitter flavor. Nobody wants their hearty winter minestrone tasting like a mouthful of dish detergent.
The Sequential Staging Strategy for Foolproof Legumes
Now that we fully understand the complex biochemistry of the legume cell wall, we need to translate this hard science into a practical, everyday kitchen routine. By employing scientific food staging techniques, you can ensure every single ingredient hits the pot at the exact right moment, resulting in a flawless dish every single time. Here is the definitive, non-negotiable order of operations for cooking beans perfectly.
Phase 1: The Alkaline Soak
While some modern recipes and trendy food influencers claim that soaking dried beans is an unnecessary step, I firmly and aggressively disagree. Soaking ensures even hydration, jumpstarts the breakdown of gas-producing oligosaccharides, and drastically reduces your active stovetop time. Submerge your dried beans in plenty of cool, filtered water, add your precisely measured baking soda, and let them sit at room temperature for 1 to 2 hours (or up to 12 hours for an overnight soak). Do not refrigerate them during this process! Cold temperatures slow down the alkaline hydrolysis kinetics by up to 65%, rendering the baking soda largely ineffective.
Phase 2: The Neutral Simmer
Once the soaking phase is complete, drain the alkaline liquid and rinse the beans thoroughly under cold water. Place them in a heavy-bottomed pot, cover them with fresh, filtered water (to avoid the calcium pectate trap we discussed earlier), and bring the pot to a gentle simmer. Do not add salt yet. While some chefs argue that early salting is fine, sodium ions can compete with calcium and magnesium for pectin binding sites, which can potentially re-toughen the skins if your water is particularly hard. Wait to salt until the beans are almost entirely tender.
Phase 3: The Flavor Build
You do not have to simmer your beans in plain, boring, flavorless water. You can build massive, complex flavor early on by taking your dry spices and blooming them in oil before adding the soaking water to the pot. Toss in some smashed garlic cloves, a halved yellow onion, a few bay leaves, a sprig of fresh rosemary, and perhaps a leftover Parmesan rind. These aromatics are pH-neutral enough that they will not interfere with the softening of the hemicellulose, but they will infuse the cotyledon with incredible depth as it hydrates.
Phase 4: The Acid Drop
This is the most crucial step in the entire process. You must wait until the beans are completely, 100% tender before you even think about looking at a tomato. Bite into a test bean. Is it creamy all the way through? Is there any chalky, white resistance in the center? If there is even a hint of chalkiness, put the lid back on and keep simmering. Only when the beans have achieved a luxurious, velvet-like texture are you allowed to introduce your crushed tomatoes, your splash of white wine, your dash of apple cider vinegar, or your squeeze of fresh lemon juice. Once the acid is in the pot, the beans will stop softening entirely. They are permanently locked in. Make sure they are absolutely perfect before you turn the key.
The Thermodynamics of the Perfect Simmer
Once you have successfully navigated the chemical minefield of pH and alkalinity, you must turn your attention to the physical forces at play in your pot. The thermodynamics of simmering are just as critical as the biochemistry of the soaking water.
Evaporation, Agitation, and Blown-Out Skins
When you bring a pot of beans to a boil, you are introducing aggressive kinetic energy into the water. If you maintain a violent, rolling boil, the physical agitation will cause the beans to smash violently against each other and the hard walls of the pot. Because the delicate seed coat hydrates and expands at a different rate than the dense inner cotyledon, this turbulent kinetic energy will cause the skins to rupture, blow out, and disintegrate long before the center of the bean has softened. You will be left with a cloudy, murky broth filled with empty bean skins and chalky, half-cooked centers.
Instead, you must master the art of the gentle simmer. After bringing the pot to an initial hard boil for about 10 to 15 minutes (which is necessary to neutralize certain naturally occurring toxins like phytohaemagglutinin found in raw kidney beans), you must immediately drop the heat to the lowest possible setting. The surface of the water should barely quiver, with only an occasional, lazy bubble breaking the surface. This low-and-slow thermodynamic approach ensures that the heat penetrates the bean evenly, allowing the starches within the cotyledon to swell and gelatinize at a steady, controlled pace without physically destroying the structural integrity of the seed coat.
The Right Vessel: A Warning on Toxic Cookware
Let’s take a brief but necessary detour to talk about the physical equipment you are using, because I cannot emphasize enough the importance of banishing toxic kitchen gear from your home, especially when you are simmering highly acidic foods. I have absolutely zero patience for the mystery-metal, peeling non-stick garbage that so many weekend hobbyists use for their soups and stews.
The Dangers of Acid in Scratched Non-Stick
When you simmer an acidic tomato broth for two hours in a scratched, degraded Teflon pot, you are actively leaching synthetic forever chemicals straight into your family’s dinner. Acid is highly reactive. It will strip the compromised coating from cheap pans and incorporate those toxic compounds directly into your painstakingly crafted chili. Throw those pans away. I mean it. Go to your kitchen right now and put them in the trash.
The Only Pots You Actually Need
You do not need a forty-piece, infomercial cookware set to be a competent home cook. Instead, rely on a heavy-bottomed multiclad stainless steel cookware pot that distributes heat evenly across the base without reacting to acidic ingredients. Enameled cast iron Dutch ovens are also spectacular for this purpose. They possess immense thermal mass, meaning they hold a steady, gentle simmer perfectly without requiring constant temperature adjustments on your stovetop. Having a beautifully organized dream kitchen means you can effortlessly transition from soaking to simmering without losing your mind, and that foundational peace begins with owning safe, reliable, heavy-duty tools.
Troubleshooting the Un-Fixable: Can You Save Hard Beans?
But what happens if you are reading this article right now, standing over a bubbling pot of chili, and you have already added the tomatoes to hard beans? You committed the cardinal sin before you knew any better. Can they be saved? The brutally honest answer is: maybe, but it is going to take absolute brute force.
The Pressure Cooker Hail Mary
Because the hemicellulose in the cell walls has already been stabilized by the acid, standard stovetop simmering is no longer going to cut it. You could simmer them until the end of the week, and they would still be crunchy. Your best bet is to transfer the entire mixture to an electric pressure cooker (like an Instant Pot). The extreme pressure and incredibly high internal temperatures (reaching up to 248°F) can sometimes force the pectin to break down despite the hostile acidic environment. Cook them on high pressure for 20 to 30 minutes, allow for a natural pressure release, and pray to the culinary gods that the thermal shock was enough to overcome the pH barrier.
The Puree Pivot
If you do not own a pressure cooker, your only other viable option is the puree pivot. Fish out as many of the hard, offending beans as you possibly can with a slotted spoon. Hit them aggressively with an immersion blender until they form a thick paste, and then stir that slurry back into the pot to act as a rustic thickener for your broth. It won’t be the beautifully textured, whole-bean chili you originally planned, but it will be entirely edible, it will taste fantastic, and most importantly, you won’t break a tooth on a kidney bean.
The Final Word on Legume Mastery
Cooking is not magic; it is applied chemistry wrapped in a warm, comforting embrace. It is the mastery of heat, time, and molecular structure. By understanding the microscopic anatomy of your ingredients and respecting the immense, transformative power of pH, you can elevate your weeknight meals from stressful, unpredictable chores to guaranteed culinary triumphs.
Stop letting a simple can of crushed tomatoes bully your legumes into submission. Take control of your cooking vessel, utilize the rigorously tested science of alkalinity, invest in safe and durable cookware, and stage your ingredients with intention. If you respect the biology of the bean, the bean will reward you with the creamiest, most satisfying texture imaginable. You have the knowledge. You have the baking soda. Now go forth, and never suffer through a bowl of crunchy, gravel-filled chili again. You’ve got this.


