We’ve all been there. It is a chilly Sunday afternoon, and you have decided to channel your inner rustic homesteader. You’ve soaked your beautiful, overpriced heirloom beans overnight. You’ve chopped your aromatics with the precision of a Michelin-starred chef. You toss everything into your heavy pot—the beans, the broth, the onions, and a gorgeous, vibrant can of crushed San Marzano tomatoes. You set it to a gentle simmer, pour yourself a glass of wine, and wait for the magic to happen. Two hours pass. You take a bite. The beans are crunchy. Three hours pass. Still gravel. Four hours in, you are starving, slightly tipsy, and aggressively chewing on legumes that have the structural integrity of river pebbles.
Welcome to one of the most frustrating, universally experienced beginner cooking mistakes in the culinary world. You didn’t buy a bad batch of beans. You didn’t set the heat too low. You committed a fundamental sin of kitchen chemistry: you added acid before the starches had a chance to soften.
As a home cook who has ruined more pots of chili than I care to admit, I am here to tell you that cooking doesn’t have to be a guessing game. You don’t need a culinary degree to make mind-blowing food, but you do need to understand the basic rules of engagement when you are dealing with stubborn ingredients. Today, we are going to strip away the pretentious chef-speak and dive deep into the microscopic world of legume chemistry. We are going to look at exactly why that seemingly innocent can of diced tomatoes turned your dinner into a bowl of tiny rocks, and more importantly, how to sequence your ingredients so you never have to aggressively chew a pinto bean ever again.
The Anatomy of a Bean: What We Are Actually Trying to Do
Before we can understand why tomatoes are the enemy of uncooked beans, we need to understand what a bean actually is. If we were to put on our lab coats and slice a dried bean in half, we would see a fascinating, highly defensive biological structure. Beans are seeds, and their primary goal in life is not to become your dinner; their goal is to survive in the dirt, resist rotting, and eventually sprout into a plant.
To achieve this, the bean is encased in a tough outer seed coat. Inside that coat lies the cotyledon, which contains all the nutrients, starches, and proteins the baby plant needs to grow. These starchy cells are glued together by a complex carbohydrate polymer called pectin, which is primarily located in the middle lamella (the space between the plant cells). You might recognize pectin as the stuff that makes fruit jams set into a gel, but in a plant cell wall, it acts as a rigid, structural cement.
When we cook dried beans, our goal is twofold. First, we need water to penetrate the tough outer seed coat through a tiny pore called the hilum, hydrating the starches inside. Second, we need thermal energy (heat) to break down that pectin cement alongside the hemicellulose in the cell walls. As the water temperature rises, the pectin chains begin to dissolve and separate. The cellular glue weakens, the cells themselves absorb water and swell, and the entire structure transforms from a rock-hard pebble into a creamy, velvety delight. Just as you might use specific techniques to achieve tender meat in a screaming hot wok, achieving tender beans requires manipulating the chemical environment to your advantage.
If the pectin doesn’t dissolve, the bean doesn’t soften. It is really that simple. You can boil a bean for ten hours, but if the chemical environment in the pot is actively reinforcing that pectin glue rather than breaking it down, you are fighting a losing battle. And this is exactly where our acidic friend, the tomato, enters the chat to ruin your life.
The Acid Trap: Why Tomatoes Are the Enemy of Uncooked Beans
Let’s get into the hard science, because understanding this will instantly eliminate kitchen chaos when you are trying to whip up a hearty stew.
Tomatoes are naturally acidic, typically boasting a pH level somewhere between 4.0 and 4.5. When you dump a can of tomatoes into your cooking liquid, you significantly lower the overall pH of the pot. Now, remember that pectin cement we just talked about? Pectin is primarily composed of galacturonic acid molecules. In a neutral cooking environment (like plain tap water, which usually hovers around a pH of 7), the heat easily disrupts the hydrogen bonds holding the pectin chains together, allowing them to dissolve.
However, when you introduce an acidic ingredient into the mix, everything changes. The acid floods the cooking liquid with excess hydrogen ions. These hydrogen ions interact with the carboxylate groups on the pectin molecules, protonating them. In plain English: the acid neutralizes the negative charges that normally cause the pectin chains to repel each other. Instead of pushing apart and dissolving, the pectin chains huddle closer together.
But it gets worse. Beans naturally contain calcium ions in their cell walls. When the acid forces the pectin chains closer together, these calcium ions act like microscopic bridges, cross-linking the pectin molecules in a highly stable formation often referred to by food scientists as the “egg-box model”. The calcium sits perfectly in the pockets between the pectin chains, locking them into a rigid, impenetrable, water-resistant network.
Once this calcium-pectin cross-linking occurs, the cell walls become incredibly heat-resistant. You have essentially fortified the bean’s defenses. To truly nerd out for a second, the degradation of pectin follows Arrhenius kinetics. In basic terms, this means the breakdown of the cellular glue is highly dependent on temperature and activation energy. At a standard boiling point of 212°F (100°C), beans typically soften in about one to two hours because the thermal energy is sufficient to overcome the baseline activation energy required to dissolve neutral pectin. But when calcium cross-linking occurs due to an acidic environment, that required activation energy skyrockets. You suddenly need significantly more thermal energy to break those fortified bonds—energy that a simmering pot on a stovetop simply cannot provide. This is why your chili beans are still hard after four hours. The acid didn’t just delay the cooking process; it fundamentally altered the structural mechanics of the bean, making it nearly impossible for them to soften.
The Accomplice: Hard Water and the Calcium Conspiracy
Now, you might be thinking, “But I didn’t add tomatoes! My beans are still hard!” If you live in an area with hard water, you have a secondary, invisible enemy sabotaging your dinner.
Hard water is characterized by high concentrations of dissolved minerals, specifically calcium and magnesium. When you fill your pot straight from the tap, you are unwittingly introducing a massive dose of the exact building blocks needed to reinforce that dreaded pectin cross-linking.
Remember how the natural calcium inside the bean acts as a bridge between the pectin chains? When you boil beans in hard water, the excess calcium and magnesium in the liquid flood the cell walls. Even without the presence of a strong acid like tomatoes, this overwhelming concentration of minerals can independently cross-link the pectin, creating a hardened shell that refuses to yield. If you ever want to fix your food and avoid an unchewable disaster, you must account for your water quality.
When hard water and acidic ingredients team up, it is an absolute disaster for legumes. The acid protonates the pectin, perfectly priming it to accept the massive influx of calcium from the tap water. The resulting cross-linked network is so strong that you could practically use it as building material.
If you know you have hard water, you have a few options. You can use filtered or bottled water for your long bean simmers, which removes the excess minerals from the equation. Alternatively, you can use a clever chemical cheat code: a tiny pinch of baking soda. Baking soda (sodium bicarbonate) is alkaline. Adding just a quarter teaspoon per pound of dried beans raises the pH of the water, neutralizing any slight acidity, and provides carbonate ions that actually precipitate the calcium out of the solution (turning it into calcium carbonate). This sequesters the calcium, preventing it from cross-linking with the pectin, and allows the beans to soften beautifully. Just don’t overdo it, or your beans will taste like a bar of soap.
The “No-Go” Rule on Toxic Gear: Safe Cookware for Simmering
As your resident sassy sous-chef, I would be entirely remiss if we talked about acidic, slow-simmered foods without addressing the elephant in the kitchen: the pot you are cooking them in. I have zero patience for cheap, toxic kitchenware, and neither should you.
When you are simmering a highly acidic tomato-based stew or chili for hours on end, the material of your cookware matters immensely. If you are still using that scratched, peeling, mystery-metal non-stick pot you bought for ten dollars in college, throw it in the trash immediately. I am not joking.
Non-stick coatings, particularly older Teflon (PTFE) and cheap ceramic imitations, are notoriously fragile. When subjected to the long, slow heat required for cooking beans, combined with the corrosive nature of acidic tomatoes, these cheap coatings degrade rapidly. If your bargain-bin pot has lost its non-stick finish, it means those chemical flakes and toxic compounds have leached directly into your food. Furthermore, reactive metals like unlined aluminum or cheap, thin cast iron will react violently with the acid in the tomatoes, giving your chili a distinct, metallic, blood-like taste while simultaneously discoloring your food.
You need heavy, durable, non-reactive cookware that offers real value and safety. For long, acidic simmers, an enameled cast-iron Dutch oven is the undisputed king of the kitchen. The thick cast iron provides exceptional thermal mass, ensuring a gentle, even simmer that won’t violently agitate and shatter your beans, while the glass-like enamel coating is completely impervious to acidic ingredients.
Alternatively, high-quality, fully clad stainless steel is an excellent, non-toxic choice. While you might typically reserve your heavy stainless steel skillets for searing steaks, a large stainless steel stockpot is completely safe for simmering acidic tomato broths without leaching mystery metals into your dinner. Invest in good gear once, and it will take care of you for a lifetime.
The Salt Myth: Why You Should Actually Brine Your Beans
While we are debunking kitchen folklore, we need to address the most pervasive, stubbornly persistent myth in the history of bean cookery: the idea that adding salt to your soaking or cooking water makes beans tough.
Generations of cooks, perhaps even your own grandmother, have sworn that you must never, ever salt your beans until they are completely soft, lest they remain hard forever. This is categorically, scientifically false. In fact, salting your beans early is one of the best things you can do for their texture and flavor.
The myth likely originated because cooks conflated the hardening effects of acid and hard water with the addition of salt. But chemically, salt (sodium chloride) does the exact opposite of calcium and acid.
When you soak or cook beans in salted water, the sodium ions from the salt easily penetrate the bean’s seed coat. Once inside, these sodium ions actually displace the calcium and magnesium ions that are naturally bound to the pectin in the cell walls. Because sodium ions are monovalent (they only have one positive charge, unlike calcium which has two), they cannot form the rigid “egg-box” cross-links. By kicking the calcium out and replacing it with sodium, you are actively weakening the pectin network.
The result? Beans that are soaked and cooked in salted water actually soften faster, cook more evenly, and possess incredibly creamy interiors with flexible, tender skins that are less prone to blowing out and turning into mush. Plus, the salt seasons the bean all the way through, rather than just coating the exterior. So, ignore the old wives’ tales. Salt your bean water generously.
The Perfect Bean Blueprint: A Foolproof Cooking Sequence
Alright, we have covered the microscopic chemistry, the water quality, the toxic pots, and the salt myths. Now it is time to put it all together into a practical, foolproof sequence. If you want to master simple weeknight dinners that actually taste like they came from a restaurant, you need to follow this blueprint exactly when dealing with dried beans and acidic ingredients.
Step 1: The Sort and Rinse
Always start by dumping your dried beans onto a baking sheet and picking through them. You are looking for shriveled beans, discolored duds, and the occasional literal rock that snuck through the harvesting process. Rinse them well in a colander to remove surface dust.
Step 2: The Salt Brine (The Night Before)
Place your sorted beans in a large bowl and cover them with at least three inches of water. Add one tablespoon of kosher salt per quart of water. Stir until dissolved, and leave them on the counter overnight (or for at least 8 hours). This allows the sodium ions to displace the calcium, softening the skins and seasoning the interior.
Step 3: The Initial Simmer (Neutral pH)
Drain the soaking liquid (this also helps remove some of the gas-producing oligosaccharides) and transfer the beans to your heavy, non-toxic Dutch oven or stainless steel pot. Cover them with fresh water or a neutral-pH chicken or vegetable broth. Add your aromatics: onions, garlic, bay leaves, maybe a smoked ham hock. Do not add tomatoes, wine, or vinegar. If you have hard water, add a tiny pinch (1/4 teaspoon) of baking soda. Bring the pot to a rolling boil for 10 minutes (this neutralizes certain natural defensive compounds found in many legumes), then reduce the heat to a very gentle simmer.
Step 4: The Tenderness Test
Let the beans simmer until they are completely, unarguably soft and creamy. Do not rush this. Depending on the age and variety of the bean, this could take anywhere from 45 minutes to two hours. Pull out a few beans and taste them. If there is even a hint of chalkiness or resistance in the center, keep simmering. They must be 100% perfectly cooked before you proceed to the next step.
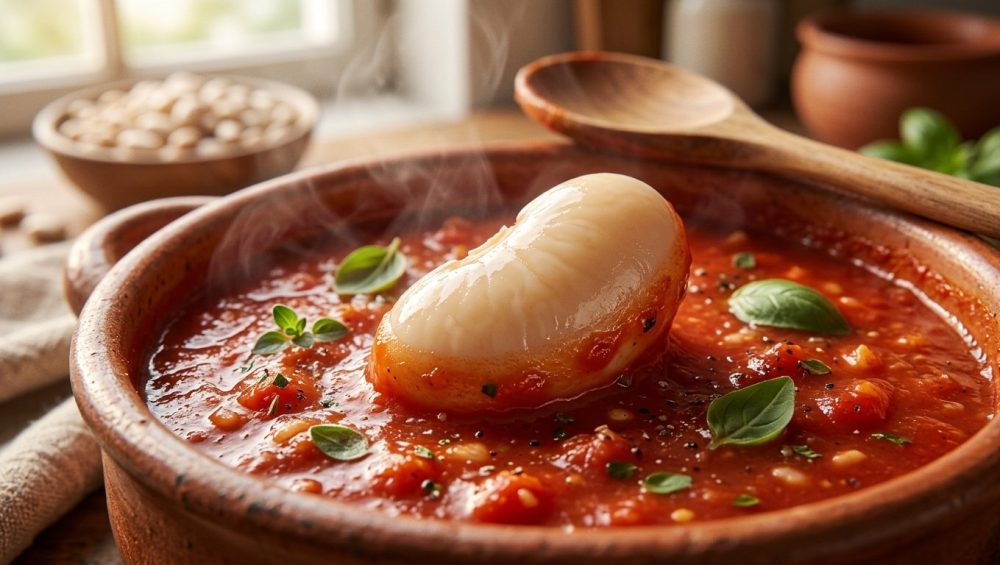
Step 5: The Acid Drop
Only when the beans are entirely soft and perfectly textured do you introduce your acidic ingredients. Now is the time to dump in that beautiful can of crushed tomatoes, the splash of red wine, or the squeeze of lime juice. Because the pectin has already been thoroughly dissolved and the starches fully hydrated, the acid can no longer cross-link the cell walls. Simmer the whole pot for another 20 to 30 minutes to allow the flavors to meld beautifully. You will be left with a rich, complex, deeply flavored dish with perfectly tender beans.
Rescuing the Unrescuable: Can You Save Acid-Locked Beans?
Let’s say you are reading this article in a state of sheer panic. Your pot is already on the stove. You dumped the diced tomatoes in two hours ago, and your beans are currently mimicking the texture of aquarium gravel. Can you save them?
I am going to give it to you straight: it is going to be incredibly difficult. Once that calcium-pectin network has been heavily cross-linked by the acid, it is notoriously stable. However, before you throw the entire pot into the garbage, you have a few emergency rescue options that might just salvage your dinner. Having a few essential kitchen tools on hand, like a pressure cooker or an immersion blender, can be the difference between a ruined meal and a happy accident.
Rescue Tactic 1: The Baking Soda Neutralizer
If you catch the mistake early enough, you can try to reverse the pH drop. Add a quarter to a half-teaspoon of baking soda to the pot and stir well. It will foam up aggressively—don’t panic, that is just the alkaline baking soda reacting with the acidic tomatoes to create carbon dioxide gas. This will raise the overall pH of the cooking liquid, neutralizing the acid and potentially allowing the pectin bonds to slowly loosen. Be warned: adding too much baking soda will destroy the flavor of your dish, making it taste metallic and soapy. Proceed with caution.
Rescue Tactic 2: The Pressure Cooker Nuke
If you have an electric pressure cooker (like an Instant Pot), transfer the entire stubbornly hard batch into the insert. The standard boiling temperature of 212°F on a stovetop isn’t enough to break the acid-locked bonds, but a pressure cooker can reach temperatures upwards of 240°F (115°C). This massive increase in thermal energy is sometimes enough to forcefully break down the fortified pectin network. Cook them on high pressure for 20 to 30 minutes, and cross your fingers.
Rescue Tactic 3: Pivot to Purée
If all else fails and the beans absolutely refuse to soften, it is time to pivot. Fish out the bay leaves and any bones, grab your immersion blender, and blitz the entire pot into a thick purée. The mechanical blades of a high-powered blender do not care about your calcium-pectin cross-links. They will obliterate the rigid cell walls that the heat couldn’t break down. Call it a “rustic Tuscan tomato-bean dip,” serve it with heavily toasted, garlic-rubbed sourdough bread, and pretend it was your plan all along.
Other Acidic Culprits You’re Probably Ignoring
We have spent a lot of time vilifying the humble tomato, but it is far from the only acidic ingredient that can ruin a pot of beans. Just as acid prevents beans from softening, it can also prevent you from ending up with mushy veggies in a stew—potatoes and carrots will retain their firm shape much longer in an acidic broth. But when it comes to legumes, you need to be hyper-vigilant about these other common culprits:
Molasses
If you have ever tried to make traditional Boston baked beans from scratch and wondered why they took eight hours in the oven, molasses is the answer. Molasses is surprisingly acidic (with a pH around 5.0 to 5.5) and is naturally packed with calcium. It is the perfect storm for pectin cross-linking. Traditional recipes actually rely on this reaction to keep the beans intact during the agonizingly long baking process. If you want a softer baked bean in a fraction of the time, boil the beans in neutral water until completely tender before folding them into the molasses-mustard sauce for a final bake.
Wine and Beer
Making a hearty, French-inspired bean and sausage stew? If you deglaze your aromatics with a heavy pour of white wine and immediately add your dried beans, you are setting yourself up for failure. Alcohol itself doesn’t harden beans, but the natural acidity of wine and certain beers will drop the pH just enough to trigger the cross-linking effect. Always let the beans soften in broth first.
Vinegar and Citrus
This should be obvious, but adding a splash of apple cider vinegar or a squeeze of fresh lemon juice to brighten up a soup must exclusively be done off the heat, right before serving. Adding it during the cooking process will instantly halt the softening of any rogue beans that aren’t quite finished.
Weekday Cheats vs. Weekend Masterpieces
As much as I advocate for the beauty of scratch cooking, I firmly believe that time is money. You do not need to be a martyr to make good food. You need a strategy that fits your lifestyle, especially if you are trying to overcome weeknight cooking anxiety.
The Tuesday Night Cheat: Embrace the Can
It is a rainy Tuesday evening. You just got off a nine-hour shift, the dog threw up on the rug, and you need dinner on the table in thirty minutes. This is not the time to romanticize dried beans.
Canned beans are one of the greatest convenience products in the modern supermarket. Because they have already been pressure-cooked in their cans to the point of perfect tenderness, the pectin is entirely dissolved. The structural battle has already been won at the factory. This means you can open a can of black beans, rinse them, and dump them directly into a bubbling pot of highly acidic crushed tomatoes, lime juice, and vinegar without a single worry. They will absorb the flavors, heat through, and remain beautifully soft. Do not let anyone shame you for using canned beans on a weekday. They are a home cook’s secret weapon.
The Sunday Masterpiece: The Heirloom Ritual
Weekends, however, are a different story. When you have a lazy Sunday afternoon stretching out before you, the ritual of cooking dried beans is deeply rewarding. This is when you break out the gorgeous, speckled heirloom beans you bought from a specialty grocer. This is when you take the time to execute the perfect salt brine. This is when you slowly render down a piece of smoky bacon, gently simmer the beans in a rich homemade stock until they are velvety and luxurious, and only then—at the very end of the process—fold in a handful of slow-roasted cherry tomatoes. The resulting texture and depth of flavor will absolutely blow any canned product out of the water.
Conclusion
Cooking is not magic. It is just applied chemistry, wrapped in a bit of love and a lot of butter. Once you understand the fundamental rules of how your ingredients interact on a microscopic level, you strip away the fear and the guesswork.
You now know exactly why your beans have been betraying you. It wasn’t bad luck, and it wasn’t a lack of culinary talent. It was simply a battle between pectin, calcium, and acid—a battle that you are now fully equipped to win.
So, the next time you set out to make a massive pot of chili or a rustic Tuscan stew, you know exactly what to do. Soak them in salt. Simmer them in a neutral, non-toxic pot. And for the love of all things holy, keep those tomatoes far, far away until the very end. Your teeth, your sanity, and your dinner guests will thank you.


