You turn your back for exactly two seconds. You just need to grab the crushed tomatoes from the pantry, maybe take a quick sip of your wine, and suddenly, the unmistakable, acrid smell of a tire fire assaults your nostrils. You whip around, spatula in hand, but it is already too late. Those beautifully minced, aromatic little pieces of garlic you painstakingly prepped have transformed into bitter, blackened chunks of charcoal. Your entire dish is now tainted.
If this scenario sounds painfully familiar, take a deep breath. You are not alone. As a home cook who has set off the smoke detector more times than I care to admit, I can assure you that scorching your aromatics is a universal rite of passage. But while it is common, it is absolutely not acceptable to keep doing it. Bitter, scorched garlic completely ruins a meal, overpowering every other delicate flavor you try to build.
Today, we are putting an end to this madness. You do not need a culinary degree from Le Cordon Bleu to master basic heat management, but you do need to understand the fundamental food science happening inside your skillet. We are going to break down exactly why this tiny, pungent allium is so incredibly volatile, how your prep methods are dictating its flammability, and the foolproof, everyday kitchen habits you need to adopt to ensure your flavor bases are consistently flawless.
The Food Science: Why Garlic is a Tiny Ticking Time Bomb
To truly understand how to control an ingredient, you have to understand what it is made of. Most home cooks treat garlic and onions as if they are the exact same vegetable. They are both alliums, they both make your breath smell, and they both go into almost every savory flavor base on the planet. But chemically speaking, they behave entirely differently when introduced to heat.
The Sugar-to-Water Ratio Trap
The primary reason your minced cloves are turning into bitter little meteorites is the internal ratio of moisture to sugar. Let us look at a standard yellow onion. An onion is basically a water balloon masquerading as a root vegetable; it is composed of roughly ninety percent water. When you drop diced onions into a hot pan, that massive volume of water immediately begins to release and evaporate. This escaping moisture creates a localized cooling effect in the pan, actively preventing the onion flesh from exceeding the boiling point of water until the majority of that moisture has cooked off. This is why onions take a delightfully long time to properly caramelize.
Garlic, on the other hand, is a completely different beast. A standard clove contains only about sixty percent water. To make matters worse, it is absolutely packed with complex carbohydrates, specifically long chains of fructose. So, you have significantly less water to act as a thermal buffer, and a massive amount of highly reactive fruit sugar just waiting to be toasted. When you introduce this low-moisture, high-sugar ingredient to a hot skillet, the minimal water content flashes off almost instantly. Without that protective barrier of evaporating steam, the concentrated fructose chains are exposed directly to the raw heat of the oil.
The Maillard Reaction vs. Pyrolysis
In cooking, we are constantly chasing the Maillard reaction. This is the complex chemical process where amino acids and reducing sugars react under heat to create those deeply savory, browned, nutty flavors we all love. With garlic, the Maillard reaction happens incredibly fast due to that high sugar content.
However, there is a very fine, incredibly treacherous line between the Maillard reaction (delicious browning) and pyrolysis (literal burning). Because the water content in your minced cloves is so low, the temperature of the cellular structure skyrockets the second it hits hot oil. It bypasses the golden-brown Maillard stage and plummets straight into pyrolysis in a matter of seconds. For context, when roasting whole bulbs in the oven, food scientists note that anything above 375°F (190°C) is the danger zone where the exterior will burn before the interior softens. Now, consider that the oil in your stovetop skillet can easily exceed 400°F (200°C). You are essentially dropping sugar-coated dry kindling into a blazing inferno.
Allicin and the Enzyme Equation
We also have to talk about flavor compounds. The sharp, pungent bite of raw garlic does not actually exist inside an undisturbed clove. It is created through a chemical reaction. When you crush, slice, or mince a clove, you rupture its cell walls. This releases an enzyme called alliinase, which immediately mixes with an amino acid called alliin to create a brand-new compound: allicin.
Allicin is what gives garlic its aggressive, spicy aroma. The more you damage the cell walls, the more allicin is produced. But allicin is highly unstable and incredibly sensitive to heat. Gentle, moderate cooking mellows the allicin, transforming it into a sweet, rich, and nutty background note. Aggressive, scorching heat violently destroys these compounds, breaking them down into harsh, bitter sulfur molecules that taste exactly like battery acid.
The Ultimate Beginner Cooking Mistake: Tossing It In First
Now that we understand the volatile chemistry of our favorite aromatic, we need to address the single worst habit plaguing modern home kitchens. If you want to know how a complete kitchen newbie stopped burning dinner every night, the answer starts with ignoring badly written recipes.
The “Sauté the Onions and Garlic” Myth
I have a bone to pick with thousands of online recipe developers. You have undoubtedly read a recipe that begins with this exact instruction: “Heat two tablespoons of olive oil over medium-high heat. Add the chopped onions and minced garlic, and sauté for five to seven minutes until translucent.”
I need you to take a red pen and cross that sentence out of your culinary vocabulary forever. This is a trap. It is an outright lie, and it is one of the most common beginner cooking mistakes that will ruin your meal before you even add the main ingredients.
If you drop dry, sugary minced garlic into a hot pan at the exact same time as a pile of wet, dense onions, the garlic will be completely incinerated by the time the onions even begin to soften. The onions require five to ten minutes to release their water and break down. The garlic, assuming your pan is hot, requires about thirty seconds. Forcing them to share a pan from minute one is a recipe for absolute disaster.
The Physics of Pan Temperatures
Let us visualize the thermodynamics of your skillet. You preheat your pan. You add your oil. The oil is shimmering, indicating it is hot and ready. If you toss your garlic in right now, it fries aggressively. The exterior crisps, the sugars caramelize, and within forty-five seconds, it is burnt.
Instead, you must treat your aromatics sequentially. You add your onions first. The cold, wet onions immediately drop the surface temperature of the pan. As they cook, they release a constant stream of steam, regulating the heat. You sweat the onions until they are soft, translucent, and sweet. Then, and only then, during the absolute final thirty to sixty seconds of the sautéing process, do you clear a little space in the center of the pan and drop in your minced garlic. The residual moisture from the onions acts as a thermal shield, preventing the pan from getting hot enough to scorch the garlic, while still providing enough gentle heat to bloom those delicious allicin compounds.
The Cold-Oil Infusion Method: A Weeknight Lifesaver
I firmly believe that time is money, especially on a Tuesday evening when you just got off work and need to feed yourself before you collapse on the couch. Weekday meals require ruthless efficiency. But as we have just established, rushing your aromatics is a guaranteed way to ruin your food. So, how do we build deep, complex flavor quickly without risking a bitter disaster? We steal a brilliant trick from traditional Italian cooking.
How and Why It Works
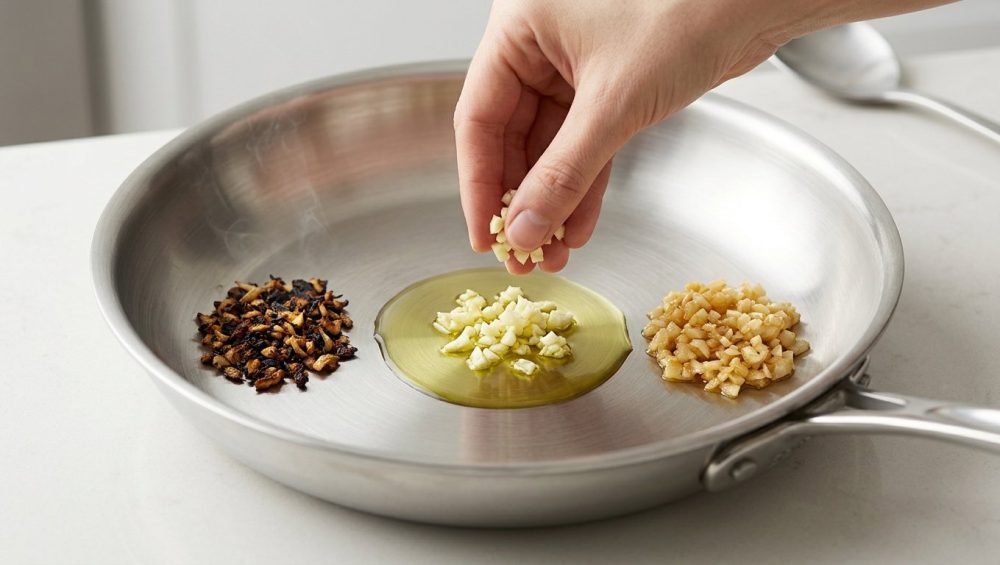
The cold-oil infusion method is the ultimate safeguard against scorching. Instead of preheating your skillet and dropping your aromatics into a violently hot environment, you start completely cold. By placing your minced or sliced cloves into room-temperature oil and then gradually bringing the heat up, you allow the flavor compounds to slowly and gently extract into the cooking fat.
Because the temperature rises gradually, the natural sugars do not experience thermal shock. The allicin mellows beautifully, creating a rich, deeply fragrant garlic oil that serves as the perfect foundation for pasta sauces, stir-fries, and pan-seared proteins. It removes the panic from the process. You are no longer racing against the clock to prevent burning; you are simply managing a gentle simmer.
Step-by-Step Execution
Here is exactly how you execute this technique flawlessly:
- Place your favorite skillet on the stove. Do not turn the burner on yet.
- Pour in your cooking oil (a good quality extra virgin olive oil is ideal here).
- Add your minced, sliced, or smashed garlic directly into the cold oil.
- Turn the burner to medium-low.
- Watch closely. As the pan heats up, you will see tiny, gentle bubbles begin to form around the edges of the garlic pieces.
- Swirl the pan occasionally to ensure even heating. You are looking for a very pale, translucent golden color. The moment you smell that sweet, nutty, almost popcorn-like aroma, the infusion is complete.
- Immediately proceed with your recipe by adding your next ingredients (like crushed tomatoes, vegetables, or proteins) to rapidly drop the pan temperature and stop the cooking process.
Size Matters: How Prep Dictates Burn Rate
We cannot have a masterclass on heat control without discussing knife skills. The physical size and shape of your prepped ingredients directly dictate how fast they will cook, and more importantly, how fast they will burn. Surface area is everything in the kitchen.
Minced vs. Sliced vs. Smashed
If a recipe calls for garlic, you have a choice to make regarding how you process it.
The Smashed Clove: If you take a whole, peeled clove and simply crush it flat with the side of your chef’s knife, you are keeping the structural integrity mostly intact. The surface area is low. This is the safest, slowest-cooking method. Smashed cloves are perfect for dropping into a pan while you baste a steak with butter, or for simmering in a slow-cooked Sunday sauce. They impart a mild, sweet flavor and take a very long time to burn.
The Sliced Clove: Thinly slicing your cloves (think of the famous razor-blade scene in Goodfellas) increases the surface area significantly. Sliced garlic cooks much faster than smashed, but it still retains enough mass to give you a decent window of forgiveness. It is ideal for quick sautés and stir-fries where you want distinct, visible pieces of garlic that offer a sweet, caramelized bite without instantly turning to ash.
The Minced Clove: This is the most common prep method, and the most dangerous. By finely chopping the clove into tiny, uniform pieces, you are maximizing the surface area and releasing a massive amount of allicin. Minced garlic provides the most aggressive, punchy flavor, but it will burn in a hot pan in as little as fifteen to thirty seconds. You must use extreme caution, lower your heat, and never leave the stove when cooking it.
The Microplane Dilemma
Lately, there is a massive trend of grating garlic on a Microplane zester. Let me be perfectly clear: grating garlic turns it into a wet, highly volatile paste. While a Microplane is fantastic for zesting citrus, you must be incredibly careful when using it for alliums. (Side note: if you are grating things on a cheap, grooved wooden board, you are actively ruining your knives, but that is a rant for another day).
Garlic paste has virtually zero structural integrity. If you drop a spoonful of grated garlic into a hot, dry skillet, it will instantly seize, stick to the metal, and burn before you can even reach for your wooden spoon. Grated garlic should strictly be used in raw applications (like salad dressings or marinades), mixed into liquid-heavy sauces, or mashed into softened butter. Never attempt to sauté it on its own.
Gear Check: How Your Pan is Sabotaging Your Aromatics
You can have perfect knife skills, flawless timing, and a deep understanding of food science, but if your equipment is garbage, you are still going to burn your food. As a home cook, your cookware is your partner. If you are constantly fighting your skillet, it is time for an upgrade.
Ditch the Flimsy Toxic Pans
I have a strict, uncompromising rule in my kitchen: no cheap, toxic, mystery-metal cookware. If you are trying to sauté delicate aromatics in a flimsy, ten-dollar aluminum pan with a peeling Teflon coating, you are setting yourself up for failure.
Cheap, thin pans have absolutely zero thermal mass. They heat up in seconds, but more importantly, they heat unevenly. They develop severe hot spots. You might have your burner set to medium, but the center of that cheap pan is roaring at 500°F while the edges are lukewarm. You drop your minced aromatics in, and the pieces in the center instantly turn to charcoal while the pieces on the outside remain completely raw.
Furthermore, high heat destroys cheap synthetic coatings. If you are wondering why your non-stick pans keep losing their slippery finish after a few months, it is because the thin metal cannot regulate temperature, and the coating is literally baking off into your food. I cannot stress this enough: stop cooking your meals on flaking chemicals. If you want to get serious about your health and your food, banishing toxic kitchen gear is the mandatory first step.
Choosing the Right Skillet for Heat Control
To properly manage the delicate caramelization of high-sugar ingredients, you need a pan with substantial thermal mass. Thermal mass refers to a material’s ability to absorb, store, and evenly distribute heat.
You need heavy-bottomed, fully clad stainless steel, a thick carbon steel skillet, or enameled cast iron. Yes, these materials require a slight learning curve, but they are the only beginner kitchen tools that will actually allow you to cook like a professional. A heavy stainless steel skillet distributes the heat from your burner evenly across the entire cooking surface. There are no hot spots. When you turn the burner down to medium-low, the heavy metal smoothly and predictably lowers its temperature, giving you ultimate control over the Maillard reaction.
If you are intimidated by cooking on uncoated metal, take an afternoon to learn how to properly preheat your pan to prevent food from sticking. Once you understand how to utilize heavy, high-quality cookware, burning your aromatics will become a thing of the past. Investing in a proper skillet is one of the essential tools every beginner needs to stop fighting their stove and start actually enjoying the cooking process.
Advanced Garlic Defense Strategies for the Home Cook
Even with the best pans and the sharpest knives, the kitchen can be a chaotic place. Sometimes the phone rings, or a pot boils over, and you suddenly realize your skillet is running way too hot. When you see your minced cloves rapidly crossing the line from pale gold to dark, threatening brown, you need an emergency defense strategy.
The Water Quench Technique
This is a brilliant, hyper-effective trick utilized by restaurant line cooks to halt the cooking process instantly. If your aromatics are browning too fast and you are seconds away from burning them, you must aggressively drop the temperature of the pan. Turning off the burner is not enough; the residual heat in the heavy metal will continue to cook the food.
Instead, you quench the heat. Keep a small cup of water or vegetable broth near your stove. The second you see the garlic getting too dark, immediately pour a tablespoon or two of liquid directly into the skillet. The liquid will instantly boil and evaporate, rapidly absorbing the excess thermal energy from the pan and dropping the surface temperature to a safe 212°F (100°C). This buys you precious time to turn down the heat and save your flavor base.
The Acid Armor
Similar to the water quench, deglazing your pan with a splash of acid is a phenomenal way to protect your aromatics while simultaneously building complex flavor. As soon as the garlic hits that perfect, fragrant golden stage, hit the pan with a splash of dry white wine, a squeeze of fresh lemon juice, or a dash of apple cider vinegar.
Not only does the cold liquid instantly arrest the browning process, but the acidity brightens the entire dish. Most home cooks severely under-utilize acidity, relying entirely too much on heavy fats and sodium. Learning that your dinner actually needs acid to balance out rich, savory flavors is a massive culinary milestone.
The Aromatic Shield
If you are cooking a complex dish with multiple components—like a hearty vegetable stir-fry or a chunky ragù—you can use the other ingredients as a physical and thermal shield.
Never add your delicate, high-sugar aromatics to an empty, screaming hot wok or skillet. Instead, sear your heavy proteins first. Remove them. Then, add your dense, water-heavy vegetables (like bell peppers, onions, or zucchini). Sauté them until they release their moisture and begin to soften. Finally, in the very last minute of the vegetable cooking process, push everything to the edges of the pan, add a tiny drop of fresh oil to the center, and briefly bloom your minced garlic for thirty seconds before tossing it all together. The sheer volume of the surrounding vegetables will regulate the heat, ensuring the garlic cooks gently without ever scorching.
Rescuing the Un-Rescuable: What to Do If You Scorched It Anyway
I am going to give you some tough love here. Despite all the science, all the high-end pans, and all the careful prep, you are eventually going to mess up. You will get distracted by an email, leave the heat on high, and scorch your garlic. It will turn dark, hard, and smell intensely bitter.
When this happens, you are going to be tempted to just push through. You will think, “It’s just a little dark, it’ll be fine once I add the tomato sauce.”
Stop. Put down the wooden spoon. Do not pour your expensive San Marzano tomatoes over burnt garlic. Do not add your beautiful, organic chicken breasts to that pan.
There is no culinary magic trick, no secret pinch of sugar, and no amount of heavy cream that can mask the taste of pyrolyzed allicin. The bitter, acrid flavor of burnt garlic is highly soluble, meaning it will instantly dissolve into whatever liquid or fat you add next, aggressively tainting the entire dish. You will end up ruining thirty dollars’ worth of groceries to save thirty cents’ worth of garlic.
If you scorch it, you must accept defeat gracefully. Take the pan off the heat. Dump the burnt oil and charred bits into the trash. Wipe the skillet clean with a paper towel, wash it if necessary, and start over. It takes exactly two minutes to mince a few fresh cloves and heat up some new oil. Having the humility to admit a mistake and the patience to restart is exactly how you survive the kitchen without ordering expensive, greasy takeout out of sheer frustration.
The Sassy Sous-Chef’s Final Verdict
Cooking is not magic; it is applied physics and chemistry that you get to eat. Once you stop blindly following terrible recipe instructions and start respecting the unique biological makeup of your ingredients, the kitchen stops being a stressful battleground and becomes a place of genuine creativity.
Garlic is a magnificent, powerful ingredient. It demands respect, a watchful eye, and a gentle touch. Remember the golden rules: respect the low water content, fear the high sugar, never toss it into a ripping hot pan alongside your onions, and when in doubt, start it in cold oil.
Ditch the toxic pans, sharpen your knife, and control your heat. You are completely capable of producing restaurant-quality flavor bases in your own home on a random weekday. Now get back in the kitchen, watch your skillet closely, and stop burning your dinner!


