The Sad, Soggy State of Weeknight Side Dishes (And How to Fix It)
Listen up, weekend culinary warriors and weeknight kitchen survivors. If you are still serving pale, limp, sad-looking roasted potatoes alongside your beautifully seared steaks or perfectly roasted chickens, we need to have a serious, closed-door intervention. I don’t care if you have been cooking for twenty years or if you are just starting to figure out your beginner kitchen tools—there is absolutely zero excuse for a soggy spud. Life is entirely too short to eat mediocre carbohydrates.
We have all experienced the tragedy of the standard home-cooked roasted potato. You chop up some raw tubers, toss them in a little oil, throw them on a baking sheet, and pray to the culinary gods. Forty-five minutes later, you pull out a tray of profound disappointment. The exteriors are leathery and tough, the interiors are dense and undercooked, and the color is a depressing, anemic beige. You chew them out of obligation, not joy.
I know you are busy. I know we don’t have all day to mess around with overly complicated, multi-day culinary projects, especially when we are just trying to throw together simple weeknight dinners before exhaustion sets in. Time is money, my friends. But here is the beautiful truth: you do not have to compromise on quality to save time, and you certainly do not need a culinary degree to cook like a professional chef.
The secret to achieving a restaurant-quality, shatteringly crisp, glass-like crust with a cloud-like, fluffy interior doesn’t require expensive specialty equipment or rare ingredients. It requires a basic understanding of food chemistry and a fifty-cent box of baking soda that is probably sitting in the back of your pantry right now. This game-changing method, heavily popularized by culinary scientist J. Kenji López-Alt, relies on manipulating the pH level of your boiling water to forcefully break down the exterior of the potato.
In this definitive, no-fluff masterclass, we are going to break down the exact thermodynamics, cellular biology, and chemical reactions that transform a dense, raw tuber into the greatest side dish you will ever produce in your home kitchen. Grab your apron, preheat your oven, and let the science do the heavy lifting.
The Chemistry of the Crunch: Why Baking Soda is Your Secret Weapon
To understand why baking soda is the ultimate potato hack, you don’t need to spend hours decoding pretentious recipe jargon. You just need to understand a little bit of cellular biology.
Potatoes are essentially biological sponges made of water and tightly packed starch granules, all held together by a carbohydrate glue called pectin. When you cook a vegetable, the softening you experience is largely the breakdown of this pectin. The cells literally become unglued.
If you boil potatoes in standard, neutral tap water (which sits around a pH of 7), the pectin breaks down at a relatively slow and steady rate. By the time the very outside of the potato has broken down enough to create a crispy crust, the inside is completely overcooked and turning to mush.
Enter sodium bicarbonate, commonly known as baking soda. Baking soda is an alkaline compound. When you add just a half teaspoon of it to two quarts of boiling water, you significantly raise the pH level of the water, creating a highly alkaline environment (around a pH of 8.5),,.
Pectin absolutely hates alkaline environments. When exposed to this high pH, the pectin on the exterior of the potato breaks down incredibly fast,. This allows the outer layers of the potato to soften and disintegrate while the interior remains perfectly intact and gently cooks. This rapid, controlled destruction is one of my all-time favorite foolproof cooking secrets because it requires virtually zero extra effort but completely transforms the physical structure of the food.
Starch Gelatinization and the Slurry
As the pectin dissolves and the cell walls weaken, the potato’s internal temperature rises. Once the potato hits about 150°F (65°C), a process called starch gelatinization occurs. The tightly packed starch granules absorb the surrounding boiling water, swelling up like microscopic water balloons until they violently rupture.
When these granules burst, they spill out long carbohydrate chains (amylose and amylopectin), creating a sticky, gel-like paste. Because we used baking soda to accelerate the breakdown of the exterior, the outside of the potato releases a massive amount of these starches into the water.
When you drain these potatoes and roughly toss them in oil, that gelatinized starch forms a thick, mashed-potato-like slurry that completely coats the exterior of each chunk,. To the untrained eye, the potatoes look ruined. They look mushy, ragged, and sad. But to the educated home cook, that starchy paste is pure gold.
The Microscopic Glass Transition
When you transfer those slurry-coated potatoes into a blazing hot 425°F (218°C) oven, the environment changes from wet heat to intense, dry heat. The water inside that starchy exterior paste rapidly evaporates.
As the moisture disappears, the gelatinized starches dehydrate and begin to cross-link with one another, forming a rigid, highly structured matrix. In food science, this is literally referred to as a microscopic glass transition. That messy paste transforms into a thick, shatter-crisp shell that encases the fluffy, steamed interior.
Simultaneously, the alkaline environment we created with the baking soda works its secondary magic. A higher pH level is directly responsible for accelerating the Maillard reaction—the complex chemical cascade where amino acids and reducing sugars collide under high heat to create hundreds of new flavor compounds and that gorgeous, deep golden-brown color,. Because of the baking soda, your potatoes will brown faster, deeper, and more evenly than they ever could in neutral water.
The Anatomy of a Potato: Choosing Your Tuber Wisely
You can have the best technique in the world, but if you start with the wrong ingredient, you are setting yourself up for failure. Potatoes are not interchangeable blocks of generic starch. They are highly varied agricultural products with vastly different ratios of starch, water, and sugar.
If you want the crispiest possible result, you have to choose a potato with the correct chemical makeup. We classify potatoes into three main categories: high-starch, medium-starch (all-purpose), and low-starch (waxy),.
High-Starch Potatoes: The Undisputed Kings of Crunch
Russet potatoes (often sold as Idaho potatoes) are the gold standard for this roasting method,. They contain a massive amount of starch—specifically a straight-chain starch molecule called amylose,.
Amylose is the secret to a fluffy interior. Because Russets have low moisture and high amylose, the interior cells easily separate into a dry, mealy, cloud-like texture when cooked,. More importantly, when that high concentration of amylose escapes to the surface during our baking soda boil, it dehydrates into the thickest, most rigid, glass-like crust possible,. If maximum shatter-crunch is your goal, Russets are your best friend.
Medium-Starch Potatoes: The Flavorful Compromise
Yukon Gold potatoes fall into the medium-starch, or “all-purpose,” category,,. They contain a bit more moisture and a higher ratio of a branched-chain starch called amylopectin.
While Russets win on pure crunch, Yukon Golds win on flavor and interior texture. They have a naturally buttery, rich, slightly earthy flavor that Russets simply lack,. Because of the higher moisture and amylopectin, the interior of a roasted Yukon Gold becomes incredibly creamy and luxurious, rather than dry and fluffy,.
The trade-off? The crust will be slightly thinner and more delicate than a Russet,. However, many chefs (myself included) often prefer Yukon Golds for this baking soda method because the contrast between the delicate, crisp exterior and the intensely creamy, buttery interior is absolute perfection,.
Low-Starch Waxy Potatoes: The Absolute Tragedy
Red Bliss, New Potatoes, and Fingerlings are waxy potatoes,. They are packed with moisture and contain very little starch. Because they lack the necessary starch granules, they will never create that gelatinized slurry, no matter how much baking soda you add.
Waxy potatoes are designed by nature to hold their shape. They are wonderful for potato salads, boiling, and simmering in soups,. But if you try to use the baking soda roasting method on a waxy red potato, you will end up with a sad, leathery, wrinkled little nugget. Keep them far away from your roasting pan.
Fat is Flavor: A Masterclass in Roasting Oils
Heat needs a medium to transfer from the hot metal pan into the potato. That medium is fat. But fat isn’t just a thermal conductor; it is the primary flavor carrier for your side dish.
The Traditional Heavyweights: Duck Fat and Beef Tallow
If you want to experience a truly transcendent, traditional English pub-style roast potato, you need to use rendered animal fat. Duck fat, goose fat, and beef tallow are loaded with saturated fats, which remain highly stable at high roasting temperatures,.
Because saturated fats are solid at room temperature, they help create a crust that feels incredibly rich and substantial in the mouth. Duck fat, in particular, imparts a deeply savory, luxurious flavor that elevates a humble potato into a holiday-worthy centerpiece.
The Aromatic Approach: Infused Olive Oil
If you prefer to keep things plant-based, or if you just don’t have jars of rendered animal fat sitting in your fridge, olive oil is a fantastic choice. However, we aren’t just going to pour raw oil over our potatoes. We are going to build layers of flavor.
While your potatoes are doing their alkaline boil, heat your olive oil in a small skillet over medium heat. Add several cloves of minced garlic and a handful of fresh, chopped rosemary. Let them sizzle gently until the garlic just barely begins to turn a light golden blonde.
Immediately strain the oil through a fine-mesh sieve into a large mixing bowl, catching the crispy garlic and rosemary bits. Why do we strain it? Because if you put raw garlic and herbs into a 425°F oven for an hour, they will incinerate into bitter, acrid carbon. By infusing the oil, we drive all those beautiful, volatile aromatic compounds into the fat. We will save the crispy garlic and herb solids to toss with the potatoes at the very end.
The High-Heat Hero: Avocado Oil
If you want a completely neutral flavor profile that allows the pure potato taste to shine, reach for avocado oil. It has an incredibly high smoke point (up to 520°F / 271°C), meaning it will never degrade, smoke, or develop off-flavors during the intense roasting process.
The “No-Go” Rule: Ditch the Toxic Cookware
We need to have a very serious conversation about your roasting vessel. I am fiercely, unapologetically passionate about banishing toxic kitchen gear from your home. If you are planning to roast these potatoes on a flimsy, warped, scratched, peeling non-stick baking sheet, I need you to stop right now.
Cheap non-stick coatings are made of PTFE (commonly known by the brand name Teflon). These coatings are absolutely not designed to withstand the aggressive, high-heat roasting environment we need for this recipe. When PTFE is heated above 400°F (204°C) to 500°F (260°C), the chemical bonds begin to break down, releasing invisible, toxic, polymer-fume gases into your kitchen and your food. It is dangerous, it is cheap, and it has no place in a kitchen that cares about quality.
Furthermore, flimsy aluminum pans lack the thermal mass required to maintain heat. When you drop two pounds of wet, heavy potatoes onto a thin pan, the temperature of the metal plummets. Instead of searing and dehydrating, your potatoes will sit in a lukewarm puddle of oil and steam themselves into a soggy mess.
You must use a pan with high thermal mass. A thick, heavy-duty bare aluminum half-sheet pan is the industry standard in professional kitchens for a reason. Alternatively, a heavy multi-clad stainless steel roasting pan is phenomenal. If you really want to achieve the ultimate crust, understanding the thermodynamics of carbon steel will change your life. A thick carbon steel roasting pan absorbs, retains, and radiates heat like an absolute vault, guaranteeing a violent, immediate sear the second the potato hits the metal.
The Masterclass Method: Step-by-Step to Potato Perfection
We have covered the chemistry, the ingredients, the fats, and the equipment. Now, it is time to execute. Follow these steps with precision, and I promise you will never look at a potato the same way again.
Step 1: The Prep and The Cut
Start by peeling 4 pounds (about 1.8 kg) of Russet or Yukon Gold potatoes. You want to cut them into large, substantial chunks—about 2 to 3 inches in size. Do not dice them small. The magic of this recipe relies on maximizing the contrast between the crispy exterior and the fluffy interior. If you cut them too small, they will just turn into hard croutons. We want massive surface area with plenty of internal volume.
Step 2: The Alkaline Boil
Bring 2 quarts (about 2 liters) of water to a rolling boil in a large pot,. Add 1 ounce (about 2 tablespoons) of kosher salt. Yes, that sounds like a lot of salt, but potatoes are incredibly dense and absorb seasoning poorly. You must season the cooking water aggressively so the salt penetrates the interior of the potato.
Next, add exactly 1/2 teaspoon of baking soda,,. The water will fizz slightly as the alkaline powder hits the liquid. Carefully drop your potato chunks into the boiling water, reduce the heat to a steady simmer, and let them cook,.
You are looking for the potatoes to be just knife-tender, which usually takes about 10 minutes,,. The exteriors should look slightly fuzzy and begin to fall apart, while the centers still offer a tiny bit of resistance. Do not overcook them into mashed potatoes, but do not undercook them either.
Step 3: The “Rough Up” (Creating the Slurry)
Once tender, drain the potatoes in a fine-mesh strainer or colander,. This next part is critical: let them sit in the strainer for about 2 to 3 minutes to allow the residual surface steam to evaporate,. Moisture is the enemy of crispiness.
Transfer the steaming potatoes into a large mixing bowl. If you want to make the transfer clean and easy without dropping stragglers all over your floor, grab your bench scraper to scoop them up in one swift motion.
Pour your chosen fat (the infused olive oil, duck fat, or beef tallow) over the hot potatoes,. Now, be aggressive. Toss the potatoes roughly in the bowl. Shake them, stir them with a wooden spoon, and watch as the softened, pectin-free exteriors mash and break down into the fat,. You want to build up a thick, paste-like layer of starchy slurry on every single chunk.
Step 4: The High-Heat Roast
Preheat your oven to 450°F (232°C), or 400°F (204°C) if you are using a convection fan.
Transfer the slurry-coated potatoes to your heavy-duty baking sheet. Spread them out evenly,. Space is crucial here. If the potatoes are touching or crammed together, the moisture escaping from them will become trapped, creating a localized steam bath. They will boil in their own juices instead of roasting. Give them room to breathe.
Step 5: The Flip and Finish
Place the tray in the oven and walk away. Do not open the door. Do not poke them. Let them roast completely undisturbed for 20 minutes,. This initial uninterrupted blast of heat is required to dehydrate the starch slurry and allow the crust to set. If you try to flip them too early, you will tear the delicate crust right off the potato and leave it stuck to the pan.
After 20 minutes, pull the tray out. Using a thin, flexible metal spatula, carefully slide under each potato and flip it over,. You should already see a beautiful, golden, micro-blistered crust forming on the bottom.
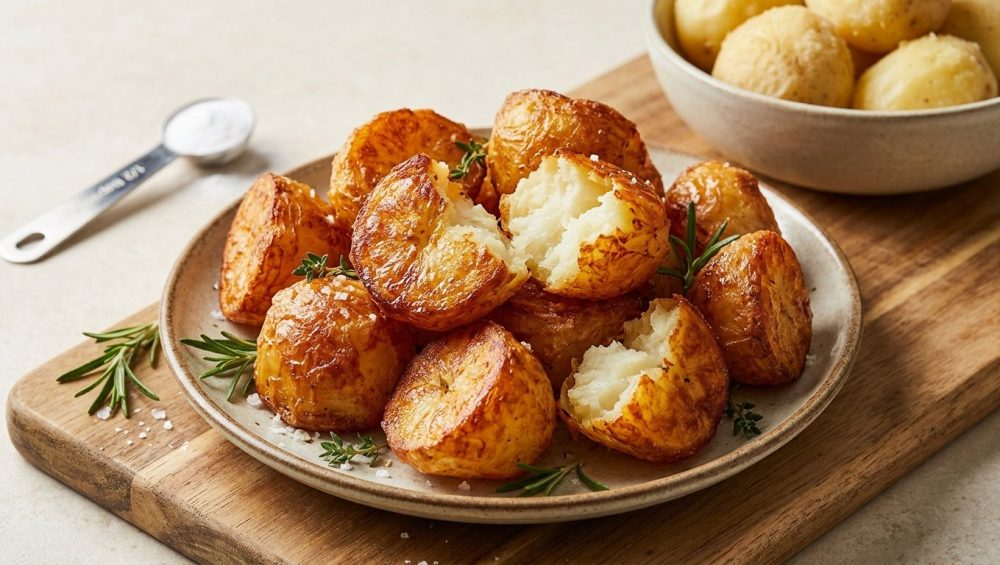
Return them to the oven and continue roasting, tossing them occasionally, for another 20 to 30 minutes. You are looking for a deep, rich, mahogany-brown color all over. When they look like they are almost too dark, pull them out.
Transfer the finished potatoes to a large bowl, toss them with the reserved crispy garlic and rosemary bits, add a final shower of flaky sea salt, and serve immediately.
Mastering Heat Transfer: How to Prevent Sticking
A lot of home cooks are terrified of ditching their non-stick pans because they have post-traumatic stress from food cementing itself to stainless steel. But physics is on our side here.
The absolute best way to prevent food from sticking to a bare metal pan is to manage your heat and moisture correctly. Proteins and starches stick to cold metal. When you place your hot, fat-coated potatoes onto the pan and blast them with 450°F heat, the water on the surface of the potato rapidly turns to steam. This escaping steam actually pushes the potato slightly away from the microscopic pores of the metal.
Furthermore, as the starch dehydrates and hardens into a crust, it naturally releases its bond from the pan. If you try to flip the potato at the 10-minute mark, it will stick because the crust hasn’t formed yet. If you wait the full 20 minutes, the hardened, dehydrated glass-like shell will release effortlessly with a gentle nudge from a metal spatula. Trust the process and trust the heat.
Troubleshooting Your Taters: Where Did It All Go Wrong?
Even with a foolproof, science-backed method, things can occasionally go sideways in the kitchen. Ruining a side dish is one of the most common beginner cooking mistakes, but every failure is just a data point for your next attempt. Let’s diagnose the issues:
“My potatoes taste like soap or metal.”
You got sloppy with your measurements. Baking soda is a powerful alkaline chemical. If you dump a massive spoonful into the water instead of measuring out exactly 1/2 teaspoon, the potatoes will absorb too much sodium bicarbonate. High alkalinity tastes soapy, metallic, and incredibly bitter,. Always use measuring spoons, never guess.
“My potatoes disintegrated into soup in the boiling water.”
You walked away and overboiled them. The baking soda breaks down the exterior incredibly fast. If you boil them for 20 minutes instead of 10, the alkaline water will eat all the way through the potato, completely dissolving the pectin holding the center together,. You must pull them when they are just barely knife-tender.
“My potatoes didn’t get crispy, they just got soggy.”
There are three possible culprits here. First, you may have used waxy red potatoes instead of starchy Russets or Yukon Golds,. Second, you may have crowded the pan, causing the potatoes to steam each other rather than roast. Third, you didn’t let the potatoes steam-dry in the colander before tossing them in oil,. If you trap excess water under the fat layer, the starch cannot dehydrate into a crust.
The Science of Leftovers: Preserving the Crunch
If you actually have leftovers of these potatoes (which is a rarity), you will notice that they lose their crispness in the fridge. This is due to a process called retrogradation, where the gelatinized starch molecules begin to re-crystallize and absorb ambient moisture as they cool.
Do not, under any circumstances, put these magnificent potatoes in a microwave. Microwaves work by exciting water molecules inside the food. This will instantly create internal steam that blows out the delicate crust, leaving you with a soggy, chewy, depressing mess.
To revive the crunch, you need dry convection heat. Toss the cold potatoes into an air fryer at 375°F (190°C) for about 5 minutes, or place them on a wire rack in a 400°F (204°C) oven for 10 minutes. The dry heat will re-evaporate the surface moisture, re-harden the starch matrix, and bring your potatoes back to their former glory.
Cooking is not magic; it is applied chemistry and physics. By utilizing a simple alkaline bath to break down cellular walls, harnessing the power of starch gelatinization, and respecting the thermodynamics of high-heat roasting, you can completely elevate your daily cooking. Throw away the toxic pans, measure your baking soda, and get ready to eat the best potatoes of your life.


