
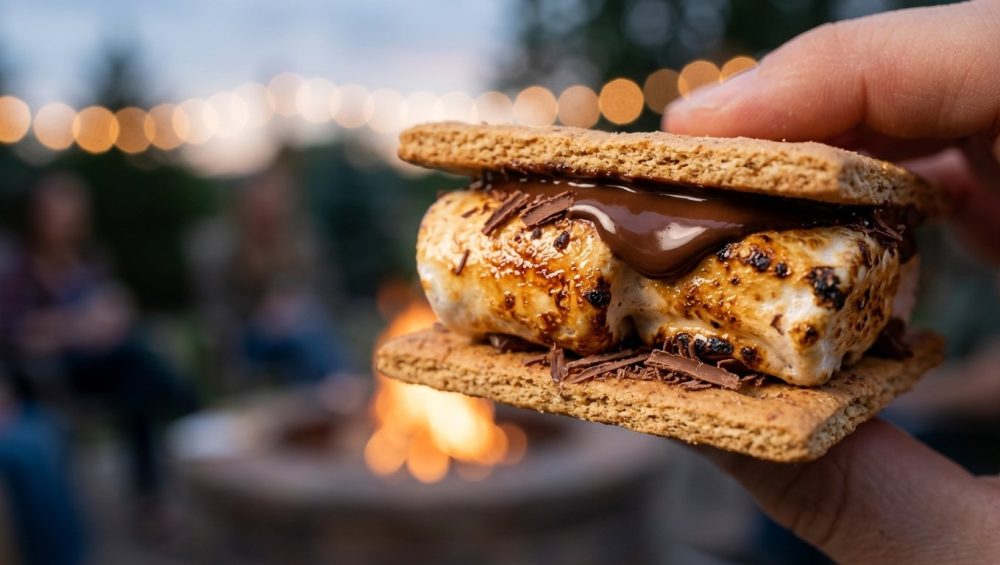
Picture this: It is a gorgeous Saturday evening. You have gathered your friends around the fire pit, the string lights are twinkling, and you are ready to cap off a lovely dinner with the undisputed king of outdoor desserts—the s’more. You carefully toast your marshmallow until it is a beautifully caramelized golden brown. You place it on top of a square of store-bought milk chocolate, press the graham crackers together, take a bite, and… crunch.
Instead of a harmonious, gooey symphony of melted chocolate and marshmallow, you are met with a jarring, structural failure. The marshmallow squishes out the sides, sticking to your fingers, while your teeth hit a cold, unyielding brick of solid chocolate.
It is a universal culinary tragedy, and frankly, it is unacceptable.
We have all been sold a lie by decades of campfire marketing. The classic s’more—as dictated by the original 1927 Girl Scouts handbook—suggests that the heat of the toasted marshmallow alone is sufficient to melt a thick slab of commercial chocolate. As a home cook who values precision and despises ruined desserts, I am here to tell you that the physics simply do not add up.
You do not need a pastry degree to fix this, but you do need to understand a little bit of thermal dynamics. Today, we are tearing down the myth of the traditional s’more and rebuilding it using basic science, better ingredients, and a touch of common sense. We are going to transform your backyard fire pit from a sticky, frustrating mess into a masterclass of weekend entertaining. Leave your weeknight cooking anxiety behind; weekend entertaining is about precision disguised as relaxation.
The Thermodynamics of a Tragic S’more
Before we can fix the problem, we have to understand why it happens. Cooking is just chemistry and physics applied to food, and the traditional s’more is a textbook example of a heat transfer failure. We want the backyard fire pit to have the effortless elegance of a relaxed dinner party, not the sticky chaos of a ruined dessert. To achieve that, we must look at the numbers.
The Melting Point of Cocoa Butter
Chocolate is a complex suspension of cocoa solids and sugar in a matrix of cocoa butter. The melting point of standard milk chocolate sits right around 86°F to 90°F (30°C to 32°C). This is intentionally designed to be just below human body temperature (98.6°F), which is why a good piece of chocolate melts in your mouth.
However, commercial chocolate bars—the kind most people grab for a campfire—are often formulated with less cocoa butter and more stabilizers like soy lecithin. This prevents them from melting during shipping, but it also means they require a more aggressive heat source to break down their crystalline structure. The Form V crystals in tempered chocolate are incredibly stubborn. They want to stay solid. Dark chocolate, with 85% or more cocoa solids, is even more resilient, often refusing to melt until it reaches closer to 114°F (46°C).
The Marshmallow’s Thermal Shortcoming
Now, let us look at the heat source: the marshmallow. A perfectly roasted marshmallow has an exterior temperature of around 250°F (121°C), which is where the Maillard reaction occurs, creating that beautiful browned crust. The interior of the marshmallow might reach 160°F (71°C) as the gelatin breaks down and the trapped air expands.
On paper, this seems like plenty of heat to melt chocolate. But here is the catch: a marshmallow is mostly air. It has an incredibly low thermal mass.
In thermodynamics, the transfer of heat depends not just on temperature, but on the amount of energy (joules) a material can hold and release. The heat transfer relationship for the total energy transferred through the chocolate relies on thermal conductivity, surface area, and thickness. When you place a hot, airy marshmallow on top of a dense, cold square of chocolate, the marshmallow rapidly transfers its limited heat to the surface of the chocolate. The surface might soften slightly, but the marshmallow runs out of thermal energy long before it can penetrate the thick, solid core of the chocolate bar.
The Graham Cracker Insulator
To make matters worse, we sandwich this flawed thermal exchange between two graham crackers. Graham crackers are dry, porous, and filled with tiny air pockets. In the construction world, we call materials like this “insulators.”
When you assemble the s’more, the graham crackers immediately trap the heat inside, but they also prevent any ambient heat from the fire from reaching the chocolate from the outside. You have essentially locked a cold brick of cocoa and a rapidly cooling sponge of sugar inside an edible thermos. The result? A cold, hard crunch that ruins the entire experience.
The “No-Go” Rule: Stop Using Toxic Roasting Sticks
Before we discuss how to actually melt your chocolate, we need to have a serious conversation about your gear. If you know my absolute, uncompromising stance on banishing toxic kitchen gear, you already know how I feel about cheap mystery metals in the kitchen. The backyard fire pit is no exception.
The Danger of Cheap Skewers
Do not buy those flimsy, dollar-store roasting sticks. They are almost always made from low-grade, galvanized steel or coated in a cheap chrome finish. When exposed to the intense, direct heat of a campfire or fire pit (which can easily exceed 1,000°F in the active coals), these cheap coatings begin to degrade. Galvanized metal off-gasses toxic zinc fumes when heated, and peeling chrome will flake directly into your food. You are trying to enjoy a mindful dessert, not ingest heavy metals.
The Risk of Foraged Twigs
“But Sassy Sous-Chef,” you say, “I just find a stick in the woods! It is all-natural!”
Stop right there. Unless you are an experienced arborist, foraging for roasting sticks is a game of botanical roulette. For example, the wood of the wild black cherry tree contains cyanogenic glycosides. When heated, these compounds can convert into hydrogen cyanide. Will a single marshmallow roasted on a cherry twig kill you? Probably not. But why on earth would you risk introducing toxins to your food just to save a few dollars? Furthermore, green wood produces bitter, acrid smoke that will completely ruin the delicate flavor profile of your toasted marshmallow.
The Only Acceptable Gear
Invest in a set of heavy-duty, food-grade 304 stainless steel roasting sticks. They do not rust, they do not off-gas, and they can withstand the blazing heat of hardwood coals without warping or degrading. They are easy to clean, infinitely reusable, and completely safe. When curating your outdoor setup, always opt for safe serving ware and reliable, high-quality stainless steel tools that will last a lifetime.
The Chocolate Solution: Hacking the Melting Point
Now that we are using safe equipment, let us solve the structural failure of the s’more. If the marshmallow lacks the thermal mass to melt a thick square of chocolate, we must alter the chocolate. We need to decrease its volume, increase its surface area, or lower its melting point entirely.
Ditch the Thick Commercial Squares
The standard, thick rectangles of commercial milk chocolate are engineered for shelf life, not for rapid melting. They are simply too thick for the marshmallow’s heat to penetrate. Nothing is worse than when your melted chocolate turns clumpy or refuses to yield because of bad temperature management. If you insist on using bar chocolate, you must abandon the chunky squares.
Instead, opt for ultra-thin chocolate bars. Many premium chocolate brands sell tasting squares that are paper-thin. These require a fraction of the thermal energy to melt and will yield instantly to a hot marshmallow.
The Shaved Chocolate Technique
If you want to feel like a true culinary artist without doing any actual cooking, break out your chef’s knife or a stainless steel bench scraper. Take a high-quality chocolate bar and shave it into delicate ribbons or finely chop it into a rough dust.
By shaving the chocolate, you exponentially increase its surface area. When the hot marshmallow makes contact with chocolate shavings, the heat transfer is instantaneous. The shavings melt into a luxurious, velvety sauce on contact. It is a minor prep step that completely revolutionizes the texture of the dessert, ensuring every single bite is perfectly integrated.
Alternative Spreads and Ganache
Who decreed that chocolate must be solid? If your goal is a gooey, melted center, bypass the melting phase entirely by using a spreadable chocolate.
A jar of high-quality chocolate hazelnut spread (like Nutella) or a jar of cookie butter offers the exact texture you want, right out of the jar. Simply smear a generous tablespoon onto the graham cracker before adding the marshmallow.
If you want to elevate the experience, make a quick ganache before your guests arrive. Heat equal parts heavy cream and dark chocolate until smooth, let it cool to a spreadable consistency, and serve it in a small bowl with a spreading knife. Just remember the hidden danger of a wet bowl when melting chocolate indoors—even a single drop of stray water will cause your cocoa butter to seize instantly, turning your luxurious ganache into a grainy nightmare.
The European Truffle Swap
If you still want the satisfaction of a solid chocolate piece, look to European truffles or peanut butter cups. Peanut butter cups are a legendary s’mores hack because the peanut butter center acts as a soft, thermal bridge, and the chocolate coating is significantly softer than a standard bar. European truffles are formulated with a much higher percentage of cocoa butter and heavy cream, drastically lowering their melting point. They will turn into a puddle of joy the second a hot marshmallow touches them.
The Thermal Environment: Ambient Warming Strategies
If you are an absolute purist and refuse to shave your chocolate or use a spread, you must change the thermal environment of the s’more itself. We have to introduce external heat to assist the marshmallow.
The Radiant Heat Trick
Fire pits generate massive amounts of radiant heat. We can harness this energy to pre-warm the chocolate.
Before you even put your marshmallow on the roasting stick, assemble the bottom half of your s’more. Place the graham cracker on a heat-safe surface (like a flat rock near the fire ring or a cast-iron skillet placed on the edge of the pit) and set the chocolate square on top.
While you spend three to five minutes patiently roasting your marshmallow over the coals, the radiant heat from the fire will gently warm the chocolate. Pre-warming actually makes chocolate taste richer by releasing volatile aromatics and physically transforming the cocoa solids. By the time your marshmallow is ready, the chocolate will already be glossy, soft, and on the verge of melting.
The Foil Wrap Method
If you are dealing with a particularly stubborn piece of dark chocolate, or if it is a chilly evening and the ambient air is cooling your ingredients too quickly, use the foil wrap method.
Assemble the entire s’more—graham cracker, cold chocolate, freshly roasted marshmallow, and top cracker. Immediately wrap the entire sandwich tightly in a square of heavy-duty aluminum foil. Place the foil packet near the hot coals (not in the flames) for exactly 30 to 45 seconds.
The foil acts as a thermal conductor, trapping the heat of the fire and forcing it through the graham crackers directly into the chocolate. When you unwrap the packet, the entire s’more will be uniformly hot, and the chocolate will be perfectly molten.
The Assembly Technique: Engineering the Perfect Bite
Even with the right chocolate and the right heat, poor assembly can ruin the experience. You need to maximize the surface area contact between the hot marshmallow and the chocolate.
The Smush Factor
Most people gently place the top graham cracker on the marshmallow and take a delicate bite. This is a massive mistake. The marshmallow retains its cylindrical shape, meaning only a tiny fraction of its surface area actually touches the chocolate.
You must aggressively smush the s’more. When you place the top cracker on the marshmallow, press down firmly and evenly until the marshmallow expands to the very edges of the graham cracker. Using uneven pressure is exactly why your baking sheets keep warping in the oven—the same physics applies to crushing a s’more. You want flat, uniform distribution. This forces the hot, gelatinous interior of the marshmallow to spread out, blanketing the entire surface of the chocolate. This rapid, widespread contact facilitates a much faster transfer of thermal energy.
The Inverted S’more
For the truly adventurous, you can try the inverted technique. Instead of placing the chocolate on the cracker, carefully slice a slit into the side of a raw, jumbo marshmallow. Slide a thin piece of chocolate directly into the center of the marshmallow, then roast the entire thing on your stick.
As the outside of the marshmallow toasts, the interior acts as an insulated oven, melting the chocolate from the inside out. When you slide it onto your graham cracker, the chocolate is already molten. Be warned: this requires a delicate touch and a slow roasting technique, or the chocolate will leak out and fall into the fire.
Hosting a Mindful S’mores Bar
Now that we have conquered the science, let us talk about the execution. The entire point of a weekend fire pit is to emulate the vibe of a relaxed gathering, not a frantic restaurant line. If you are running back and forth to the kitchen to grab napkins and dropped chocolate, you are doing it wrong.
Prep is Everything
Set up your s’mores station before the fire is even lit. You want the evening to flow like a perfectly smooth cheese night, without anyone frantically trying to salvage a burnt marshmallow in the dark.
Create a dedicated grazing board for your ingredients. Use a heavy-duty wooden board, a slate slab, or thick stoneware to present your components beautifully.
Organize your ingredients logically. Place the graham crackers on one side, your variety of chocolates (shaved, spreads, thin squares, and peanut butter cups) in the center, and the marshmallows on the other side. Provide small spreading knives for the ganache or Nutella, and have a stack of wet wipes readily available. Sticky fingers are inevitable, but ruining your outdoor furniture is optional. Just like a DIY caramel apple bar, organization is key to preventing a sticky disaster.
Pacing the Burn: Coals Over Flames
As the host, it is your job to manage the fire. You cannot roast a perfect marshmallow over a roaring, licking flame. If you try, the outside will instantly carbonize into bitter, black ash while the inside remains a cold, rubbery solid.
You must practice patience. Build a robust fire early in the evening and let it burn down until you have a glowing, red-hot bed of coals. Coals provide consistent, even, radiant heat without the chaotic flare-ups of open flames.
Instruct your guests to hold their marshmallows about six to eight inches above the coals and rotate the stick continuously. It should take a full three to five minutes to achieve that perfect, even, golden-brown caramelization. This slow-roasting method ensures that the heat penetrates all the way to the center of the marshmallow, breaking down the gelatin and creating the molten core necessary to melt the chocolate.
Flavor Variations for the Discerning Palate
Once you have mastered the thermal dynamics of the standard s’more, you can start playing with the flavor profile. The beauty of a curated s’mores bar is that it allows your guests to experiment and customize their desserts without any extra cooking on your part.
- The Salty Sweet: Swap the traditional graham cracker for a buttery, salted pretzel crisp or a savory water cracker. The salt cuts through the intense sweetness of the marshmallow and elevates the rich notes of the chocolate.
- The Tart Berry: Add a smear of high-quality raspberry jam, a dollop of lemon curd, or a slice of fresh strawberry beneath the chocolate. The bright acidity balances the heavy fats of the cocoa butter and cuts through the sugar.
- The Toasted Coconut: Roll the freshly roasted marshmallow in toasted coconut flakes before squishing it into the sandwich. It adds an incredible textural crunch and a complex, nutty flavor that pairs beautifully with dark chocolate.
- The Spiced Kick: Lightly dust your chocolate squares with a pinch of cayenne pepper and flaky sea salt before assembling. The heat from the pepper amplifies the chocolate and creates a sophisticated, warming bite.
Conclusion: Reclaiming the Weekend Fire Pit
Cooking, whether it happens in a pristine indoor kitchen or over a smoky backyard fire pit, should never be a source of frustration. It is simply a matter of understanding the materials you are working with and refusing to settle for subpar results.
The traditional s’more fails because it demands that a tiny, airy marshmallow do the heavy lifting of melting a dense block of commercial chocolate. By acknowledging this thermodynamic reality, you can take control of the process. Whether you choose to shave your chocolate, swap to a rich ganache, harness the radiant heat of the coals, or perfectly execute the slow-roast marshmallow technique, you are no longer at the mercy of flawed campfire traditions.
You do not need a culinary degree to make mind-blowing food. You just need a little bit of science, a refusal to accept mediocre results, and a set of high-quality, non-toxic roasting sticks.
So, the next time you gather around the fire, banish the cold, hard chocolate brick to the annals of history. Engineer a better dessert, pour yourself a glass of wine, and enjoy the gooey, perfectly melted fruits of your labor. You have officially mastered the mindful s’mores bar.






