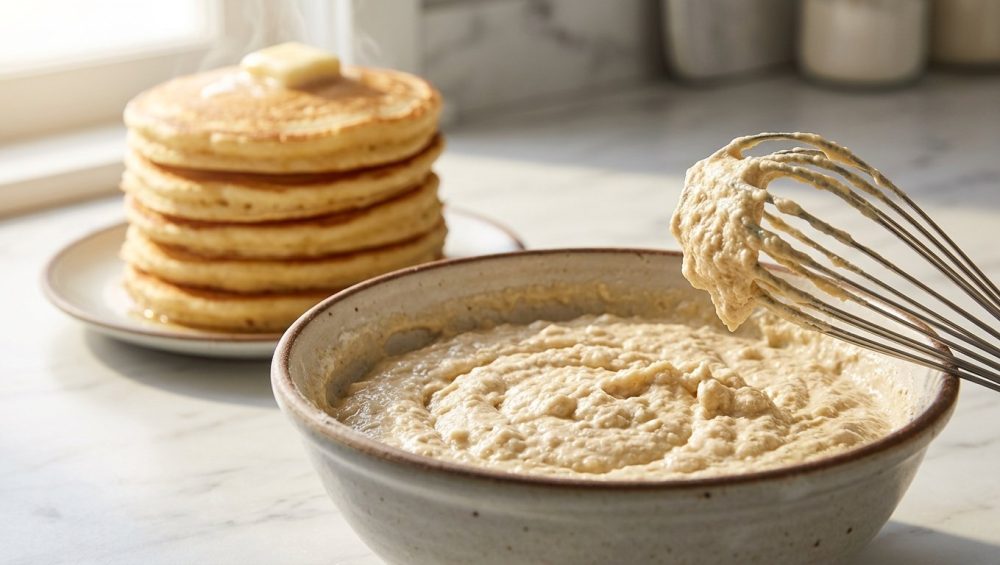
You wake up on a Saturday morning with grand ambitions. You’ve survived another grueling workweek of 30-minute shortcut meals and tactical microwave deployment, and now it’s your time to shine. You’re going to make diner-style pancakes. You gather your ingredients, crack some eggs, and start whisking. And whisking. And whisking. You whisk until that batter is smoother than a luxury car commercial. You pour it into the pan, flip it, and serve up a stack of… rubbery, dense, lifeless discs that require a steak knife to cut through. Congratulations, you just baked a batch of sweet neoprene.
Listen to me, my ambitious weekend culinary warriors: your perfectionism is ruining your breakfast. As someone who has spent years decoding the science of everyday cooking so you don’t have to, I am here to deliver a hard truth. When it comes to pancake batter, a perfectly smooth, lump-free bowl is not a badge of honor. It is a crime against pastry. The very act of vigorously beating your batter into submission is exactly why your pancakes are tough, chewy, and flat.
If you are serious about mastering the art of the home kitchen, you need to unlearn the instinct to over-agitate your food. Today, we are going to embark on an incredibly detailed, no-nonsense masterclass exploring the culinary science of quick breads, the hidden dangers of gluten development, and the absolute magic of lumpy batter. Grab a coffee, put down the whisk, and let’s fix your breakfast.
The Anatomy of a Pancake Disaster: Why Your Breakfast Feels Like a Chew Toy
To understand how to make a good pancake, we first have to dissect a bad one. When a pancake is tough, it lacks the delicate, airy crumb structure that allows it to absorb syrup like a sponge. Instead of yielding effortlessly to the side of your fork, a tough pancake fights back. It has a springy, elastic resistance.
This elasticity is not a random accident. It is the direct result of a chemical and mechanical process that you initiated the moment your whisk hit the bowl. Pancakes belong to a category of baked goods known as “quick breads.” Unlike yeast breads, which rely on the slow biological fermentation of yeast to create lift and structure, quick breads rely on chemical leavening agents—like baking soda and baking powder—to provide immediate aeration.
Because quick breads do not undergo a long fermentation process, their structural integrity is entirely dependent on how you handle the batter in the few minutes before it hits the heat. The primary architectural framework of any wheat-based batter is gluten. In bread baking, we want a massive, strong, highly developed gluten network. We knead bread dough for ten minutes specifically to build that chewy, elastic structure. But in a pancake? That exact same elastic structure is your worst enemy. If you find yourself constantly trying to stir out the lumps, you are actively building a bread-like network in a batter that desperately needs to remain tender.
The Culprit: Gluten Development in Quick Breads
Let’s get nerdy for a second, because understanding the underlying chemistry is the only way you’ll actually change your habits. Wheat flour is not just a uniform white powder; it is a complex biological ingredient packed with starch granules and proteins. The two most important proteins for our purposes are glutenin and gliadin.
When flour is sitting dry in your pantry, these proteins are isolated and inactive. However, the moment you introduce a liquid—whether that’s milk, buttermilk, water, or eggs—these two proteins wake up, seek each other out, and bond together. When glutenin and gliadin link up, they form a new, composite protein called gluten.
Gluten is practically a miracle of nature. It is a highly elastic, web-like matrix that can stretch and trap gases. Gliadin provides the extensibility (the ability to stretch), while glutenin provides the elasticity (the ability to snap back into place). This protein matrix is what traps the carbon dioxide bubbles produced by your baking powder, allowing the batter to rise. You need some gluten in a pancake, or else it would completely disintegrate into mush when you tried to flip it. But there is a massive difference between the delicate, fragile gluten network required for a tender pancake and the robust, iron-clad gluten network of a chewy bagel.
The Science of Flour, Water, and Agitation
The formation of gluten is triggered by hydration, but the strength of that gluten is determined by mechanical agitation. This is where the home cook’s obsessive need for smoothness becomes a fatal flaw.
Gliadin, Glutenin, and the Protein Matrix
Imagine the proteins in your flour as microscopic, coiled-up strings of yarn. When you pour wet ingredients into your dry ingredients, the water molecules act as a solvent, uncoiling these proteins and allowing them to tangle together into a disorganized, sticky web.
If you simply fold the wet and dry ingredients together a few times and walk away, the resulting gluten network is weak, random, and fragile. The protein strands are barely holding hands. When the pancake cooks and expands, this weak network easily yields, resulting in a soft, tender crumb that melts in your mouth.
The Overmixing Trap: Why Your Whisk is Ruining Everything
But what happens when you grab a wire whisk and start beating the batter like it owes you money? You are applying mechanical shear force to those protein strands.
As you whisk, you force those randomly tangled proteins to align themselves into long, organized, parallel sheets. The more you stir, the tighter and stronger these sheets become. You are literally cross-linking the proteins, building a microscopic bungee cord system throughout your batter. By the time the batter is perfectly smooth, you have developed a highly organized, intensely elastic gluten matrix.
When you pour this overmixed batter onto a hot griddle, the heat activates the baking powder, which releases carbon dioxide gas. The gas tries to expand the pancake, but the tightly wound gluten network acts like a straitjacket. It resists the expansion. The result is a pancake that doesn’t rise properly, cooks up dense, and has a rubbery, chewy texture. Your obsessive whisking didn’t just remove the lumps; it fundamentally altered the molecular structure of your food.
The Magic of Lumpy Batter: Embracing the Chaos
So, what is the solution? You must learn to embrace the chaos of a lumpy batter. I know it goes against every instinct you have. We are conditioned to believe that lumps in our food are a sign of failure—a rookie mistake. But in the world of quick breads, lumps are actually a visual indicator that you have successfully avoided over-agitation.
What Exactly Are “The Lumps”?
Let’s look at the anatomy of a pancake batter lump. When you gently fold your wet and dry ingredients together—using a spatula or a wooden spoon, not a whisk—you will inevitably be left with small pockets of dry flour that haven’t fully dissolved into the liquid.
To the naked eye, these look like gross, powdery mistakes. But on a microscopic level, these lumps are actually highly functional structures. The outside of the lump is a hydrated shell of flour that has come into contact with the milk and eggs. The inside of the lump is a tiny, isolated core of dry flour.
Because you stopped stirring early, the global gluten network in the surrounding batter remains weak and tender. But what about those dry pockets? Won’t you bite into a pocket of raw, powdery flour at the breakfast table? No. And this is where the magic of chemistry and time comes into play.
Hydration Without Agitation: Letting Chemistry Do the Work
You do not need mechanical force (whisking) to hydrate flour. Water is incredibly efficient at moving through porous materials via capillary action and osmosis. If you simply leave the batter alone, the liquid from the surrounding batter will naturally penetrate the hydrated shell of the lump and slowly seep into the dry core.
This process is called passive hydration. The flour absorbs the liquid, the starches swell, and the proteins link up—but because there is no mechanical agitation forcing the proteins to align into strong sheets, the resulting gluten is incredibly weak. The lump essentially dissolves itself from the inside out, without adding any toughness to the final pancake.
The Secret Weapon: The Batter Resting Period
This brings us to the most critical, yet most frequently skipped, step in making diner-quality breakfast: the resting period. If you mix your lumpy batter and immediately ladle it onto a hot pan, those lumps won’t have time to passively hydrate, and you might actually end up with powdery spots.
If you want the secret to perfectly fluffy pancakes, you must let the batter sit undisturbed on the counter for at least 15 to 30 minutes. This resting phase is not optional; it is a mandatory chemical processing period.
Starch Gelatinization and Liquid Absorption
During this 20-minute timeout, several crucial things happen. First, the passive hydration we just discussed takes place. The liquid fully permeates the flour lumps, smoothing out the batter naturally without the need for a whisk.
Second, the starches in the flour begin to absorb the liquid and swell. Flour is roughly 70% to 75% starch. When these starch granules absorb liquid, they soften and expand. This makes the batter thicker and more robust, which means it will hold its shape better when you pour it onto the griddle, rather than spreading out into a sad, thin puddle. Thicker batter means taller pancakes.
Third, the small amount of gluten that did form during your brief mixing phase gets a chance to relax. Gluten is like a rubber band; when you stretch it (by mixing), it becomes tense. If you let it sit, the protein strands slowly unwind and relax, ensuring the final texture is as tender as possible.
The Baking Powder Activation Phase
Finally, the resting period allows your leavening agents to do their preliminary work. Most modern baking powders are “double-acting.” This means they react and produce gas twice: once when they are exposed to moisture, and a second time when they are exposed to heat.
During the resting phase, the first reaction occurs. The baking powder reacts with the liquid in the batter, creating millions of tiny carbon dioxide bubbles. Because you haven’t overmixed the batter, the weak gluten network is flexible enough to allow these bubbles to expand. The batter will literally become lighter, puffier, and aerated right in the bowl. When you finally scoop it into your pan, the heat will trigger the second reaction, expanding those pre-existing bubbles and sending your pancakes sky-high.
The Gear Check: Ditching Toxic Pans for Better Fluff
Before we get into the step-by-step technique, we need to have a serious talk about your equipment. I am “The Sassy Sous-Chef,” and if you have read my column for more than five minutes, you know I have a zero-tolerance policy for cheap, toxic kitchenware. You can have the most scientifically perfect, optimally rested pancake batter in the world, but if you pour it onto a scratched, peeling, $15 non-stick pan from a discount store, you are ruining your food and your health.
The PFAS Problem: Why Your Cheap Non-Stick is Trashing Your Food and Health
Let’s look at the facts. For decades, the standard non-stick pan has been coated with PTFE (Polytetrafluoroethylene), part of a massive family of synthetic chemicals known as PFAS (per- and polyfluoroalkyl substances). These are the notorious “forever chemicals.”
Recent data and legislative actions throughout 2025 and 2026 have blown the lid off the cookware industry. States across the U.S. have aggressively expanded bans on intentionally added PFAS in cookware coatings. The Environmental Working Group (EWG) and numerous independent studies have repeatedly highlighted that when these cheap pans are heated past a certain threshold—which happens incredibly fast on a standard home stove—the coating begins to degrade, releasing toxic fumes and leaching forever chemicals right into your perfectly rested pancake batter.
I cannot stress this enough: banishing toxic kitchen gear is the first step to becoming a competent home cook. Aside from the terrifying health implications, cheap non-stick pans are terrible for cooking. They have incredibly poor thermal mass. The moment you pour cold pancake batter onto a thin aluminum non-stick pan, the surface temperature plummets. Instead of getting a beautiful, golden-brown Maillard reaction on the surface of your pancake, the batter just sits there, slowly steaming and turning a pale, unappetizing gray. Furthermore, the danger of aerosol cooking sprays—which contain emulsifiers like soy lecithin that bake into a sticky, permanent residue on non-stick coatings—only compounds the issue, ruining the pan’s surface and your food’s flavor.
The Safe Alternatives: Carbon Steel and Cast Iron
If you want diner-style pancakes, you need to use diner-style equipment. Diners do not use Teflon. They use massive, seasoned steel griddles.
For the home kitchen, your best options are carbon steel or cast iron. Both materials boast phenomenal thermal mass, meaning they hold onto heat and distribute it evenly. When you pour batter onto a preheated carbon steel skillet, the temperature doesn’t drop. The heat immediately begins to caramelize the sugars in the batter, creating that slightly crispy, deeply flavorful, golden-brown edge that defines a perfect pancake.
Yes, carbon steel requires a bit of maintenance. You have to season it. But understanding the thermodynamics of carbon steel pans is a rite of passage. Once polymerized, a carbon steel pan is naturally non-stick, completely non-toxic, and will literally outlast you. If you are serious about cooking, these are the essential tools every beginner needs to invest in. If you are terrified of things sticking to your uncoated pans, simply learn the magic of the water drop test to gauge perfect preheating temperatures.
A Step-by-Step Masterclass to Foolproof, Fluffy Pancakes
Alright, we’ve covered the protein chemistry, the hydration physics, and the metallurgy of your cookware. Now, let’s put it all together into a foolproof, step-by-step masterclass. This technique is designed to minimize gluten development, maximize aeration, and deliver the fluffiest pancakes of your life.
Step 1: The Dry Mix and the Wet Mix
The first rule of pancake club is that wet and dry ingredients must be thoroughly mixed in their own separate bowls before they ever meet.
In a large bowl, whisk together your flour, sugar, baking powder, baking soda (if using buttermilk), and salt. This is the only time you are allowed to use a whisk aggressively. You want the leavening agents and salt perfectly distributed throughout the flour. And please, for the love of all things culinary, weigh your flour with a digital scale, or at least spoon it into the measuring cup. If you jam a measuring cup into a bag of densely packed flour, you are adding way too much dry mass to the recipe. I will tell you to stop scooping your flour until I am blue in the face.
In a separate, smaller bowl, whisk together your wet ingredients: milk (or buttermilk), eggs, vanilla extract, and melted butter. Here is a pro-tip from diner chefs: if you are using melted butter, make sure your milk and eggs are at room temperature. If you pour hot melted butter into fridge-cold milk, the butter will instantly congeal into tiny, hard pebbles of fat, defeating the purpose of adding liquid fat to the batter.
Step 2: The Folding Technique (Not Stirring!)
This is the make-or-break moment. Pour the wet ingredients into the center of the dry ingredients. Put the whisk in the sink. You are done with it.
Grab a silicone spatula or a wooden spoon. You are going to fold the batter, not stir it. Scrape the bottom of the bowl, lift the dry flour up, and fold it over the wet ingredients. Rotate the bowl and repeat. Do this exactly 10 to 12 times. No more.
Stop when the batter is just barely combined. There should be streaks of flour visible. There should be lumps the size of peas and marbles. The batter will look shaggy, ugly, and entirely unfinished. This is exactly what you want. Step away from the bowl. Your work here is done.
Step 3: The Mandatory Rest
Set a timer for 20 minutes. Do not touch the batter. Use this time to clean up your workspace, brew a pot of coffee, and preheat your carbon steel or cast iron skillet over medium-low heat.
As the batter rests, you will literally see it transform. The surface will become pockmarked with tiny bubbles as the baking powder activates. The batter will thicken considerably as the starches hydrate and the lumps dissolve from the inside out. By the time the 20 minutes are up, you will have a spongy, aerated, thick batter that is primed for the griddle.
When it is time to cook, do not stir the batter again to deflate it. Use a ladle or a measuring cup to gently scoop the batter directly from the bowl and plop it onto the hot pan.
Step 4: The Temperature Control
Cooking pancakes is an exercise in thermal management. Your pan needs to be hot enough to trigger the Maillard reaction (browning) and activate the second stage of the baking powder, but not so hot that the exterior burns before the interior cooks.
Medium-low heat is usually the sweet spot. Add a small pat of butter or a tiny drizzle of high-heat oil (like avocado oil) to the pan and wipe it around with a paper towel so there is just a microscopic film of fat.
Pour your batter. Now, watch closely. Do not flip the pancake when you see the first bubble. Wait until the bubbles rise to the surface, pop, and stay open, forming little craters. The edges of the pancake should look dry and set. This usually takes about 2 to 3 minutes. Slide a thin, flexible spatula underneath, and confidently flip it. The second side will only need about 1 to 2 minutes.
Troubleshooting Common Pancake Fails
Even with the science on your side, the kitchen can be a hostile environment. If things go wrong, you need to know how to diagnose the issue. Here are the two most common pancake disasters and the scientific reasons behind them.
Burnt on the Outside, Raw on the Inside
If you consistently find that your pancakes burn on the outside while the center remains a gooey, raw mess of wet batter, you have a temperature delta problem.
Your pan is simply too hot. The exterior of the batter is rapidly dehydrating and caramelizing (and then burning) before the heat has time to conduct all the way through the thick batter to the center. The solution is simple: turn the heat down. It is far better to cook a pancake slowly over medium-low heat than to rush it over medium-high. If you are struggling to gauge the heat, you might need a simple oven thermometer or an infrared surface thermometer to verify your pan is sitting around 350°F to 375°F (175°C to 190°C), which is the optimal zone for pancake griddling.
Flat as a Crepe (When You Wanted a Diner Stack)
If your pancakes are coming out thin, flat, and sad, there are three possible culprits.
- You overmixed the batter: As we exhaustively covered, overmixing develops gluten and deflates the bubbles created by the baking powder. The batter becomes too runny and spreads out in the pan instead of puffing up.
- You skipped the resting phase: Without time for the starches to absorb liquid and swell, the batter remains too thin and lacks the viscosity needed to hold its shape.
- Your baking powder is dead: Baking powder loses its potency over time, especially in humid environments. If your baking powder has been sitting in the back of your pantry since the last presidential election, it is inert. Test it by dropping a spoonful into a cup of hot water. If it doesn’t immediately fizz and bubble violently, throw it in the trash and buy a new can.
Conclusion: Step Away from the Whisk
Cooking is not just about following a list of ingredients; it is about understanding the physical and chemical reactions occurring in your bowl. The difference between a dense, rubbery hockey puck and a light, cloud-like diner pancake comes down entirely to technique.
You do not need a culinary degree to make mind-blowing food. You just need to respect the ingredients. Wheat flour wants to make gluten. It is your job to stop it. By gently folding your batter, leaving the lumps intact, and giving the chemistry time to work during a mandatory resting period, you are manipulating the molecular structure of the food to your advantage.
So this weekend, when you step into the kitchen, channel your inner food scientist. Put away the toxic non-stick pans, preheat that carbon steel skillet, and for the love of all that is holy, step away from the whisk. Embrace the lumps, trust the resting process, and prepare to eat the best pancakes of your life. Class dismissed.