
The Granola Dust Dilemma: Why Your Breakfast is Currently Sawdust
We have all been there. You spend a lazy Sunday afternoon mixing up a batch of homemade granola, dreaming of those massive, satisfying, boulder-sized clusters that you usually have to pay nine dollars a bag for at the artisanal grocery store. You carefully measure your ingredients, you bake it, your kitchen smells like a cozy autumn candle, and then… you scoop it into a bowl and realize you have just baked a pan of sweetened gravel. It is dusty. It is loose. It is, essentially, a crumbly topping for a sad, disappointing bowl of milk.
I have zero patience for recipes that lie to you, and the internet is absolutely full of them. Countless bloggers will tell you to just “toss some oats with maple syrup and bake,” completely ignoring the basic laws of culinary thermodynamics. Making giant, crunchy granola clusters is not some mystical secret guarded by bearded hipsters in Brooklyn. It is basic, straightforward kitchen science. And today, we are going to master it.
I firmly believe that anyone can produce professional-level food in a standard home kitchen, provided they understand the “why” behind the instructions. Once you stop making dusty oat-gravel and start mastering the culinary basics, you unlock the freedom to be creative. And mastering the perfect, clumpy granola unlocks one of my absolute favorite weekend hosting hacks: the mindful yogurt parfait bar.
But before we can invite your friends over for a chic, low-stress brunch, we need to fix your granola. We need to talk about binders, temperature control, and the absolute worst mistake you are currently making in your oven.
The Anatomy of a Cluster: The Holy Trinity of Binding
If your granola is falling apart, it is because it lacks structural integrity. You cannot just throw dry ingredients and wet ingredients into a hot box and expect them to magically fuse together. To create a cluster, you need a binding matrix. In the world of granola, that matrix relies on a delicate balance of sugar, fat, and—if you want to achieve true culinary greatness—protein.
The Sugar Science: Viscosity and Caramelization
Not all sweeteners are created equal when it comes to binding. If you are using standard pancake syrup or a thin agave nectar, you are setting yourself up for failure. To glue oats together, you need viscosity.
Honey is the undisputed king of the granola cluster. Honey has a unique molecular structure, composed primarily of fructose and glucose, with a naturally high viscosity. As it heats up in the oven, the natural sugars begin to caramelize, creating a sticky, molten coating around every single oat, nut, and seed. When this molten honey cools, it hardens into a firm, brittle structure.
Pure maple syrup is delicious, but it is significantly thinner than honey and contains more water. While it offers a phenomenal flavor profile, it simply does not have the same glue-like properties. If you are dead-set on a vegan granola and refuse to use honey, your best alternative is a thick brown rice syrup, or a combination of maple syrup and tightly packed dark brown sugar. The molasses in the dark brown sugar provides the sticky, binding properties that thin maple syrup lacks.
The Fat Factor: Crispiness and Heat Conduction
Fat is not just there for flavor; it is a crucial thermodynamic conductor. Fat coats the oats, preventing them from absorbing too much water from the sweeteners, which would result in a chewy, stale texture rather than a crisp one. Furthermore, fat conducts the heat of the oven evenly across the surface of the ingredients, promoting the Maillard reaction (the chemical reaction between amino acids and reducing sugars that gives browned food its distinctive flavor).
Refined coconut oil is my fat of choice for granola. It is solid at room temperature, which means that as the granola cools, the coconut oil helps solidify the clusters. It also provides an incredibly crisp texture without making the oats feel greasy. If you prefer a richer, more decadent flavor, melted unsalted butter is a fantastic substitute. Olive oil can work for a savory-leaning granola, but it will yield a slightly more fragile cluster.
The Secret Weapon: The Egg White Trick
If you have optimized your sugar and your fat and you are still not getting those massive, fist-sized clusters, it is time to deploy the secret weapon. This is the trick that separates the amateurs from the bakery professionals: the egg white.
Here is the science behind it: An egg white is composed of roughly 90% water and 10% proteins (primarily albumin). When you aggressively whisk an egg white until it is white and frothy, you are mechanically denaturing (uncoiling) those tightly wound proteins and trapping air. When you fold this frothy egg white into your raw granola mixture, that protein network coats the dry ingredients.
While some people like to toast your oats first for a deeper flavor in other recipes, the egg white trick requires raw, highly absorbent rolled oats. As the granola bakes at a low temperature, the heat causes those uncoiled egg proteins to form new, incredibly strong bonds (coagulation). This creates an interconnected, solid web that physically glues the oats and nuts together without requiring an absurd, tooth-aching amount of extra sugar. It is the exact same structural concept used in baking macarons or meringues, just applied to breakfast food. The result is a shiny, mega-crunchy cluster that will absolutely blow your mind.
The Pan-Pressing Technique: Engineering the Crunch
You can have the perfect ratio of honey, coconut oil, and frothy egg whites, but if you fail at the mechanical engineering stage of the process, your granola will still end up as dust.
Most home cooks simply dump their wet granola mixture onto a baking sheet, spread it around loosely with a spoon, and throw it in the oven. This is a critical error. If the oats are not physically touching each other under pressure, they cannot bond. You have to force them into a relationship.
Once you transfer your sticky oat mixture to your baking sheet, you must press it down into a dense, compact, even layer. You are essentially making one giant, pan-sized granola bar. I highly recommend using a piece of parchment paper placed over the top of the raw granola, and using the flat bottom of a heavy measuring cup or a bench scraper to press the mixture down firmly. You want a solid, tightly packed sheet from edge to edge.
Of course, this requires a baking sheet that won’t buckle under pressure or heat. If you are using a cheap, flimsy pan that twists and pops the second it gets hot, it will physically crack your beautiful sheet of oats right down the middle. You must invest in heavy-duty, durable baking sheets that maintain their shape and distribute heat evenly across the entire surface area.
Baking Thermodynamics: Low, Slow, and Strictly Hands-Off
Now that you have engineered the perfect, compacted sheet of raw granola, it is time to bake it. This is where the most egregious recipe errors occur.
Temperature Control: The Low and Slow Method
Do not bake granola at 350°F (175°C). Just don’t do it. Granola is packed with natural sugars from the honey, as well as the fragile oils in your nuts and seeds. At 350°F, the exterior of your granola will burn and turn bitter long before the interior moisture has a chance to evaporate.
You need to bake your granola at a gentle 300°F (150°C), or even 275°F (135°C) if your oven runs hot. This low and slow approach allows the water content in the syrup and egg white to gently evaporate, drying out the oats so they become crispy rather than chewy. It also gives the sugars time to slowly caramelize and undergo the Maillard reaction without crossing the line into scorched, acrid territory.
The “Do Not Stir” Mandate
I am about to contradict 90% of the recipes on the internet: Do not stir your granola while it is baking.
Most recipes will instruct you to open the oven every 15 minutes and toss the mixture. This is an absolute crime against clusters. Every single time you run a spatula through that pan, you are violently breaking the delicate sugar and protein bonds that are trying to form between the oats. You are actively destroying your clusters.
Put the pan in the oven, close the door, and walk away. Leave it completely undisturbed for the entire 40 to 45-minute baking time. A sudden warp in a cheap pan can also ruin this, which is why preventing your baking sheets from popping is so crucial for cluster integrity.
The Sugar Glass Transition (The Cooling Phase)
When the timer goes off and you pull the pan out of the oven, the granola will still feel soft and slightly damp. Do not panic. Do not put it back in the oven. This is exactly what is supposed to happen.
At 300°F, the sugars in the honey and the fats in the oil are in a molten, liquid state. They will not crisp up while they are hot. The true magic happens during the cooling phase, governed by a principle called the sugar glass transition. As the pan sits at room temperature, the temperature of the molten sugars drops below their glass transition point, causing them to solidify into a hard, brittle, crystalline structure.
You must let the pan sit, completely undisturbed, for at least one full hour. Only after it is entirely cool to the touch should you gently break that giant, pan-sized granola bar into the massive, satisfying clusters of your dreams.
The “No-Go” Rule: A Brutally Honest Warning About Toxic Bakeware
As a culinary blogger and an advocate for the everyday home cook, I have a strict “No-Go” rule in my kitchen, and it applies directly to the cheap, peeling, scratched non-stick bakeware you probably have shoved in the bottom drawer of your oven.
If you are roasting your healthy, wholesome, organic granola on a degraded Teflon sheet pan, you are completely defeating the purpose of cooking at home. Most dark, non-stick baking sheets are coated with PTFE (polytetrafluoroethylene). When these pans are heated, scratched, or simply age, they can degrade and release PFAS—per- and polyfluoroalkyl substances, charmingly known as “forever chemicals”.
The Ecology Center’s Healthy Stuff Lab and the German Federal Institute for Risk Assessment (BfR) have published extensive data on how the production and degradation of these chemicals leach into our water systems and our bodies. PFAS exposure has been linked to a myriad of health issues, including hormone disruption, liver damage, and certain cancers.
I am begging you to banish toxic kitchen gear from your life. Throw away the scratched non-stick pans.
Instead, purchase a heavy-duty, bare aluminum half-sheet pan or a high-quality stainless steel baking sheet. To prevent your granola from sticking, simply line the pan with unbleached, PFAS-free parchment paper. (Yes, you need to check your parchment paper labels, as many cheap brands use PFAS to make their paper grease-proof!) Alternatively, invest in a premium, platinum-grade silicone baking mat. When you are pressing your raw granola mixture down into the pan, be sure to use high-quality silicone spatulas to ensure no weird chemical tastes or toxic residues transfer to your food.
The Mindful Parfait Bar: Hosting Without the Headache
Now that you possess the knowledge to create perfect, bakery-level granola clusters, it is time to put them to use.
Weekend entertaining is often a chaotic nightmare of timing scrambled eggs, flipping pancakes, and stressing over a hot stove while your guests sit in the living room without you. Stop doing that. Your weekends are precious, and your time is money.
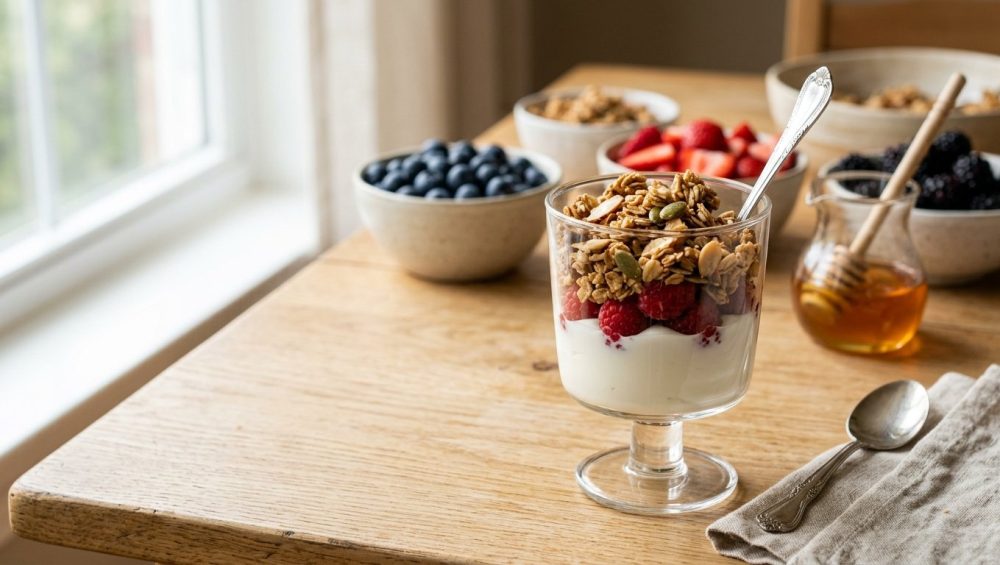
A mindful yogurt parfait bar is the ultimate, sophisticated hack to host a relaxed gathering. It requires zero active cooking while your guests are present, it looks incredibly aesthetic, and it caters to almost every dietary restriction imaginable.
The Yogurt Renaissance
If you think a yogurt bar sounds boring, you are vastly out of touch with current culinary trends. Yogurt is having a massive global renaissance. According to recent market data, the global fruit and yogurt parfait market was valued at $18.7 billion in 2025 and is projected to skyrocket to $32.4 billion by 2033.
Consumers are ditching heavy, sugar-laden breakfasts in favor of functional, protein-dense meals. Innova Market Insights reported in their 2025/2026 trends analysis that a staggering 48% of consumers now purchase yogurt specifically for its perceived health benefits, prioritizing functional nutrition over mere taste. With the widespread rise of GLP-1 medications and wellness-focused diets, your guests are actively seeking out high-protein, low-sugar breakfast options.
To build the perfect bar, offer two distinct bases:
- A High-Protein Dairy Option: Skip the watery, standard yogurts and opt for a thick, luxurious Icelandic skyr (like siggi’s) or a full-fat Greek yogurt. These are packed with protein and provide a tart, creamy canvas that balances the sweetness of your granola.
- A Plant-Based Option: Accommodate your dairy-free guests with a high-quality cashew or coconut milk yogurt.
Curating the Toppings
The toppings are where your parfait bar goes from a standard breakfast to a curated culinary experience.
The Fruit: Offer a mix of fresh and cooked fruits. Fresh raspberries, blueberries, and sliced bananas are non-negotiable. Prep your fruit the night before; just be sure you know how to make fresh berries last in the fridge so they don’t turn into a mushy, sad, moldy mess before your guests arrive.
The Compote: Elevate the bar by offering a warm berry compote. Simply simmer frozen mixed berries with a splash of lemon juice and a pinch of chia seeds until it thickens into a jammy sauce. If you are keeping the compote warm in the oven before serving, please ditch the glass bakeware that can unexpectedly shatter under fluctuating heat, and use a reliable stainless steel or enameled cast iron dish instead.
The Crunch: This is where your freshly baked, mega-cluster granola takes center stage. Place it in a beautiful, wide-mouthed bowl with a serving scoop. Add a few smaller bowls of toasted coconut flakes, chia seeds, and cacao nibs for those who want extra texture.
The Drizzle: Finish the station with a small pitcher of high-quality local honey, pure maple syrup, and perhaps a jar of runny almond butter.
Set out your favorite aesthetic glassware or wide ceramic bowls, line up the ingredients, and let your guests build their own masterpieces while you actually get to sit down and enjoy your coffee.
The Step-by-Step Masterclass Recipe: Mega-Cluster Vanilla Almond Granola
This is it. The definitive, foolproof, science-backed recipe for granola that actually clumps.
The Ingredients
- 3 cups Old-Fashioned Rolled Oats: Do not use quick oats. They are cut too fine, will turn to mush, and cannot provide the structural integrity required for a cluster.
- 1 ½ cups Raw Nuts and Seeds: I prefer 1 cup of roughly chopped raw almonds and ½ cup of raw pumpkin seeds (pepitas). Make sure they are raw; pre-roasted nuts will burn in the oven.
- ½ cup Pure Honey: The ultimate binder.
- ⅓ cup Refined Coconut Oil, melted: Refined coconut oil provides the fat for crispiness without making your granola taste like a piña colada.
- 1 Large Egg White: The secret protein glue.
- 1 tsp Pure Vanilla Extract: For depth of flavor.
- 1 tsp Fine Sea Salt: Do not skip this. Without salt, your granola will taste flat, cloying, and boring.
- Optional: 1 tsp ground cinnamon.
The Method
- Preheat and Prep: Preheat your oven to 300°F (150°C). Line a heavy-duty, bare aluminum half-sheet pan with PFAS-free parchment paper or a silicone baking mat.
- Whisk the Wet Ingredients: In a large mixing bowl, combine the melted coconut oil, honey, vanilla extract, and sea salt. In a separate small bowl, whisk your egg white vigorously until it is completely white, opaque, and highly frothy. Gently fold the frothy egg white into the honey mixture.
- Coat the Dry Ingredients: Add the rolled oats, chopped almonds, and pumpkin seeds to the wet mixture. Use a silicone spatula to fold everything together. Take your time here. You want to ensure that every single oat and nut is thoroughly coated in the sticky, protein-rich liquid.
- The Pan-Press: Pour the mixture onto your prepared baking sheet. Spread it out roughly, then use the back of your spatula (or the flat bottom of a measuring cup) to press the granola down into a tight, dense, even layer. It should look like one massive granola bar covering the pan.
- Bake (And Do Not Touch): Place the pan on the middle rack of the oven. Bake for 40 to 45 minutes until the edges are deeply golden brown. Do not stir it. I repeat, keep your hands off the spatula.
- The Glass Transition Cure: Remove the pan from the oven. The granola will feel soft. Place the pan on a wire cooling rack and leave it completely undisturbed for at least one full hour.
- The Break: Once the pan is entirely cool to the touch, use your hands to gently fracture the giant sheet of granola into massive, glorious, crunchy clusters.
- Storage: Store your finished masterpiece in a large glass jar or airtight container at room temperature. If you must use plastic, make sure you know how to clean greasy plastic containers properly beforehand, as leftover fat residue trapped in cheap plastic will immediately make your fresh granola taste rancid.
Final Thoughts from the Sous-Chef
Cooking is not magic; it is applied physics and chemistry that you get to eat. By understanding the roles of viscosity, protein coagulation, and thermal conductivity, you have just elevated a basic breakfast staple into a gourmet, artisanal product.
You no longer have to settle for the dusty, disappointing granola crumbs at the bottom of the pan, and you certainly do not have to stress over hosting a weekend brunch. Whip up a batch of these mega-clusters, curate a beautiful yogurt parfait bar, pour yourself a mimosa, and enjoy the fact that you just outsmarted every pretentious brunch restaurant in your city. Now get into the kitchen, press those oats, and absolutely refuse to stir.






