
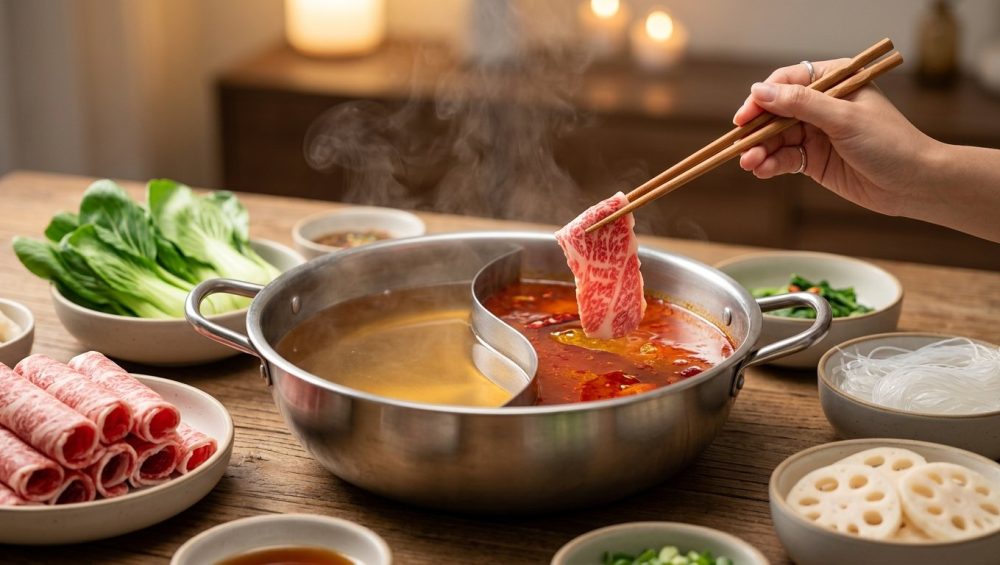
Let’s be real for a second, weekend warriors. You’ve spent all week prioritizing efficiency, hacking your way through 30-minute Tuesday night dinners, and surviving on sheer willpower and caffeine. But now it’s the weekend. You’ve invited friends over, you’ve spent good money on premium ingredients, and you are ready to host an interactive, communal feast. You set up a gorgeous hot pot spread: paper-thin slices of marbled beef, vibrant leafy greens, bouncy fish balls, and a pristine, deeply aromatic broth bubbling away in the center of the table. It’s a culinary triumph.
And then, forty-five minutes later, you look into the pot.
The beautiful, crystal-clear broth you spent hours simmering now looks like a muddy puddle of dishwater. It’s thick, it’s gray, there’s a suspicious foam clinging to the edges, and your guests are politely fishing around in a murky swamp trying to find their lost enoki mushrooms.
Listen, I love you, but your hot pot technique needs an intervention. You do not need a culinary degree to host a mind-blowing dinner party, but you do need to understand the basic chemistry of what happens when raw food meets boiling water. As the European hot pot market surges toward a projected $2.18 billion in 2026, more home cooks than ever are attempting this communal dining experience, only to be met with frustratingly cloudy, muted results.
But don’t panic. Today, we are stripping away the pretentious chef-speak and diving deep into the actual science of why your broth turns into a swamp, and exactly how to sequence your ingredients and manage your heat to keep it pristine from the first bite to the last. Welcome to your mindful hot pot masterclass.
The Science of the Swamp: Why Your Broth Turns Cloudy
If you want to fix a culinary disaster, you have to understand the chemistry behind it. A cloudy broth isn’t just a visual failure; it’s a textural and flavor failure. When a broth turns muddy, it’s because the physical structure of your ingredients has broken down and hijacked the liquid. There are three primary culprits ruining your pot: protein coagulation, starch gelatinization, and violent emulsification.
Protein Coagulation: The Scum Factor (Meats and Seafood)
When you drop a slice of raw beef or a piece of fish into hot water, you are introducing a massive payload of water-soluble proteins—specifically myoglobin and albumin—into your broth. As these proteins hit the heat, they denature. Their tightly coiled structures unwind and immediately begin to bond with one another, forming a gray, foamy substance that floats to the surface.
In professional kitchens, this is affectionately known as “scum.” It is completely harmless to eat, but it is the absolute nemesis of a clear broth. If you leave this denatured protein in the pot, the bubbling action of the water will eventually shatter these protein rafts into millions of microscopic particulates. Once those micro-particulates disperse into the liquid, your broth turns permanently gray and cloudy. No amount of straining will save it at that point.
Starch Gelatinization: The Thickening Thief (Noodles and Root Veggies)
While proteins make your broth gray, starches make your broth thick, gummy, and opaque. Ingredients like udon noodles, glass noodles, potatoes, taro, and lotus root are packed with starch granules (complex carbohydrates made of amylose and amylopectin).
When these ingredients are submerged in hot liquid, the starch granules absorb water and swell. Once the water temperature reaches the boiling point, those swollen granules literally explode, releasing a massive wave of sticky amylose polymers directly into your soup. This process is called starch gelatinization. It is the exact same mechanical process we use to make gravy or thicken a pie filling. It is brilliant when you want a thick sauce, but it is an absolute catastrophe when you are trying to maintain a light, drinkable hot pot broth.
Emulsification: When Fat Meets Furious Boiling
The final nail in the coffin of a clear broth is emulsification. As your meats cook, they render fat into the pot. Fat and water naturally repel each other, meaning the fat should simply float on the surface in distinct, easily skimmable pools.
However, if you are blasting your hot pot on maximum heat, creating a violent, rolling boil, you are essentially turning your soup pot into a mechanical blender. The aggressive turbulence of the boiling water forcefully smashes the liquid fat and the water together, creating a permanent, milky emulsion. This is the exact technique used to create the creamy, opaque broth of a Tonkotsu ramen. But in a clear, delicate hot pot? It just makes your soup look like dirty bathwater.
The “No-Go” Gear Warning: What Not to Cook Your Hot Pot In
Before we talk about ingredient sequencing, we need to have a serious chat about your equipment. As your resident advocate for the home cook, I have zero patience for toxic, cheap kitchenware that ruins your food and endangers your health.
The Danger of Scratched Non-Stick and Mystery Metals
I see entirely too many people hosting hot pot nights using flimsy, twenty-dollar electric pots coated in peeling, scratched Teflon. We have a strict “No-Go” rule on toxic gear here. When you use cheap non-stick pots for prolonged, high-heat boiling sessions, you risk degrading the chemical coating, leaching mystery compounds into your family’s dinner, and frankly, you are ruining your nonstick pans in the process.
Furthermore, cheap, thin-bottomed pots have terrible thermal mass. They create aggressive hotspots that will scorch your broth at the bottom while barely simmering at the top.
Safe, High-Quality Alternatives for Communal Dining
You need cookware that offers precise temperature control and retains heat beautifully. A heavy-bottomed, multi-clad stainless steel pot is an exceptional choice. While you don’t need to worry about performing the water drop test since you are boiling a liquid rather than searing a steak, the aluminum core of a clad stainless pot will distribute the heat perfectly evenly across the base.
Enameled cast iron (like a classic French Dutch oven) is another phenomenal option for hot pot. It holds heat so well that even when you drop a plate of cold ingredients into the broth, the temperature won’t plummet. Alternatively, a traditional Japanese Donabe (clay pot) is stunning for communal dining and naturally regulates a gentle simmer. Pair any of these with a high-quality portable induction burner, and you have a safe, professional-level setup.
Master Class: The Perfect Hot Pot Ingredient Sequencing
The biggest rookie mistake in hot pot history is treating the pot like a culinary garbage disposal. You cannot just dump a mountain of raw beef, a handful of starchy noodles, and a block of tofu into the water all at once and expect a good result. Hot pot is an exercise in pacing. By sequencing your ingredients correctly, you control the release of starches and proteins, keeping the broth pristine.
Phase 1: The Aromatic Awakening and Clear Broth Baseline
When the pot first comes to a simmer, the broth is at its purest. This is the time to build foundational flavors without introducing anything that will cloud the liquid.
Start by adding your hearty aromatics and robust mushrooms: scallions, thick slices of ginger, whole garlic cloves, shiitake mushrooms, and wood ear mushrooms. These ingredients release deep, earthy flavors but contain virtually no free-floating starches or coagulating proteins. They act as flavor enhancers, fortifying the broth for the journey ahead. Be mindful of your seasoning at this stage, and please, avoid salting too early because as the broth reduces over the next hour, the salt concentration will intensify dramatically.
Phase 2: The Veggie and Tofu Buffer
Once the aromatics have had about ten minutes to mingle, it is time to introduce the structural vegetables and the sponges. Napa cabbage, bok choy, daikon radish, and tomatoes are perfect here. They add sweetness and a clean, vegetal profile to the soup.
This is also the moment for tofu. Firm tofu, tofu skin, or puffed tofu are incredible flavor sponges, especially if you freeze it first to alter the cellular structure, creating gorgeous little pockets that soak up the savory broth. None of these ingredients will muddy your water. They act as a buffer, establishing a rich, complex soup base before the messy proteins arrive.
Phase 3: The Protein Plunge (Done Right)
Now we introduce the meats and seafood. This is where the danger of clouding is highest. The golden rule of the protein plunge is: Swish, do not abandon.
When you pick up a beautifully marbled, paper-thin slice of ribeye or lamb, you should hold it with your chopsticks and gently swish it through the simmering broth for about ten to fifteen seconds. The moment it changes color, pull it out, dip it in your sauce, and eat it. If you drop a massive clump of cold meat into the pot and leave it in there for five minutes, your meat gets chewy, gray, and completely depressing. Furthermore, abandoning meat at the bottom of the pot maximizes the release of that dreaded protein scum.
If you are cooking thicker items, like chicken or fish balls, you will need to let them float freely, but keep a close eye on them. You don’t want to abandon it in the bubbling abyss until the chicken breast turns out dry and stringy. Cook proteins in small, manageable batches.
Phase 4: The Starch Finale (Noodles and Dumplings)
Starches are the absolute final act of a hot pot night. Do not let anyone at your table drop udon noodles or sliced potatoes into the pot during Phase 1 or Phase 2. The moment starches hit the water, the gelatinization process begins, and your clear broth is on a one-way trip to Gravy Town.
Save the noodles, the taro root, and the dumplings for the very end of the meal. By this point, the broth has been enriched by the juices of the meats and the sweetness of the vegetables. It is deeply flavorful. Now, you want it to thicken slightly so it clings beautifully to the noodles. Drop in your starches, making sure to stir gently so they don’t stick to the bottom of the pot, because nobody wants a tragic scenario where their dumplings always tear and spill their filling everywhere. Once the noodles are cooked, you portion out the rich, thickened soup into bowls to finish the feast.
Temperature Control: The Real Secret to Broth Longevity
You can sequence your ingredients perfectly, but if you screw up the heat management, your broth is doomed anyway. The single most common mistake home cooks make during hot pot is blasting the heat on high and leaving it there.
The Rolling Boil Myth
There is a persistent myth that hot pot must be consumed at a violent, rolling boil to ensure the food cooks safely. This is scientifically false. Water at a rolling boil is 212°F (100°C). Water at a gentle, barely bubbling simmer is typically between 195°F and 205°F.
The difference in cooking time for a millimeter-thick slice of beef between 205°F and 212°F is literally a matter of two seconds. But the difference in what that temperature does to your broth is catastrophic. As we discussed earlier, a rolling boil creates aggressive mechanical turbulence. That turbulence shatters protein scum into micro-particulates and violently emulsifies rendered animal fat into the water. If your pot always boils over, you are running the heat way too high, and you are actively destroying the clarity of your soup.
The Gentle Simmer Strategy
The goal of a mindful hot pot is to maintain a steady, gentle simmer. You want to see small, lazy bubbles breaking the surface of the broth, not a chaotic, churning jacuzzi.
When you first bring the pot to the table, you may need to use medium-high heat to bring the liquid up to temperature. But the moment it begins to simmer, dial that heat back. If you drop a large batch of cold vegetables into the pot, the temperature will naturally drop; simply bump the heat up for two minutes to recover the simmer, and then immediately turn it back down. Active heat management is the hallmark of a great host.
Pre-Game Prep: How to Treat Your Ingredients Before They Hit the Pot
The work of a pristine hot pot actually begins in the kitchen, long before your guests sit down at the table. A little bit of smart, scientific prep work will save you massive headaches later. It’s incredibly frustrating when your knives go dull right in the middle of prepping a mountain of vegetables, so ensure your tools are sharp and your station is organized. Then, focus on mitigating the two biggest threats: proteins and starches.
Blanching Meats: The Pro Move
If you are making your own broth from scratch using raw chicken, pork bones, or beef bones, you absolutely must blanch them first. This is a non-negotiable step in professional kitchens.
Place your raw bones or meat chunks into a separate pot of cold water, bring it to a boil, and let it violently boil for about five to ten minutes. You will see a horrifying amount of gray, foamy scum rise to the surface. Dump the entire pot of water down the sink, thoroughly rinse the bones under cold tap water to wash away any clinging coagulated proteins, and then start your actual broth with fresh, clean water. By forcing the proteins to coagulate and purge in a sacrificial pot of water, your final broth will remain brilliantly clear.
You can also apply this technique to dense, bone-in meats you plan to serve during the hot pot, like chunks of chicken or pork ribs. Give them a quick three-minute blanch in the kitchen before arranging them on the serving platter.
Rinsing Starches: Washing Away the Cloud
Just as we purge proteins from meat, we need to purge surface amylose from our starches. Packaged noodles—especially fresh udon, ramen, or rice noodles—are often coated in loose starch to prevent them from sticking together in the bag.
If you drop those noodles directly into your hot pot, that loose starch instantly dissolves into the broth, thickening it prematurely. To prevent this, place your noodles in a colander and rinse them thoroughly under cold running water for thirty seconds before bringing them to the table. This washes away the surface starch, ensuring that only the internal starches of the noodle make it into the pot.
Rescuing a Cloudy Broth Mid-Meal (Damage Control)
Let’s say you get distracted pouring wine, your guests get a little too enthusiastic with the beef slices, the heat gets cranked up, and suddenly, you have a cloudy, foamy situation on your hands. It happens to the best of us. Here is how you execute rapid damage control.
The Skimming Technique
You cannot reverse emulsification, but you can absolutely remove protein scum and excess fat before they ruin the pot. The key is using the right tool. A wooden spoon or a standard ladle will just push the foam around. Do yourself a massive favor and invest in a stainless steel spider skimmer or a dedicated fine-mesh fat skimmer.
While the broth is at a gentle simmer (never a rolling boil!), the foam will naturally push toward the edges of the pot. Gently run your fine-mesh skimmer along the surface, lifting the foam and fat out of the liquid. Keep a small bowl of clean water next to the hot pot to rinse the skimmer between passes. Remember, skimming fat from broth is technically most effective when the liquid is chilled in the fridge overnight, but during an active dinner party, a fine-mesh skimmer is your best line of defense.
The Water Dilution Trick
If the broth has become overly thick and murky due to early starch gelatinization, skimming won’t help. The amylose is already dissolved into the liquid. Your only option here is dilution.
Keep a kettle of boiling water or a thermos of hot, clear stock on standby near the table. As the broth in the hot pot evaporates and thickens, gently pour in the hot water or stock to thin it out. Never add cold water to an active hot pot. Adding cold water will violently crash the temperature of the pot, halting the cooking process and potentially shocking and warping your cookware. Always dilute with a hot liquid to maintain the thermal equilibrium of the meal.
Conclusion: Your Mindful Hot Pot Era Begins Now
Hosting a hot pot night should be one of the most relaxed, joyful, and effortless ways to entertain. It is the ultimate communal dining experience, allowing you to prep everything in advance and actually sit down and enjoy the meal with your friends, rather than sweating over a hot stove in isolation.
By understanding the simple, unpretentious science of what happens in that simmering liquid, you elevate the entire experience. You now know that protein coagulation demands a gentle touch, that starch gelatinization requires strict ingredient pacing, and that a rolling boil is the enemy of clarity. You know to ditch the toxic, peeling electric pots and rely on the steady thermal mass of quality cookware.
You don’t need to be a Michelin-starred chef to make incredible food at home. You just need to respect the ingredients, manage your heat, and stop treating your beautiful broth like a swamp. Now go prep your veggies, slice your beef, and host the most pristine, flavorful, and mindful hot pot night your friends have ever seen. You’ve got this.






