
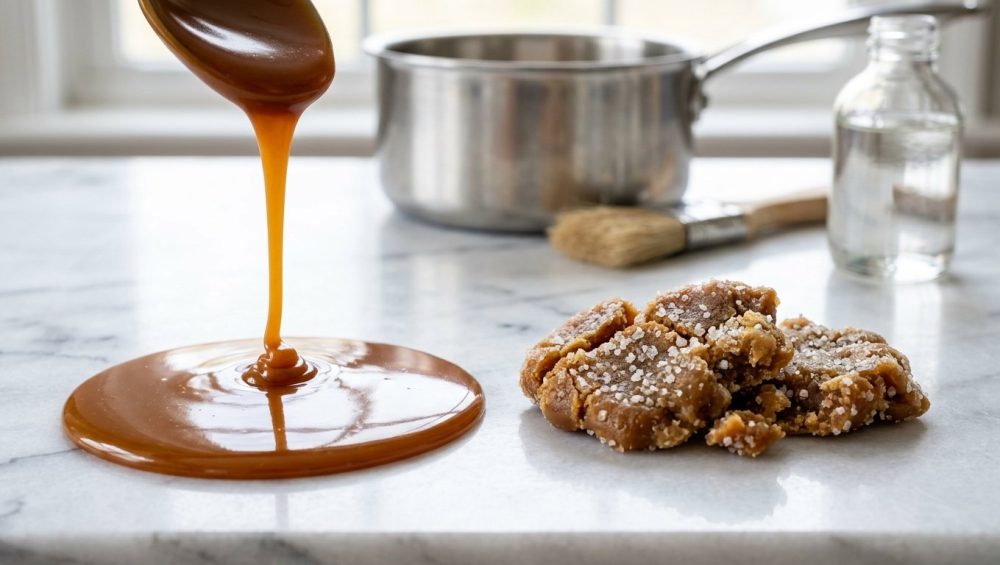
Picture this: It’s Saturday afternoon. You’ve got a gorgeous apple pie cooling on the counter, and you decide to be a culinary overachiever by whipping up a batch of homemade salted caramel to drizzle over the top. You melt the sugar, you watch it bubble, you add your expensive European butter, and suddenly… disaster strikes. The glossy, liquid gold seizes up into a cloudy, gritty, crystallized mess that looks more like wet sand than a dessert topping. You stare at the pan, contemplating throwing the entire thing—pot included—out the window.
We’ve all been there. I have personally ruined enough batches of caramel to fund a small dairy farm, and I’ve set off my smoke detector so many times my neighbors probably think it’s just my kitchen timer. But here is the brutal, honest truth: making caramel is not magic. It is pure, unadulterated chemistry. And once you understand the science behind why sugar behaves the way it does, you will never waste another block of premium butter again.
As a home cook, you do not need a culinary degree to make mind-blowing food. You just need to stop committing the same rookie kitchen mistakes over and over again. My philosophy is simple: we survive the chaotic weekdays with clever hacks, which buys us the time to be absolute perfectionists on the weekends. Today, we are being perfectionists. We are going to dive deep into the molecular drama of sugar, banish toxic cookware from your stove, and equip you with foolproof, science-backed solutions for perfectly glossy, smooth caramel every single time. Grab a glass of wine, tie your apron, and let’s get to work.
The Chemistry of Catastrophe: Why Does Caramel Seize?
Before we talk about how to fix grainy caramel, we need to understand why it happens in the first place. I promise not to bore you with too much pretentious recipe jargon, but a little bit of food science is non-negotiable here.
Table sugar (sucrose) is a highly structured crystal. The molecules are essentially clinging to each other for dear life. When you add water to sugar and heat it up, you are forcing those sucrose molecules to break apart and dissolve into a liquid syrup. But here is the catch: they desperately want to get back together. As the water evaporates during the boiling process, the sugar syrup becomes hyper-concentrated. The sucrose molecules start bumping into each other, looking for any excuse to re-bond into a solid crystal.
In the world of confectionery, candies are divided into two main categories: crystalline and amorphous. Crystalline candies, like fudge and fondant, are deliberately agitated to create millions of tiny, microscopic sugar crystals that give them a smooth, melt-in-your-mouth texture. Amorphous candies, on the other hand, include hard candies, toffees, and our beloved caramel. “Amorphous” literally means lacking a crystalline structure. For caramel to be smooth and glossy, we must actively prevent the sugar molecules from forming crystals.
The problem is that sugar crystallization is a chain reaction. It only takes one single, microscopic, un-dissolved sugar crystal clinging to the side of your pot to ruin the entire batch. If that one rogue crystal falls back into the hot syrup, it acts as a “seed” or a nucleation point. Instantly, the dissolved sucrose molecules latch onto it, and within seconds, your beautiful liquid amber turns into a gritty, opaque nightmare. It is exactly the same feeling of defeat you experience when your cheese sauce gets grainy because the proteins seized up—one tiny structural failure, and the whole pot is compromised.
The Two Paths to Caramel: Wet vs. Dry Methods
There is more than one way to melt sugar, and choosing your method dictates the rules of engagement. In the culinary world, we categorize caramel into two distinct camps: the Wet Method and the Dry Method. Both will get you to the promised land of liquid gold, but they require completely different techniques.
The Wet Caramel Method
The wet method involves combining granulated sugar with a splash of water (usually about a quarter cup of water for every cup of sugar) before you apply heat. The water dissolves the sugar, creating a simple syrup that you then boil until the water evaporates and the remaining sugar caramelizes.
The Pros: This is the method I recommend for weekend hobbyists and beginners. Because the sugar is dissolved in water first, it heats much more evenly. It gives you a significantly larger window of time to control the color of your caramel, meaning you are far less likely to accidentally burn it into bitter ash.
The Cons: It is highly, almost comically, susceptible to crystallization. Because you are boiling water out of a sugar solution, those sucrose molecules are highly volatile and desperately looking for a reason to seize. If you agitate the pan incorrectly, it’s game over.
The Dry Caramel Method
The dry method is exactly what it sounds like: you dump dry sugar into a hot pan and let it melt. No water, no safety net. As the sugar hits the hot metal, it liquefies and begins to caramelize almost immediately.
The Pros: It is incredibly fast. More importantly, because you haven’t introduced water to dissolve the sugar, the risk of crystallization is drastically lower. You can even stir a dry caramel without ruining it!
The Cons: It is a high-wire act without a net. Sugar melts unevenly in a dry pan, meaning half of your sugar might be smoking and burning while the other half is still a white, powdery mountain. It requires constant babysitting, rapid heat adjustments, and nerves of steel.
The Cardinal Sins of Caramel Making (And How to Avoid Them)
If you are using the wet method (which most home recipes call for), there are a few strict rules you must follow. Break them, and you will be scrubbing rock-hard sugar cement out of your cookware until midnight.
Sin 1: Stirring a Wet Caramel
I cannot emphasize this enough: once your sugar and water mixture comes to a boil, you must step away from the whisk, drop the spatula, and stop touching the food. Stirring a boiling sugar syrup forces the sucrose molecules to crash into each other. The friction of the spoon against the pot can literally trigger crystallization on the spot. If you need to equalize the heat or mix in a stubborn patch of un-melted sugar, gently swirl the pan by the handle. Do not stick a utensil in it.
Sin 2: Ignoring the Sides of the Pot
As your sugar syrup boils, bubbles will pop and splatter tiny droplets of sugar water onto the inner walls of your pot. The water in those droplets evaporates instantly, leaving behind dried, jagged sugar crystals. If the vibration of the boiling syrup knocks just one of those crystals back into the pot, the whole batch seizes.
The Fix: You must wash those crystals away. Keep a small bowl of clean water and a clean pastry brush next to your stove. Dip the brush in the water and gently wash down the inside walls of the pot, just above the boiling syrup line. The water will dissolve the stray crystals and safely wash them back into the syrup.
Sin 3: Using a Dirty Pot
Sugar molecules are clingy, and they will latch onto absolutely anything. If your pot has a speck of dried food, a smear of leftover grease, or a speck of dust, that impurity will act as a nucleation site and trigger crystallization. Your cookware must be surgically clean before you start.
Sin 4: Cranking the Heat Too Fast
Time is money during the week, but on the weekend, patience is a virtue. If you blast the heat on high immediately, the water will boil off before the sugar crystals have fully dissolved. You will be left with a pan full of boiling, undissolved sand. Start on medium-low heat until the syrup is completely clear and no visible grains remain, then crank it up to medium-high to boil off the water and achieve caramelization.
The Secret Weapons: Invert Sugars and Acids
If you are tired of playing Russian Roulette with your wet caramel, it is time to bring in the heavy artillery. Food scientists and professional pastry chefs rarely rely on just sugar and water; they use chemical interventions to guarantee a smooth result.
The Magic of Invert Sugars
An invert sugar is a liquid sweetener that contains a high percentage of glucose and fructose—two types of sugar molecules that have a different physical shape than sucrose. Common invert sugars include light corn syrup, liquid glucose, and honey.
When you add just one or two tablespoons of corn syrup to your granulated sugar and water, the glucose molecules act like bouncers at a nightclub. They physically get in the way of the sucrose molecules, preventing them from locking arms and forming crystals. It is an incredibly cheap, foolproof insurance policy for your caramel.
The Acid Trick
If you don’t have corn syrup in your pantry, you can use acid to achieve a similar result. Adding a tiny splash of lemon juice or a pinch of cream of tartar to your sugar and water mixture creates an acidic environment. As the syrup boils, the acid chemically breaks down (or “inverts”) some of the sucrose into glucose and fructose right there in the pot. This creates a natural barrier against crystallization without altering the final flavor of the caramel.
The “No-Go” Rule on Toxic Gear: Why Your Pan Matters More Than You Think
Let’s have a serious talk about your kitchen equipment. I have zero patience for cheap, toxic, peeling cookware. If you are trying to make caramel in a flimsy, scratched, $15 non-stick pan you bought at a big-box store five years ago, you are not just setting yourself up for culinary failure—you are actively ruining your nonstick pans and potentially exposing yourself to toxic fumes.
The Danger of High-Heat Teflon
Traditional non-stick pans are coated with Polytetrafluoroethylene (PTFE), commonly known as Teflon. While PTFE is generally safe for low-heat cooking (like scrambling eggs), it begins to physically degrade and break down at temperatures above 500°F (260°C). When it breaks down, it releases toxic perfluorinated compound fumes into the air, which can cause flu-like symptoms in humans and are famously lethal to pet birds.
Now, you might be thinking: “But Sassy Sous-Chef, caramelization happens around 320°F to 350°F! That’s well below the danger zone!”
Technically, yes. But here is the reality of home cooking: cheap, thin non-stick pans have terrible thermal conductivity. They do not distribute heat evenly. The burner underneath your pan is blasting heat at over 1,000°F. In a thin pan, the metal directly above the flame can easily spike well past 500°F in localized “hot spots,” even if the sugar syrup floating on top is only at 300°F. This uneven heating is exactly why your frying pans keep warping when you wash them, and it is exactly why your sugar burns in one corner while remaining completely raw in the other.
The Ultimate Caramel Pan
To make perfect caramel, you need a pan that provides flawless, even heat distribution and has a light-colored interior so you can monitor the changing color of the sugar.
My strict recommendation: You must use a heavy-bottomed, multi-clad stainless steel saucepan, or an enameled cast iron pot (like a Le Creuset or Staub). A high-quality, thick-walled pan absorbs the aggressive heat from your burner and distributes it evenly across the entire base. There are no hot spots. The sugar melts uniformly. And most importantly, there are no synthetic chemical coatings off-gassing into your dessert.
Temperature Control: The Stages of Sugar Cooking
Making caramel is an exercise in precise thermal management. As water boils out of your sugar syrup, the temperature of the liquid rises. The temperature corresponds directly to the concentration of the sugar, which dictates how the sugar will behave when it cools.
Here is a quick cheat sheet for the stages of cooked sugar:
- Thread Stage (230°F – 235°F): Used for simple syrups.
- Soft Ball Stage (235°F – 240°F): Used for fudge and fondant.
- Firm Ball Stage (245°F – 250°F): Used for marshmallows.
- Hard Ball Stage (250°F – 266°F): Used for nougat and gummies.
- Soft Crack Stage (270°F – 290°F): Used for taffy.
- Hard Crack Stage (300°F – 310°F): Used for brittle and lollipops.
- Caramel Stage (320°F – 350°F): The magic zone.
At 320°F, the sugar is a clear liquid. As it climbs toward 340°F, it begins to break down and form hundreds of complex, highly flavorful new compounds. It turns pale gold, then amber, then a deep, rich copper. If it hits 350°F, it is on the verge of burning. If it hits 360°F, it is burnt, bitter, and ruined.
You can eyeball the color, but if you want foolproof results, invest in a high-quality digital instant-read thermometer.
Finishing Your Caramel: Butter, Cream, and Thermal Shock
You’ve successfully navigated the crystallization minefield. Your sugar is a gorgeous, deep amber color, and the temperature is sitting right at 345°F. Now comes the most dangerous part of the process: stopping the cooking.
To turn hard caramel candy into a pourable, luscious caramel sauce, we have to add dairy—specifically, heavy cream and butter.
The Thermal Shock of Dairy
When you pour cold or room-temperature heavy cream into 345°F boiling sugar, the water content in the cream instantly vaporizes into steam. The mixture will violently bubble, spit, and quadruple in volume. This sudden temperature shock is exactly why your glass bakeware shatters if you move it from a hot oven to a cold counter—extreme temperature differentials cause violent physical reactions.
The Fix: Warm your heavy cream in the microwave or a small saucepan before adding it to the caramel. Warm cream significantly reduces the violent bubbling and prevents the hot sugar from immediately seizing into hard candy clumps when the cold liquid hits it.
Pour the warm cream in a slow, steady stream while whisking vigorously. Be careful with your tools here. Do not use a cheap plastic spatula that will melt into your food. Use a high-quality stainless steel whisk. If you insist on using silicone, make sure it is 100% platinum-grade, high-heat silicone, otherwise, you will quickly find out why your taste like soap after a few high-heat applications.
The Emulsification of Butter
Once the cream is smoothly incorporated and the bubbling has subsided, remove the pan from the heat and stir in your butter. The butter adds richness and fat, which emulsifies into the syrup to create a glossy, velvety texture. Always use unsalted butter so you can control the final sodium level yourself.
Finally, stir in a generous pinch of flaky sea salt (or kosher salt) and a splash of high-quality vanilla extract. The salt cuts through the cloying sweetness and elevates the deep, roasted notes of the caramelized sugar.
The Rescue Mission: How to Fix Grainy Caramel
Alright, let’s address the elephant in the room. What happens if you messed up? You blinked, you stirred when you shouldn’t have, or a rogue crystal fell down the side of the pot, and now your caramel has seized into a grainy, cloudy, sandy mess.
Do you throw it away? Absolutely not. Unless the sugar has blackened and burnt (in which case, yes, throw it out, you cannot un-burn carbon), a crystallized caramel can be saved.
If your chocolate turns clumpy when you melt it, you usually have to add fat to smooth it out. But with seized sugar, the solution is water. Here is your emergency rescue protocol:
- Leave the pot on the stove and turn the heat down to low.
- Carefully add 2 to 3 tablespoons of tap water to the grainy sugar.
- Allow the water to heat up and begin dissolving the crystallized sugar. You can gently swirl the pan to help it along.
- Be patient. It may take 5 to 10 minutes, but the water will eventually break down the sucrose bonds and melt the crystals back into a clear liquid syrup.
- Once the syrup is completely clear and smooth again, turn the heat back up to medium-high and resume the boiling process, paying strict attention to washing down the sides of the pot this time!
You have essentially hit the reset button. The water will evaporate, the sugar will eventually caramelize, and no one will ever know you almost ruined dessert.
Cleaning Up the Sticky Mess
Once your perfect caramel sauce is transferred to a heat-proof glass jar to cool, you are going to look at your saucepan and whisk, which are now coated in a layer of rock-hard, cooled sugar cement.
Do not stand at the sink aggressively scrubbing with a sponge. Much like air drying your cast iron will ruin it, violently scraping your nice pans with an abrasive pad will scratch the finish.
Instead, use physics to your advantage. Fill the sticky saucepan with tap water, drop your sticky whisk and pastry brush right into the water, and put the whole thing back on the stove. Bring the water to a rolling boil. Within five minutes, the boiling water will completely dissolve every trace of the hardened caramel. Pour the sweet water down the drain, and your pot will wipe perfectly clean with zero effort.
This is the kind of effortless kitchen maintenance that leaves you time to focus on the fun stuff—like properly maintaining your gear (because using a glass cutting board is why your kitchen knives get dull, but that’s a rant for another article).
Storing and Serving Your Masterpiece
Homemade caramel sauce is a living emulsion. It does not have the artificial stabilizers and chemical preservatives found in the squeeze bottles at the grocery store.
When you store your beautiful caramel in the refrigerator, the butterfat will naturally solidify, and the sauce will become quite stiff. This is perfectly normal. To bring it back to its glorious, pourable state, simply microwave the jar in 15-second bursts, stirring gently between each interval, until it is warm and fluid.
You can drizzle it over vanilla bean ice cream, use it as a binder for homemade pecan pie, swirl it into your morning coffee, or—my personal favorite—eat it straight out of the jar with a spoon while hiding in the pantry.
Making caramel at home is a rite of passage. It tests your patience, it demands your attention, and it forces you to respect the science of the kitchen. But once you master the wet method, utilize the magic of invert sugars, and arm yourself with a heavy-bottomed pan, you will never be intimidated by melted sugar again. You are the boss of your kitchen. Now go prove it.






