Listen up, weekend culinary warriors. We need to talk about the absolute tragedy happening in your kitchen every Sunday morning. You wake up, brew a beautiful cup of coffee, and decide to treat yourself to a luxurious, restaurant-quality breakfast. You whisk some eggs, splash in whatever milk is dying in the fridge, dunk a flimsy piece of sandwich bread into the bowl, and toss it into a moderately warm pan. Ten minutes later, you are staring at a floppy, weeping, wet sponge that tastes vaguely of raw flour, cinnamon, and profound disappointment.
You chew through a soggy, dense middle while trying to convince yourself that this is just what “custardy” means. Let me stop you right there: it is not. There is a massive, undeniable difference between a rich, silky, perfectly set custard interior and a piece of bread that is simply waterlogged with raw egg juice.
But do not despair. You do not need a culinary degree, a professional kitchen, or a pretentious chef’s attitude to fix this. You just need to understand the basic, undeniable science of hydration, protein coagulation, and thermal dynamics. Cooking is just edible chemistry, and right now, your formula is yielding a structural disaster. Today, we are going to tear down your entire French toast process and rebuild it from the ground up. We are going to banish the mush, optimize the crisp, and turn you into an absolute perfectionist at the stovetop.
The Anatomy of a Breakfast Tragedy
Before we can fix the problem, we have to understand the disease. Why does French toast get soggy in the first place? It comes down to a catastrophic failure in one of three areas: the structural integrity of the bread, the chemical ratio of the custard, or the thermal management of the cooking process.
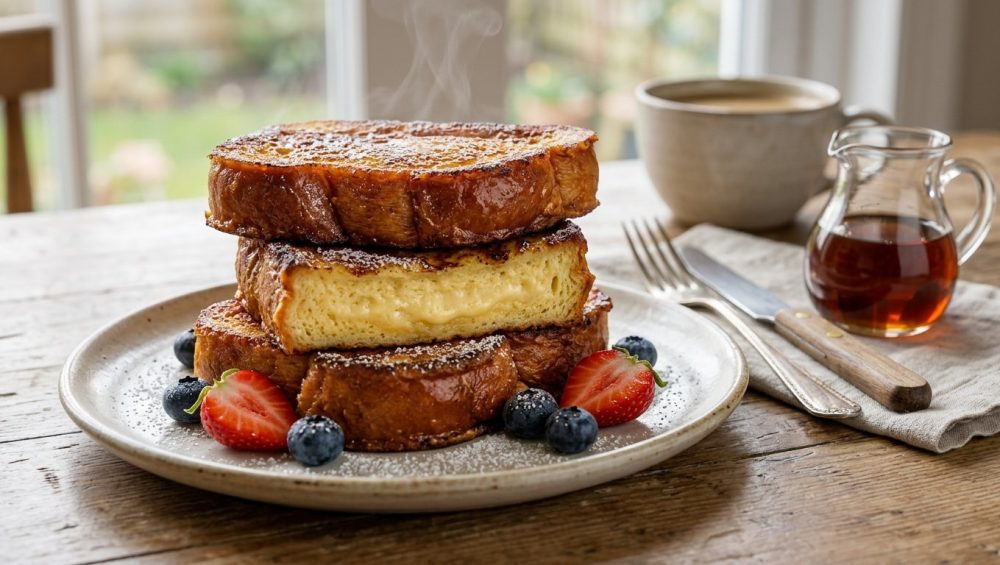
A perfect piece of French toast should possess a beautifully caramelized, golden-brown exterior that offers a slight, satisfying crunch when you cut into it. Beneath that crust, the interior should be creamy, rich, and fully set—meaning the egg proteins have cooked enough to hold the liquid in a stable matrix, rather than weeping it out onto your plate. If your current output resembles a wet kitchen sponge, you are violating the core laws of kitchen science. Let’s fix them, phase by phase.
Phase 1: The Bread (The Structural Foundation of Your Breakfast Empire)
The Fresh Bread Fallacy
The cardinal sin of French toast—the absolute guaranteed way to ruin your meal before you even crack an egg—is using fresh bread. I see you, grabbing that squishy, ultra-soft, freshly baked loaf from the bakery section and thinking you are doing yourself a favor. Stop it. Fresh bread is the mortal enemy of a good custard soak.
Fresh bread has an incredibly high moisture content. The starch molecules are fully hydrated and swollen. When you plunge a piece of fresh bread into a liquid custard, it has no capacity to absorb anything without its structural integrity completely collapsing. It instantly turns into a gelatinous paste. You cannot build a sturdy house on a flooded foundation, and you cannot build great French toast on wet bread.
The Science of Starch Retrogradation
To create the perfect canvas for your custard, you need stale bread. But staling is not just about the bread “drying out” from exposure to air; it is a complex chemical process called starch retrogradation. As bread ages, the starch molecules crystallize and expel the water they were holding. This crystallization firms up the crumb structure, turning the bread into a rigid, highly absorbent sponge that can drink up your egg mixture without disintegrating.
If you forgot to leave your bread out on the counter overnight, do not panic. You can artificially stale your bread by placing the slices on a wire rack in a 275°F (135°C) oven for about 15 to 20 minutes. This draws out the surface moisture and stiffens the crumb. And please, do not try to accelerate this by using your refrigerator. If you are familiar with the science behind storing bread in the fridge, you already know that while cold temperatures accelerate retrogradation, they also ruin the flavor profile and texture in unpredictable ways. Stick to the oven-drying method.
Choosing the Right Loaf
Not all bread is created equal, and your standard, pre-sliced supermarket white bread is strictly forbidden here. It is far too airy, far too thin, and contains too many dough conditioners that turn to mush when wet.
You need a bread with a tight, sturdy crumb and a high fat content. Brioche is the undisputed king of French toast. Its high butter and egg content gives it a naturally rich flavor and a structure that holds up beautifully to soaking. Challah is a close second, offering a slightly chewier texture and a gorgeous golden color. If you want to get truly elevated, seek out Shokupan (Japanese milk bread), which boasts a pillowy yet incredibly resilient crumb. Sourdough can work if you enjoy a savory, tangy contrast to the sweet custard, but be warned: the large, irregular holes in artisan sourdough can cause the custard to leak right through, leaving you with unevenly soaked patches.
The Golden Ratio of Thickness
Let’s talk about dimensions, because size absolutely matters here. If you slice your bread a quarter-inch thick, you are making a fundamental error in structural engineering. A thin slice simply does not have the internal real estate to support a wet custard. The moment it hits the liquid, the hydration penetrates all the way through instantly, obliterating the crumb. When you try to lift it, it tears. When you cook it, it compresses into a dense, rubbery mat.
On the flip side, if you go full lumberjack and hack off a three-inch slab, you are creating an impossible thermal challenge. By the time the heat penetrates to the center to set the egg proteins, the exterior will be blackened like a meteorite.
The golden ratio—the absolute sweet spot for French toast—is exactly three-quarters of an inch to one inch thick. This provides enough dry interior to maintain structural integrity while allowing the heat to reach the center before the outside burns. You do not need fancy gadgets to measure this, just reliable beginner kitchen tools like a sharp, high-quality serrated bread knife and a little bit of common sense.
Phase 2: The Custard (Where Ratios Dictate Reality)
The Egg-to-Dairy Formula
Now that we have our structural foundation, we need to talk about the custard. This is where most weekend hobbyists completely lose the plot. Cooking is a science, and if you are just blindly splashing milk and cracking eggs into a bowl until it “looks right,” you are gambling with your breakfast.
The ideal French toast custard relies on a very specific ratio: one large egg for every one-quarter to one-third cup of dairy.
If you use too much milk, you are drowning your bread in a liquid that lacks the structural proteins necessary to set up when heated. The result is a soggy, weeping mess. If you use too much egg, the bread gets coated in a thick, sulfurous layer of protein that tastes exactly like a scrambled egg sandwich masquerading as a pastry. If you want a slightly richer, more luxurious texture, the professional secret is to use the standard ratio but add one extra egg yolk to the bowl. The yolk provides pure fat and emulsifiers (lecithin) without adding the firm, rubbery proteins found in the egg white.
The Dairy Dilemma: Fat is Flavor, Water is Weeping
Do not even think about using skim milk for this. Skim milk is essentially cloudy water. When you soak bread in skim milk and apply heat, the water evaporates into steam, leaving behind zero richness and a collapsed, soggy crumb.
You need fat to tenderize the bread and create that rich, velvety mouthfeel. Whole milk is the absolute baseline. Half-and-half is better. Heavy cream, used sparingly in combination with whole milk, is the ultimate indulgence. The fat coats the flour proteins in the bread, preventing them from turning gummy, while the milk sugars (lactose) contribute heavily to the beautiful browning on the outside.
The Sugar and Spice Symphony
Most people dump a tablespoon of cinnamon into their custard, whisk it, and then stare in confusion as the cinnamon stubbornly floats on the surface like a life raft, refusing to mix. Cinnamon is hydrophobic; it repels water. To properly integrate your spices, you need to whisk them into your sugar and egg yolks before you add the milk. The friction and the fat will help disperse the spice evenly.
Furthermore, you must add salt. I do not care that French toast is a sweet dish. Salt is a flavor enhancer and a protein modifier. Just like the science behind salting eggs early for a perfect scramble, a pinch of kosher salt in your custard breaks down the tightly coiled egg proteins, preventing them from squeezing out moisture when cooked. It also perfectly balances the sweetness of the maple syrup you will inevitably drown the dish in later.
The Crucial Rest Period
Once you have whisked your custard into a homogeneous, pale-yellow liquid, you are going to do something that goes against every impatient bone in your body: you are going to walk away.
Similar to the magic of letting the batter rest when making pancakes, your French toast custard requires a brief timeout. Letting the mixture sit for ten to fifteen minutes allows the sugar to fully dissolve, the proteins to relax, and the vanilla extract to permeate the liquid. If you skip this step, you risk cooking pockets of undissolved sugar that will burn instantly when they hit the hot pan.
Phase 3: The Soak (Timing and Hydration Gradients)
The Flash Dip vs. The Long Soak
How long should you soak your bread? That depends entirely on how stale your bread is and how thick you cut it. If you are using a standard one-inch slice of day-old brioche, a quick three-second dip on each side is usually sufficient.
However, if you are using heavily oven-dried bread or an incredibly dense loaf, you need to allow time for the liquid to penetrate. You want the custard to reach the center of the slice, but you do not want the exterior to become so waterlogged that it falls apart in your hands.
Managing the Hydration Gradient
When you soak a thick piece of bread, you create a hydration gradient. The outside is saturated, while the inside remains dry. If you throw it straight into the pan, the outside will cook before the inside has a chance to hydrate.
To fix this, employ the resting rack method. After dipping your slices, place them on a wire rack set over a baking sheet for about two to three minutes before cooking. Just as chilling your cookie dough allows the flour to fully hydrate and prevents spreading, letting your soaked bread rest allows the custard to slowly migrate from the saturated exterior into the dry core. This ensures an even, creamy texture throughout the entire slice without compromising the structural integrity of the crust.
Phase 4: The Hardware and The Heat (Where the Magic Happens)
The “No-Go” Rule on Toxic Gear
We need to have a very serious, brutally honest conversation about your cookware. I have a strict, non-negotiable rule in my kitchen: absolutely zero cheap, toxic, peeling non-stick pans. If you are cooking your beautiful, expensive brioche on a scratched-up Teflon skillet from 2012 that looks like it has a skin condition, throw it in the trash immediately.
You are ingesting forever chemicals because you are too stubborn to upgrade your gear. We do not use mystery metals or degrading coatings in this house. I am absolutely ruthless about banishing toxic kitchen gear from my life, and if you want to cook like an expert, you need to do the same.
The Pan of Choice
For French toast, you need a pan with massive thermal mass. When you drop a cold, wet, heavy piece of custard-soaked bread onto a cooking surface, it immediately sucks the heat out of the metal. A cheap, thin aluminum pan will instantly drop in temperature, causing your bread to steam and boil in its own juices rather than sear.
You need a heavy-duty cast iron skillet, a sleek carbon steel pan, or a thick, multi-clad stainless steel griddle. Once you understand the deep culinary science of seasoning cast iron pans, you will realize they are the ultimate tool for achieving a flawless, non-stick, deeply caramelized crust. Their ability to hold onto heat ensures that the Maillard reaction—the chemical process responsible for browning and flavor development—kicks off the second the bread hits the surface.
Temperature Control and the Butter-Burn Threshold
Temperature control is where most people ruin their French toast. If the pan is too cold, the bread absorbs the cooking fat, steams, and becomes a greasy, soggy nightmare. If the pan is too hot, the sugars in the custard burn into bitter black carbon before the heat can penetrate to the center to cook the raw egg.
The sweet spot is medium-low to medium heat, aiming for a surface temperature of around 325°F to 350°F (160°C to 175°C). But here is the catch: whole butter, which is absolutely essential for flavor, contains milk solids that burn at 350°F. If you cook your French toast purely in butter over a long period, your pan will fill with acrid, black smoke.
The professional workaround is the hybrid fat method. Add a tablespoon of a neutral, high-smoke-point oil (like avocado or grapeseed oil) to the pan first, let it heat up, and then drop in a tablespoon of butter right before you add the bread. The oil raises the overall smoke point of the fat mixture, while the butter provides that irreplaceable, nutty, caramelized flavor. Alternatively, use clarified butter or ghee, which has had the milk solids removed and can withstand much higher temperatures without scorching.
The Art of the Flip
Patience is a virtue you must learn to embrace. Do not poke, prod, or aggressively shimmy the bread while it is forming its crust. Let it sit undisturbed for at least three to four minutes. You are waiting for the Maillard reaction to work its magic, transforming the pale custard into a deep, mahogany-brown shield.
When it is finally time to flip, do not come at this delicate, custard-soaked masterpiece with a bulky, thick-edged plastic spatula. You will tear the crust, ruin the aesthetic, and squeeze out the internal moisture. Grab a flexible, stainless steel slotted fish turner, slide it gently underneath the slice, and execute a confident, swift flip. The razor-thin metal edge glides under the caramelized crust without breaking it, ensuring your presentation remains flawless.
Phase 5: The Oven Finish (The Professional Secret)
Why the Stovetop is Never Enough
If you followed my advice and cut your bread to the proper one-inch thickness, I have a harsh truth for you: the stovetop alone will never fully cook the center of your French toast without burning the outside. It is a thermodynamic impossibility. The heat simply cannot travel through the dense, wet, insulating custard fast enough.
If you serve it straight from the pan, the outside might look beautiful, but the inside will be a lukewarm, raw, soggy puddle of egg. This is the exact reason why your French toast always feels wet in the middle.
The Wire Rack Method
The solution is the oven finish. This is the professional restaurant secret that separates the weekend amateurs from the culinary legends.
Preheat your oven to 350°F (175°C) before you even start mixing your custard. To avoid the terrifying sound of cheap baking sheets warping under the heat, invest in a heavy-duty, commercial-grade rimmed baking sheet fitted with a stainless steel wire rack.
As soon as your French toast achieves that perfect, golden-brown sear on both sides in the skillet, immediately transfer the slices to the wire rack. Do not put them directly on the flat baking sheet, or the trapped steam will instantly destroy the crispy crust on the bottom, turning it into mush.
Bake the slices in the oven for 8 to 12 minutes. The gentle, ambient heat of the oven penetrates the thick slices evenly, causing the internal egg proteins to fully coagulate. The custard sets into a creamy, luxurious, pudding-like texture rather than a weeping puddle. Furthermore, the dry heat of the oven flashes off any excess surface moisture, reinforcing the crispness of the exterior crust.
Advanced Troubleshooting: The French Toast Q&A
Even with a masterclass under your belt, things can occasionally go sideways. Here is how to diagnose your failures so you never repeat them.
Why is my French toast leaking liquid onto the plate?
This phenomenon is called syneresis. It means you cooked the egg proteins too fast and at too high of a heat. When egg proteins are shocked by aggressive heat, they coil up tightly and violently squeeze out the liquid they were holding—just like wringing out a wet towel. To fix this, lower your pan temperature, ensure you are using the correct ratio of dairy to egg, and rely on the gentle oven finish to set the center.
Why is it burnt on the outside but raw in the middle?
You violated the laws of thermodynamics. Your pan was entirely too hot, causing the sugars in the milk and the bread to scorch before the heat could penetrate the crumb. Alternatively, you sliced your bread two inches thick and stubbornly refused to use the oven finish method. Turn down the burner, use a thicker pan with better heat retention, and utilize your oven.
Why does it taste like a scrambled egg sandwich?
You committed one of two errors. First, your ratio was off—you used too many eggs and not enough dairy, creating a dense, rubbery protein matrix rather than a delicate custard. Second, you were lazy with your whisking. If you do not vigorously whisk the eggs until the yolks and whites are completely homogenized, you will end up with rogue globs of pure egg white clinging to the outside of the bread. When these hit the hot pan, they fry up exactly like a breakfast scramble, completely ruining the sweet, pastry-like illusion of the dish.
The Final Bite
Banish the soggy, wet, weeping weekend breakfasts to the past where they belong. You now possess the scientific knowledge, the proper ratios, and the thermodynamic strategies to execute this dish flawlessly every single time.
When it comes to mastering kitchen basics, conquering French toast is a glorious rite of passage. It teaches you patience, temperature control, and the profound difference between a recipe that is merely thrown together and one that is engineered for perfection.
So throw away that flimsy sandwich bread, toss your peeling non-stick pan into the garbage, and respect the custard. Your Sunday mornings are about to get infinitely better. Now go cook something amazing, and try not to set off the smoke detector.


