The Tragedy of the Taco Blowout
Look, we have all been there. You have spent an hour braising the perfect, melt-in-your-mouth pork carnitas. You have meticulously diced your white onions, chopped the fresh cilantro, and mixed a killer batch of margaritas. You assemble your masterpiece, lift it to your mouth, and go in for that glorious first bite.
And then, disaster strikes. Rip.
The bottom falls out. Your perfectly spiced meat, along with all of its beautiful juices, is now resting in a sad, messy puddle on your plate. You are left holding a cracked, brittle crescent of dry corn that tastes like edible cardboard. If you have ever wondered why your tortillas keep tearing at the exact moment you try to eat them, you are not alone. It is the single most frustrating structural failure in the modern home kitchen, and it is entirely preventable.
You do not need a culinary degree to fix this. You do not need to spend your precious weekend hand-pressing fresh masa from scratch—unless you want to, in which case, I applaud your dedication. But for the rest of us, we just need a basic understanding of heat, moisture, and starch chemistry. Today, we are going to dive deep into the food science of pliability, banish the brittle tortilla forever, and outline a stress-free, prep-ahead blueprint for hosting a beautifully organized taco night. Let’s reclaim Taco Tuesday.
The Food Science of the Rip: Why Your Tortillas Are Failing You
To understand how to fix a broken tortilla, we first have to understand why it breaks in the first place. What makes a tortilla fresh is not simply heat or time off the griddle; it is the delicate condition of the starch network inside the dough and the moisture distributed through that network.
Starch Retrogradation: The Enemy of Pliability
Whether you prefer corn tortillas (which rely on the ancient alkaline steeping process known as nixtamalization) or flour tortillas (which rely on gluten relaxation), they both go stale and rigid through the exact same chemical culprit: starch retrogradation.
When a tortilla is first cooked, the starch granules gelatinize. They absorb water, swell up, and form a soft, flexible gel. This is when the tortilla is at its absolute peak—stretchy, warm, and structurally sound. However, the moment that tortilla begins to cool down, those expanded starch molecules (specifically amylose and amylopectin) begin to realign and recrystallize. As they return to a rigid, crystalline structure, they actively expel moisture. The result is a tortilla that feels firm, rubbery, and incredibly prone to cracking when folded.
The Moisture Deficit and the Refrigerator Trap
Moisture migration makes this retrogradation process exponentially worse. Water does not stay evenly distributed inside a resting tortilla; it moves from the wetter center toward the drier edges, which is why your tortillas almost always start cracking at the perimeter first. If left uncovered, that moisture evaporates directly into the surrounding air.
This brings us to the ultimate betrayal: your refrigerator. Cold temperatures aggressively accelerate starch recrystallization. Storing your leftover store-bought tortillas in the fridge practically guarantees they will turn into stiff frisbees within twenty-four hours. For short-term freshness, room temperature storage in an airtight container consistently outperforms refrigeration. If you must store them long-term, freeze them. Freezing halts the retrogradation process entirely, whereas the fridge acts as a hyper-speed aging chamber for starches.
Store-Bought vs. Homemade: A Brutal Reality Check
Let’s get one thing straight: industrial, store-bought tortillas are engineered for shelf life, not for immediate structural integrity. While traditional artisanal tortillas are meant to be consumed fresh off the comal, mass-produced commercial tortillas sit in plastic bags on supermarket shelves for weeks. To achieve this, manufacturers rely on anti-staling hydrocolloids, commercial enzymes, and preservatives to artificially hold onto moisture.
When you pull a store-bought tortilla out of the bag, it might feel soft to the touch, but it is a chemical illusion. The starch matrix has already retrograded. If you try to fold it cold, it will snap. You cannot just serve these raw out of the plastic. You have to actively reverse the retrogradation process by reintroducing what was lost: heat and humidity.
The Fix: How to Resurrect and Perfect Your Tortillas
Reversing starch retrogradation requires breaking down those crystallized starch molecules and forcing them to reabsorb water. Heating a tortilla completely dry will just turn it into a giant tortilla chip. We need steam. Here are the exact methods to achieve flawless pliability, depending on how much time you have.
The Microwave Steam (For the Weekday Warrior)
Time is money. When it is a random Tuesday night and you are desperately focused on breaking your takeout habit, you need a fast, efficient solution that does not involve preheating heavy cast iron. The microwave is your best friend here, provided you use it correctly.
Do not just throw a stack of dry tortillas on a plate and nuke them. The concentrated heat will evaporate whatever residual moisture is left, leaving you with tough, leathery discs that will shatter upon impact. Instead, take a clean paper towel and run it under the faucet until it is completely saturated, then wring it out so it is damp but not dripping. Wrap a stack of no more than six tortillas completely in this damp towel. Microwave on high for 30 to 45 seconds.
The microwave excites the water molecules in the damp towel, creating an instant, localized steam bath. This steam penetrates the tortillas, re-gelatinizing the starches and restoring their original, stretchy glory. Keep them wrapped in the towel until the exact moment you are ready to plate.
The Skillet and Splash Method (For Weekend Perfectionists)
When you are hosting a dinner party or you actually have the time to care about the nuances of flavor, the stovetop is the only acceptable method. A proper pan-heating method not only rehydrates the tortilla but also toasts the exterior, activating the Maillard reaction to bring out the deep, earthy, roasted corn notes.
However, a dry pan is a death sentence for a stale tortilla. If you want to know why your food always sticks or burns on the stove, it is usually a lack of proper temperature control and lubrication. But for tortillas, our lubrication is water, not oil.
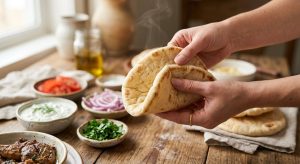
Preheat a heavy carbon steel or cast-iron skillet over medium-high heat for a full five minutes. You want the metal ripping hot. Set up a shallow bowl of tap water next to the stove. Take a single corn tortilla, quickly dunk it entirely into the water, shake off the excess, and slap it directly onto the hot, dry skillet.
It will immediately hiss and billow with steam. That water is flashing into vapor, driving moisture straight into the core of the tortilla while the conductive heat of the pan toasts the exterior. Leave it for about 30 to 45 seconds until it starts to bubble slightly and develop small, charred brown spots, then flip it. Another 30 seconds, and you have a perfectly resurrected, incredibly pliable, restaurant-quality tortilla.
The Towel Wrap: The Unsung Hero of Taco Night
Warming the tortillas is only half the battle; keeping them warm is the real challenge. A hot tortilla exposed to room-temperature air will rapidly lose its heat and moisture, retrograding back into a stiff piece of cardboard before your guests even reach the buffet line.
As soon as a tortilla comes off the skillet or out of the microwave, it must immediately go into a heavily insulated environment. A dedicated ceramic or insulated cloth tortilla warmer is ideal, but a thick, clean kitchen towel with a lid placed over it works just as well. The goal is to trap the residual steam radiating off the freshly heated tortillas, creating a humid microclimate that keeps the starches relaxed and pliable for up to an hour.
Ditch the Toxic Teflon: A Sassy Sous-Chef PSA
Since we are talking about heating skillets to ripping hot temperatures to blister tortillas, we need to have a serious conversation about your cookware. I have absolutely zero patience for cheap, peeling, mystery-metal non-stick pans. If you are using a scratched Teflon pan to heat your tortillas, you need to throw it in the garbage right now.
The “Forever Chemical” Nightmare in Your Kitchen
Traditional non-stick coatings are made using polytetrafluoroethylene (PTFE), which belongs to a family of thousands of synthetic compounds known as PFAS, widely referred to as “forever chemicals”. These chemicals do not break down in the environment, and worse, they do not break down in the human body.
When you heat a traditional non-stick pan over medium-high heat to warm a tortilla—especially a dry pan without a pool of oil or water to absorb the thermal energy—that chemical coating begins to degrade. It can release toxic, invisible fumes into your kitchen air and leach chemicals directly into your food. Recent statistics and studies from 2024 and 2026 have linked prolonged PFAS exposure to severe health impacts, including kidney cancer, liver damage, thyroid disease, and weakened immune responses.
The industry knows exactly how dangerous this is. In 2023, chemical giants like 3M and DuPont reached settlements exceeding $11 billion over PFAS contamination claims. Yet, cookware manufacturers are still fighting legislation trying to ban these toxins from our kitchens.
Do not wait for the FDA to save you. It is your responsibility to stop ruining your nonstick pans by overheating them, or better yet, remove them from your high-heat cooking rotation entirely. We do not serve a side of endocrine disruptors with our weekend tacos.
Safe, High-Quality Gear You Actually Need
You do not need a kitchen full of toxic chemicals to cook eggs or warm tortillas. You just need proper technique and safe, durable materials. Cast iron and carbon steel are the absolute gold standards for taco night. They are naturally PFAS-free, they can withstand the blazing high temperatures required to perfectly char a tortilla without off-gassing toxic fumes, and they possess incredible thermal mass.
When curating the essential tools every beginner needs in their kitchen, a heavy-gauge carbon steel skillet or a traditional flat cast-iron comal should be at the very top of the list. Yes, they require a bit of maintenance and seasoning, but they will literally outlast you. They are heirloom pieces that reward you with professional-level searing capabilities. Invest in quality once, and stop poisoning your dinner guests.
The Anatomy of a Mindful Taco Bar
Now that we have solved the structural integrity of the tortilla and banished toxic pans from our homes, we can talk about the actual event. Hosting a dinner party should not induce a panic attack, yet a recent survey revealed that half of adults find hosting a dinner party more stressful than going to work, and 25 percent find it more traumatic than a job interview.
No wonder Americans are in a “party recession,” with the amount of time spent attending or hosting social events plummeting by a staggering 50 percent over the last two decades. We have completely lost the plot.
What “Mindful” Actually Means (Spoiler: You Get to Drink)
When I say we are going to build a “mindful” taco bar, I am not suggesting we sit around a table in complete silence meditating over a bowl of salsa. Mindful hosting simply means engineering your menu and your prep work so intelligently that you actually get to be present at your own party.
If you want to host a relaxed dinner party, you cannot be trapped in the kitchen frantically chopping tomatoes while your guests are awkwardly standing in the living room wondering if they should offer to help. A taco bar is the ultimate mindful gathering because it is inherently modular. 90% of the work can be done before the doorbell even rings.
The Prep-Ahead Blueprint: The 48-Hour Countdown
To eliminate kitchen chaos for good, you must treat your home kitchen like a professional catering operation. You need a timeline.
48 Hours Out:
This is when you tackle the heavy lifting. If you are making braised meats—like pork carnitas, beef barbacoa, or chicken tinga—cook them now. Stews and braises actually taste significantly better on the second or third day because the flavor compounds have time to meld and mature in the refrigerator. Cook the meat, shred it, and store it in airtight containers in its own cooking liquid to prevent it from drying out.
24 Hours Out:
This is your cold prep day. Dice your white onions, slice your jalapeños, and chop your cilantro. Store them in separate, sealed deli containers in the fridge. Make your salsas and your pico de gallo. Wash and dry your serving platters and bowls. Set up the physical flow of the buffet line on your kitchen island or dining table so you know exactly where everything will go.
2 Hours Out:
Take your shredded meats out of the fridge and begin slowly reheating them on the stove over low heat. Set out your room-temperature toppings (like hot sauces and pickled red onions).
30 Minutes Out:
This is when you execute the final, time-sensitive tasks. Mash your avocados, warm your tortillas using the skillet-splash method, and place them into your insulated tortilla warmers. Pour yourself a drink. You are officially ready to host.
Thermodynamic Food Strategies for the Hot Holding Zone
The biggest challenge of a buffet-style taco bar is keeping the hot food hot without drying it out or turning it to mush.
Let’s talk about beans. If you have ever wondered why your beans stay hard despite hours of simmering, it is usually because you added acidic ingredients (like tomatoes or lime juice) before the starches fully softened. But once they are perfectly cooked, keeping them warm on a buffet requires moisture management. Serve your black or pinto beans in a heavy ceramic or cast-iron pot (like a Dutch oven) that retains thermal mass. Keep the lid on between servings to trap the steam, and always leave a little extra bean-cooking liquid in the pot so they don’t turn into a dry paste.
Next, the liquid gold: queso. If you are serving a hot cheese dip, you have to fight against emulsion breakage. If you want to know why your cheese sauce breaks and turns into a gritty, oily nightmare, it is because prolonged, direct high heat causes the dairy proteins to tighten and squeeze out the butterfat. To hold queso on a taco bar, never use direct heat. Use a small slow cooker set to the “warm” setting, or hold the serving bowl over a water bath. Furthermore, using a touch of sodium citrate or evaporated milk in your recipe will chemically stabilize the emulsion, ensuring it stays silky smooth for hours.
Finally, the guacamole. Avocado oxidation is the bane of every host’s existence. If you are tired of wondering why your guacamole turns brown before the party even starts, stop relying on old wives’ tales like leaving the pit in the bowl. Browning is an enzymatic reaction caused by oxygen exposure. To stop it, you must create a physical barrier. If you make the guac a few hours early, pack it tightly into a bowl, smooth the top completely flat with a spoon, and pour a thin, half-inch layer of room-temperature water directly over the top of the dip. Water is an oxygen barrier. When you are ready to serve, simply pour the water off, give it a quick stir, and it will be vibrantly, perfectly green.
Interactive Hosting: Making Your Guests Do the Work
The absolute beauty of a taco bar is that it transfers the labor of plating from the host to the guest. People genuinely love customizable food. It gives them a sense of agency and interaction. But to make this work smoothly, you must act as the architect of their experience.
The Flow of the Taco Line
Do not just throw bowls randomly on a table. A taco bar must have a logical, linear progression that mimics the actual construction of a taco. If you mess up the order, you will create a massive traffic jam in your kitchen.
- The Foundation: Start with the plates, napkins, and the insulated tortilla warmer. The warm, pliable tortillas are the canvas.
- The Heavy Cargo: Next in line are the hot proteins (carnitas, chicken, fajita veggies) and the warm bases (beans and rice). These go on the bottom of the taco to anchor the structure.
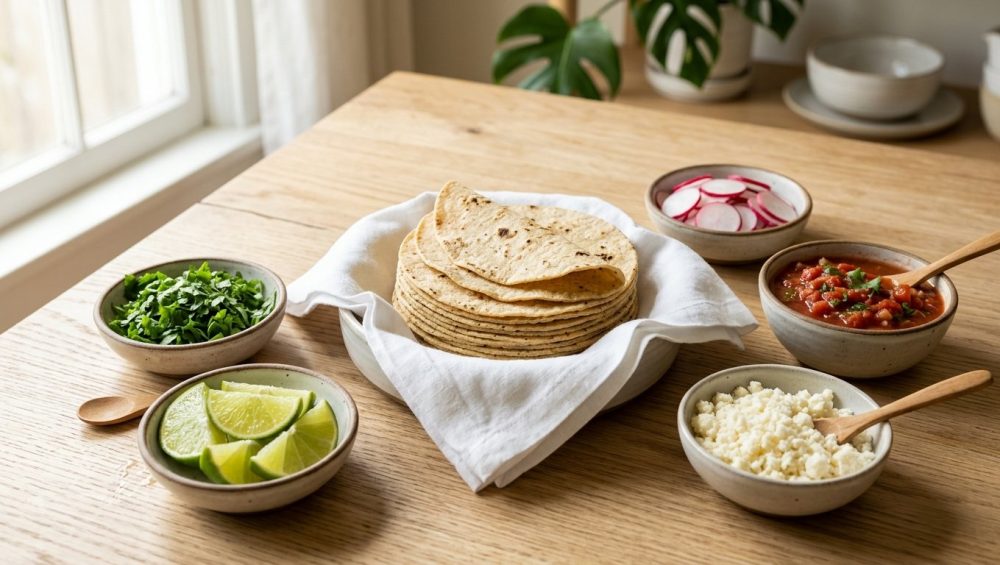
- The Cool Crunch: Follow the hot items with the fresh, textural components: shredded cabbage, diced onions, jalapeños, and radishes.
- The Binders: Next come the creamy elements that hold the toppings together: guacamole, sour cream, and crumbled cotija cheese.
- The Finishers: End the line with the liquid accents. Salsas, hot sauces, and freshly cut lime wedges should be the absolute last stop before the guest walks away.
Managing Dietary Restrictions Without the Panic
In today’s hosting landscape, dietary restrictions are a guarantee, not an exception. A taco bar handles this effortlessly because it is naturally deconstructed.
Keep your meat entirely separate from your beans and rice, ensuring that your vegetarian and vegan guests can build hearty, substantial meals without cross-contamination. Offer both corn (gluten-free) and flour tortillas. Keep the dairy (cheese and sour cream) in clearly designated bowls away from the main proteins. By keeping every component isolated, you empower your guests to safely navigate their own dietary needs without requiring you to cook three separate, customized meals. It is inclusive, it is respectful, and above all, it is incredibly easy for you.
Reclaiming Taco Tuesday
Cooking for people you care about should be a joy, not a source of dread. You do not need to subject yourself to the anxiety of perfectly timing a plated, six-course French dinner to be a phenomenal host. Sometimes, the most profound culinary experiences come from mastering the simple things—like understanding the science of starch retrogradation so you can serve a tortilla that bends beautifully instead of shattering into pieces.
By applying a little bit of food science, ditching the toxic equipment that is holding you back, and implementing a militant but stress-free prep schedule, you can completely transform the way you entertain. You can banish the brittle tortilla. You can eliminate the chaos. And most importantly, you can finally pour yourself a margarita, sit down with your friends, and actually enjoy the mind-blowing food you just created.
Now go soak a paper towel, heat up that heavy carbon steel pan, and go reclaim your taco night. You’ve got this.