
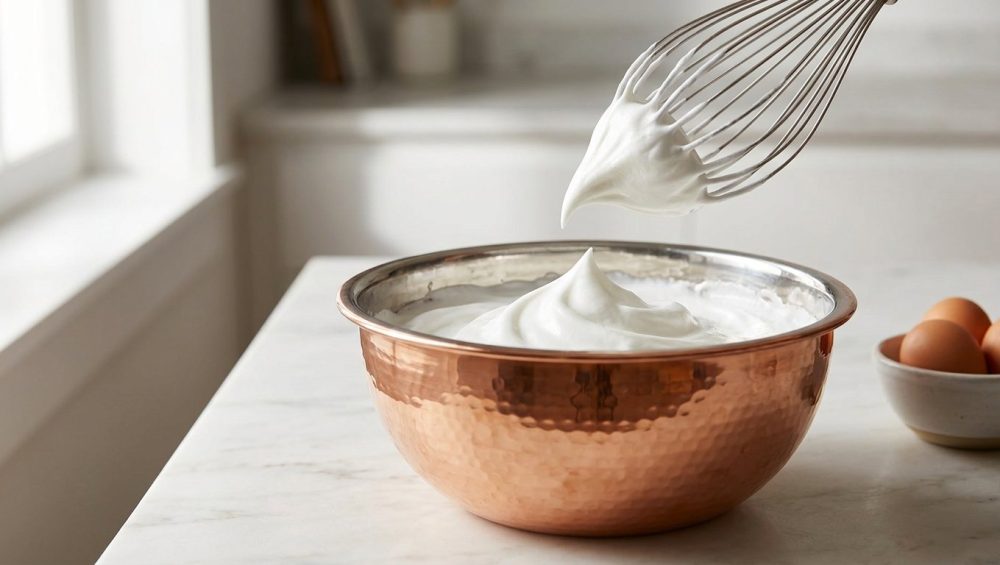
The Weekend Baker’s Worst Nightmare: The Weeping Meringue
Look, I get it. You have spent your entire week surviving on thirty-minute sheet pan meals, utilizing every shortcut imaginable just to keep yourself fed. Your time is money, and weeknights are strictly for culinary survival. But when the weekend finally rolls around, the kitchen becomes your sanctuary. You want to execute that intimidating French macaron recipe. You want to bake a towering lemon meringue pie that looks like it belongs in a Parisian patisserie. You separate your eggs with the precision of a transplant surgeon, you whip those whites until your forearm burns with the fire of a thousand suns, and you pipe out your perfect, glossy little peaks.
And then? They weep. They deflate. They lose their structure and collapse into a sad, grainy, sugary puddle that openly mocks your weekend culinary ambitions.
If you are reading this while glaring at a bowl of separated, clumpy egg whites, take a deep breath. Put down the whisk. It is not your fault, and you absolutely do not need a culinary degree to fix this. You just need a basic understanding of food science, and you need to stop using garbage equipment. As your dedicated kitchen advocate, I have zero patience for pretentious chef-speak, but I have even less patience for tools that actively sabotage your cooking. We are going to talk about the molecular biology of your dessert, the chemistry of egg foams, and the absolute necessity of banishing toxic kitchen gear from your life forever.
Today, we are doing a deep dive into why your meringue keeps collapsing, and why investing in a solid, unlined copper mixing bowl is the closest thing to real, scientifically-proven magic you will ever experience in your home kitchen.
The Anatomy of an Egg White: What Actually Happens When You Whisk
To understand why a copper bowl works, you first have to understand what an egg white actually is. In the culinary world, we call the egg white the albumen. It is remarkably simple in its composition: it is roughly 90 percent water and 10 percent protein. But that 10 percent protein is where all the structural magic happens.
The Protein Lineup
Not all proteins in an egg white are created equal. The albumen is a complex cocktail of different proteins, each serving a unique biological and culinary purpose. Ovalbumin makes up the bulk of it (about 54 percent), providing the basic nutritional structure. Ovomucin (about 1.5 percent) is what makes thick egg whites thick and jelly-like; it is the structural backbone. Lysozyme acts as an antibacterial agent. But the star of our show—the protein that dictates whether your meringue will stand tall or collapse into a weeping mess—is a little powerhouse called conalbumin (also known as ovotransferrin), which makes up about 12 percent of the protein content.
In their natural, resting state, these proteins look like microscopic, tightly wound balls of yarn floating in water. The amino acids that make up these protein chains have different personalities: some are hydrophilic (water-loving) and some are hydrophobic (water-fearing). Because they are floating in an environment that is 90 percent water, the hydrophobic amino acids hide on the inside of the yarn ball, while the hydrophilic ones stay on the outside.
The Physics of the Whisk
When you take a balloon whisk to a bowl of egg whites, you are applying intense mechanical shear force. You are literally beating the living daylights out of those tightly wound balls of yarn, causing them to uncurl and stretch out—a process known as denaturing.
At the same time, your whisk is dragging millions of tiny air bubbles into the water. Suddenly, those hydrophobic (water-fearing) amino acids have an escape route. They rush to stick themselves inside the air bubbles to get away from the water, while the hydrophilic (water-loving) amino acids stay happily submerged in the liquid. The unfolded proteins link together, forming a delicate, microscopic net that traps the air and the water in a stable suspension. Congratulations, you have just created a culinary foam.
The Science of Syneresis: Why Your Foam Collapses
If creating a foam is that simple, why does it go wrong so often? Because human beings lack restraint. We see the foam getting thick and glossy, and we think, “If whipping it for three minutes made it this good, whipping it for six minutes will make it indestructible!”
Wrong. Over-whipping is the number one cause of meringue failure.
The Disulfide Bond Dilemma
As you continue to whip the egg whites, the denatured proteins keep bumping into each other and forming bonds. Initially, these are gentle, flexible bonds that give your meringue its beautiful elasticity. But if you keep beating, the sulfur-containing amino acids in the proteins get too close to one another. When they do, they form what biochemists call a “disulfide bond.”
Disulfide bonds are incredibly strong, tight, and rigid. Once they form, the flexible protein net turns into a microscopic vice grip. The proteins squeeze together so tightly that they literally wring the water out of the foam, much like wringing out a wet sponge.
This tragic expulsion of liquid is called syneresis (commonly known as “weeping”). You will know syneresis has occurred because your once-glossy meringue will suddenly look dull, grainy, and clumpy, and a puddle of sad, yellowish water will begin to pool at the bottom of your bowl. Once those disulfide bonds form, the damage is irreversible. You cannot un-whip a broken meringue. You just have to throw it out and start over.
The Material Failure of Your Mixing Bowl
Here is where your equipment betrays you. If you are using a cheap plastic mixing bowl, you are practically begging for syneresis. Plastic is lipophilic, meaning it clings to fats and oils. Even if you scrub a plastic bowl with scorching hot soapy water, it will retain a microscopic film of grease. When that residual fat mixes with your egg whites, it coats the proteins and prevents them from forming a strong net, leading to immediate collapse. If you’ve ever fallen into the hidden trap of plastic bowls, you already know the heartbreak of a foam that absolutely refuses to rise.
Glass and stainless steel bowls are completely inert. They do not hold onto fats like plastic does, which is great. But they also offer absolutely no chemical assistance to your egg whites. If you whip your egg whites in a glass or steel bowl, the window between “perfectly stiff peaks” and “over-whipped, weeping disaster” is incredibly narrow. Look away for thirty seconds, and your stand mixer will destroy your meringue.
The Magic of Copper: A Culinary Chemistry Masterclass
Enter the unlined copper mixing bowl. This is not just a shiny piece of aesthetic kitchen jewelry meant to look pretty on an open shelf. A copper bowl is a highly functional, scientifically proven chemical tool. French pastry chefs have known for over two centuries that whipping egg whites in a copper bowl yields a vastly superior, more stable foam, but it wasn’t until the late 20th century that science finally proved exactly why.
The Conalbumin-Copper Complex
In 1984, the legendary food science writer Harold McGee teamed up with biologists Sharon Long and Winslow Briggs at Stanford University to figure out what was actually happening inside the bowl. They hand-whipped 60 milliliters of egg whites in a copper bowl and analyzed the resulting foam. They published their findings in the prestigious journal Nature, and the results changed culinary science forever.
When you whisk egg whites in a copper bowl, the mechanical friction of the whisk physically scrapes microscopic, harmless copper ions (Cu2+) off the surface of the bowl and into the egg whites. Remember our star protein, conalbumin? Conalbumin is biologically designed to bind to metal ions. As soon as those copper ions enter the foam, the conalbumin snatches them up, forming what is known as a conalbumin-copper complex.
This chemical complex is a game-changer. The conalbumin-copper complex is incredibly stable and resilient. More importantly, the presence of the copper ions actively prevents those sulfur-containing amino acids from linking up and forming those dreaded, water-squeezing disulfide bonds.
Because the proteins are chemically blocked from squeezing too tightly, it becomes almost physically impossible to over-whip your egg whites. You can whisk them for ten minutes, and instead of turning grainy and weeping, they will remain luxuriously glossy, elastic, and perfectly stiff. The copper ions even give the foam a very faint, creamy, golden-yellow tint. It is foolproof chemistry in action.
The “No-Go” Rule: Why I Despise Cheap, Toxic Kitchenware
If you have read my blog before, you know my strict “No-Go” rule. I absolutely despise cheap, toxic kitchenware. I am constantly warning my readers against mystery metals, peeling non-stick coatings, and flimsy plastic garbage that leaches chemicals into your food.
When it comes to copper bowls, the market is absolutely flooded with cheap, fake knock-offs. You will see bowls labeled “copper-plated” or “copper-toned stainless steel.” Do not buy them. The plating is paper-thin, and the aggressive friction of a metal whisk will cause that cheap plating to flake off directly into your food. You are essentially eating metal glitter.
If you are going to invest in a copper bowl for baking, it must be 100% solid, unlined copper. This is crucial. Many copper pots and pans are lined with tin or stainless steel to prevent copper toxicity when cooking highly acidic foods (like tomato sauce). But for whipping egg whites, a lining will completely block the whisk from contacting the copper, meaning no copper ions will enter your foam, rendering the bowl useless for meringue.
You must use a dedicated, unlined copper bowl exclusively for whipping non-acidic foams. Keep those cheap, chemical-laden aerosol cooking sprays far away from it, treat it with respect, and it will last you a lifetime.
How to Whip Egg Whites Like a Pro: A Step-by-Step Guide
Now that you understand the chemistry, let’s talk technique. Even with a magic copper bowl, you still need to follow the fundamental rules of pastry making.
Step 1: The Separation Anxiety
You must separate your eggs when they are cold straight out of the fridge. Cold yolks are firm and less likely to rupture. However, while chilling your dough is a mandatory step for perfectly thick chocolate chip cookies, egg whites play by a completely different set of rules. Once separated, you must let the whites sit on the counter until they reach room temperature. Room temperature proteins are relaxed and much easier to uncurl and whip into a high-volume foam.
Step 2: The Absolute Zero-Fat Policy
Egg yolks contain fat (lipids). If even a microscopic speck of egg yolk gets into your whites, the fat will coat the proteins and prevent them from forming a net around the air bubbles. Your whites will stay flat forever. Always separate your eggs one by one into a small “safety bowl” before transferring the clean white into your pristine copper bowl.
Step 3: The Right Whisk
You need a large, balloon-style whisk with many thin wires to maximize the amount of air you are dragging into the liquid. And please, invest in a seamless, high-quality stainless steel whisk. There is nothing more infuriating than when your cheap, poorly manufactured whisk leaks dishwater directly into your pristine egg whites from a hollow handle, ruining the entire batch.
Step 4: The Motion
Do not just stir the eggs in a circle. You need to use a vigorous, lifting, figure-eight or side-to-side motion. You are trying to incorporate as much air as possible. Start slowly to break up the thick albumen, and then increase your speed as the foam begins to build.
Step 5: Adding the Sugar
Sugar is a stabilizer, but it is also heavy. If you dump all your sugar in at the beginning, the weight and viscosity will prevent the proteins from unfolding, and you will be whisking until your arm falls off. Wait until your egg whites reach the “soft peak” stage (opaque, foamy, and the peaks flop over when you lift the whisk). Then, add your sugar one tablespoon at a time. You need to slowly dissolve the sugar into the whites to ensure a smooth, glossy, structurally sound meringue that won’t weep in the oven.
Copper Bowl Alternatives (And Why They Are Just “Okay”)
I can already hear some of you asking: “Sassy Sous-Chef, I just spent my paycheck on groceries. I cannot drop $100 on a solid copper mixing bowl right now. Am I doomed to a life of weeping meringues?”
No, you are not doomed. If you do not have a copper bowl, you can hack the chemistry using acid. The most common culinary acids used for this are cream of tartar (tartaric acid), lemon juice, or distilled white vinegar.
When you add a weak acid to your egg whites, you lower the pH of the mixture. This floods the environment with positively charged hydrogen ions. These hydrogen ions rush in and bind to the sulfur groups on the proteins, effectively blocking them from bonding with each other to form those disastrous disulfide bonds.
The standard ratio is 1/8 to 1/4 teaspoon of cream of tartar per egg white. If you are using this method, a stainless steel bowl is your best option. We all know how frustrating it is when food sticks to your stainless steel skillets during a weeknight dinner, but when it comes to whipping egg whites with acid, a stainless steel bowl is totally inert and perfectly safe.
However, the acid method is not flawless. Add too much, and your meringue will taste sour. Add too little, and it won’t stabilize the foam. It is a highly effective backup plan, but it lacks the foolproof, structural invincibility of the conalbumin-copper complex.
Troubleshooting Common Meringue Disasters
Even with the best tools, baking is a science, and variables matter. If your meringue is still acting up, let’s run through some rapid-fire troubleshooting.
The Grainy Mess
If your meringue looks like a bowl of soapy sea foam or cottage cheese, it is over-whipped. The disulfide bonds have formed, and the water has been pushed out. If you caught it early, sometimes you can whisk in one fresh, un-whipped egg white to re-hydrate the foam, but usually, it is a lost cause. Buy a copper bowl.
The Flat Puddle
If you have been whisking for ten minutes and the liquid simply refuses to foam, you have fat contamination. Either a speck of yolk got in, or your bowl wasn’t clean. Wash everything in scorching hot water and white vinegar, and try again.
The Weeping Pie Topping
If your lemon meringue pie comes out of the oven looking gorgeous, but starts leaking a sticky syrup an hour later, your sugar didn’t fully dissolve, or you applied the meringue to a cold pie filling. Always pipe meringue onto piping hot filling; the heat cooks the bottom of the meringue, sealing it in place.
The Dense, Chewy Macaron
If your macarons look like flat, chewy little discs without those beautiful ruffled “feet,” it’s probably because your ingredient ratios were wildly off. You cannot rely on volumetric measuring cups for advanced pastry. If you aren’t using a digital kitchen scale by now to measure your egg whites and almond flour down to the gram, we need to have a serious talk about your commitment to baking.
The Soggy Collapse
Weather matters. Sugar is highly hygroscopic, meaning it actively pulls moisture out of the air. If you are trying to bake a crisp pavlova on a day with 90 percent humidity, the sugar in your meringue will suck the water right out of the atmosphere, causing the structure to melt and collapse. Bake your meringues on dry days. Furthermore, the extreme temperature changes in your oven can make your baking sheets warp violently, which will instantly crack your delicate meringue shells. Use heavy-duty, warp-resistant aluminum half-sheets.
Caring for Your Copper Bowl (Without Losing Your Mind)
If you take the plunge and buy a solid, unlined copper mixing bowl, you must care for it properly. Copper is a reactive metal. Over time, exposure to oxygen and moisture will cause it to tarnish and develop a dull, dark patina.
Do not panic. You do not need expensive, toxic chemical metal polishes to clean your bowl. You just need basic pantry staples.
The Salt and Vinegar Trick
To restore your copper bowl to its brilliant, shining glory, make a paste out of kosher salt and distilled white vinegar (or lemon juice). The acetic acid in the vinegar reacts with the sodium chloride in the salt to form a mild, highly effective solution that instantly dissolves the copper oxide (tarnish). Rub the paste all over the bowl with a soft sponge, rinse it thoroughly with warm water, and dry it immediately with a microfiber cloth.
Never, under any circumstances, put your copper bowl in the dishwasher. The harsh alkaline detergents will pit and ruin the metal. And speaking of detergents, if your silicone spatulas taste soapy from absorbing cheap dishwasher liquid, that chemical residue will absolutely transfer to your egg whites and destroy your foam. Hand wash your baking gear. It takes two minutes.
The Final Verdict: Is a Copper Bowl Worth the Investment?
If you are someone who only bakes boxed brownies once a year, no, you do not need a copper mixing bowl. Stick to stainless steel and enjoy your life.
But if you are a weekend culinary hobbyist who wants to master the art of the perfect souffle, the delicate French macaron, or a towering, cloud-like Pavlova, an unlined copper bowl is one of the greatest investments you can make. It is not a gimmick. It is not old-wives-tale folklore. It is hard, documented, peer-reviewed chemistry.
A copper bowl bridges the gap between the chaotic unpredictability of a home kitchen and the exact, scientific precision of a professional patisserie. It buys you insurance against over-whipping. It saves you the frustration of throwing away expensive ingredients. Most importantly, it empowers you to tackle intimidating recipes with total confidence.
You don’t need a culinary degree to cook like an expert. You just need to understand the science, respect your ingredients, and equip your kitchen with gear that actually works for you, not against you. Now go separate some eggs, grab your whisk, and show that meringue who is boss.






