
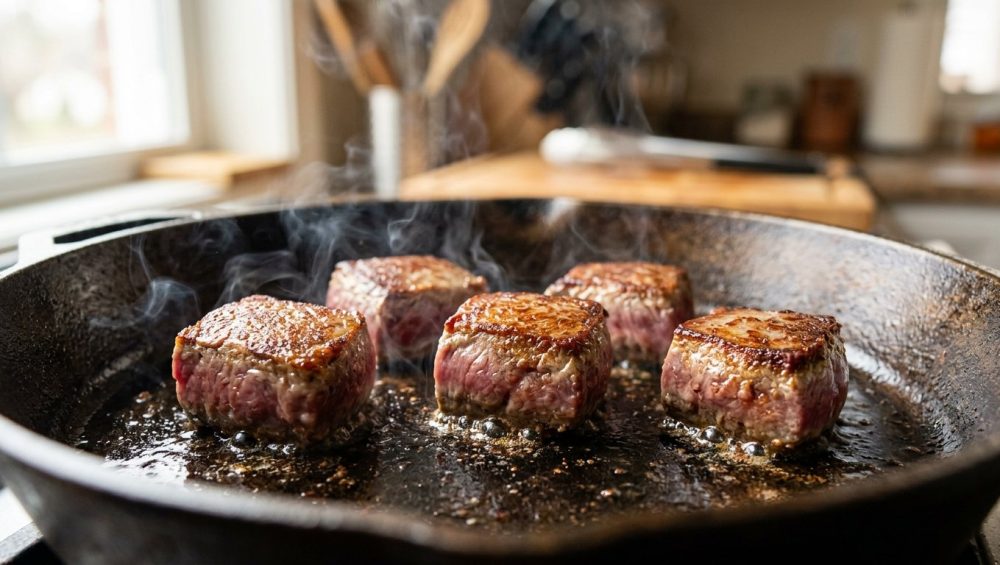
Picture this: It is 6:15 PM on a random Tuesday. You are exhausted, your patience is thinner than a cheap paper towel, and you just want to get dinner on the table before you resort to eating shredded cheese directly out of the bag. You toss a massive, cold block of ground beef into a skillet, grab a wooden spoon, and start hacking away at it. Fast forward seven minutes, and instead of the rich, deeply browned, sizzling meat you envisioned, you are staring into a sad, bubbling swamp of gray misery. Your meat isn’t cooking; it is boiling in a pool of its own extruded juices.
If this scenario triggers your fight-or-flight response, take a deep breath. You are not a bad cook. You have simply fallen victim to the unforgiving laws of thermodynamics. Understanding exactly why your ground beef steams is the first step toward reclaiming your kitchen and transforming your weeknight staples from bland and watery to intensely savory and restaurant-quality. You don’t need a fancy culinary degree to make mind-blowing food at home. You just need to stop fighting the physics of your cookware and start using it to your advantage.
The Physics of the Sizzle: What Actually Happens in Your Skillet
To master the art of the perfect sear, we have to put on our lab coats for a brief moment. Cooking is, at its core, applied chemistry and physics. When you throw raw meat into a hot pan, you are initiating a complex series of reactions that dictate whether your final dish will be a culinary triumph or a textural nightmare.
The Maillard Reaction: The Holy Grail of Flavor
If there is one scientific concept every home cook needs to memorize, it is the Maillard reaction. Named after the French chemist Louis Camille Maillard, who documented the phenomenon in 1912, this is the chemical reaction that occurs between amino acids (proteins) and reducing sugars when exposed to high heat.
The Maillard reaction is the undisputed holy grail of savory cooking. It is the reason a seared steak tastes infinitely better than a boiled one, why toast is more delicious than raw bread, and why roasted coffee beans possess such complex depth. When this reaction triggers, it doesn’t just change the color of your ground beef to a rich, dark mahogany; it literally creates hundreds of brand-new, highly complex flavor and aroma compounds that did not exist in the raw meat.
However, there is a massive catch: The Maillard reaction requires a dry environment and temperatures exceeding 300°F (150°C) to kick into high gear. If your pan cannot maintain that temperature, the reaction simply will not happen.
The Enemy of the Sear: Water and Steam
Here is where the tragedy of the overcrowded pan begins. According to data from the USDA, raw muscle tissue is composed of approximately 75% water. Even a standard package of 85% lean ground beef consists of roughly 64% water by weight before it hits the stove.
When you dump a full pound (or worse, two pounds) of cold ground beef into a skillet, you are effectively dumping a massive glass of cold water into your hot oil. As the meat heats up, the muscle fibers contract and squeeze out that internal moisture. Because water boils and turns to steam at 212°F (100°C), the surface temperature of your meat—and the liquid pooling around it—cannot exceed 212°F as long as that liquid is present.
Since we just established that the Maillard reaction requires temperatures upwards of 300°F, you can see the dilemma. Your meat is physically trapped in a temperature zone that is far too low for browning, but perfectly calibrated for boiling. Ignoring this fundamental rule of moisture is one of the most common rookie kitchen mistakes that everyday cooks make. Until every last drop of that water evaporates, your beef is going to remain a depressing, rubbery gray.
The Overcrowding Trap: Why Your Pan Rejects Your Beef
So, why does the water pool up in the first place? Why doesn’t it just evaporate the second it hits the hot metal? The answer lies in how much food you are trying to force into the pan at once.
The Thermodynamics of a Crowded Pan
Every piece of cookware possesses a specific “thermal mass,” which is essentially its capacity to absorb, store, and radiate heat energy. When you preheat a skillet, you are charging it up with thermal energy. When cold food touches the surface of that skillet, heat transfers from the metal to the food, causing the temperature of the pan to drop.
If you place a single, small meatball into a hot skillet, the temperature drop is negligible. The pan has enough stored energy to quickly rebound, instantly vaporizing the small amount of moisture the meatball releases. But when you crowd the pan with a massive slab of cold, wet ground beef, you overwhelm the skillet’s thermal mass. The temperature of the metal plummets drastically.
This rapid loss of heat is especially devastating if you are using thin, cheap cookware. Thin aluminum skillets simply do not have the physical mass to store enough heat. They cool down instantly upon contact with a heavy load of cold meat, which is incidentally the sneaky reason your pans keep losing their slip over time—the constant, violent temperature fluctuations warp the metal and degrade the coating.
The Moisture Evaporation Bottleneck
Because the overcrowded pan has lost its heat, it lacks the energy required to flash-evaporate the juices being squeezed out of the contracting meat fibers. The water escapes the beef faster than the weakened pan can boil it off.
This creates a brutal bottleneck. The water pools at the bottom of the skillet, submerging the beef. The heat from your stove is now entirely wasted on trying to boil a shallow puddle of beef water rather than searing the actual meat. If you want to stop steaming your meat, you need to give it space to breathe. An overcrowded pan is a suffocated pan, and a suffocated pan yields boiled, flavorless results.
Ditch the Toxic Cookware: A Sassy Sous-Chef PSA
As your dedicated culinary advocate, I have zero patience for kitchen gear that actively sabotages your weeknight dinners. If you are trying to get a hard, caramelized sear on a batch of ground beef using a scratched-up, $15 non-stick pan you bought at a big-box store five years ago, you are fighting a losing battle.
The Teflon Tragedy
Non-stick pans (specifically those coated with PTFE, commonly known as Teflon) are wonderful for gently scrambling eggs or flipping delicate crepes. They are absolutely atrocious for searing meat.
To achieve the Maillard reaction, you need high heat. But exposing traditional non-stick coatings to surface temperatures above 375°F to 400°F begins to irreversibly degrade the chemical structure of the pan. If you crank the heat to get a good crust on your beef, you are completely ruining your nonstick pans, significantly shortening their lifespan, and potentially releasing toxic fumes into your kitchen. Stop using delicate egg pans for heavy-duty meat searing. It is a waste of your time, your money, and your ingredients.
Heavy Metal Heroes: Cast Iron and Carbon Steel
For a proper, aggressive sear, you need heavy metal. Cast iron and carbon steel are the undisputed champions of the weeknight crust.
Cast iron is dense and heavy, giving it an incredibly high thermal mass. It takes a few minutes to properly preheat, but once it gets hot, it stays aggressively hot. When you drop a pound of ground beef into a well-heated cast iron skillet, the temperature barely flinches. The pan retains enough raw thermal power to instantly vaporize escaping moisture, preventing the dreaded water pooling and allowing the Maillard reaction to commence immediately.
Stainless steel is also a fantastic option, provided you buy a high-quality, multi-clad pan with a thick aluminum or copper core to help distribute the heat evenly. Just remember that if everything always sticks to your stainless steel, you aren’t preheating it properly before adding your oil and your meat.
The Weeknight Warrior’s Guide to Perfect Ground Beef
Alright, we have covered the science and the hardware. Now, let’s talk about execution. You are a busy person, and your time is money. You need foolproof, efficient techniques that guarantee a savory, crispy, deeply flavored batch of ground beef every single time you fire up the stove. Here is your definitive masterclass on making it happen.
Step 1: The Art of the Smash and Leave
The single greatest sin committed by home cooks when preparing ground beef is the compulsive urge to stir. You drop the meat into the pan, and suddenly you feel possessed by the spirit of a frantic DJ, chopping, mixing, and flipping the meat incessantly.
You absolutely must stop stirring your ground beef the second it hits the pan. When you constantly agitate the meat, you are repeatedly breaking its contact with the hot surface of the skillet. You are also exposing new, cold, wet surface area to the pan, which drives the temperature down further and releases more water.
Instead, practice the “Smash and Leave” technique. Place the ground beef into your preheated skillet and use a stiff spatula to smash it down into one large, flat, even patty that covers the bottom of the pan. Then, step away. Do not touch it. Do not look at it funny. Let it sit completely undisturbed for at least 3 to 5 minutes.
By leaving it alone, you allow the bottom layer of the meat to establish uninterrupted contact with the searing hot metal. The moisture on the bottom will flash off, and the proteins will undergo a beautiful, deep Maillard reaction, forming a gorgeous, dark brown crust. Only after you have achieved a serious crust on the bottom should you break the meat apart and flip the pieces to briefly cook the other side.
Step 2: Batch Cooking (Yes, It Actually Saves Time)
If a recipe calls for two pounds of ground beef, your standard 10-inch or 12-inch skillet cannot handle it all at once without overcrowding and steaming. You have two choices: cook the meat in two separate batches, or utilize a brilliant, science-backed restaurant shortcut.
Here is a professional secret that will change your weeknight cooking forever: You do not actually need to deeply brown every single ounce of the meat to get an incredible depth of flavor. In fact, browning all of it can sometimes lead to a dry, crumbly final texture.
Instead, take about 30% to 50% of your raw ground beef and smash it into your screaming hot skillet. Let this smaller portion develop a ridiculously dark, crispy, deeply caramelized crust. Once you have achieved maximum Maillard flavor on this “flavor base” portion, add the remaining raw ground beef to the pan, turn the heat down slightly, and gently fold it all together until the new meat is just cooked through.
This hybrid method leverages the intense flavor-generating power of the Maillard reaction from the first batch, while the second batch cooks gently, retaining its internal moisture and keeping the overall dish incredibly tender. It prevents the pan from flooding, reduces your active stovetop time, and results in a dramatically superior texture.
Step 3: The Baking Soda Hack (Better Browning Through Science)
If you want an absolute guarantee that your ground beef will brown beautifully and stay incredibly juicy, you need to raid your baking pantry. Baking soda is not just for cookies; it is a miracle worker for weeknight meats, and turns out to be the secret to tender meat every single time.
This technique, often referred to as “velveting” in Chinese cuisine, relies on altering the pH of the meat. Baking soda is alkaline (a base). When you toss raw ground beef with a tiny bit of baking soda, you raise the pH level on the surface of the meat.
Why does this matter? Because when meat proteins are exposed to heat, they naturally want to coil up, tighten, and aggressively squeeze out their internal water. However, in an alkaline environment, those proteins are physically hindered from bonding together too tightly. Because they can’t squeeze together as hard, the water stays trapped inside the meat, leaving your beef unbelievably tender and juicy.
Furthermore, a higher pH environment actively accelerates the Maillard reaction, meaning your meat will achieve a dark, savory crust much faster than untreated meat.
How to do it: For every one pound of ground beef, dissolve ½ teaspoon of baking soda in 1 tablespoon of water. Pour this slurry over the raw meat in a bowl and gently mix it in with your hands until evenly distributed. Let it sit on the counter for 15 minutes while you chop your onions or prep your other ingredients. Then, cook it as usual. The difference in texture and browning will blow your mind. Just don’t exceed the ½ teaspoon ratio, or your meat might develop a slightly metallic, soapy off-flavor.
Temperature Control: The Unsung Hero of the Stove
All the baking soda and cast iron in the world won’t save you if you don’t know how to manage the dial on your stove. Cooking is not a passive activity; you have to actively manage your heat source to respond to what is happening in the pan.
Preheating: Your Skillet’s Warm-Up Routine
I cannot stress this enough: Never put cold meat into a cold pan. If you do, the meat will slowly heat up alongside the metal, gently weeping out all of its moisture long before the pan is hot enough to evaporate it.
You must give your cookware time to warm up. Place your cast iron or stainless steel skillet on medium heat for at least 5 to 8 minutes before you even think about adding oil. You want the metal to be fully saturated with thermal energy. To test if it is ready, flick a few drops of water onto the surface. If the water lazily bubbles and sits there, it isn’t hot enough. If it instantly shatters into tiny beads that dance and skate across the surface (the Leidenfrost effect), your pan is ready for action. Add your oil, wait 10 seconds for it to shimmer, and drop in your beef.
Reading the Sizzle
A good home cook uses their eyes; a great home cook uses their ears. The sound emanating from your skillet will tell you exactly what is happening to your food.
When you drop your ground beef into a properly heated pan, it should sound like a violent, aggressive, high-pitched crackle. That is the sound of moisture hitting hot fat and instantly vaporizing. It is the sound of searing.
If that aggressive crackle suddenly dulls into a low, wet, bubbling, simmering sound, you are in trouble. That is the sound of water pooling in the pan. That is the sound of steaming. If you hear the simmer, you need to act immediately to save your dinner.
Rescuing a Ruined Batch: What to Do When the Steaming Starts
Let’s say you messed up. You were rushing, you dumped two pounds of cold, wet beef into a lukewarm pan, and now you are staring at a bubbling gray swamp. Do not throw it in the trash. We can salvage this.
The Drain and Sear Maneuver
If your pan is flooded with beef water, you have to get rid of the bottleneck. Push all of the gray, steaming meat to one side of the skillet. Carefully tilt the pan so all the liquid pools on the empty side. Use a spoon or a ladle to aggressively scoop out as much of that liquid as possible. (Do not pour it down the drain; save it in a bowl! It is basically a quick beef stock that you can add back into your sauce later.)
Once the pan is mostly dry, crank the heat up to medium-high. Add a fresh drizzle of oil or a small pat of butter to the center of the pan to reintroduce some fat. Spread the meat back out into an even layer, press it down, and leave it alone. By removing the water and raising the heat, you are giving the pan a second chance to trigger the Maillard reaction.
Flavor Band-Aids
If you managed to cook the meat all the way through but it remained stubbornly gray and lacks that deep, roasted flavor, you have to cheat. You need to artificially introduce the savory umami notes that the Maillard reaction failed to provide.
Clear a small circle in the center of your skillet. Squeeze in a tablespoon of tomato paste and let it fry directly on the hot metal for 60 seconds until it darkens from bright red to a rusty brick color. This caramelizes the sugars in the paste and adds a massive hit of savory depth. Next, splash in a tablespoon of soy sauce, Worcestershire sauce, or even a dash of fish sauce. Toss the meat in this highly concentrated, umami-rich mixture. It will instantly darken the color of the beef and mimic the savory complexity of a proper sear.
Elevating the Basics: Tacos, Chili, and Meat Sauces
Now that you have mastered the physics of the skillet and banished gray, steamed meat from your kitchen forever, let’s talk about how this applies to your actual weeknight rotation. Treating your ground beef with respect will instantly elevate your most basic, reliable recipes.
Taco Tuesday, Upgraded
We all love a quick weeknight taco night using a store-bought spice packet. But if you dump that spice packet into a pan full of watery, steaming beef, the spices just turn into a gritty, muddy sludge.
Instead, use the “Smash and Leave” method to get a hard, crispy sear on your beef. Once the meat is browned and broken apart, do not drain all the fat! Leave about a tablespoon of that rendered beef fat in the pan. Sprinkle your taco seasoning directly onto the meat and let it fry in that hot fat for 30 to 60 seconds. This process, known as “blooming,” releases the essential oils in the spices, making them infinitely more fragrant and flavorful. Only then should you add a splash of water or broth to create the final sauce.
The Ultimate Chili Base
A great chili is an exercise in building layers of flavor. If your foundational layer consists of boiled, flavorless ground beef, your final dish will be incredibly one-dimensional, which is exactly why your chili tastes watery and bland despite simmering for hours.
When prepping meat for chili, use the batch cooking method. Deeply brown half of the meat to create intense, roasted flavor compounds, then gently cook the rest. The deeply seared bits will act as tiny flavor bombs that permeate the entire pot as it simmers, while the gently cooked portions will remain tender and juicy, providing the perfect textural contrast in every bite.
Meat Sauces That Actually Cling
If you are making a weeknight Bolognese, a sloppy joe, or a hearty ragu, the texture of your meat dictates the success of the sauce. Steamed, rubbery ground beef acts like tiny pebbles; it repels liquid, causing your sauce to separate into a watery mess on the plate.
Properly seared meat, especially meat treated with the baking soda hack, is porous and tender. When you deglaze the pan with wine or broth, scraping up all those beautiful browned bits (the fond) stuck to the bottom, the tenderized meat absorbs that liquid like a sponge. The result is a cohesive, luxurious, unified sauce that clings beautifully to your pasta, rather than relying on the frying pan pasta trick to save the day at the last minute.
Conclusion: Reclaiming Your Skillet
Cooking is not magic. It is just a series of physical reactions that you have the power to control. You do not need to be a professionally trained chef to make a mind-blowing pot of chili or a plate of weeknight tacos that taste like they came from a high-end food truck.
By understanding the simple relationship between heat, moisture, and pan capacity, you can eliminate the hidden trap of the overcrowded skillet for good. Ditch the toxic, peeling non-stick pans. Embrace the heavy-duty power of cast iron. Use a little baking soda to bend the rules of chemistry in your favor. And for the love of all things culinary, put the wooden spoon down and let the meat sear!
Your weeknight dinners deserve better than gray, steamed, rubbery beef. Armed with this knowledge, you are ready to march back into your kitchen, fire up the stove, and demand the sizzle, the crust, and the flavor you rightfully deserve. Now get cooking.






