
We have all been there. You are standing in your kitchen on a busy Tuesday morning, trying to prep a quick, healthy protein snack for the week. Or perhaps it is a Saturday afternoon, and you are ambitiously preparing a platter of deviled eggs for a dinner party. You boil the eggs, you cool the eggs, and you confidently tap one on the counter to peel it.
But instead of the shell slipping off to reveal a pristine, glossy, perfectly smooth egg, disaster strikes.
The shell clings desperately to the egg white. As you pick and scrape, chunks of the delicate albumen tear away. You are left with a mangled, pockmarked, lunar-surfaced disaster that looks less like a culinary masterpiece and more like it was chewed on by a feral raccoon. It is infuriating. It is messy. And if you are anything like me, it makes you want to throw the entire carton directly into the trash can.
But before you give up on meal prep forever, take a deep breath. I firmly believe that absolutely anyone can cook like a seasoned expert in a standard home kitchen. You do not need a culinary degree, and you certainly do not need to rely on overpriced takeout. All you need is a solid grasp of basic food science and a few essential kitchen tools to transform your daily cooking from a stressful chore into a seamless, efficient routine.
Let’s look at the sheer scale of this problem. According to recent industry data, global egg consumption was projected to reach a staggering 1.3 trillion eggs in 2025. In Germany alone, the average person consumed 252 eggs in 2025, while per capita consumption in the United States hovered between 273 and 300 eggs. That is an astronomical amount of eggs being cooked and eaten every single year. It also means that on any given day, millions of well-intentioned home cooks are silently suffering through the deeply frustrating process of peeling them.
It is time to put an end to the madness. Today, we are going to dive deep into the fascinating, slightly nerdy food science of why egg whites stubbornly bond to their membranes. We are going to permanently debunk the terrible advice your grandmother gave you, and I am going to teach you the foolproof, scientifically validated thermal shock method that guarantees a clean peel every single time.
The Anatomy of an Egg: Why It Hates You
To understand why an egg shell refuses to let go of its contents, we first have to understand the brilliant, complex biological engineering of the egg itself. An egg is not just a shell filled with liquid; it is a highly structured, multi-layered marvel of nature. Unfortunately for us, the very features that protect a growing chick are exactly what make the egg a nightmare for the uninformed home cook.
Let’s break down the layers. On the very outside, you have the cuticle (or bloom), a microscopic protective coating. Beneath that is the shell, composed almost entirely of porous calcium carbonate. Just inside the shell lie two vital layers: the outer shell membrane and the inner shell membrane. These membranes are made of keratin—the exact same tough, resilient protein that makes up your hair and fingernails.
Moving inward, we hit the albumen, commonly known as the egg white. The albumen is a water-rich matrix packed with complex proteins, primarily ovalbumin, conalbumin, and ovomucin. When you apply heat to an egg, these tightly folded proteins begin to denature, unwinding and linking together to form a solid, opaque gel.
Here is where the culinary sabotage occurs. If the proteins in the egg white are heated too slowly, they have ample time to chemically bond with the keratin in the inner shell membrane. They essentially fuse together, creating a microscopic layer of organic superglue. When you try to peel the egg, the bond between the white and the membrane is actually stronger than the delicate structure of the cooked egg white itself. The result? The white tears away with the shell.
Just like how cheap, poorly made bamboo cutting boards will aggressively dull your expensive chef’s knives, a slow, gradual application of heat will aggressively ruin the structural integrity of your hard-boiled eggs.
The pH Factor: Fresh vs. Old Eggs
You may have heard the old adage that farm-fresh eggs are harder to peel than older eggs from the supermarket. For once, the old wives’ tale is entirely scientifically accurate.
When an egg is freshly laid, the albumen is slightly acidic, boasting a pH level of around 7.6. In this slightly acidic environment, the proteins in the egg white are highly reactive and incredibly eager to bond with the keratin membrane when heated.
However, eggshells are porous. As an egg sits in your refrigerator, it slowly loses moisture and carbon dioxide through the microscopic pores in the shell. The loss of carbon dioxide causes the pH of the albumen to rise, eventually reaching a highly alkaline level of around 9.2. In an alkaline environment, the proteins in the egg white become far less adhesive. They simply do not want to bond to the keratin membrane anymore.
This is why eggs that have been sitting in your fridge for two weeks are generally easier to peel than eggs you bought at the farmer’s market yesterday. But what if you don’t want to wait two weeks to make egg salad? What if you need perfectly peeled eggs right now? That is where precise temperature control comes in.
The Cold Water Myth: Why Your Grandmother Was Wrong
If you ask the average home cook how to boil an egg, they will likely tell you to place the eggs in a pot, cover them with cold tap water, put the pot on the stove, and slowly bring the whole thing to a boil.
I am here to tell you that this is the single worst piece of culinary advice ever perpetuated.
Why do people do this? The logic seems sound on the surface: starting with cold water gently brings the eggs up to temperature, preventing the shells from cracking due to sudden temperature changes. But while you are saving the shell from a hairline fracture, you are systematically destroying the inside of the egg.
By starting with cold water and slowly raising the heat, you are creating the absolute perfect, gradual thermal environment for the albumen proteins to chemically weld themselves to the inner membrane. You are literally baking the superglue into place.
Do not just take my snarky word for it. Look at the exhaustive research conducted by J. Kenji López-Alt, the former culinary director of Serious Eats and author of The Food Lab. In his quest for the perfect boiled egg, López-Alt tested thousands of eggs under rigorous, scientifically controlled conditions. His findings were definitive and undeniable: starting eggs in cold water resulted in a miserable 50% success rate for clean peeling.
Let me be brutally honest: we do not have time for a 50% failure rate on a weekday. Time is money, and spending twenty minutes picking microscopic shell fragments off your breakfast is a ridiculous waste of your morning. If you want to maintain your sanity in the kitchen, you must stop starting in cold water immediately.
The Thermal Shock Treatment: The Only Way to Boil an Egg
If slow, gradual heating is the enemy, what is the solution? Extreme, immediate thermal shock.
To achieve a flawless, effortless peel every single time, you must drop your cold eggs directly into an already hot environment. When a refrigerator-cold egg hits boiling water or intense steam, the outermost microscopic layer of the egg white cooks instantaneously. The proteins denature so rapidly that they physically do not have the time to form those pesky chemical bonds with the keratin membrane. Instead, they instantly set into a firm, non-stick barrier that perfectly encases the rest of the egg white.
In López-Alt’s extensive testing, eggs that were subjected to an immediate hot water or steam start boasted a clean-peel success rate of well over 90%. That is the kind of reliable, efficient food science that a busy home cook needs.
The Danger of the Violent Boil
Now, before you go dropping your delicate eggs into a violently erupting volcano of boiling water, we need to establish some boundaries. While you absolutely need high heat to initiate the thermal shock, a violently rolling, aggressive boil is your worst enemy once the eggs are actually in the pot.
A rolling boil will physically throw your eggs around the pot like socks in a washing machine. They will smash against the metal sides and against each other, causing the shells to crack and leak unsightly white streamers of cooked albumen into your water.
The correct technique is to bring the water to a boil, gently lower the eggs into the pot using a stainless steel spider skimmer, and then immediately reduce the heat to a gentle, bubbling simmer (roughly 180°F to 190°F). This maintains the heat necessary to cook the egg thoroughly without subjecting it to a violent, shell-cracking jacuzzi.
Steaming vs. Boiling: The Ultimate Showdown
While dropping eggs into gently simmering water is a vast improvement over the cold-water start, it is not actually the best method. If you want the absolute pinnacle of egg-peeling perfection, you need to abandon boiling entirely and embrace the power of steam.
Why is steaming scientifically superior to boiling? It all comes down to the physics of heat transfer and temperature stability.
Imagine you have a medium-sized pot of boiling water. You take six large, refrigerator-cold eggs and drop them into the pot. What happens to the water? The temperature immediately plummets. It can take several minutes for the water to recover and return to a boil. During those crucial first few minutes, you are losing the intensity of the thermal shock, giving the egg white proteins a dangerous window of opportunity to bond with the membrane.
Steam, on the other hand, operates differently. Water turns to steam at exactly 212°F (100°C). When you place cold eggs into a steamer basket suspended above boiling water and cover the pot with a tight lid, the environment inside that pot remains at a constant, unwavering 212°F. The ambient steam does not experience the massive temperature drop that a body of water does when cold mass is introduced.
Furthermore, we must consider the latent heat of vaporization. When water converts into steam, it absorbs a massive amount of thermal energy. When that steam makes contact with the cold surface of your eggshell, it condenses back into water, instantly releasing all of that stored energy directly onto the shell. This provides an incredibly fast, highly efficient heat transfer that cooks the outer layer of the albumen almost instantaneously.
You might worry about the extreme heat causing cracks—after all, we have all had a tragic moment where a glass baking dish shattered because it was subjected to sudden temperature changes. But ironically, steaming is actually far gentler on eggshells than boiling. Because the eggs are resting stationary in a steamer basket rather than bouncing around in bubbling water, the physical trauma is eliminated. You get the maximum thermal shock with zero physical impact. It is the ultimate win-win scenario for the weekend culinary hobbyist.
The Ice Bath: Stopping the Sulfuric Green Ring of Death
Cooking the egg perfectly is only the first half of the battle. If you do not cool the egg properly the exact second your timer goes off, you will ruin all of your hard work.
Have you ever bitten into a hard-boiled egg and been greeted by a chalky, crumbly yolk surrounded by an unappetizing, grayish-green ring? Have you ever noticed that those eggs usually smell faintly of sulfur, reminiscent of a high school chemistry lab?
That green ring is a chemical compound called ferrous sulfide. It is created when hydrogen sulfide gas (released by the sulfur-containing amino acids in the egg white as it breaks down under heat) reacts with the iron naturally present in the egg yolk.
This chemical reaction is driven by two factors: high heat and prolonged cooking time. As an egg cooks, the pressure inside the shell forces the hydrogen sulfide gas inward, toward the center of the egg, where it meets the iron-rich yolk. If you take a hot egg out of the pot and simply let it sit on the counter to cool, carry-over cooking ensures that the internal temperature remains high enough to fuel this reaction for another ten to fifteen minutes. You are practically guaranteeing a green, smelly yolk.
The only way to stop this reaction dead in its tracks is an aggressive, immediate ice bath.
The moment your timer sounds, you must plunge those eggs into a bowl filled with equal parts cold water and ice. Do not just use cool tap water; the thermal mass of the hot eggs will heat up a bowl of tap water in seconds. You need actual ice cubes. If you don’t have a skimmer handy, you can easily fish the eggs out of the ice bath later using a fine mesh strainer.
The ice bath serves two critical, scientifically proven purposes:
- Halting the Cook: It rapidly drops the internal temperature of the egg, immediately stopping the cooking process and preventing the formation of ferrous sulfide. Your yolks will remain a beautiful, vibrant, creamy yellow.
- Thermal Contraction: As the egg cools rapidly, the contents of the egg physically contract and shrink slightly inside the shell. This pulls the cooked albumen away from the keratin membrane, creating a microscopic layer of space that makes peeling even more effortless.
You must leave the eggs in the ice bath for a bare minimum of 15 minutes. If the egg still feels warm to the touch, the core is still hot, and the green ring is still forming. Patience is mandatory here.
A Word on Your Gear: Ditch the Toxic Unitaskers
As a home cook who deeply values efficiency, I have a strict “No-Go” rule when it comes to kitchen equipment. I absolutely despise cheap, toxic, single-use gadgets that clutter up your countertops and offer zero real value.
If you browse any online marketplace, you will be inundated with ads for $30 plastic electric “egg cookers”. Let me be perfectly clear: these are a complete waste of your hard-earned money. Not only do they take up valuable cabinet space, but heating your food inside cheap, mystery plastics is a fantastic way to leach microplastics and endocrine disruptors into your morning breakfast.
Furthermore, you do not need to boil your eggs in a cheap, scratched Teflon pot. Cooking at high temperatures in degraded non-stick cookware is a massive health hazard. You should never allow toxic aerosol cooking sprays or peeling chemical coatings anywhere near your family’s food.
All you actually need to execute the perfect hard-boiled egg is a high-quality, heavy-bottomed stainless steel pot, a simple stainless steel steamer basket insert, and a tight-fitting lid. Stainless steel is incredibly durable, entirely non-toxic, and will easily last you a lifetime.
Many beginner cooks are intimidated by stainless steel because they think everything will stick to it. But if you take the time to learn proper heat management and utilize the water drop test to gauge your pan’s temperature, your stainless steel cookware will perform beautifully for searing, sautéing, and yes, steaming eggs. Stop buying cheap gimmicks and start investing in professional-grade basics.
Debunking the Internet’s Favorite Egg Hacks
Because peeling eggs is such a universal pain point, the internet is absolutely flooded with ridiculous “hacks” and old wives’ tales promising a miracle cure. Let’s put on our food science hats and aggressively debunk the nonsense.
The Baking Soda Myth
You will frequently see bloggers claiming that adding a teaspoon of baking soda to your boiling water will make the eggs slide right out of their shells. The theory relies on the pH factor we discussed earlier: baking soda is highly alkaline, so adding it to the water supposedly raises the pH of the egg, preventing the albumen from sticking.
The Reality: Eggshells are mostly impermeable during a quick 10-minute boil. The alkaline water does not penetrate the shell fast enough to alter the internal pH of the egg white. What it does do is seep through microscopic cracks, making your egg taste like a mouthful of bitter, sulfurous soap. It is a deeply unpleasant experience, much like the horror you face when your cheap silicone spatulas taste soapy because they absorbed heavily scented dishwasher detergent. Skip the baking soda.
The Vinegar Myth
The opposite of the baking soda trick is the vinegar trick. The claim here is that adding acid to the boiling water will dissolve the calcium carbonate shell, making it thinner and easier to peel.
The Reality: While it is true that acetic acid (vinegar) dissolves calcium carbonate, the chemical reaction is incredibly slow. It takes roughly 24 to 48 hours of soaking a raw egg in pure vinegar to dissolve the shell completely. Adding a splash of vinegar to a pot of water for 12 minutes does absolutely nothing to the structural integrity of the shell. It is a waste of good vinegar.
The Thumbtack Hole
Many traditionalists swear by using a thumbtack or a specialized egg piercer to poke a tiny hole in the fat end of the egg before boiling.
The Reality: At the fat end of every egg is a small air pocket. As the egg heats up, that air expands. Piercing the shell gives the expanding gas an escape route. This is actually a very useful trick if your goal is a perfectly symmetrical, oval-shaped egg, as it prevents the expanding air from flattening the bottom of the cooked egg white. However, piercing the shell does absolutely nothing to alter the chemical bonding between the albumen and the keratin membrane. It will not make a stubborn egg easier to peel.
Peeling Under Water (The Only Hack That Works)
Finally, a hack that is actually rooted in physical reality. Once your eggs are fully cooled, cracking them and peeling them while submerged in a bowl of water (or under a gentle stream from the faucet) is highly effective. The water acts as a lubricant, slipping between the thin keratin membrane and the cooked egg white, helping to separate the two layers smoothly.
The Sassy Sous-Chef’s Foolproof Step-by-Step Guide
We have covered the biology, the chemistry, and the thermodynamics. Now it is time to put it all together into a rigorous, efficient, no-nonsense workflow. Follow these steps exactly, and you will never mangle a hard-boiled egg again.
Step 1: The Setup
Place a stainless steel steamer basket into a heavy-bottomed pot. Add exactly one inch of water to the bottom of the pot. The water level should sit just below the bottom of the steamer basket. Place the pot on the stove over high heat and bring it to a vigorous, rolling boil.
Step 2: The Thermal Shock
Take your eggs directly out of the refrigerator. They must be cold. Using tongs or a spoon, gently place the eggs into the steamer basket in a single layer.
Step 3: The Lockdown
Immediately place a tight-fitting lid on the pot. Do not peek. Do not lift the lid to check on them. You must trap the 212°F steam inside to maintain the thermal shock environment.
Step 4: Precision Timing
Baking and boiling both require exact measurements. You wouldn’t bake a cake without using a digital kitchen scale, and you shouldn’t boil an egg without a timer. Set your timer immediately based on your desired yolk texture:
- 6 Minutes: A liquid, runny yolk with incredibly soft whites. (Perfect for ramen).
- 7 to 8 Minutes: A jammy, gooey, translucent yolk with firm whites. (The ultimate toast topper).
- 9 to 10 Minutes: A firm but still slightly creamy, bright yellow yolk.
- 11 to 12 Minutes: A fully hard-boiled egg with a pale yellow, completely set yolk. (Ideal for deviled eggs and egg salad).
Step 5: The Ice Bath
While the eggs are steaming, fill a large mixing bowl with cold tap water and at least two cups of solid ice cubes.
Step 6: The Shocking Halt
The exact second your timer goes off, remove the lid (carefully, to avoid steam burns) and immediately transfer the eggs from the steamer basket directly into the ice bath.
Step 7: The Chill
Leave the eggs in the ice water for a minimum of 15 minutes. If the ice melts completely, add more. The eggs must be completely cold to the core.
Step 8: The Crack and Peel
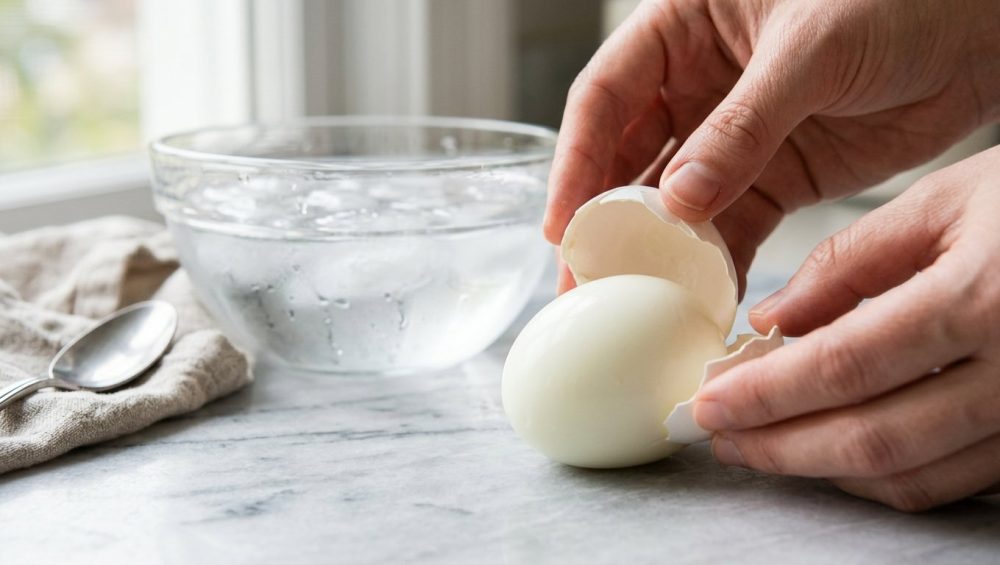
Remove an egg from the bath and gently tap it all over on the countertop until the shell is covered in a web of fine cracks. Roll the egg gently under the palm of your hand with slight pressure to loosen the shell. Submerge the egg back into the water (or hold it under a running faucet) and peel. Start at the fat end where the air pocket is located. The shell will slip off in massive, satisfying sheets.
Troubleshooting Your Egg Disasters
Even with the perfect scientific method, the kitchen can occasionally throw you a curveball. Here is how to diagnose and fix the rare anomalies.
“My eggs cracked and leaked white stuff as soon as I put them in the pot!”
This happens when the eggshell already had microscopic, invisible hairline fractures before you even started cooking. When the cold egg hits the intense heat, the rapid expansion of the shell causes those micro-fractures to burst wide open. Always inspect your eggs carefully, and handle them gently from the carton to the pot. Steaming (rather than boiling) dramatically reduces this issue because the eggs aren’t being violently jostled.
“My yolks are totally off-center and pushing through the egg white!”
This is an aesthetic nightmare for deviled eggs. The yolk is suspended in the center of the egg by two twisted, rope-like strands of protein called chalazae. If an egg sits in your fridge on its side for a long period, gravity will slowly pull the yolk off-center. To ensure perfectly centered yolks, always store your egg cartons flat on a shelf, never sideways, and buy eggs that are relatively fresh if presentation is paramount.
“I did the steam method, but my eggs still stuck to the shell!”
If you followed the steam method and still ended up with a mangled egg, one of three things happened:
- You did not let the water come to a full, vigorous boil before adding the eggs, meaning the thermal shock was too weak.
- You used eggs that were literally laid yesterday (their pH was too low and acidic).
- You rushed the cooling process. If you only left them in the ice bath for three minutes, the egg white did not have enough time to thermally contract and pull away from the membrane.
Cooking does not have to be a stressful, chaotic guessing game. By understanding the fundamental food science behind what happens in your pots and pans, you can eliminate the frustration and take total control of your kitchen. Ditch the cold water, embrace the thermal shock of steam, respect the ice bath, and you will never have to fight a stubborn eggshell ever again. Now, go make some deviled eggs that you can actually be proud of.






