
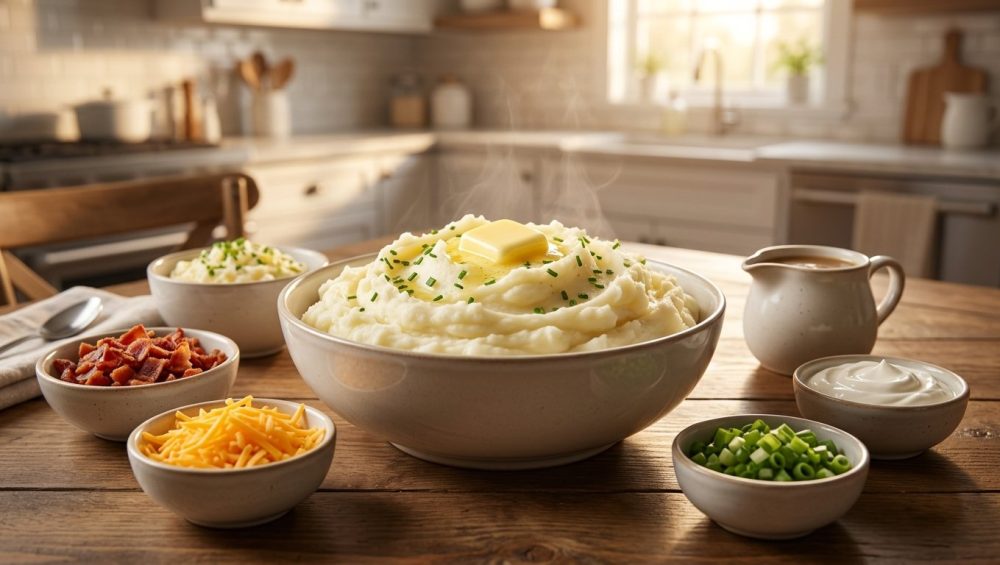
Listen, we need to have a serious conversation about what is happening in your kitchen. I know you mean well. I know you just wanted to serve a comforting, buttery, cloud-like bowl of mashed potatoes to your friends on a random weekend. But somehow, despite your best intentions, you ended up with a bowl of translucent, gummy spackle that could effectively wallpaper a Victorian mansion.
It is a culinary tragedy, but it is also entirely preventable. As your resident home-cooking advocate, I am here to tell you that you do not need a culinary degree from Le Cordon Bleu to fix this. You do not need to spend hours crying over a hot stove while your guests awkwardly sip wine in the living room. You simply need to understand a tiny bit of basic starch chemistry, upgrade your technique, and stop treating your spuds like they owe you money.
Today, we are going completely scorched-earth on bad potato habits. We are going to break down the exact molecular reasons why your side dish turns into glue, how to select the right ingredients, and the proper gear required to achieve Michelin-level fluffiness. But we are not stopping there. Because time is money and weekend hosting should actually be fun, we are going to translate these foolproof techniques into the ultimate, stress-free entertaining hack: the interactive, highly customizable DIY mashed potato bar.
Grab your vegetable peeler and a glass of wine. Class is in session.
The Science of Starch: Why Good Potatoes Go Bad
To understand why mashed potatoes fail, you have to understand what a potato actually is. Think of a potato as a biological water balloon filled with microscopic starch granules. The major carbohydrate source in all potatoes is starch, which primarily consists of two different types of molecules: amylose and amylopectin.
Amylose is a straight, tightly packed molecular chain. It retrogrades (or crystallizes) rapidly and forms stable structures. Amylopectin, on the other hand, is a highly branched molecule. The ratio of amylose to amylopectin determines how a potato behaves when it is cooked. When you boil a potato, heat and water cause these starch granules to swell, absorb liquid, and eventually gelatinize. The heat essentially disintegrates the cell walls, loosening the cells from one another and making the vegetable tender enough to mash.
Here is where the disaster happens: mechanical agitation. When you mash a potato, you are physically breaking those swollen cells apart. If you mash them gently, the cells separate cleanly, leaving you with a fluffy, light texture. But if you violently overwork them, you shear the cell walls open. The ruptured cells vomit their gelatinized starches—specifically the sticky amylopectin—directly into your dish.
The more you mix, whip, or process the potatoes, the more cells you destroy, and the more starch is released. This is the exact scientific mechanism that transforms a fluffy potato into a cohesive, unappetizing paste. I cannot overstate the hidden danger of the blender when processing starchy vegetables. High-speed blades do not mash; they obliterate. If you aggressively process your potatoes, you are essentially manufacturing industrial adhesive.
Choosing the Right Spud: A Masterclass in Potato Varieties
You cannot make world-class mashed potatoes out of the wrong potato. It does not matter how flawless your technique is; if you start with the wrong biological structure, you are doomed. Potatoes generally fall into three categories: waxy, starchy, and all-purpose.
Waxy Potatoes
Waxy potatoes, such as red potatoes or new potatoes, have a high moisture content and are lower in starch. Their flesh tends to be dense, and they hold their shape extremely well after boiling. Because their cellular structure is designed to stay firm, they are brilliant for potato salads or hearty stews where you want a distinct bite. However, if you attempt to mash them, they will resist breaking down, resulting in a chunky, heavy, and often gummy mess. Do not use them for mashing.
Starchy Potatoes
Starchy potatoes, primarily Russets (or Idaho potatoes), are the undisputed kings of the fluffy mash. They have a high starch content—specifically a higher ratio of amylose—and a low moisture content. When boiled, their cells readily swell and separate, meaning they fall apart easily and mash into a light, delicate texture. Furthermore, because they are dry, they act like biological sponges, eagerly soaking up all the butter and heavy cream you throw at them.
All-Purpose Potatoes
All-purpose potatoes, like the beloved Yukon Gold, sit right in the middle of the spectrum. They have an intermediate glycemic index and a medium starch content. What they lack in sheer fluffiness, they make up for in flavor and texture. Yukon Golds have a naturally golden flesh and a dense, almost buttery flavor profile. They yield a creamier, slightly denser mash than Russets.
The Sassy Sous-Chef’s Golden Ratio: For the absolute best mashed potatoes known to humanity, use a 50/50 split of Russets and Yukon Golds. The Russets provide the structural integrity and cloud-like fluffiness, while the Yukon Golds deliver the rich, buttery flavor and creamy mouthfeel.
The Kitchen Gear: Weapons of Mass (Potato) Destruction
Before we even discuss mashing, we need to talk about banishing toxic kitchen gear from your stovetop. I have zero patience for cheap, peeling cookware that poisons your food.
The Toxic Trap
Do not boil your potatoes in a scratched, degraded non-stick pot. Most traditional non-stick coatings are made of polytetrafluoroethylene (PTFE), a polymer that belongs to the highly controversial PFAS family of “forever chemicals”. While intact PTFE is generally considered stable at low temperatures, scratched and damaged pans can shed microplastics directly into your boiling water. Furthermore, if you accidentally heat an empty non-stick pan past 500°F (which can happen in under five minutes), it releases toxic fumes. Throw those scratched pans in the garbage. Invest in a heavy-bottomed stainless steel or enameled cast-iron Dutch oven. They are safe, durable, and offer superior heat distribution.
The Mechanical Enemies
As we discussed in the science section, sheer force is the enemy of the starch cell. Therefore, your food processor, your high-speed blender, and your electric stand mixer are strictly forbidden. If you want to save your side dish, you must ditch the hand mixer immediately. These motorized tools spin at hundreds of revolutions per minute, violently tearing the potato cells to shreds and releasing a tidal wave of gluey starch.
The Heroes of the Kitchen
To achieve perfection, you need tools that gently press the potato rather than tearing it. I am going to explain exactly why you need a ricer to achieve Michelin-level fluffiness. A potato ricer looks like a giant garlic press. You place a boiled potato chunk into the hopper and squeeze the handles together, forcing the potato through small perforated holes. This process extrudes the potato gently, cleanly separating the cells without rupturing them. The result is a mound of delicate, rice-like potato strands that are impossibly light.
If you do not have a ricer, a traditional food mill works beautifully. If you prefer a more rustic, homestyle mash with a few lumps, a standard stainless steel wire masher is perfectly fine—just use a gentle, pressing motion and stop the second the potatoes are broken down.
The Blueprint for Perfect Mashed Potatoes (Step-by-Step)
Now that we have the science, the ingredients, and the gear sorted, it is time to execute. Follow these steps with ruthless precision, and you will never eat bad potatoes again.
Step 1: The Prep
Peel your Russets and Yukon Golds. (While leaving the skin on is fine for a rustic weeknight meal, a dinner party demands elegance). Cut the potatoes into uniform, one-and-a-half-inch chunks. Uniformity is non-negotiable. If you have tiny pieces and massive boulders in the same pot, the small pieces will disintegrate into mush before the large pieces are even cooked through.
Step 2: The Cold Water Start
This is where most home cooks fail before they even turn on the stove. You must place your raw potato chunks into a pot of cold water. Do not wait for the water to boil before dropping them in.
Why? Because potatoes are dense root vegetables that grow underground. If you drop them into rapidly boiling water, the intense heat immediately attacks the exterior of the potato. The outside will rapidly soften and overcook while the dense interior remains completely raw and hard. By the time the center finally cooks through, the exterior will have disintegrated into the water, leaving you with a waterlogged, mushy disaster.
If you’ve ever wondered why your potatoes cook unevenly, starting in cold water is the scientific rule you’ve been missing. By starting with cold water and bringing the pot to a simmer together, the heat penetrates the potato gradually. The temperature difference between the outside and the center is minimized, ensuring the entire chunk cooks perfectly uniformly from edge to edge.
Step 3: Salting the Water
Potatoes are notoriously bland on their own. They need salt, and they need it early. Adding salt to the cooking water allows the potatoes to absorb the seasoning as they cook from the inside out. Add a generous handful of kosher salt to the cold water—it should taste like the sea.
Step 4: The Simmer, Not the Boil
Bring the pot to a boil, then immediately reduce the heat to maintain a gentle simmer. A violent, rolling boil will aggressively bounce the potatoes against each other and the sides of the pot, causing them to break apart and absorb excess water. Simmer them gently until a paring knife slides into the largest chunk with absolutely zero resistance (usually 15 to 20 minutes).
Step 5: The Drying Phase (Crucial)
Once tender, drain the potatoes in a colander. But do not mash them yet! They are currently coated in surface moisture. Water is the enemy of flavor; it dilutes your dairy and makes the final texture sloppy.
Return the drained potatoes to the hot, empty pot and set it over low heat for two to three minutes. Gently shake the pot. You will see steam rising from the potatoes. You are actively evaporating the residual moisture. Once the edges of the potatoes look slightly chalky and dry, remove them from the heat. They are now primed and ready to absorb fat.
Step 6: Heating the Dairy
Never add cold milk or cold butter to hot potatoes. Cold dairy instantly drops the temperature of the mash, causing the starches to seize up and become gummy. While your potatoes are drying, gently heat your heavy cream (or whole milk) and unsalted butter in a small saucepan until the butter is completely melted and the liquid is steaming.
Step 7: The Mash and Fold
Push your dry, hot potatoes through your stainless steel ricer into a large, warm mixing bowl. Pour the hot butter and cream mixture over the fluffy potato strands. Using a silicone spatula, gently fold the liquid into the potatoes. Do not whip. Do not stir aggressively. Use a gentle, sweeping folding motion just until the liquid is absorbed and the potatoes are creamy. Taste for seasoning, add more salt if necessary, and step away. You have just achieved perfection.
The Mindful Mashed Potato Bar: Your Ultimate Dinner Party Hack
Now that you possess the sacred knowledge of the perfect mash, let’s talk about how to deploy it. Weekday meals are about survival, efficiency, and getting food on the table before you collapse. But the weekend? The weekend is when we entertain.
However, entertaining does not mean you have to be miserable. In 2026, the stiff, formal dinner party is officially dead. Recent data shows that modern hosts are abandoning rigid, multi-course plated meals in favor of relaxed, intentional, and highly social gatherings. Over 70% of Americans now prefer a cozy night in with friends over a loud night out. People are craving genuine connection, not a performative culinary show that leaves the host trapped in the kitchen having a panic attack.
This is the beauty of a mindful potato bar. It perfectly aligns with the massive trend toward buffet-style spreads, grazing tables, and interactive DIY meals. It is the ultimate cheat code to host a relaxed dinner party without breaking a sweat. It is incredibly budget-friendly, scales effortlessly whether you are feeding four people or fourteen, and most importantly, 90% of the work can be done before your guests even ring the doorbell.
Setting Up the Base Station
The key to a successful food bar is temperature control. Mashed potatoes must be served piping hot; nobody wants a lukewarm, congealed scoop of starch.
To keep your masterclass potatoes warm without drying them out, utilize your slow cooker or crockpot. Rub the entire inside of the slow cooker insert with a generous layer of softened butter. Transfer your freshly made, hot mashed potatoes into the cooker and set it to the “Warm” setting. Pour a tiny splash of hot cream over the top to create a moisture barrier, and leave the lid on until it is time to eat. They will hold perfectly for up to two hours, freeing you up to actually enjoy a cocktail with your friends.
The Topping Zones: Elevating the Experience
The magic of the mashed potato bar lies in the toppings. By providing a diverse array of mix-ins, you allow your guests to customize their bowls to their exact dietary preferences and flavor profiles. To prevent chaos, organize your toppings into three distinct “Zones” on your kitchen island or dining table. Place the toppings in an eclectic mix of small bowls, ramekins, and jars.
Zone 1: The Comfort Classics
This zone is for the purists. It provides the nostalgic, steakhouse-style baked potato experience.
- Crispy Bacon Bits: Do not buy the terrifying, shelf-stable red pebbles from the grocery store aisle. Fry thick-cut bacon until shatteringly crisp, drain it well, and chop it finely.
- Fresh Chives and Scallions: Finely chopped for a sharp, oniony bite that cuts through the rich dairy.
- Sour Cream or Crème Fraîche: For an extra hit of tangy creaminess.
- Sharp Cheddar Cheese: You must grate this yourself from a block. Pre-shredded cheese is coated in cellulose and anti-caking agents that prevent it from melting smoothly. If your homemade cheese sauce is gritty, or your toppings refuse to melt, bagged cheese is the culprit.
Zone 2: The Elevated Elegance
This zone is designed to make your budget-friendly potato bar feel like a $100-per-plate tasting menu.
- Truffle Oil or Truffle Salt: A little goes a long way, but it instantly adds an intoxicating, earthy aroma.
- Roasted Garlic Paste: Raw garlic is far too aggressive for delicate potatoes. Avoid the bitter trap of the garlic press by slowly roasting whole cloves in olive oil until they are sweet, mellow, and spreadable.
- Caramelized Onions: Cook thinly sliced onions low and slow for 45 minutes until they are deeply browned and jammy.
- Crispy Prosciutto: Lay slices of prosciutto flat on a baking sheet and bake at 400°F for 10 minutes until they crisp up like delicate meat chips.
Zone 3: The Hearty Wildcards
This zone transforms a side dish into a complete, filling main course.
- Short Rib Ragù or Beef Chili: A spoonful of rich, slow-braised meat turns a bowl of potatoes into a decadent winter meal.
- Roasted Vegetables: Think charred broccoli florets or blistered cherry tomatoes. While preheating the pan is essential for getting those crispy edges on your roasted veggies, make sure to chop them small enough so they integrate easily into the mash.
- Basil Pesto: A dollop of bright, herbaceous pesto adds a beautiful pop of color and a fresh, summery flavor profile that pairs surprisingly well with the starch.
- Blue Cheese Crumbles: For your bold guests who want a pungent, salty kick.
The Art of Mindful Hosting
When your guests arrive, hand them a drink, point them toward the slow cooker, and let them build their own culinary masterpieces. Some will go the traditional route with bacon and cheddar. Others will create a truffle-prosciutto-roasted-garlic monstrosity. It doesn’t matter. What matters is that everyone is fed, everyone is happy, and you are not standing over a stove sweating into a sauce that refuses to emulsify.
Cooking should not be a source of anxiety. By respecting the basic chemistry of your ingredients—knowing why starch cells burst, why cold water starts are mandatory, and why ricers rule supreme—you strip away the mystery and frustration of the kitchen. You empower yourself to create extraordinary food out of the most humble, inexpensive ingredients on earth.
So throw out your scratched Teflon, hide your hand mixer, and embrace the elegant simplicity of the potato. Your dinner parties—and your sanity—will never be the same.






