
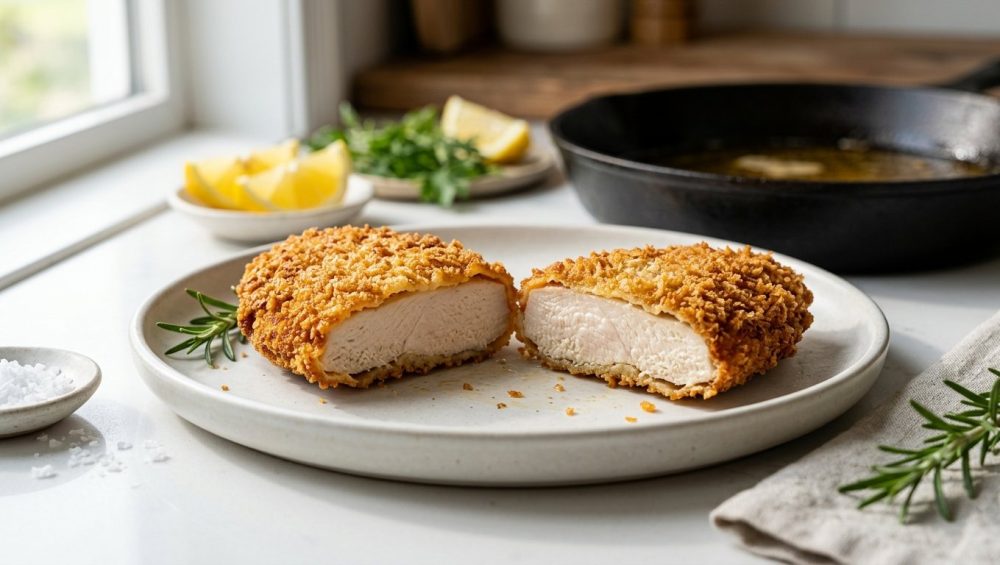
Listen, I know exactly why you are here. You spent your hard-earned money on beautiful, organic chicken breast cutlets. You lovingly set up your little bowls of flour, egg, and breadcrumbs. You meticulously breaded those cutlets, dropped them into the hot oil, and watched in absolute culinary horror as the golden, crispy crust immediately detached itself, floating away into the grease like a tiny, mocking life raft. When you finally pulled the meat from the pan, you were left with a pale, naked, rubbery piece of poultry and a skillet full of burnt, useless crumbs.
It is infuriating. It makes you want to throw your spatula across the room, give up on cooking forever, and order overpriced takeout. But put the phone down, sweetie, because we are going to fix this right here, right now.
As a home cook who has set off the smoke detector more times than I care to admit, I can promise you one thing: making restaurant-quality, perfectly breaded pan-fried proteins does not require a fancy culinary degree. It requires a basic understanding of kitchen physics, a little bit of patience, and the willingness to stop rushing the process. If you want to master simple weeknight dinners without having a meltdown, you need to understand why food behaves the way it does.
Today, we are diving deep into the definitive, no-nonsense masterclass on breading. We are going to break down the starch gelation process, analyze the thermodynamics of your frying pan, and completely overhaul your standard breading procedure. By the time we are done, your crust will be fused to your meat like concrete, and you will never serve a bald cutlet again.
The Physics of the Flop: Why Delamination Happens
In the culinary world, when your beautiful crust separates from your protein, it is called “delamination.” It sounds like a roofing problem, and honestly, the mechanics are pretty similar. When your breading falls off the chicken, it is not because the universe hates you; it is because you have fundamentally misunderstood the relationship between moisture, heat, and starch.
Steam is the Ultimate Enemy
To understand why breading fails, we have to look at what frying actually is. From a scientific standpoint, frying is not just “cooking food in fat.” Frying is a process of rapid, high-temperature dehydration. Water boils at 212°F (100°C), but your cooking oil is sitting pretty at 350°F (175°C) or higher.
When raw, moisture-heavy meat hits that violently hot oil, the water on the surface of the meat instantly flashes into steam. Here is the kicker: when liquid water turns into vapor, its volume expands roughly 1,600 times. If you have a tight, heavy layer of breading glued over a pocket of excessive surface moisture, that rapidly expanding steam has nowhere to go. It acts like a microscopic explosive charge, literally blowing the breading right off the surface of the meat.
The Slick Surface Trap
Have you ever tried to apply fresh paint to a wet, slimy wall? Of course not. It would slide right off. The same principle applies to your pork chops and chicken breasts. Raw meat is naturally wet. If you take a wet piece of poultry and immediately dump it into a bowl of flour, the flour absorbs that surface water and turns into a slick, gummy paste.
This paste creates a barrier. Instead of the flour acting as a dry primer that grips the microscopic crevices of the meat, it becomes a slip-and-slide. When the egg wash and breadcrumbs are applied over this unstable foundation, the entire structural integrity of the crust is compromised. The moment it hits the pan, the heat causes the meat to shrink slightly, and that gummy layer of flour simply lets go.
The Temperature Shock Phenomenon
Another massive culprit behind delamination is thermal shock. If you take a piece of meat straight out of the refrigerator, bread it, and immediately drop it into a skillet, you are introducing a block of ice into a finely balanced thermal environment. The temperature of your oil will plummet.
When the oil temperature drops below the optimal frying zone, the crust stops dehydrating and starts absorbing the oil instead. Instead of a crisp, structural shell that locks onto the meat, you get a heavy, greasy sponge. As the meat slowly comes up to temperature and begins to release its juices, the soggy, oil-logged breading becomes too heavy to hold onto the protein and slides right off.
Decoding the Holy Trinity: The Standard Breading Procedure (SBP)
If you have ever watched a cooking show, you have seen the classic three-bowl setup: flour, egg, and breadcrumbs. This is universally known as the Standard Breading Procedure (SBP). It is not just a tradition passed down by grandmothers; it is a precise chemical equation designed to create an unbreakable bond between a wet protein and a dry crust. You cannot skip a step, and you cannot swap the order. Let’s break down exactly what is happening in each of those three bowls.
Bowl One: The Primer (Flour)
The first step in the SBP is dredging your thoroughly dried protein in flour. The purpose of the flour is twofold. First, it acts as a desiccant, absorbing any microscopic droplets of residual moisture left on the surface of the meat after you have patted it dry.
Second, and more importantly, the flour provides a textured, starchy surface for the egg wash to cling to. Raw meat is relatively smooth. Egg wash is liquid. If you dip a bare piece of chicken directly into beaten eggs, the egg will just slide off, leaving you with patchy, uneven coverage. The flour acts exactly like a coat of primer on a wall, giving the subsequent layers something to grip. When the flour meets the egg wash, a process called starch hydration begins, which is critical for creating the “glue” that holds everything together.
Bowl Two: The Glue (Egg Wash)
The second bowl contains your beaten eggs. Eggs are a miraculous culinary binder, consisting primarily of water and complex proteins. When you dip your flour-coated meat into the egg wash, the water in the eggs hydrates the flour, creating a sticky paste.
But the real magic happens when the egg wash hits the hot oil. Heat causes the proteins in the egg to denature and coagulate—meaning they unfold and link together, forming a tight, flexible, structural net. This protein net locks the flour layer (which is attached to the meat) to the breadcrumb layer (which is attached to the egg). Without a properly mixed egg wash, your crust has no structural integrity.
Sassy Pro-Tip: Never use straight, thick, gloopy eggs. Always whisk a splash of water or milk into your eggs (about one tablespoon per egg) to thin the mixture out. If your egg wash is too thick, it will create heavy puddles on the meat, which will turn into weird, scrambled-egg pockets under your crust.
Bowl Three: The Armor (The Crumb)
The final bowl is your armor. This is the layer that takes the brunt of the heat, protecting the delicate meat inside while providing that shatteringly crisp texture we all crave.
While you can use standard, sand-like breadcrumbs, if you want extra crispy fried chicken or pork schnitzel, you should be using Panko. Panko breadcrumbs are processed differently than standard crumbs; they are crustless and have a jagged, airy, flake-like structure. Because of their irregular shape, they don’t pack tightly together. This allows hot oil to circulate around each individual flake, frying them faster and creating a lighter, crunchier texture that doesn’t hold onto excess grease.
The Secret Weapon: The 15-Minute Rest
We have arrived at the single most important section of this masterclass. If you ignore everything else I say today, remember this: You must rest your breaded meat before you fry it.
I know, I know. Time is money. You are tired, it is a Tuesday night, and you just want to eat. But skipping this step is the exact reason your crust is failing.
When you pull your meat out of the breadcrumbs, the SBP is not actually finished. The chemical reaction needs time to occur. If you immediately toss freshly breaded meat into hot oil, the flour is still dry underneath the egg, and the breadcrumbs are just loosely sitting on top of the wet egg wash. The violent bubbling of the oil will easily tear them apart.
When you let the breaded protein rest on a wire rack for 10 to 15 minutes, you allow the process of starch hydration to complete. The flour has time to absorb the moisture from the egg wash, swelling and turning into a tacky, cohesive paste. The breadcrumbs absorb the outer layer of the egg wash, fusing themselves to that paste. The distinct layers of flour, egg, and crumb meld into a single, unified shell that is practically welded to the meat.
Use this 15-minute window efficiently. Do not just stand there staring at your chicken. This is the perfect time to clean up your messy dredging bowls, wipe down your counters with a stainless steel bench scraper, and start preheating your skillet.
Thermodynamics: Heat Management and the Frying Environment
You can execute a flawless breading procedure, rest the meat perfectly, and still ruin your dinner if you do not respect the thermodynamics of your frying pan. Pan-frying is a delicate dance of temperature management.
The Maillard Reaction and the Frying Sweet Spot
The ultimate goal of frying is to trigger the Maillard reaction. This is a complex chemical reaction between amino acids and reducing sugars that occurs rapidly at temperatures above 300°F (150°C). It is responsible for the deep, savory, complex flavors and the beautiful golden-brown color of a perfect crust.
To achieve this rapidly without overcooking the meat inside, your oil needs to be sitting in the absolute sweet spot: between 350°F and 375°F (175°C – 190°C).
- If the oil is too cold (below 325°F): The crust does not dehydrate fast enough. The Maillard reaction stalls. The breading acts like a sponge, soaking up the warm oil and becoming a heavy, greasy, grey mess that will slide right off the meat.
- If the oil is too hot (above 400°F): The outside of your breading will burn and turn acrid before the internal temperature of the meat reaches a safe level. You will be left with a charred exterior and a raw, dangerous interior.
The “No-Go” Rule: Banish Toxic Cookware
This brings me to a subject I am incredibly passionate about. You cannot—I repeat, cannot—maintain proper frying thermodynamics in a cheap, flimsy, scratched-up non-stick pan. It is time to finally banish toxic kitchen gear from your life.
Those paper-thin aluminum pans with peeling Teflon coatings are not just a health hazard; they are a culinary disaster. They lack thermal mass. The moment you drop a cold piece of meat into a thin pan, the temperature of the pan and the oil plummets drastically, and the pan does not have the heat retention capabilities to recover quickly. Your perfectly breaded cutlet will sit in lukewarm oil for five minutes while the pan struggles to reheat, resulting in a soggy, delaminated crust.
Furthermore, high-heat frying degrades cheap non-stick coatings, releasing toxic fumes and flaking mystery chemicals into your food. Stop it. You deserve better.
For pan-frying, you must use cookware with significant thermal mass—meaning it holds onto heat and doesn’t drop in temperature when cold food is introduced. You need heavy-bottomed stainless steel, carbon steel, or enameled cast iron. Yes, stainless steel requires a slight learning curve, but once you master it, you will never look back. If you are worried about food sticking to stainless steel, you simply need to ensure your pan is properly preheated. You can easily verify this by utilizing the water drop test—flicking a drop of water into the pan; if it beads up and glides across the surface like mercury, your pan is ready for oil.
The Definitive Masterclass: Step-by-Step to Flawless Adhesion
We have covered the science, the gear, and the theory. Now, it is time to put it all together. Here is your foolproof, step-by-step guide to breading proteins so perfectly that the crust will outlast the apocalypse.
Step 1: The Aggressive Pat Down
Remove your protein from the refrigerator about 20 minutes before you begin to take the chill off. Place the meat on a cutting board and grab a roll of paper towels. You need to dry the surface of the meat aggressively. Press the paper towels into every nook and cranny. If the meat feels even slightly damp or tacky, keep drying. Remember, surface moisture turns to steam, and steam blows off your breading.
Step 2: The Primer Dredge
Drop your bone-dry meat into your bowl of seasoned all-purpose flour. Toss it around until it is completely coated. Now—and this is crucial—pick the meat up and aggressively shake off the excess flour. You want a microscopic, translucent dusting of flour, not a thick, clumpy blanket. Clumps of dry flour will not hydrate in the egg wash, creating weak pockets of powdery air that will cause the crust to separate in the pan.
Step 3: The Egg Wash
Transfer the flour-dusted meat into your egg wash (which you have smartly thinned out with a splash of milk or water). Use one hand for your dry bowls (flour and crumb) and one hand for your wet bowl (egg). If you use the same hand for everything, you will end up breading your own fingers into a clubbed, doughy mess. Ensure the meat is coated entirely in the egg wash, leaving no dry flour spots. Lift the meat and let the excess egg drip back into the bowl for three to four seconds.
Step 4: The Armor Press
Drop the egg-coated meat into your Panko breadcrumbs. Do not just lightly toss the crumbs over the top. You need to use your dry hand to aggressively pack and press the crumbs into the meat. Use your body weight. Force the breadcrumbs to embed themselves into the sticky egg-flour layer. Flip the meat and repeat.
Step 5: The Hydration Rest
Carefully transfer your perfectly breaded cutlet to a wire cooling rack set over a baking sheet. Do not place it on a flat plate; the bottom will get soggy. Leave it completely alone for 10 to 15 minutes. Let the starch hydrate. Let the protein glue set.
Step 6: The Precision Fry
While the meat is resting, preheat your heavy-bottomed skillet over medium heat. Add enough high-smoke-point oil (like avocado, canola, or grapeseed) to come about a quarter-inch up the side of the pan. Use an instant-read thermometer to check the oil temperature. Do not guess. Wait until it hits 350°F (175°C).
Gently lower the breaded meat into the oil, laying it away from you so you don’t splash hot oil onto your shirt. Do not overcrowd the pan! If you cram four giant chicken breasts into a 10-inch skillet, the temperature will plummet, and you will end up with a greasy disaster. Cook in batches if necessary.
Step 7: The Art of Doing Nothing
Once the meat is in the pan, step back. Do not poke it. Do not nudge it. Do not try to peek underneath it with your tongs. If you try to move the meat before the crust has fully dehydrated and solidified, you will tear the breading right off. Let the Maillard reaction do its job. When the crust is deeply golden brown and perfectly crisp, it will naturally release from the bottom of the pan.
When it is time to flip, do so gently. Once both sides are golden and the internal temperature of the meat is safe, remove it from the pan. To keep the bottom from getting soggy, use a wire cooling rack to drain the meat, rather than setting it on paper towels which trap steam against the crust.
Advanced Troubleshooting and Edge Cases
Even with a flawless technique, different cuts of meat and dietary restrictions can throw a wrench into your breading operation. Here is how to handle the tricky stuff.
The Problem with Thick Cuts
If you are trying to pan-fry a chicken breast that is two inches thick on one end and half an inch thick on the other, you are setting yourself up for failure. The thin end will turn into jerky, and the thick end will remain raw, forcing you to leave it in the pan so long that the breading burns. Furthermore, the most common reason your chicken breast turns out dry is uneven cooking times.
You must pound your meat to an even thickness. Place the meat inside a heavy-duty zip-top bag (or between two sheets of plastic wrap) and use a meat mallet to gently pound it out to an even half-inch thickness. This ensures the meat cooks rapidly and evenly, finishing at the exact same time the crust reaches golden-brown perfection.
Gluten-Free Breading Woes
If you are cooking for someone with Celiac disease or a gluten intolerance, the Standard Breading Procedure becomes much more difficult. Wheat flour contains gluten, which provides a massive amount of structural integrity to the crust.
When using gluten-free flours (like almond flour or rice flour), you are missing that protein net. To compensate, you need to lean heavily on pure starches. Swap the initial flour dredge for pure cornstarch or potato starch. These starches hydrate beautifully and create an incredibly sticky, strong bond with the egg wash. For the crumb layer, seek out gluten-free Panko, which is usually made from extruded rice flour and provides an excellent crunch.
The Double Dredge Dilemma
You may have seen recipes calling for a “double dredge”—flour, egg, flour, egg, crumb. This is a technique primarily used for deep-frying bone-in Southern fried chicken, where you want a thick, craggy, armor-like crust that can withstand a 20-minute deep fry.
Do not use a double dredge for shallow pan-frying thin cutlets. The crust will be far too thick, absorbing massive amounts of oil and overpowering the delicate texture of the meat. Stick to the single SBP for weeknight pan-frying.
Preventing Pan Warping
A quick note on pan care: when you are finished frying, do not immediately drag your screaming hot skillet to the sink and blast it with cold water. The sudden thermal shock will warp the metal, permanently ruining the flat cooking surface. If you want to keep your expensive frying pans from warping, let them cool completely on the stove before washing them.
The Pork Chop Curl
If you are breading pork chops, you might run into a specific issue where the chop curls up into a bowl shape the second it hits the hot oil. This happens because the band of fat and connective tissue around the edge of the chop shrinks much faster than the meat itself, pulling the edges inward. When the chop curls, the center lifts off the surface of the pan, meaning it won’t fry evenly, and your breading will be ruined. Just like you score the edges to prevent pork chops from curling when grilling, you must take a sharp knife and make small slits every inch or two around the fat cap before you begin the breading process.
The Sassy Sous-Chef’s Final Verdict
Cooking is not magic; it is just edible science. When you understand the basic mechanics of how ingredients interact with heat and moisture, you gain total control over your kitchen.
You no longer have to cross your fingers and pray to the culinary gods that your breading stays attached. By aggressively drying your proteins, respecting the precise order of the Standard Breading Procedure, enforcing a mandatory 15-minute hydration rest, and maintaining an exact oil temperature in a high-quality, non-toxic pan, you have completely eliminated the variables that cause delamination.
You have got this. Put on your apron, ditch the cheap peeling skillets, grab your meat mallet, and go make some mind-blowing, perfectly crusted food. Your weeknight dinners are about to get a massive upgrade, and you didn’t even need to go to culinary school to pull it off. Science, sweetie. It works every time.






