
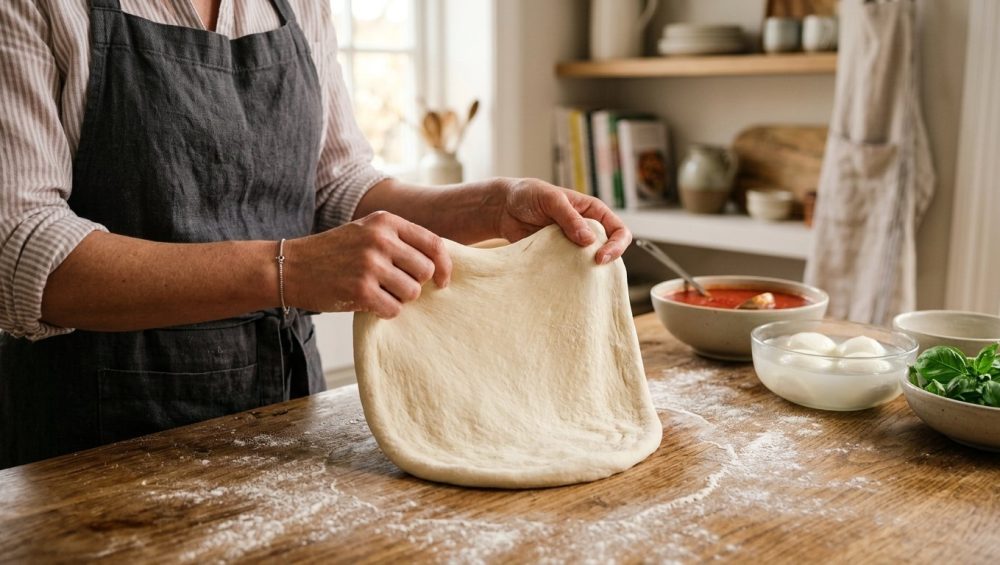
Picture this: It is a Friday evening. You have poured yourself a generous glass of a robust Sangiovese, your favorite playlist is humming in the background, and your kitchen is meticulously prepped for a glorious, hands-on DIY pizza night. You have an array of gorgeous, fresh toppings lined up in little bowls. Your friends are eagerly watching. You confidently grab your ball of pizza dough, place it on your floured surface, and begin to stretch it out.
And then, the dough fights back.
You pull it into a ten-inch circle, and the second you let go, it aggressively snaps back into a thick, stubborn, six-inch puck. You pull it again. It shrinks again. You start to sweat. You grab a rolling pin in a moment of sheer panic, desperately trying to force the dough into submission, only to end up with a dense, tear-riddled, oddly shaped amoeba that looks more like a topographical map of a sad island than a Neapolitan masterpiece.
If this scenario triggers a visceral stress response, take a deep breath. You are not alone, and more importantly, you are not a bad cook. You are simply misunderstanding the fundamental kitchen science of gluten mechanics.
When your dough keeps snapping back, it is not because the culinary gods have cursed your kitchen. It is because your dough is stressed out, too cold, or improperly handled. Today, we are going to fix all of that. I am going to teach you how to read your dough, how to manipulate temperature and time to your advantage, and how to host a completely stress-free, mindful pizza night without ever having to wrestle your dinner into submission.
The Kitchen Science of Gluten: Elasticity vs. Extensibility
Let us get one thing straight right out of the gate: to master pizza dough, you must understand gluten. I promise not to bore you with pretentious chef-speak, but a little bit of basic chemistry is going to save your sanity.
When you mix wheat flour with water, two naturally occurring proteins—glutenin and gliadin—bind together to form a complex, web-like network known as gluten. This gluten network is the entire structural foundation of your pizza. It is what traps the carbon dioxide gases produced by the yeast, creating those beautiful, airy bubbles in your crust.
However, gluten has a dual personality. It possesses both elasticity (the ability to bounce back to its original shape, like a rubber band) and extensibility (the ability to stretch out and hold a new shape without tearing).
When you knead dough, you are actively strengthening and tightening that gluten network. If you try to stretch the dough immediately after kneading it, or immediately after aggressively balling it up, the elasticity will completely overpower the extensibility. The gluten strands are tight, agitated, and tense. Think of it like a muscle cramp. If you try to force a cramped muscle to stretch, it is going to resist, and eventually, it is going to tear.
Your goal as a home cook is to encourage the gluten to relax. You want to shift the balance away from aggressive elasticity and lean heavily into smooth extensibility. This requires patience, a gentle touch, and an understanding of how environmental factors influence protein structures.
Flour Power: How Your Choice of Wheat Dictates the Stretch
Not all flours are created equal, and grabbing whatever dusty bag of white powder has been sitting in your pantry since 2019 is a surefire way to invite disaster. The protein content of your flour directly dictates the strength and behavior of your gluten network.
If you are using standard all-purpose flour, you are working with a moderate protein content (usually around 10% to 11.5%). This flour will yield a decent, soft crust, but it can sometimes lack the structural integrity needed for a super-thin, perfectly chewy Neapolitan-style base.
Bread flour, on the other hand, boasts a higher protein content (typically 12% to 14%). This creates a much stronger, tighter gluten network. While this is fantastic for giving your crust a phenomenal, bakery-level chew, it also means the dough is inherently more elastic. High-protein doughs require significantly more resting time to relax before they will allow you to stretch them.
Then we have the holy grail of pizza flours: Italian Tipo “00” flour. The “00” refers to the incredibly fine milling of the wheat, not necessarily the protein content (though most pizza-specific 00 flours sit comfortably around 12% protein). Because it is milled so finely, it absorbs water differently and creates a dough that is incredibly extensible. It stretches like an absolute dream and bakes up with a delicate, crispy exterior and a pillowy interior. If you want to stop fighting your food, upgrading your flour is the easiest first step.
Temperature: The Ultimate Dough Whisperer
If there is one absolute, non-negotiable rule of pizza making, it is this: cold dough is angry dough.
When dough is cold, the gluten proteins contract and stiffen. If you pull a ball of pizza dough straight out of your refrigerator and immediately try to stretch it, you are going to lose that battle every single time. The dough will shrink, it will snap back, and if you force it, it will tear into pieces. This is one of the most classic beginner cooking mistakes that ruins dinner parties before they even begin.
To achieve maximum extensibility, your dough needs to be brought to room temperature. Ideally, the internal temperature of your dough ball should sit comfortably between 65°F and 71°F (18°C to 22°C) before you even think about touching it.
How long does this take? It depends entirely on the ambient temperature of your kitchen. On a hot summer day, a cold dough ball might relax in 45 minutes. In the dead of winter in a drafty house, it might take three to four hours.
You will know the dough is ready to stretch when it yields easily to a gentle poke. If you press your finger lightly into the dough and the indentation springs right back out, the gluten is still tight. Walk away. Pour another glass of wine. If the indentation remains and the dough feels soft, slack, and relaxed, you are cleared for takeoff.
Time: The Secret Ingredient You Cannot Buy
We all have busy lives, and I am the first person to advocate for aggressive time-saving shortcuts on a Tuesday night. But when it comes to weekend pizza dough, time is the one ingredient you absolutely cannot skip, rush, or fake.
Resting is the only way to convince a tight gluten network to chill out. When dough rests, the gluten strands physically elongate and relax. Furthermore, enzymes in the flour (specifically proteases) begin to gently break down some of the protein bonds, naturally increasing the dough’s extensibility.
If you are making your own dough from scratch, you must allow for a proper bulk fermentation, followed by a resting period after you divide and shape the dough into individual balls. The act of shaping the balls tightens the gluten again! You cannot shape a ball and stretch it into a pizza in the same breath. It needs at least an hour or two of rest after being balled up.
Taming the Supermarket Beast: Store-Bought Dough
Let us be real: sometimes you just do not have the bandwidth to mix, knead, and ferment your own dough. Store-bought dough from your local supermarket or favorite local pizzeria is a fantastic, time-saving cheat code.
However, store-bought dough is notoriously difficult to stretch. Why? Because it is usually sold tightly wrapped in a plastic bag, heavily oxidized, and ice-cold from the commercial refrigerated display case. If your supermarket dough keeps shrinking back, it is because it is both freezing cold and completely compressed.
Here is my foolproof, strictly enforced protocol for store-bought dough:
- Unpack and Re-Ball: Remove the dough from its suffocating plastic bag the moment you get home. It will likely be in a weird, amorphous blob. Gently pull the edges under themselves to form a smooth, taut ball.
- The 3-Hour Proof: Place the re-balled dough in a lightly oiled bowl, cover it tightly with a damp towel or plastic wrap, and leave it on your counter at room temperature for a minimum of two to three hours.
Do not touch it. Do not look at it. Just let it sit. This extended room-temperature proof allows the dough to warm up, while giving the gluten ample time to relax from the trauma of being stuffed into a plastic bag. By the time your guests arrive, that stubborn supermarket blob will stretch like a dream.
The “No-Go” Rule: Banishing Toxic Pizza Gear
We need to have a serious conversation about your kitchen equipment. I have zero patience for cheap, toxic kitchenware, and neither should you.
Far too many home cooks try to bake their beautiful, hand-stretched pizzas on flimsy, peeling, non-stick pizza crisper pans or mystery-metal baking sheets they bought for three dollars. These pans are a culinary travesty. Not only do they fail to conduct heat properly (resulting in a pale, soggy, depressing crust), but cheap non-stick coatings begin to degrade and release toxic fumes when exposed to the extreme high heat required for good pizza (usually 500°F or higher).
I am a militant advocate for banishing toxic kitchen gear from your home immediately. Throw out the peeling non-stick. Toss the warped aluminum.
If you want professional-level pizza at home, you need to invest in a Baking Steel.
A Baking Steel is a heavy, solid slab of highly conductive steel that lives in your oven. Unlike traditional ceramic pizza stones, which can crack under thermal shock and take hours to heat up, a Baking Steel absorbs and conducts heat with terrifying efficiency. It blasts the bottom of your pizza dough with intense, immediate heat the second it makes contact, creating massive oven spring (those beautiful bubbles) and a perfectly charred, crispy undercarriage.
The magic of a baking steel lies in its sheer thermal mass. It does not drop in temperature when you load a cold pizza onto it. It holds its heat, ensuring that your crust bakes rapidly before the toppings have a chance to turn into a watery soup. If your cheap baking sheets keep warping and ruining your crusts, a solid steel slab is the permanent, lifetime-guaranteed solution.
The Step-by-Step Masterclass to Stretching Dough by Hand
Alright, your dough is perfectly relaxed at room temperature. Your Baking Steel is preheated in a 500°F oven for at least an hour. You have your toppings ready. It is time to stretch.
Put the rolling pin away. I mean it. Hide it in a drawer. Using a rolling pin on pizza dough violently crushes all the trapped carbon dioxide gas out of the dough, resulting in a dense, heavy, cracker-like crust. We want light, airy, and chewy. We use our hands.
Step 1: The Flour Dust (Not Dump)
You need to prevent the dough from sticking to your counter, but you do not want to incorporate raw, dry flour into the dough itself. Use a bench scraper to gently lift the relaxed dough ball out of its container without tearing it or deflating it. Drop it gently into a shallow bowl of flour, flip it once to coat both sides, and immediately shake off the excess. Transfer it to a clean, lightly dusted work surface.
Step 2: The Dimple
With the dough ball in front of you, use the pads of your fingers to gently press down in the center of the dough, pushing outward toward the edges. You are essentially dimpling the dough, flattening the middle while leaving a distinct, thicker rim around the outside. This rim will become your cornicione (the puffy outer crust). Never press the air out of the rim.
Step 3: The Steering Wheel Stretch
Once you have a flattened disc with a thicker rim, pick the dough up. Drape it over the knuckles of both hands, keeping your hands near the outer edge (just inside the rim). Hold your hands gently apart, letting gravity pull the dough downward.
Slowly rotate the dough along your knuckles, like you are turning a steering wheel hand-over-hand. Do not pull aggressively; simply let the weight of the dough stretch itself as you rotate it. Because you allowed the dough to properly rest and come to room temperature, it will gracefully expand into a beautiful, thin circle without fighting you.
If at any point the dough starts to resist, or if it feels like it is going to tear, stop. Lay it flat on the counter, walk away for five minutes, and let the gluten relax again. You are the boss, but the dough dictates the timeline.
Troubleshooting the 5 Most Common Pizza Dough Disasters
Even with the best intentions, things can go awry. Here is how to fix the most common pizza night catastrophes without losing your cool.
1. The Dough is Tearing
If your dough is ripping into holes the moment you pick it up, one of two things has happened. Either the gluten is severely underdeveloped (you did not knead it enough initially to form a strong network), or the dough is over-proofed. When dough proofs for too long, the yeast produces too much acid, and the enzymes completely degrade the gluten structure, turning it into a weak, tearing mess. If this happens, gently press the dough into a heavily oiled cast-iron skillet and make a pan pizza instead. Pan pizzas require zero stretching and are incredibly forgiving.
2. The Soggy, Soupy Middle
You finally stretched the dough perfectly, but after baking, the center is a wet, limp disaster. Finding out your pizza crust is soggy is heartbreaking. This happens for two reasons: topping greed and poor heat transfer.
First, stop treating your pizza like a landfill. A proper pizza requires restraint. A thin layer of sauce, a scattering of cheese, and minimal toppings. If you load it with water-heavy vegetables (like raw mushrooms or thick tomato slices), they will steam in the oven and turn your crust to mush.
Second, ensure your oven is as hot as it can possibly go, and bake the pizza on a preheated Baking Steel. The intense bottom heat will set the crust before the moisture from the toppings can penetrate it.
3. The Giant Alien Bubble
Sometimes, a massive, baseball-sized bubble will inflate in the middle of your pizza while it bakes, pushing all your cheese and toppings onto the floor of the oven. This is usually caused by cold dough hitting a hot oven, or by failing to properly press the air out of the center of the dough during the dimpling phase. If you see a massive bubble forming in the oven, quickly reach in with a long fork and pop it.
4. The Crust is Pale and Hard
If your crust looks like a sad, anemic cracker, your oven is not hot enough, or your dough lacks sugar/oil for browning. Home ovens max out around 500°F to 550°F, which means it takes longer to bake a pizza than it does in a 900°F wood-fired commercial oven. To help your dough brown in a home oven, ensure your recipe includes a small amount of olive oil or sugar, which aids in the Maillard reaction (the chemical process of browning and flavor development).
5. The Dough Sticks to the Peel
There is nothing worse than building a beautiful pizza on your wooden peel, only to realize it is glued to the wood when you try to launch it into the oven. To prevent this, build your pizza quickly. Do not let the wet dough sit on the peel for ten minutes while you chat with your guests. Dust the peel lightly with semolina flour (which acts like tiny ball bearings) before laying the dough down. Before you launch, give the peel a quick shimmy to ensure the dough is sliding freely.
Designing the Ultimate Mindful Pizza Bar
The secret to hosting a flawless DIY pizza night is not just about mastering the dough; it is about mastering your environment. You want your guests to have fun, get their hands dirty, and enjoy the process without you running around the kitchen like a stressed-out line cook.
Setting up a beautifully organized dream kitchen space specifically for the pizza assembly is crucial. Create a distinct flow.
Zone 1: The Dough Station
Clear a large section of your counter. Have your room-temperature dough balls resting under a damp towel. Keep a small bowl of flour, your bench scraper, and your wooden pizza peel right next to the dough.
Zone 2: The Topping Bar
Pre-cook any raw meats (sausage, bacon) and roast any water-heavy vegetables (mushrooms, peppers) well before your guests arrive. Place all toppings, cheeses, and sauces in individual bowls with their own spoons. This prevents cross-contamination and keeps the line moving.
Zone 3: The Launch Pad
Keep the area directly in front of the oven completely clear. You need space to maneuver the peel, check the pizza, and pull it out safely.
Mastering the art of effortless hosting means doing 90% of the work before anyone knocks on your door. If your dough is properly rested, your toppings are prepped, and your oven is blazing hot, all you have to do is pour the wine and guide your friends through the stretching process.
Conclusion: Perfect is the Enemy of Delicious
At the end of the day, pizza is rustic, humble food. It is not meant to be a mathematically perfect circle. If your first attempt at stretching results in an oblong oval or a slightly lopsided rectangle, embrace it. Call it “artisanal.” Charge your friends a premium for it.
The mechanics of gluten relaxation, temperature control, and proper hydration are simply tools to make your life easier and your food tastier. Once you stop fighting the dough and start listening to what it needs—warmth, time, and a gentle touch—you will unlock a level of home cooking that feels completely effortless.
So, ditch the rolling pin, banish the toxic non-stick pans, give your dough the time it deserves, and reclaim your weekend pizza night. You have absolutely got this. Now, go preheat that oven.






