
The Tragedy of the Rock-Hard S’more
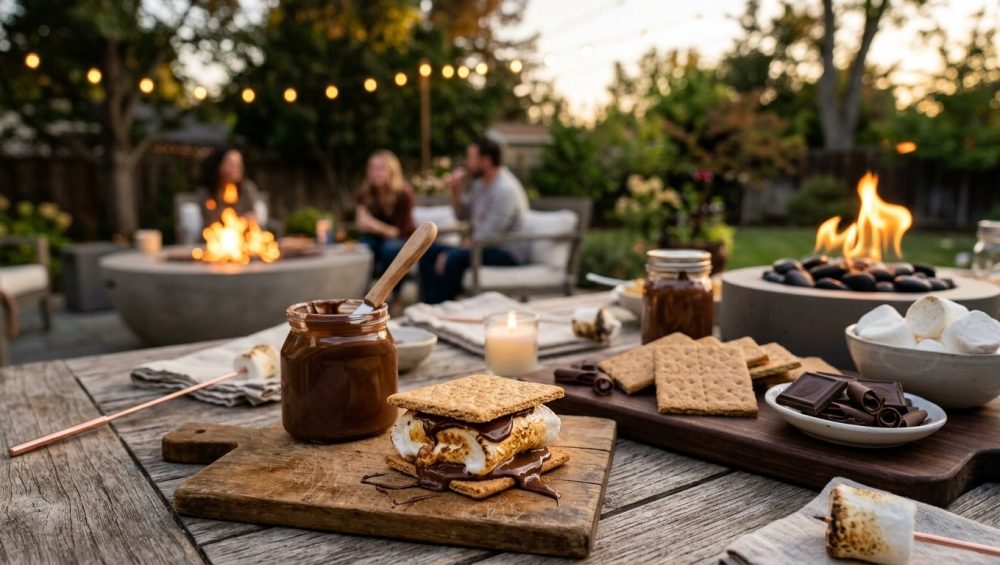
Picture this: You are sitting around a beautifully curated backyard fire pit. The string lights are glowing, the wine is flowing, and you have just achieved the holy grail of campfire cooking—the perfectly toasted marshmallow. It is a masterpiece of culinary patience. The exterior is a delicate, golden-brown caramelized shell, while the interior is a molten, quivering cloud of sugary perfection. You carefully slide this triumph of thermal engineering onto a thick, artisanal slab of 72% dark chocolate, cap it with a rustic graham cracker, and press down.
You take a bite, expecting a symphony of gooey, warm, chocolatey decadence. Instead, your teeth hit a cold, unyielding brick.
Crack.
The chocolate snaps aggressively. The pressure forces the molten marshmallow to violently evacuate out the back of the graham cracker, landing directly onto your favorite cashmere sweater. You are left chewing a mouthful of dry, shattered cracker and cold, bitter chocolate. Your dessert has physically fought back, and your evening has been ruined by a fundamental misunderstanding of thermodynamics.
As a busy professional who relies on ruthless efficiency and clever hacks to survive weekday dinners, my weekends are sacred. When I host a gathering, I am an absolute perfectionist. I believe that anyone can produce mind-blowing food in a home kitchen (or backyard) without a culinary degree, but I have absolutely zero patience for pretentious chef-speak, and even less patience for a dessert that fails at its only job.
We need to have a serious, science-backed conversation about why your s’mores chocolate is defying you. We are going to dive deep into the physics of heat transfer, the molecular structure of cocoa butter, and the exact ingredients you need to build a frustration-free, interactive dessert station. Welcome to the definitive masterclass on the mindful s’mores bar.
The Thermodynamics of a Campfire Dessert
To understand why your chocolate refuses to melt, we have to look at the physics of a s’more. Don’t panic—there will be no pop quiz at the end of this, just vastly superior desserts.
When you build a s’more, you are relying entirely on conduction. Conduction is the transfer of heat between two objects that are in direct physical contact. The hot marshmallow touches the cold chocolate, and thermal energy flows from the hotter object to the cooler one.
In a perfectly engineered universe, this heat transfer would seamlessly melt the chocolate. But in reality, we are battling the physical limitations of the marshmallow itself. A marshmallow is essentially a stabilized foam made of sugar, water, air, and gelatin. Because it is largely composed of trapped air pockets, a marshmallow is a spectacularly effective thermal insulator.
When you roast a marshmallow over a campfire, you are exposing it to intense infrared radiation. The exterior of the marshmallow quickly reaches around 320°F (160°C), which triggers the Maillard reaction and caramelization, creating that beautiful brown crust and hundreds of complex flavor compounds. However, because the marshmallow is such a good insulator, that intense heat does not easily penetrate to the core. The inside of the marshmallow only needs to reach about 95°F (35°C) for the gelatin to melt and become gooey.
So, what happens when you place this marshmallow on your chocolate?
The paper-thin, 320°F crust of the marshmallow makes contact with the chocolate. But because the crust is so thin, it holds a very small amount of total thermal energy (measured in Joules). It transfers its heat instantly and rapidly cools down. Now, the chocolate is resting against the 95°F interior of the marshmallow.
This brings us to the heat transfer equation: Q = (k · A · ΔT · t) / L.
In this equation, Q is the total heat transferred, A is the surface area, ΔT is the temperature difference, t is time, and L is the thickness of the material.
Because the marshmallow’s interior is only 95°F, the temperature difference (ΔT) between the marshmallow and the chocolate drops drastically within seconds. If you are using a thick slab of chocolate (a large L value), the meager heat provided by the marshmallow simply cannot penetrate all the way through before the entire system cools down. The marshmallow loses its thermal energy, and the chocolate’s core remains a solid, stubborn block.
The Science of Melting Chocolate: Decoding Cocoa Butter
Now that we understand the weakness of the marshmallow, we must examine the stubbornness of the chocolate.
Chocolate is a complex emulsion of cocoa solids, cocoa butter, and sugar (plus milk powder, if you are using milk chocolate). The ingredient that dictates how and when chocolate melts is cocoa butter. Cocoa butter is a fascinating, highly temperamental fat that crystallizes into six different microscopic structures, known as polymorphs (Form I through Form VI).
When chocolatiers create high-quality chocolate, they put it through a precise heating and cooling process called tempering. Tempering forces the cocoa butter to crystallize almost exclusively into Form V crystals. Form V is the holy grail of chocolate architecture—it gives the bar a glossy finish, a satisfying snap, and a melting point of approximately 93°F (34°C), which is just slightly below human body temperature. This is why good chocolate melts so luxuriously in your mouth.
However, the overall melting point of a chocolate bar shifts dramatically based on its ratio of ingredients:
The Dark Chocolate Dilemma
Dark chocolate typically contains 70% to 85% cocoa solids and cocoa butter, with very little added sugar. Because of this dense, fat-rich structure, dark chocolate has a highly stable crystal lattice. It generally requires temperatures between 113°F and 120°F (45°C to 48°C) to fully melt.
Remember how the interior of our toasted marshmallow is only about 95°F? This is exactly why a thick square of premium dark chocolate will survive a s’more completely unscathed. The marshmallow simply does not possess the thermal energy required to break down the Form V crystals in a dense dark chocolate bar. Furthermore, if you attempt to pre-melt dark chocolate outside on a humid summer night, you run the risk of ruining it entirely. It is crucial to understand why your melted chocolate turns clumpy when exposed to moisture; even a single drop of condensation from a humid evening can cause the sugar and cocoa solids to instantly seize into a gritty, unfixable paste.
The Milk Chocolate Advantage
Milk chocolate is a completely different structural beast. By law, it contains a lower percentage of cocoa solids (often between 10% and 30%) and is packed with sugar and milk powder. The introduction of milk fat interrupts the rigid cocoa butter crystal lattice, making the overall structure much softer and more heat-sensitive.
Milk chocolate generally melts between 104°F and 113°F (40°C to 45°C). While this is still slightly higher than the internal temperature of a marshmallow, the softer texture of milk chocolate allows it to yield and soften beautifully under the mild heat and physical pressure of a s’more assembly.
The “No-Go” Rule on Toxic Fire Pit Gear
Before we talk about how to successfully construct your dessert, we need to have a harsh, brutally honest intervention about the equipment you are using. I am absolutely militant about banishing toxic kitchen gear from my life, and that standard does not disappear just because we have moved into the backyard.
I see hosts spend hundreds of dollars on premium grass-fed steaks, organic wines, and artisanal cheeses, only to hand their guests a $2 novelty marshmallow roasting stick pulled from a dusty discount bin. This is unacceptable.
Cheap roasting sticks are a chemical nightmare. They are almost universally made from low-grade steel coated in a microscopic layer of chrome plating. A standard wood campfire can easily reach internal temperatures of 1,500°F (815°C) in the coal bed. When you plunge a cheap chrome-plated stick into that inferno, the extreme thermal expansion and contraction causes the cheap plating to blister, flake, and adhere directly to the sticky surface of your marshmallow. You are actively feeding your guests heavy metals.
Other common offenders include aluminum skewers (which have a melting point of 1,220°F but begin to dangerously soften and warp at just 600°F) and uncoated copper wire, which can leach toxic copper ions into acidic foods. And please, do not get me started on foraging for “natural” wooden twigs in the dark. Unless you are a botanist, you run the risk of using toxic wood (like oleander or rhododendron), and porous wood actively harbors bacteria if you are using the same stick to roast raw hot dogs before dessert. Using mystery metals and cheap plastics over an open flame is the exact same reason why your cheap spatulas taste like soap after a run through the dishwasher—you get what you pay for.
The Only Acceptable Roasting Stick
If you want to host a mindful, safe gathering, you must invest in food-grade 304 stainless steel roasting sticks.
Type 304 stainless steel (often referred to as 18/8 stainless because it contains 18% chromium and 8% nickel) is the culinary gold standard. It is highly resistant to oxidation and corrosion, meaning it will never rust or flake into your food, even after years of campfire abuse. Furthermore, 304 stainless steel has a relatively low thermal conductivity compared to aluminum or copper. This means the tip of the stick can sit in a blazing fire, but the heat will not travel up the shaft fast enough to burn the hand holding the handle.
Look for telescoping 304 stainless steel sticks that extend to at least 32 to 36 inches. This ensures that guests (especially children) can maintain a safe distance from the radiant heat of the fire pit while still achieving the perfect roast.
Chocolate Architecture: Engineering the Perfect Melt
We have established that a thick block of premium chocolate is a thermodynamic failure in a s’more. So, how do we fix it? We manipulate the variables in our heat transfer equation. Specifically, we reduce L (thickness) and maximize A (surface area).
The “Thin is In” Rule
There is a reason the classic Hershey’s Milk Chocolate bar has been the undisputed king of the campfire since the first official s’mores recipe was published in the 1927 Tramping and Trailing with the Girl Scouts handbook.
Hershey bars are cast in incredibly thin, easily breakable rectangles. This geometry is not an accident; it is calibrated for rapid heat absorption. The thin profile drastically reduces the distance the heat must travel to melt the chocolate through to the center. While a Hershey bar may not win any awards at a Parisian chocolate tasting, it is an engineering marvel for a s’more. It yields instantly to the heat of the marshmallow, creating a flawless, gooey emulsion.
The Caramel Bypass
If you want to elevate the flavor profile beyond standard milk chocolate without sacrificing texture, your best option is a filled chocolate square, specifically Ghirardelli Milk Chocolate Caramel Squares.
These squares are thin enough to soften quickly, but their true genius lies in the center. The liquid caramel core requires absolutely zero heat to melt. The moment you bite down, the caramel bursts outward, providing the luxurious, messy, gooey texture you want from a s’more, while the thin chocolate shell gently gives way. It is a brilliant textural cheat code.
The Peanut Butter Hack
Another phenomenal alternative is the Reese’s Thin Peanut Butter Cup. The standard-sized cups are too thick and will remain cold in the center, but the “Thins” variety is perfect. Peanut butter has a massive fat content, primarily from peanut oil, which remains soft at room temperature. By introducing peanut butter into the chocolate matrix, you drastically lower the overall melting point of the confection.
Shards and Shavings
If you are an absolute purist and demand that your guests eat 75% single-origin dark chocolate, you must physically alter the chocolate’s architecture before serving. Do not set out a thick block and expect guests to break off chunks.
Instead, take a sharp chef’s knife or a heavy-duty vegetable peeler and shave the dark chocolate block into paper-thin shards and curls. Pile these delicate shavings onto a plate. When a hot marshmallow is pressed into a pile of dark chocolate shavings, the massive surface area of the curls absorbs the heat instantly, melting the dark chocolate into a rich, velvety sauce in seconds.
Base Layers: Ditching the Graham Cracker
Sylvester Graham invented the graham cracker in the 19th century as a bland, high-fiber health food explicitly designed to be as boring as possible to suppress carnal urges. (I wish I was making that up, but I am not). While modern graham crackers are loaded with sugar and honey, they are still structurally problematic. They are brittle, they shatter unpredictably, and they often overwhelm the delicate flavors of the chocolate and marshmallow.
If you want to build a truly memorable dessert experience, it is time to upgrade the structural foundation of your s’more.
The Dutch Stroopwafel
A stroopwafel consists of two impossibly thin, crispy waffle cookies bound together by a layer of spiced caramel syrup. They are traditionally placed over a hot cup of coffee or tea so the rising steam melts the caramel inside.
When used as a s’more base, the ambient heat from the toasted marshmallow gently warms the stroopwafel, turning the internal caramel into a stretchy, warm delight. The waffle exterior holds its shape perfectly without shattering into a million dusty crumbs.
The Shortbread Solution
Traditional Scottish shortbread is essentially just butter, sugar, and flour. It has a tender, crumbly texture that yields beautifully when bitten, preventing the dreaded “marshmallow blowout” that happens when you bite into a hard graham cracker. The high butter content also adds a rich, savory note that pairs beautifully with dark chocolate. If you are baking your own shortbread bases from scratch, remember to rely on the magic of chilled dough before baking; placing warm dough in the oven will cause the butter to melt too quickly, leaving you with flat, fragile cookies that cannot support the weight of a s’more.
The Salty Pretzel Crisp
S’mores are aggressively sweet. To combat palate fatigue, you need salt. A wide, flat pretzel crisp provides incredible structural integrity, a satisfying auditory crunch, and a heavy hit of coarse surface salt that perfectly balances the cloying sweetness of the marshmallow.
Alternative Melting Strategies: The Indoor S’mores Dip
Sometimes, a backyard fire pit isn’t an option. Whether you are dealing with a torrential downpour, a tiny apartment balcony, or a strict HOA fire ban, you can still deliver a flawless s’mores experience indoors.
The secret to indoor s’mores is the cast-iron skillet dip. This method completely removes the heat transfer burden from the marshmallow and places it entirely onto your oven.
To execute this, take a well-seasoned cast-iron skillet (do not use a flimsy aluminum baking sheet; the reason your cheap baking sheets warp in the oven is because thin metals cannot handle rapid thermal expansion, leading to uneven cooking and dangerous popping).
Fill the bottom of the heavy cast-iron skillet with a dense layer of high-quality chocolate chips or chopped chocolate. Pour a splash of heavy cream over the chocolate to help create a smooth, ganache-like consistency as it melts. Next, cover the entire surface of the chocolate with a tight, uniform layer of marshmallows.
Place the skillet into an oven preheated to 350°F (175°C). Ensure your oven is accurately calibrated; investing in a simple oven thermometer is the easiest way to guarantee your marshmallows toast to a beautiful golden brown instead of instantly incinerating into bitter ash. Bake for 5 to 7 minutes until the marshmallows are puffed and golden, and the chocolate below is a bubbling, molten pool. Serve immediately with a platter of sturdy dipping vessels (pretzel rods, strawberries, and shortbread).
Building the Ultimate Mindful S’mores Bar
Mastering the art of effortless hosting is not about running around like a frantic restaurant line cook while your guests are trying to relax. It is about doing the heavy lifting and intellectual preparation before anyone rings the doorbell. A mindful s’mores bar is the ultimate expression of this philosophy. You are providing the curated ingredients and the safe equipment, but the guests are doing the actual cooking.
To prevent chaos around the fire pit, you must use scientific food staging techniques. Do not just throw bags of marshmallows and boxes of crackers onto a single picnic table. This creates a bottleneck where guests are bumping elbows, dropping ingredients, and getting frustrated. Instead, break the process down into a linear, logical flow.
Station 1: The Foundation
Set up a large, beautiful wooden board away from the immediate heat of the fire. This is where guests will select their base. Offer three distinct options to cater to different textures:
- The Classic: High-quality honey graham crackers.
- The Buttery: Thick-cut Scottish shortbread or stroopwafels.
- The Savory: Flat pretzel crisps or lightly salted water crackers.
Station 2: The Melt
Next to the bases, present your highly engineered chocolate selection. Keep this station shaded and cool to avoid the danger of a wet bowl or premature melting from the summer humidity.
- The Quick-Melt: Thinly snapped squares of standard milk chocolate.
- The Cheat Code: Caramel-filled chocolate squares and thin peanut butter cups.
- The Purist: A bowl of finely shaved 70% dark chocolate curls.
- The Alternative: A jar of high-quality lemon curd or a rich chocolate-hazelnut spread. Spreads completely eliminate the melting variable, guaranteeing a perfect texture every time.
Station 3: The Roast
This is the active zone. Place a heavy, weighted container (like a tall ceramic vase filled with dry rice or decorative stones) near the fire pit to safely hold your 304 stainless steel roasting sticks upright. Provide two types of marshmallows: standard vanilla, and a flavored artisanal option (like toasted coconut or espresso marshmallows).
Station 4: The Finish
This is where the magic happens. Once a guest has successfully assembled their s’more, they move to the finishing station to elevate the flavor profile. Understanding the chemistry of flavor pacing is essential here. S’mores are inherently heavy, fat-laden, and incredibly sweet. To make them truly spectacular, you must introduce contrasting elements.
- Acid: Provide a small bowl of tart raspberry coulis or passionfruit puree to drizzle over the chocolate. The sharp acidity cuts through the heavy cocoa butter and sugar, refreshing the palate.
- Salt: A small dish of flaky Maldon sea salt. A single pinch of coarse salt on top of the melted chocolate amplifies the cocoa notes and balances the sweetness of the marshmallow.
- Texture: Toasted slivered almonds, crispy bacon bits, or toasted coconut flakes to roll the sticky edges of the s’more in.
The Sassy Wrap-Up
Hosting a flawless backyard gathering does not require a Michelin star, a massive budget, or a stressful weekend spent chained to your stove. It simply requires a basic respect for the ingredients, a fundamental understanding of how heat works, and the absolute refusal to use toxic, cheap equipment.
By ditching the thick, stubborn blocks of dark chocolate, embracing the geometry of thin shards and filled squares, and upgrading your structural bases, you can completely eliminate the tragedy of the rock-hard s’more. You are no longer just throwing a bag of marshmallows at your friends; you are curating a mindful, interactive culinary experience.
So, pour yourself a glass of wine, pre-shave your dark chocolate, and go light that fire pit. You’ve got this.






