
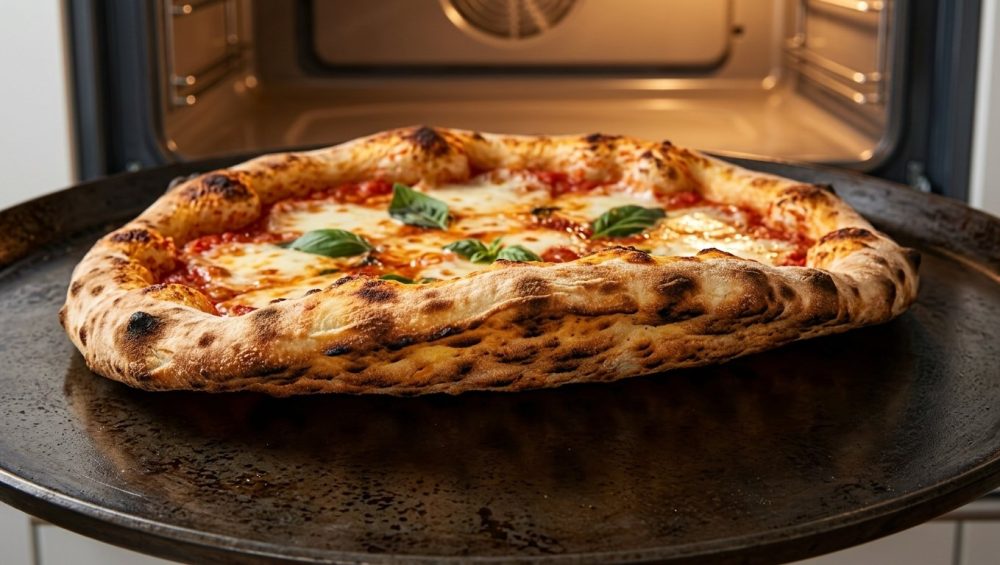
Picture this: It is Friday night. You have spent the last seventy-two hours meticulously cold-fermenting a batch of artisan dough. You have sourced the finest imported San Marzano tomatoes and splurged on the good cheese. You stretch the dough with the grace of an Italian nonna, carefully slide it into your preheated home oven, and wait. Ten minutes later, you pull out… a tragedy. The top is melted, but the bottom is a sad, pale, limp disaster that folds under the weight of its own toppings.
If your homemade pizza is floppy, you are definitely not alone. It is the universal heartbreak of the weekend culinary hobbyist. But here is the brutal truth: it is not your recipe, and it is not your lack of a culinary degree. The culprit is your standard residential oven. It is a thermal weakling.
But do not throw in the towel and order overpriced takeout just yet. You do not need to drop thousands of dollars on a dedicated outdoor wood-fired pizza oven to achieve perfection. You just need to understand a little bit of basic thermodynamics and upgrade your baking surface to the heavy metal hero of the modern kitchen: the baking steel.
The Anatomy of a Pizza Disaster: Why Your Crust is Currently a Floppy Mess
To fix the problem, we first have to understand why your home oven is currently failing you. Baking a phenomenal pizza requires a massive, instantaneous transfer of heat the millisecond the raw dough hits the cooking surface.
The 500-Degree Lie
Your oven dial might proudly claim it is sitting at 500°F (260°C), but that number is highly deceptive. Air is a spectacularly terrible conductor of heat. Think about it: you can comfortably reach your bare hand into a 500-degree oven for a few seconds to grab a roasting pan without instantly combusting. But if you touch a 500-degree piece of metal? You are going to the emergency room.
When you place a wet, room-temperature pizza dough onto a standard wire rack or a flimsy aluminum pan, the ambient hot air simply cannot deliver heat fast enough to the bottom of the pie. The dough cools the immediate area around it, and instead of frying and crisping, the bottom of your pizza effectively steams.
The Moisture Migration Problem
Dough is wet. Tomato sauce is wet. Cheese is wet. As the pizza bakes, gravity and heat cause that moisture to migrate downward. If the surface underneath the pizza does not possess enough thermal mass and conductivity to rapidly evaporate that moisture and sear the dough, the water gets trapped. The result is a soggy, gummy layer right between the crust and the sauce, otherwise known as the dreaded “gum line.”
Enter the Baking Steel: The Heavy Metal Hero Your Oven Needs
This is where we fix your Friday night pizza ritual forever. A baking steel is exactly what it sounds like: a heavy, thick, solid slab of highly conductive carbon steel (typically A36 or 1018 food-grade steel) that lives in your oven.
The “No-Go” Rule: Why We Are Banishing Cheap Pizza Stones Forever
I have zero patience for pretentious chef-speak, but I have even less patience for cheap, toxic, or fragile kitchenware. I am fiercely dedicated to banishing toxic kitchen gear from my home, and that includes those peeling, chemical-laden non-stick pizza trays that off-gas mystery fumes the second they get hot.
For decades, the home cook’s only alternative was the ceramic pizza stone. Let me be brutally honest: traditional ceramic and cordierite pizza stones are wildly overrated. Sure, they are better than a bare wire rack, but they are incredibly fragile. They are notorious for cracking under thermal shock. Much like when a cheap glass baking dish shattered in the middle of roasting a chicken because a single drop of cold water hit it, a ceramic stone will violently split in half if your pizza dough is a little too cold or your sauce drips over the edge.
Furthermore, stone is porous. It absorbs rancid oils and flavors over time, and you cannot wash it. A solid slab of carbon steel, on the other hand, is virtually indestructible. You could drop it down a flight of concrete stairs, and the only thing that would break is the stairs.
The Science of the Steel: Thermal Conductivity Explained (Without the Pretentious Chef-Speak)
Why does a slab of metal outperform a piece of fired clay? It comes down to two simple concepts: thermal conductivity and volumetric heat capacity.
Heat Capacity vs. Thermal Conductivity
Thermal conductivity measures how fast a material can transfer its stored heat into whatever it is touching. Cordierite ceramic has a thermal conductivity rating of roughly 2.8 to 6.5 W/m·K. Carbon steel clocks in at a whopping 50 to 52 W/m·K.
In plain English? Steel transfers heat into your pizza dough about 18 to 20 times faster than a ceramic stone.
When your raw dough hits a preheated steel, that massive dump of thermal energy fries the bottom of the crust instantly. It creates a deep, beautiful Maillard reaction (that gorgeous brown crust) before the cheese on top has a chance to turn into a greasy, separated mess.
The Magic of Oven Spring
This rapid heat transfer is also the secret to “oven spring.” Oven spring is the explosive upward expansion of the dough during the first few minutes of baking. When the intense heat from the steel hits the dough, the moisture inside the dough rapidly turns to steam, and the yeast goes into a hyperactive frenzy before dying off. This violent expansion inflates the gas bubbles in your dough, giving you that airy, blistered, beautiful cornicione (the outer rim).
If your flimsy aluminum baking sheets keep warping the second your oven hits 450 degrees, they are actively working against your oven spring. They buckle, lose contact with the dough, and fail to deliver heat. A quarter-inch slab of carbon steel doesn’t flinch.
How to Choose the Right Baking Steel (And Avoid Toxic Mystery Metals)
Not all steels are created equal. You want pure, food-safe, CNC-cut A36 or 1018 carbon steel. Do not buy a random piece of scrap metal from a junkyard unless you want your pizza flavored with industrial machine oil and rust.
Thickness Matters: 1/4-inch vs. 3/8-inch vs. 1/2-inch
When shopping for a steel, you will immediately notice they come in different thicknesses. Here is the breakdown so you do not accidentally buy a steel that breaks your oven rack.
The 1/4-Inch Steel (The Home Cook’s Best Friend):
At a quarter-inch thick (about 6.4 mm), this steel weighs roughly 15 to 18 pounds. It is the absolute sweet spot for 95% of home cooks. It preheats in about 45 to 60 minutes and recovers its surface temperature in just 75 to 90 seconds after you bake a pizza. It will give you a spectacular crust without requiring you to hire a forklift to get it out of the oven.
The 3/8-Inch Steel (The Weekend Enthusiast):
At three-eighths of an inch (9.5 mm), you are looking at around 22 to 25 pounds. This thickness holds significantly more thermal mass, meaning it won’t drop in temperature as much when a cold pizza hits it. If you regularly host pizza parties and need to bake four or five pies back-to-back without waiting for the oven to recover, this is your weapon of choice. However, it requires a solid 60 to 75 minutes to preheat.
The 1/2-Inch Steel (The Overkill):
At half an inch thick (12.7 mm), these monsters weigh upwards of 30 pounds. Unless you are running a commercial bakery out of your studio apartment, skip this. It takes over 90 minutes to preheat, and hauling it to the sink to clean it is a legitimate hazard to your toes.
Material Purity and Food-Safe Seasoning
Avoid any baking steel that boasts a “proprietary non-stick coating.” We do not do mystery chemicals here. Just like when your cheap ceramic pan lost its non-stick abilities and started flaking into your scrambled eggs, a coated pizza steel will eventually degrade under the extreme 500-degree heat. You want bare, raw carbon steel that has been seasoned with a high-smoke-point oil (like flaxseed, canola, or grapeseed oil), exactly like a cast-iron skillet.
The Masterclass: Step-by-Step Guide to Using Your Baking Steel
Owning a steel is only half the battle. You have to know how to pilot it. Here is my foolproof, no-nonsense method for achieving pizzeria-level greatness on a Friday night.
Step 1: The Pre-Heat Ritual
Your oven takes about 15 minutes to beep and tell you it has reached 500°F. Your oven is lying. The air might be 500 degrees, but your heavy slab of steel is probably only hovering around 300 degrees.
Place your steel on the second-highest rack in your oven. You want it close enough to the top heating element to benefit from the broiler later, but with enough room to easily slide a pizza on and off. Turn your oven to its absolute maximum temperature (usually 500°F or 550°F). Now, walk away for a full 60 minutes. Do not cheat. A fully saturated steel is the secret to a crispy bottom. Always use a simple oven thermometer to verify your actual ambient temperature, because most residential ovens are wildly uncalibrated.
Step 2: The Dough Prep and Hydration Balance
If you try to bake a traditional, authentic Neapolitan dough on a steel in a home oven, you will be disappointed. Traditional Neapolitan dough is formulated at a low 60% hydration (water-to-flour ratio) because it is designed to cook in 90 seconds in a 900-degree wood-fired oven. If you bake a 60% hydration dough for six minutes in a 500-degree home oven, it will dry out and turn into a giant, tooth-shattering cracker.
For a home oven baking steel, you need to bump up the hydration to the 65% to 70% range. This extra moisture protects the dough during the longer bake time, ensuring the inside stays chewy and steamy while the outside gets impossibly crisp.
If you are struggling with shaping, and your pizza dough keeps shrinking back like a rubber band when you try to stretch it, your gluten is too tight. Stop fighting it. Cover it with a damp towel, let it rest on the counter for 15 minutes to relax, and try again.
Step 3: The Toppings and The Launch
When it comes to topping your pizza, less is always more. A baking steel is powerful, but it cannot perform miracles if you overload the dough with a pound of wet vegetables and a swimming pool of sauce.
You might even need to stop using fresh mozzarella if you aren’t properly draining and pressing the excess moisture out of it beforehand. All that milky water will dump straight into the center of your pie, ruining the crispness the steel is trying to build. Opt for whole-milk, low-moisture mozzarella for the perfect, stringy melt.
To launch the pizza, build it on a wooden pizza peel lightly dusted with equal parts flour and semolina. Give the peel a gentle shimmy to ensure the dough isn’t sticking, then confidently slide it onto the screaming hot steel. Do not hesitate. Hesitation smells like fear, and dough can sense fear.
Step 4: The Broiler Hack for Neapolitan-Style Blistering
Here is the ultimate pro-tip. The steel is going to cook the bottom of your pizza in about five to six minutes. But to get those beautiful, charred “leopard spots” on the top crust, you need intense, direct radiant heat.
About 90 seconds before the pizza is done, switch your oven from “Bake” to “Broil.” The top heating element will blaze to life, blasting the top of your pizza with 1,000-degree radiant heat. Keep your eyes glued to the oven window, because it will go from perfectly blistered to a charcoal briquette in a matter of seconds.
Caring for Your Steel: A Lifetime of Pizzeria-Quality Crusts
Unlike a ceramic stone, you cannot really break a baking steel, but you can neglect it. Since it is made of raw carbon steel, it is susceptible to the one enemy of all iron-based cookware: rust.
Cleaning Up the Burnt Cheese Disasters
Inevitably, you are going to misjudge a launch, and a handful of cheese and sauce is going to slide off the dough and burn directly onto the steel. Do not panic, and whatever you do, do not let your kitchen knives go dull by furiously scraping them against the metal surface to remove the debris.
Instead, let the steel cool completely. Use a heavy-duty stainless steel bench scraper or a stiff chainmail scrubber to knock off the burnt carbonized bits. Wipe it down with a dry or slightly damp paper towel. Never, ever soak your steel in the sink, and keep it far away from the dishwasher.
Re-Seasoning and Rust Prevention
If your steel starts looking a little dull, or if you accidentally scrubbed off the protective patina, it is incredibly easy to re-season. Simply rub a microscopic drop of high-smoke-point oil (like canola or grapeseed) over the entire surface. Buff it out with a paper towel until the steel looks completely dry. You want the thinnest layer humanly possible. Then, bake the empty steel at 400°F for an hour. The oil will polymerize, creating a slick, dark, rust-proof barrier.
Beyond Pizza: Unexpected Ways Your Baking Steel Will Upgrade Your Kitchen
The best part about a baking steel is that it is not a unitasker. Because it is essentially a giant, indestructible griddle, it will transform the way you cook a dozen other things.
Smashed Burgers and Searing Steaks
Want to make the greatest smash burgers of your life? Place your steel directly over two burners on your gas or induction stovetop (check your manufacturer’s manual first, of course). Let it get smoking hot. The massive thermal capacity of the steel means that when you smash a cold ball of ground beef onto it, the temperature won’t drop a single degree. You will get a lacy, crispy, caramelized crust that a standard frying pan simply cannot replicate.
Artisan Breads and English Muffins
If you bake sourdough, baguettes, or English muffins, the steel will become your best friend. Ditch those cheap silicone baking mats that just insulate the heat and result in sad, pale bottoms on your artisan loaves. Baking your bread directly on a preheated steel provides the massive jolt of bottom-heat necessary for maximum oven spring and a deeply browned, crusty base.
Conclusion: Your Weekend Pizza Game Will Never Be the Same
Listen, I know that dropping a significant chunk of change on a heavy slab of industrial metal seems a bit intense for a Friday night pizza habit. But as a home cook who has set off the smoke alarm more times than I care to admit in the pursuit of culinary perfection, I can confidently tell you that this is one of the few kitchen upgrades that actually lives up to the hype.
You do not need a culinary degree, you do not need a backyard wood-fired oven, and you certainly do not need to settle for soggy, disappointing crusts. You just need to harness the simple, brutal physics of thermal conductivity.
Buy a baking steel. Give it a full hour to preheat. Dial in your dough hydration. And prepare to absolutely ruin your local delivery place for yourself, because once you experience the magic of a perfectly blistered, shatteringly crisp, steel-baked crust in your own kitchen, you are never going back. Now, go pour yourself a glass of wine, feed your sourdough starter, and let’s get baking.






