
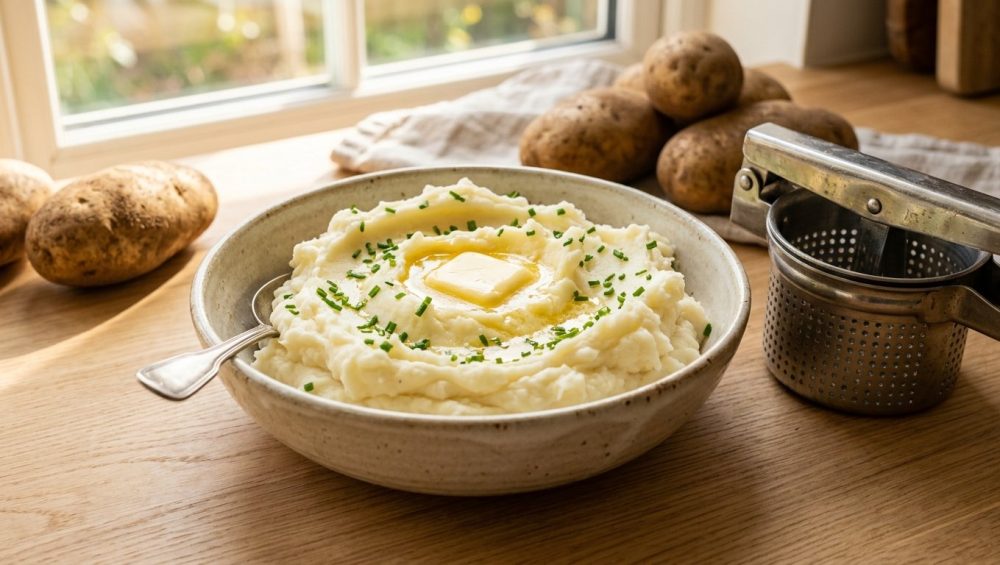
We have all been there. It is a highly anticipated holiday meal, or perhaps just a cozy Sunday family dinner. You have spent hours meticulously roasting a beautiful piece of meat, your gravy is bubbling away perfectly, and you are ready to serve the ultimate comfort food: a giant, steaming bowl of mashed potatoes. But as you drag your spoon through the bowl, you notice something is horribly wrong. The potatoes are pulling back. They are dense. You take a bite, and the texture coats the roof of your mouth like industrial spackle. You have accidentally created culinary wallpaper paste.
I have zero patience for pretentious chef-speak, but I am going to give it to you straight: if your mashed potatoes are turning out gummy, gluey, or dense, it has absolutely nothing to do with your lack of a culinary degree. It has everything to do with a fundamental misunderstanding of plant biology and food physics. As a home cook, you can achieve mind-blowing, restaurant-quality, cloud-like potatoes in your standard home kitchen. You just need to stop fighting the science and start working with it.
Time is money during the week, and I am the first person to advocate for clever kitchen shortcuts to get dinner on the table. But when you are tackling a starchy side dish that demands perfection, you cannot cheat the chemistry. Today, we are going to break down the exact molecular reasons why your spuds are turning into adhesive, which specific potato varieties you actually need to be buying, and the foolproof techniques that will guarantee light, fluffy perfection every single time.
The Culinary Science of the Spud: Anatomy of a Starch Bomb
To understand why mashed potatoes fail, you have to understand what a potato actually is. Potatoes are tubers, which are essentially underground storage organs for the plant. Their primary job is to store energy, and they do this in the form of starch.
The Microscopic Balloons: Amyloplasts
Inside the raw flesh of a potato, this starch is tightly packed inside microscopic cellular sacs called amyloplasts. Think of these amyloplasts as millions of tiny, delicate water balloons. When a potato is raw, these balloons are firm and intact. However, when you introduce them to heat—specifically when the internal temperature of the potato reaches about 60 to 70°C (140 to 158°F)—a magical process called starch gelatinization occurs.
During gelatinization, the starch granules inside these cellular balloons begin to absorb the surrounding water. They swell up, expand, and soften dramatically. This softening is exactly what transforms a rock-hard raw potato into a tender, edible vegetable.
Amylose and Amylopectin: The Architects of Texture
The starch trapped inside these swollen balloons is not just one uniform substance; it is composed of two different polymeric molecules: amylose and amylopectin.
- Amylose is a long, linear, unbranched chain of glucose molecules. When hydrated, it forms rigid, tight, porous gels.
- Amylopectin is a highly branched, bushy molecule that yields a creamy, viscous texture when it interacts with liquid.
In a perfectly cooked potato, these two starches remain safely contained within their swollen cell walls. The ultimate goal of mashing is simply to separate these intact, swollen cells from one another so they form a soft, fluffy mound.
The Rupture: How Mechanical Force Creates Culinary Glue
Here is where the disaster happens. The cellular walls of these amyloplasts are incredibly fragile once they are cooked and swollen. If you apply violent mechanical force to them, the cell walls will rupture.
When the balloons burst, they spill their gelatinized amylose and amylopectin directly into the surrounding liquid. Once freed from their cellular cages, these long, tangled starch molecules immediately bind together, cross-linking with the water and dairy in your pot to create a thick, sticky, cohesive network. You are no longer separating cells; you are creating a literal polymer adhesive. The more you mix, mash, and agitate, the more cells you break, and the gluier your potatoes become.
Choosing Your Fighter: The Great Potato Cultivar Debate
Most home cooks blame their technique when their potatoes fail. They think they added the milk at the wrong time or stirred too aggressively. While technique matters, the root cause of gummy potatoes is often a botanical error. Potatoes are not interchangeable. Their cellular architecture, starch composition, and water content vary wildly by cultivar.
High-Starch Potatoes: The Fluffy Champions
If you want light, fluffy, absorbent mashed potatoes, you must buy high-starch, low-moisture potatoes. The undisputed king of this category is the Russet Burbank (often sold simply as Idaho potatoes or baking potatoes).
According to USDA data and food science research, Russets boast a massive starch content of up to 22.7%. More importantly, they contain a high ratio of amylose (around 20 to 25%). Because they are so dense with starch and low in natural moisture, their cells separate incredibly easily when cooked. They crumble rather than clump. This creates a highly porous, open crumb structure that acts like a dry sponge, ready to absorb massive amounts of butter and cream without offering any gummy resistance.
Medium-Starch Potatoes: The Buttery Middle Ground
If you prefer a denser, creamier, more buttery mouthfeel rather than pure airy fluff, Yukon Golds are your best bet. Yukon Golds are medium-starch potatoes. They have slightly less starch than a Russet and slightly more water, but they possess a naturally rich, buttery flavor and a gorgeous yellow hue.
Because their cell structure is a bit more robust, Yukon Golds are actually slightly more forgiving if you accidentally over-mix them. Many professional chefs swear by a 50/50 split of Russets and Yukon Golds to achieve the ultimate balance of fluffy texture and rich flavor.
Waxy Potatoes: The Gummy Culprits
This is where people ruin their dinners before they even turn on the stove. Waxy potatoes—such as Red Bliss, fingerlings, and New Potatoes—are fantastic for roasting or tossing into a potato salad, but they are an absolute nightmare for mashing.
Waxy potatoes have a very low starch content (sometimes as low as 13%) and a very high moisture content. Their cellular structure is incredibly strong, meaning they are designed to hold their shape when boiled. Because they do not naturally crumble and fall apart, home cooks have to apply massive amounts of mechanical force to crush the lumps out of them. By the time you have finally mashed a red potato until it is smooth, you have violently ruptured millions of starch cells, practically guaranteeing a dense, gummy paste. If you have ever wondered why your roasted veggies turn mushy in the oven, it is usually a moisture control issue, but when it comes to mashing, moisture is your absolute worst enemy.
Setting the Stage: Peeling, Prepping, and the Cold Water Rule
Achieving potato perfection requires meticulous prep work. You cannot just hack up a tuber, throw it in boiling water, and hope for the best.
To Peel or Not to Peel?
If you are using Yukon Golds and want a rustic, homestyle mash, you can leave the thin skins on for added texture. However, if you are aiming for a silky, refined, restaurant-quality purée, you must peel your potatoes completely. Russet potato skins are tough, earthy, and fibrous; they have absolutely no place in a smooth mash.
Use a sharp, high-quality Y-peeler and a proper chef’s knife to cut the peeled potatoes into uniform chunks, roughly 1.5 to 2 inches in size. Do not chop them into tiny, minced pieces. Cutting them too small exposes an excessive amount of surface area to the water, causing the cells to over-hydrate and burst prematurely in the pot, leading to waterlogged mush. Also, make sure you are cutting on a proper, knife-friendly cutting board. It is baffling how many home cooks wonder why their knives get dull so fast while aggressively hacking away on cheap bamboo or glass surfaces. Treat your ingredients and your tools with respect. Once chopped, scoop up the pieces—this is exactly why you need a bench scraper in your prep arsenal—and transfer them to your cooking vessel.
The Cold Water Immersion Strategy
This is a non-negotiable rule of culinary science: never, ever drop raw potatoes into a pot of rapidly boiling water.
Potatoes are dense. If you plunge them into boiling water, the exterior of the potato will cook instantly, turning to mush and sloughing off into the water while the dense interior remains raw and crunchy. By the time the center is tender, the outside is completely waterlogged and ruined.
You must always practice starting in cold water. Place your uniform potato chunks into a large, heavy-bottomed pot and cover them with about an inch of cold water. This allows the temperature of the entire potato—from the surface to the core—to rise gradually and evenly.
Salting the Ocean
Potatoes are essentially bland sponges. As they heat up and their starch cells expand, they absorb the liquid they are cooking in. If that liquid is plain, unseasoned tap water, you will have bland potatoes. You cannot fix under-seasoned potatoes by simply dumping salt on them at the end; they will just taste like bland potatoes with salt sitting on top. You must salt the cooking water aggressively—it should taste pleasantly salty, like a mild broth. This seasons the potatoes from the inside out.
The Danger Zone: Boiling, Draining, and Drying
The cooking process is where most home cooks lose the plot. You have to monitor the heat and moisture levels meticulously.
The Gentle Simmer vs. The Rolling Boil
Once your pot of cold water and potatoes comes to a boil, immediately reduce the heat to a gentle, steady simmer. A violent, aggressive, rolling boil is a disaster waiting to happen. The intense agitation will cause the potato chunks to smash against each other and the sides of the pot, prematurely breaking them apart and forcing them to absorb excess water. You want them to cook peacefully.
(As a quick aside: you do not need a delicate, toxic nonstick pot for boiling potatoes. In fact, you are probably ruining your nonstick pans by exposing them to high-heat boiling and metal utensils anyway. Stick to a heavy, high-quality stainless steel pot or an enameled Dutch oven).
The Fork Test: Knowing Exactly When to Stop
Boil the potatoes until they are completely tender when pierced with a fork—usually about 10 to 15 minutes after the water reaches a simmer, depending on the size of your chunks. Do not undercook them, or you will have hard, crunchy lumps that refuse to mash. Do not overcook them until they are falling apart into mush in the water, or they will be irreparably waterlogged.
The Dry-Out Phase: Evaporating the Enemy
This is the single most important step that 90% of home cooks skip. Water is the mortal enemy of fluffy mashed potatoes. If your potatoes are wet when you mash them, they will be heavy, dense, and incapable of absorbing the butter and cream you are about to add.
Once the potatoes are tender, drain them thoroughly in a colander. Then, immediately return the drained potatoes to the hot, empty pot and place it back on the stove over medium-low heat. Gently toss the potatoes in the dry pot for about one to two minutes. You will see a significant amount of steam rising from the pot. This is the residual surface moisture evaporating. By drying the potatoes out, you are creating a thirsty, porous structure that is desperate to soak up fat and dairy.
Weapons of Mass Destruction vs. Tools of Perfection
Now we arrive at the actual mashing phase. The tool you choose to break down your potatoes will single-handedly dictate the final texture of the dish.
The Food Processor and Blender: Kitchen Felonies
Let me be absolutely crystal clear: do not ever, under any circumstances, put cooked potatoes into a food processor or a blender. It is a culinary felony.
These appliances operate using high-speed, razor-sharp blades that violently shear and shred everything they touch. If you put soft, swollen potatoes into a blender, the blades will instantly obliterate the delicate amyloplast cell walls, unleashing a massive flood of amylose and amylopectin. Within a matter of seconds, the machine will churn the potatoes into a shiny, gummy, cohesive glue. The hidden danger of the blender is that it is far too efficient at destruction. Save it for smoothies and soups.
The Hand Mixer: Proceed with Extreme Caution
Many of us grew up watching our mothers or grandmothers attack a pot of boiled potatoes with an electric hand mixer. While it is technically possible to get away with this if you use incredibly starchy potatoes and mix for only a few seconds, it is playing with fire.
The rapid mechanical agitation of the metal beaters acts like a centrifuge, whipping the starch cells against the sides of the bowl and tearing them open. If you leave the mixer running for even ten seconds too long, you will cross the threshold from fluffy to gummy. Do yourself a favor, eliminate the risk entirely, and stop using a hand mixer for this job.
The Traditional Potato Masher: The Old Reliable
A standard wire or perforated stainless steel potato masher is the old reliable tool of the home kitchen. It is perfectly fine if you are making rustic, chunky, homestyle potatoes. However, it relies on downward crushing force. If you are a perfectionist trying to achieve a completely lump-free purée, you will inevitably end up overworking the potatoes with the masher, repeatedly crushing the same cells until they rupture and release their starch.
The Potato Ricer: The Holy Grail of Fluffy Mash
If you want to know how high-end steakhouses and Michelin-starred restaurants achieve those impossibly silky, cloud-like, lump-free potatoes, this is why you need a ricer.
A potato ricer looks like a giant garlic press. You place the cooked potato chunks into the hopper and squeeze the handles together, forcing a plunger to extrude the potato through a plate of tiny holes. The science behind the ricer is brilliant: it applies even, downward pressure to gently separate the potato flesh into tiny, rice-like strands without grinding, shearing, or tearing the delicate cell walls.
Because the amyloplasts remain intact, the starch stays trapped inside the cells. You get a perfectly smooth, lump-free texture in a matter of seconds with zero risk of gumminess.
The “No-Go” Rule on Toxic Gear: When you buy a potato ricer, do not cheap out. I absolutely despise flimsy plastic kitchen gadgets that warp in the dishwasher or snap under pressure, and I refuse to tolerate cheap, mystery-metal tools that flake toxic coatings into your food. You must actively invest in a heavy-duty, 100% commercial-grade stainless steel ricer. We are seriously banishing toxic kitchen gear from our lives, and a solid stainless steel ricer will last you a lifetime, will not leach chemicals into your hot food, and provides the necessary leverage to process pounds of potatoes effortlessly.
The Fat Equation: Coating the Starch for Silky Perfection
You have successfully riced your potatoes without rupturing the starch cells. The final hurdle is incorporating the fat and dairy. The order in which you add these ingredients is a matter of strict scientific protocol.
The Butter-First Rule: Order of Operations
Never, ever add your milk or cream to the potatoes before the butter.
Once your potatoes are riced and sitting in a warm bowl, immediately fold in your softened, high-quality butter. Why? Because fat is hydrophobic. When you coat the warm, intact starch cells in pure butterfat, you are essentially lubricating them and creating a waterproof barrier. This protective coating prevents the starch molecules from interacting too aggressively with the water content in the milk or cream you are about to add. By adding the butter first, you are scientifically safeguarding the texture of the dish against gumminess.
Temperature Matters: Heating Your Dairy
One of the most common rookie mistakes is pulling a jug of freezing cold milk out of the refrigerator and splashing it directly into a pot of steaming hot potatoes.
When you introduce a cold liquid to hot, gelatinized starches, it causes a rapid drop in temperature. This triggers a process called starch retrogradation. The starch molecules rapidly cool, bond to one another, and seize up, causing the potatoes to become stiff, waxy, and completely unmixable.
You must always heat your dairy before incorporating it. Place your milk, heavy cream, or half-and-half in a small saucepan and warm it gently over medium-low heat until it is steaming but not boiling.
Heavy Cream vs. Whole Milk vs. Sour Cream
The liquid you choose dictates the final richness of the dish.
- Heavy Cream: Provides an ultra-luxurious, dense, restaurant-style richness. Because it is mostly fat and very little water, it drastically reduces the risk of activating the starches.
- Whole Milk: The classic choice for a lighter, everyday mash.
- Sour Cream or Buttermilk: Adding a dollop of full-fat sour cream or a splash of buttermilk at the very end introduces a beautiful, tangy acidity that cuts through the heavy richness of the butter.
The Folding Technique
When it is time to combine everything, ditch the whisk and the wooden spoon. Use a flexible silicone spatula to gently fold the warm dairy into the butter-coated potatoes. Do not beat them. Do not whip them. Gently fold the mixture just until the liquid is absorbed and the potatoes are creamy. The second it comes together, stop touching it.
The Rescue Mission: Can You Fix Gluey Mashed Potatoes?
Despite your best efforts, let’s say you rushed the process, used a waxy red potato, went crazy with a hand mixer, and now you are staring at a pot of dense, sticky, gluey paste. Can you fix it?
The Harsh Truth About Culinary Glue
I am not going to sugarcoat this: you cannot un-rupture a starch cell. Once those amyloplasts have burst and the amylose has cross-linked with the water to form a polymer gel, the chemical reaction is permanent. No amount of aggressive whisking or wishing is going to reverse the process and make them fluffy again.
However, if they are only slightly gummy, you can attempt a minor triage by gently folding in another tablespoon or two of melted butter. The extra fat can help lubricate the sticky starch strands, masking the gluey mouthfeel slightly. But do not over-mix it, or you will just make the problem worse.
The Pivot: Transforming Failure Into Culinary Art
If the potatoes are completely irredeemable as a side dish, do not throw them in the trash. A smart home cook knows how to pivot.
Because gluey potatoes are essentially a powerful starch binder, they are actually the perfect base for entirely different recipes.
- Potato Croquettes: Let the gummy potatoes cool completely in the fridge. Roll them into small balls, stuff a cube of cheese in the center, coat them in flour, egg wash, and panko breadcrumbs, and deep fry them until golden brown. The dense starch structure will hold them together perfectly in the hot oil.
- Potato Pancakes: Mix the gluey potatoes with a beaten egg, a handful of flour, some chopped scallions, and a handful of shredded cheddar cheese. Form them into patties and pan-fry them in butter until crispy on the outside.
- Soup Thickener: Freeze the gummy mash in ice cube trays and drop a cube or two into your next batch of potato leek soup or beef stew to act as a natural, gluten-free thickening agent.
The Sassy Sous-Chef’s Final Manifesto
Cooking is not magic; it is just applied science that you get to eat. When you respect the ingredients, understand the basic chemistry of how they react to heat and mechanical force, and equip your kitchen with the right tools, you completely eliminate the stress of weeknight dinners and holiday hosting.
You do not need a culinary degree to make mind-blowing food. You just need to stop taking shortcuts that destroy your ingredients. Buy the right high-starch potatoes, dry them out properly, treat them gently, and invest in the essential tools every beginner needs to succeed. Throw away the toxic gear, ditch the blenders for your side dishes, and embrace the simple, beautiful perfection of a properly riced spud. Now go put on an apron, grab some butter, and show those starches who is boss.






