
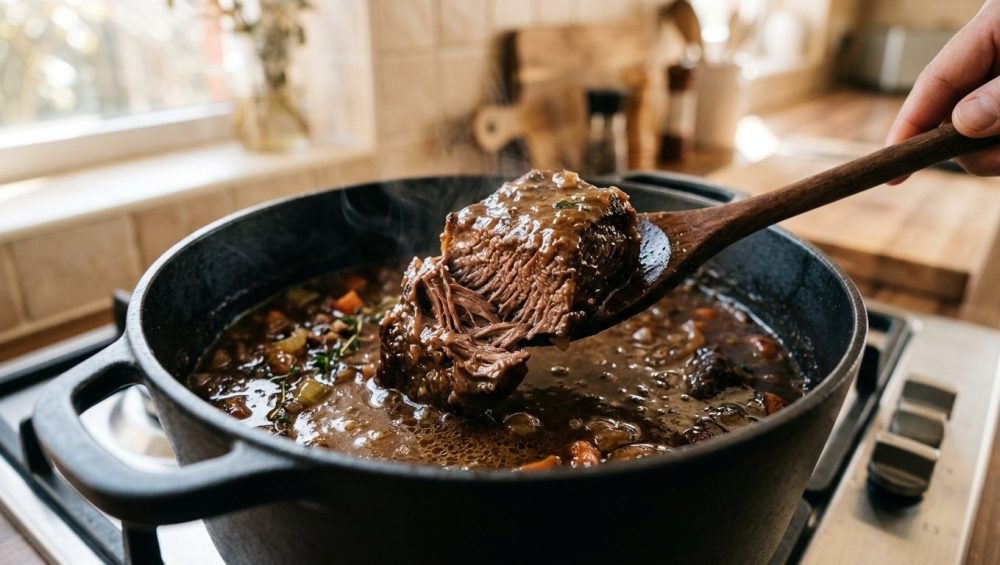
The Great Stew Deception: Why Your Hard Work Tastes Like Shoe Leather
Picture this: It is a crisp Saturday morning. You have decided that today is the day you channel your inner French countryside grandmother. You head to the butcher, drop thirty dollars on a beautifully marbled chuck roast, and spend the next hour meticulously chopping a mountain of carrots, celery, and onions. You brown the meat, deglaze the pan with a splash of that expensive Cabernet you promised yourself you wouldn’t just drink on the couch, and you submerge everything in a rich, dark beef stock. You cover the pot, crank the heat up so it bubbles away merrily, and you walk away for three hours, dreaming of the melt-in-your-mouth culinary masterpiece that awaits you.
But when you finally lift the lid and take a bite, tragedy strikes. The meat is dry. It is stringy. It requires the jaw strength of a hyena to chew. You swallow it with a heavy heart and wonder why the universe hates you. You did everything right, didn’t you? You cooked it for hours!
Welcome to the club, my friend. You have just fallen victim to one of the most common rookie kitchen mistakes in the culinary world: you boiled your braise.
As a home cook who has ruined more than my fair share of expensive dinners, I am here to tell you that you do not need a culinary degree to make a mind-blowing, restaurant-quality beef stew. What you do need, however, is a fundamental understanding of what happens to a piece of meat when it meets heat. Today, we are going to strip away the pretentious chef-speak and dive deep into the thermodynamics of your dinner. We are going to explore exactly why a rolling boil is the absolute enemy of a tender braise, and how a gentle, barely-there simmer is the only thing standing between you and a pot of luscious, fork-tender perfection. Grab a glass of wine, pull up a stool, and let’s get to work.
The Anatomy of a Stewing Cut: Meet the Hard Workers
Before we can talk about temperature control, we have to talk about the meat itself. Not all beef is created equal, and if you try to treat a chuck roast the same way you treat a filet mignon, you are going to have a very bad time.
When we make stews, pot roasts, and braises, we are almost exclusively using cuts from the heavily exercised parts of the cow. Think about the chuck (the shoulder), the brisket (the chest), and the short ribs. Cows are massive, heavy animals that spend the vast majority of their lives standing up, walking, and grazing. These specific muscle groups are doing the heavy lifting day in and day out. Because they are so active, they are incredibly dense, packed with robust muscle fibers, and laced with a vast, intricate network of connective tissue.
This connective tissue is primarily made of a protein called collagen. Think of collagen as the biological duct tape that holds the cow’s muscles together. In its raw state, collagen is incredibly tough, rigid, and unyielding. If you were to take a piece of raw chuck roast and throw it into a hot skillet for three minutes on each side like a ribeye steak, it would be virtually inedible. The muscle fibers would tighten, and the raw collagen would act like a web of rubber bands, making the meat impossibly chewy.
This presents a fascinating culinary paradox: the toughest, most heavily worked cuts of the animal are actually the ones that produce the most tender, luxurious, and flavorful stews. But this transformation only happens if you unlock the secret of the connective tissue. You have to break the collagen down, and to do that, you need a very specific combination of moisture, time, and—most importantly—precise temperature control.
The Thermal Physics of Meat: What Actually Happens in the Pot
To understand why a rolling boil destroys your stew, we need to put on our lab coats for a minute and look at the microscopic changes happening inside the pot. When you apply heat to a piece of meat, you are initiating a complex cascade of chemical and physical reactions.
Meat is essentially a sponge made of protein, filled with water and fat. The primary structural proteins in muscle fibers are myosin and actin. As the internal temperature of the meat rises, these proteins begin to denature—meaning they lose their natural structure, unfold, and then coagulate, or bond together in new, tighter formations.
At around 105°F to 140°F (40°C to 60°C), the myosin proteins begin to denature. This is the phase where the meat starts to turn from translucent and red to opaque and pink. The fibers begin to shrink slightly, and a small amount of moisture is squeezed out. At this stage, the meat is still quite juicy—this is the temperature range of a rare to medium-rare steak.
However, as the temperature continues to climb, things get violent. Between 150°F and 163°F (66°C and 73°C), the actin proteins denature. This is a critical threshold in meat science. When actin denatures, the muscle fibers shrink drastically in both length and width. According to extensive culinary research, the amount of moisture lost in meat increases exponentially once its internal temperature crosses this 150°F (66°C) mark. The fibers seize up, acting like a sponge being aggressively wrung out by a giant, invisible hand. The water inside the muscle cells is forcefully expelled into the surrounding cooking liquid.
By the time the meat reaches 212°F (100°C)—the temperature of boiling water—the muscle fibers have contracted as much as physically possible. They have expelled almost every drop of their internal moisture. The proteins have formed tight, dense, impenetrable knots. Once this happens, the moisture loss is completely irreversible. You cannot force water back into a muscle fiber that has been cooked to 212°F. It is gone forever, leaving behind a dry, chalky, rubbery texture.
The Magic of Collagen: Turning Rubber into Liquid Gold
Now, you might be looking at those temperatures and thinking, “Wait a minute. If meat loses all its moisture and gets tough at 150°F, why on earth do we cook beef stew for three hours until it reaches an internal temperature of 190°F or 200°F?”
That is a brilliant question, and the answer lies in our old friend, collagen.
While the muscle fibers (actin and myosin) are busy panicking and squeezing out all their water, the collagen is playing a completely different game. Collagen is a stubborn, triple-helix protein. It doesn’t care about a quick sear, and it doesn’t care about being rushed. It requires a sustained application of moderate heat to break down.
At around 160°F (71°C), the collagen finally starts to shiver. The rigid triple-helix structure begins to slowly unwind and dissolve. But the real magic happens when the temperature of the meat reaches the sweet spot between 180°F and 190°F (82°C and 88°C). In this range, over a prolonged period of time, the tough, rubbery collagen undergoes a miraculous chemical transformation: it melts into gelatin.
Gelatin is a hydrocolloid, which is a fancy way of saying it is a substance that binds with water to create a rich, thick, silky gel. As the collagen melts into gelatin, it weaves its way through the tightly contracted muscle fibers. It coats every single strand of the dry, well-done meat in a luscious, sticky, moisture-rich glaze.
This is the ultimate secret of braising: the meat itself is technically completely dried out and overcooked. But because the connective tissue has melted into gelatin, it feels incredibly moist, succulent, and tender in your mouth. The gelatin provides the illusion of juiciness, while also thickening the surrounding cooking liquid into a glorious, lip-smacking sauce.
But here is the catch: this conversion takes time. You cannot rush the melting of collagen. It is a function of both temperature and time. If you try to speed up the process by cranking the heat, you will trigger a culinary disaster.
The Trap of the Rolling Boil: A Culinary Crime Scene
This brings us to the ultimate villain of our story: the rolling boil.
We live in a fast-paced world. We want our food, and we want it now. When we put a pot of stew on the stove, there is a deep psychological temptation to turn the burner up to high. We see the liquid bubbling violently, we hear the aggressive hissing, and we think, “Ah, yes. It is cooking faster. I am winning.”
You are not winning. You are destroying your dinner.
A rolling boil occurs at 212°F (100°C). When you subject a piece of chuck roast to a rolling boil, two terrible things happen simultaneously. First, the extreme heat causes the actin and myosin proteins to seize up so violently and so rapidly that they form microscopic knots of impenetrable protein. They wring out their moisture so aggressively that the meat fibers become permanently tough and stringy.
Second, while the high heat might technically break down the collagen a little bit faster, the violent mechanical agitation of the boiling water physically tears the meat apart. Instead of a beautiful, cohesive piece of tender beef, you end up with a pot full of dry, shredded, gray meat fibers floating in a thin liquid. The violent bubbling also smashes your delicate vegetables into a sad, mushy pulp, leaving you with a gritty, unappetizing texture that closely resembles a pot of cloudy chicken soup.
Furthermore, a rolling boil violently churns the rendered beef fat into the cooking liquid, creating a greasy, broken emulsion rather than a silky, refined sauce. Boiling is fantastic for pasta, potatoes, and blanching green beans. It has absolutely no place in the cooking of a tough cut of meat.
The Art of the Barely-There Simmer
If boiling is the enemy, then the gentle simmer is your best friend, your savior, and the only path to stew perfection.
A simmer occurs at a much lower temperature than a boil, generally hovering between 185°F and 205°F (85°C to 96°C). However, for the absolute best results when braising or stewing meat, you want to aim for the lower end of that spectrum—around 180°F to 190°F (82°C to 88°C).
What does a perfect simmer look like? It is an exercise in restraint. You should not see a chaotic, rolling jacuzzi of bubbles. Instead, the surface of the liquid should look calm and relaxed. Every second or two, a small, lazy bubble should rise to the surface and gently pop. It should look like a tranquil hot spring. This gentle environment allows the collagen to slowly, lazily melt into gelatin over the course of several hours, without subjecting the muscle fibers to the violent, moisture-wringing trauma of 212°F heat.
Achieving and maintaining this perfect simmer on a modern stovetop is notoriously difficult. Stovetop burners—especially gas flames—are incredibly intense, and they apply all their heat directly to the bottom of the pot. This creates chaotic convection currents and hot spots, meaning the bottom of your stew might be boiling aggressively while the top is barely warm.
The foolproof solution? Move your pot to the oven.
An oven provides ambient, omnidirectional heat. It surrounds the heavy pot with a steady, even temperature. By setting your oven to a low temperature—usually between 275°F and 300°F (135°C to 150°C)—the liquid inside a heavy, covered pot will naturally settle into a perfect, undisturbed simmer of around 190°F. Just remember that residential ovens are notorious liars when it comes to temperature accuracy. Do yourself a favor and invest in a simple oven thermometer to ensure you are actually cooking at the temperature you set.
The Equipment Check: Ditch the Toxic Trash
You cannot execute a perfect, low-and-slow simmer if you are using the wrong equipment. The vessel you choose to cook your stew in is just as important as the ingredients you put inside it.
For a proper braise or stew, you need thermal mass. You need a pot that is heavy, thick, and capable of absorbing, retaining, and evenly distributing heat. The undisputed king of the braise is the enameled cast iron Dutch oven. Cast iron is a terrible conductor of heat, but it is an incredible retainer of heat. Once it gets warm, it stays warm, acting as a buffer against the temperature fluctuations of your oven or stove, ensuring that your liquid stays at that perfect, lazy simmer.
I have zero patience for cheap, lightweight aluminum pots when it comes to slow cooking. Thin metal creates aggressive hot spots that will scorch the bottom of your stew, ruining the entire batch with a bitter, burnt flavor.
Even worse are the cheap, lightweight pots coated in synthetic non-stick chemicals. These coatings are not designed to withstand hours of cooking, and they inevitably begin to scratch, peel, and flake into your food. If you want to elevate your cooking, you need to start banishing toxic kitchen gear from your cabinets immediately. A high-quality enameled Dutch oven is an investment that will literally outlive you, and it is the safest, most effective tool for the job.
Finally, the lid of your pot is crucial. A heavy, tight-fitting lid traps the steam escaping from the simmering liquid. This creates a slightly pressurized, incredibly humid environment inside the pot, which prevents the exposed tops of your meat from drying out. Many high-end Dutch ovens even feature small spikes or ridges on the underside of the lid. These are designed to catch the condensing steam and drip it evenly back down over the meat, continuously self-basting your stew as it cooks.
A Step-by-Step Masterclass to Foolproof, Melt-in-Your-Mouth Stew
Now that we understand the science of the meat, the danger of the boil, and the magic of the simmer, let’s put it all together into a foolproof, step-by-step workflow. Do not let pretentious recipe jargon intimidate you; braising is ultimately a very simple, rustic process that just requires a little bit of technique and a whole lot of patience.
Step 1: The Dry Sear
Before you do anything, you must dry your chunks of beef thoroughly with paper towels. Moisture is the enemy of browning. If you drop wet meat into a hot pan, the water will instantly turn to steam, and your steaks turn out gray, boiled, and flavorless. Heat a thin layer of oil in your Dutch oven until it is shimmering. To ensure your pan is hot enough to prevent sticking without chemical coatings, you can always rely on the water drop test. Sear the meat in small batches to avoid crowding the pan. You want a deep, dark, crusty brown on all sides. This is the Maillard reaction, and it is the foundation of your stew’s flavor.
Step 2: The Aromatic Sauté and Deglaze
Remove the browned meat and set it aside. Lower the heat slightly and toss in your mirepoix (onions, carrots, and celery). I highly recommend using a stainless steel bench scraper to easily scoop up your massive piles of chopped veggies from the cutting board directly into the pot. Sauté them in the rendered beef fat until they soften. Then, pour in a splash of wine, broth, or even a dark beer. As the liquid bubbles, use a wooden spoon to scrape up all the dark, sticky, caramelized bits stuck to the bottom of the pot. You are effectively turning burnt bits into sauce, a process chefs call deglazing. This “fond” is pure, concentrated flavor.
Step 3: The Braising Liquid
Return the meat to the pot. Now, add your primary cooking liquid (beef stock, crushed tomatoes, or more wine). Here is a crucial rule: do not drown the meat. You are braising, not boiling pasta. The liquid should come about halfway to three-quarters of the way up the sides of the meat. If you fully submerge everything in gallons of broth, you will dilute the flavor and end up with watery slow cooker meals instead of a rich, velvety stew.
Step 4: The Oven Simmer
Bring the liquid to a gentle simmer on the stovetop just to get the temperature up, then immediately cover the pot with your heavy lid and transfer it to a preheated 275°F (135°C) oven. Walk away. Do your laundry. Read a book. Let the ambient heat of the oven maintain that perfect 190°F (88°C) simmer for the next two and a half to three hours.
Step 5: The Crucial Rest
When you pull the pot out of the oven, the meat will be incredibly tender. But if you serve it immediately while it is boiling hot, the gelatin inside the meat will be completely liquefied, and the muscle fibers will still be slightly contracted from the heat. You must let the stew rest off the heat, with the lid slightly ajar, for at least 30 to 45 minutes before serving. As the temperature drops, the gelatin will begin to thicken, and the muscle fibers will relax, allowing them to reabsorb some of the flavorful cooking liquid. This resting period is the difference between a good stew and a life-changing one.
Troubleshooting Your Stew: Frequently Ruined Dinners
Even armed with the science, things can occasionally go sideways. If your weekend project didn’t turn out quite right, let’s diagnose the problem so you never make the same mistake twice.
“My meat is tough, chewy, and holds its shape perfectly when I bite it.”
You undercooked it. The collagen has not had enough time to melt into gelatin. This is a common issue when people strictly follow the cooking time on a recipe rather than checking the meat itself. Every cow is different, and some cuts require more time than others. If it is tough and chewy, put the lid back on and keep simmering. Test it with a fork every 30 minutes until it yields easily.
“My meat is dry, chalky, and falling apart into stringy shreds.”
You overcooked it, or you boiled it. Either you let the temperature spike to 212°F (100°C) and violently wrung out all the moisture, or you left it in the oven for five hours and completely melted away all the fat and gelatin into the sauce, leaving nothing behind in the meat fibers. Next time, lower the heat and check for that fork-tender sweet spot earlier.
“My sauce is thin, greasy, and lacks depth.”
You either used too much liquid to begin with, or your lid wasn’t tight enough, preventing the proper humid environment. If you find yourself with a watery sauce at the end of the cooking time, simply use a slotted spoon to carefully remove the tender meat and vegetables, set them aside, and place the pot back on the stove over medium-high heat. Let the liquid reduce uncovered until it thickens into a rich glaze, then gently fold the meat back in.
The Final Bite: Patience is Your Greatest Ingredient
Cooking a phenomenal beef stew is not about possessing elite knife skills or spending a fortune on imported truffles. It is about respecting the ingredients and understanding the basic rules of thermal physics. The connective tissues in tough cuts of meat are stubborn, but they are also incredibly rewarding if you treat them with the patience they deserve.
The next time you find yourself staring down a beautiful chuck roast, resist the urge to rush. Embrace the slow, lazy rhythm of the simmer. Let the collagen do its invisible, miraculous work. If you can master the simple art of temperature control and banish the aggressive rolling boil from your braising repertoire, you will never have to chew your way through a bowl of dry, rubbery shoe leather ever again.
Now get out of here, go buy a cheap cut of beef, and show that pot who is boss. You’ve got this.






