
The Heartbreak of the $8 Pint of Raspberries
Listen, we need to have a serious talk about one of the most universal, infuriating experiences in the modern home kitchen. You are at the grocery store on a Sunday afternoon. You are feeling inspired, healthy, and ready to conquer the week. You spot a beautiful, jewel-toned pint of fresh organic raspberries. Sure, they cost eight dollars, but you deserve them. You bring them home, place them lovingly on the top shelf of your refrigerator, and go about your business. Twelve hours later, you open the fridge door only to discover that your expensive, pristine berries have sprouted a thick, fuzzy coat of gray hair. They look less like a healthy breakfast and more like a high school science experiment gone horribly wrong.
It is absolutely maddening. It feels like a personal failure, but I am here to tell you that it is not your fault. You are fighting a biological war against microscopic enemies that are quite literally engineered to destroy your fruit.
Before you find yourself completely frustrated and throwing away sad veggies and fuzzy fruit on a weekly basis, we need to look at the hard data. The global food waste crisis is staggering. According to the UN Environment Programme’s 2024 Food Waste Index, approximately one-third of all food produced globally is lost or wasted. But here is the kicker: households generate over half of that waste. In fact, studies show that fresh fruits and vegetables account for nearly 40% of all household food waste. We are literally throwing our hard-earned money straight into the compost bin.
As a home cook who values efficiency and refuses to waste a single dime on avoidable mistakes, I have zero patience for this. It is just as frustrating as when your cheap non-stick pans keep losing their coating after a month of use. We work too hard to let our groceries rot. Fortunately, you do not need a culinary degree or a commercial blast chiller to keep your berries fresh. You just need a basic understanding of food science, a few clever prep techniques, and the willingness to spend ten minutes on a Sunday setting yourself up for success. We are going to completely overhaul your berry storage game, extend their shelf life by days (if not weeks), and reclaim your grocery budget once and for all.
The Science of Spoilage: Why Berries Are Mold Magnets
I firmly believe that anyone can cook like an expert and manage a kitchen like a pro, but to do that, you have to understand the “why” behind the “how.” Why do berries spoil so much faster than apples, oranges, or grapes? It all comes down to their unique biological structure and the relentless nature of fungal pathogens.
The Anatomy of a Berry
Berries are incredibly delicate. Unlike an apple, which is protected by a thick, waxy epidermal layer (the cuticle), berries have virtually no protective armor. Their skin is incredibly thin, highly porous, and covered in microscopic stomata and micro-cracks. This leaves them entirely exposed to the elements.
Furthermore, berries have an extraordinarily high surface-area-to-volume ratio. A single strawberry has a massive amount of surface area relative to its actual weight, which maximizes the physical space where microbes can attach and colonize. To make matters worse, as berries are handled during picking, packing, and shipping, they experience micro-abrasions. These tiny wounds allow their natural sugars (fructose and glucose) to migrate outward, forming a sticky, microscopic film of sugar on the outside of the fruit. You are basically serving up an all-you-can-eat buffet for mold spores.
Meet the Enemy: Botrytis Cinerea and Friends
The primary villain ruining your breakfast is a necrotrophic fungal pathogen known as Botrytis cinerea, commonly referred to as gray mold. This fungus is omnipresent. Its spores are floating in the air, resting on the soil at the farm, and sitting quietly on the surface of the fruit when you buy it. Botrytis cinerea is particularly insidious because it can thrive in a wide variety of conditions. While it loves warmth and humidity, it does not simply die when you put it in the refrigerator. Below 40°F (4°C), its growth slows down significantly, but it does not stop entirely.
Once a single spore finds a micro-wound on a damp, sugary berry, it germinates. It penetrates the weak cellular walls of the fruit and begins to consume it from the inside out, spreading rapidly to neighboring berries. This is why a single bad raspberry can infect an entire pint in a matter of hours.
The Moisture and Respiration Problem
Berries are living, breathing organisms, even after they have been harvested. They undergo cellular respiration, taking in oxygen and releasing carbon dioxide and moisture. When you buy berries in those tightly packed plastic grocery store clamshells and toss them straight into the fridge, you are creating a disaster zone.
As the berries breathe, they release moisture. Because the plastic clamshell lacks proper airflow, that moisture has nowhere to go. It condenses on the plastic and drips right back down onto the fruit. Botrytis cinerea needs free moisture to germinate. By leaving your berries in their original packaging, you are trapping them in a humid microclimate that acts as an incubator for mold.
The Grocery Store Gauntlet: How to Pick the Best Berries
Your battle against mold does not begin in your kitchen; it begins in the produce aisle. If you bring home compromised fruit, no amount of scientific washing techniques will save it. You need to be ruthless when selecting your produce.
The Flip-and-Inspect Method
Never, ever grab the first container of berries off the top of the stack. You need to pick up the clamshell and perform a full 360-degree inspection. Look at the berries from the top, the sides, and the bottom. You are looking for a single fuzzy spot, a shriveled berry, or any sign of dull, wrinkled skin. If you see even one speck of mold, put the container back. The spores have already spread to the rest of the batch, even if you cannot see them yet.
When you get home, you must immediately sort through the batch. If you find a bruised or mushy berry, pull it out. If you need to trim away a tiny blemish on a strawberry to save the rest of it, do it immediately. Just make sure you are using a razor-sharp paring knife. When your kitchen knives get dull, you end up crushing and bruising the delicate flesh of the fruit rather than slicing it cleanly, which just creates more entry points for mold.
Checking the Absorbent Pad
Pay close attention to the little absorbent pad sitting at the bottom of the plastic clamshell. This pad is designed to soak up excess moisture, but it is also a massive red flag. If the pad is heavily stained with dark red, purple, or blue juices, it means the berries at the bottom of the container have already been crushed under the weight of the fruit above them. They are weeping their sugary juices, and they are already beginning to rot. Look for a container where the pad is mostly clean and dry.
The Ultimate Berry Washing Masterclass: Destroying Spores Before They Grow
Let me be perfectly clear: rinsing your berries under a cold running tap for three seconds before you eat them is a rookie mistake. Plain water does absolutely nothing to kill mold spores, and it certainly does not remove the sticky biofilm of agricultural dust and natural sugars that the mold feeds on. To actually extend the shelf life of your fruit, you need to intervene chemically or thermally.
The Diluted Vinegar Bath
This is the gold standard of home kitchen berry preservation. Rinsing your berries in a diluted vinegar solution is a scientifically validated, high-return method that can extend refrigerated shelf life by several days and drastically reduce the incidence of visible mold.
The science is simple but highly effective. The acetic acid in vinegar lowers the pH of the water, creating an acidic environment that disrupts the biofilm matrix that Botrytis cinerea and other spoilage organisms use to colonize the surface of the fruit. It physically washes away the field dust, the residual sugars, and the latent spores.
Here is the exact method:
- The Ratio: Mix 3 parts cold water to 1 part white vinegar in a large, clean bowl. Do not use apple cider vinegar. Apple cider vinegar contains natural particulates and has a highly variable pH (anywhere from 3.3 to 3.7). Standard distilled white vinegar has a stable, highly acidic pH of 2.4 to 2.6, making it far more effective for this specific task.
- The Soak: Submerge your berries in the solution. For delicate, thin-skinned fruit like raspberries and blackberries, do not leave them in the bath for more than 30 to 60 seconds. If you soak them too long, the acid will begin to break down their fragile cell walls, turning them to mush. For thicker-skinned blueberries, you can push the soak to 1 to 2 minutes.
- The Rinse: Immediately transfer the berries to a colander and rinse them thoroughly under cold, running water for at least 30 seconds to remove any residual vinegar flavor.
The Baking Soda Alternative
If you are highly sensitive to the smell of vinegar, or if your primary concern is removing pesticide residue rather than just preventing mold, you can use an alkaline bath. A recent 2026 study highlighted by environmental health researchers suggests that a baking soda wash is incredibly effective at degrading certain classes of pesticides found on the surface of non-organic berries.
Mix 1 teaspoon of baking soda into 2 cups of cold water. Submerge the berries for 30 to 60 seconds (again, keeping it brief for fragile berries so they do not absorb the solution), and then rinse thoroughly. The alkaline nature of the baking soda helps break down the chemical structure of surface pesticides while also mechanically washing away mold spores.
The Thermotherapy (Hot Water) Bath
If you want to get truly nerdy and utilize a method championed by legendary food scientist Harold McGee, you can use thermotherapy. This method uses precise heat to instantly kill mold spores without actually cooking the fruit.
You must use a reliable digital instant-read thermometer for this. Do not guess the temperature by touching the water. Fill a stainless steel saucepan with water and heat it gently over the stove. (Do not attempt to mix boiling and cold water in a glass bowl to reach the right temperature; if you shock cold glass with boiling water, you might find your glass baking dish shattered into a thousand dangerous pieces).
Bring the water to exactly 125°F (52°C). Submerge your strawberries, raspberries, or blackberries in the hot water for exactly 30 seconds. Remove them immediately with a slotted spoon or spider skimmer. For blueberries, because of their thicker skins, you can raise the water temperature to 140°F (60°C) for 30 seconds. This brief blast of heat is lethal to surface mold spores but is not sustained long enough to penetrate the flesh and cook the berry.
The Drying Phase: Moisture is the Ultimate Enemy
Washing your berries is only half the battle. If you put wet berries into the refrigerator, you have just wasted your time. Moisture is the ultimate enemy. Wet berries equal dead berries. You must ensure they are bone dry before they go into storage.
The Salad Spinner Trick
For sturdy berries like blueberries and firm strawberries, the salad spinner is your best friend. However, you cannot just throw them in the plastic basket and crank the handle, or you will bruise them severely.
Line the basket of your salad spinner with three thick layers of high-quality paper towels. Place the washed berries in a single, even layer on top of the paper towels. Do not pile them up. Spin the handle gently. The centrifugal force will pull the heavy water droplets off the skin of the fruit, while the paper towels provide a soft cushion to prevent bruising and immediately wick away the moisture.
The Towel-Lined Tray Method
For incredibly fragile raspberries and blackberries, skip the spinner. Lay out a clean, dry, lint-free kitchen towel on a rimmed baking sheet. Gently spread the berries out in a single layer so they are not touching each other. Let them air dry on the counter for 30 to 60 minutes.
Do not take shortcuts here. Never place soaking wet berries directly onto a wooden surface to dry. Wood is porous, and leaving standing water on it is exactly why your wooden cutting board keeps cracking and warping over time. Stick to a towel-lined metal baking sheet. You want the ambient air to evaporate every last drop of surface moisture. If you trap wet fruit in a container, it will rot instantly—just like how your fresh herbs get slimy and disgusting when you leave them suffocating in a damp plastic produce bag.
Storage Solutions: Banish Toxic Plastic and Embrace Airflow
Now that your berries are pristine and perfectly dry, we need to talk about where they are going to live for the next week. As I mentioned earlier, the plastic clamshell they came in is garbage. Throw it into the recycling bin immediately.
The “No-Go” Rule on Toxic Plastic Containers
I am a massive advocate for banishing toxic kitchen gear from your home, and that starts with cheap plastic storage containers. Flimsy plastic tubs warp in the dishwasher, scratch easily, and are notorious for leaching endocrine-disrupting chemicals (like BPA and phthalates) into your food, especially when exposed to acidic ingredients.
Furthermore, plastic is naturally lipophilic (it attracts oils and fats). Unlike high-quality glass, cheap plastic containers stay greasy and hold onto old food odors no matter how aggressively you scrub them. You do not want your delicate, expensive raspberries tasting like last week’s leftover garlic chicken.
Glass, Vents, and Moisture-Wicking: The Holy Trinity of Storage
You must invest in high-quality borosilicate glass storage containers. Glass is non-porous, completely non-toxic, and naturally cool, which helps regulate the temperature of the fruit.
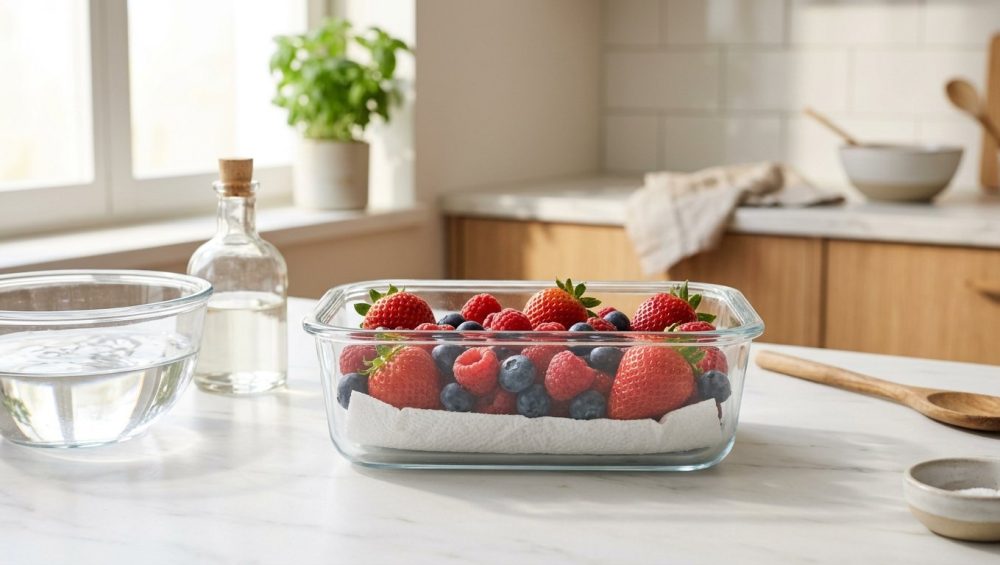
To create the ultimate berry storage environment, line the bottom of your glass container with a dry, folded paper towel. This acts as a moisture-wicking safety net to catch any residual humidity or condensation that forms in the fridge. Place your dry berries gently on top of the paper towel.
Next, you need to manage airflow. If you seal the glass container with a heavy, airtight lid, you will trap the carbon dioxide and moisture produced by the respiring fruit. You must allow the berries to breathe. If your container has a vented silicone lid, pop the vent open. If you are using a standard glass container, simply leave the lid slightly ajar or cracked open at one corner. This allows the excess humidity to escape while keeping the berries protected.
Having a beautifully organized dream kitchen isn’t just about making your fridge look like a Pinterest board; it is about creating functional, highly efficient systems that save you money and keep your ingredients fresh.
Berry-Specific Strategies: Not All Fruit is Created Equal
While the general rules of washing and drying apply across the board, different berries have different personalities. You cannot treat a rugged blueberry the same way you treat a delicate raspberry.
Strawberries: The Divas of the Fridge
Strawberries are high-maintenance. Their skin is incredibly porous, and they act like little sponges. The most important rule for strawberries is to leave their green leafy tops (the calyx) intact until the exact moment you are ready to eat them. The top acts as a natural seal. The second you cut the top off, you expose the inner flesh to oxygen and moisture, and the berry will begin to degrade rapidly. Wash them, dry them thoroughly, and store them whole.
Raspberries and Blackberries: The Fragile Sponges
These are aggregate fruits, meaning they are made up of dozens of tiny individual drupelets clustered together around a hollow core. This complex structure creates hundreds of microscopic crevices where water and mold spores can hide. They are extraordinarily fragile. When washing them in the vinegar solution, limit the soak to 30 seconds max. Do not use a salad spinner. Air dry them exclusively, and when transferring them to your glass container, handle them as if you are moving delicate glass ornaments.
Blueberries: The Resilient Cousins
Blueberries are the tough guys of the berry world. They have a thicker, slightly more durable skin covered in a natural, powdery white coating called “bloom.” This bloom is actually a natural barrier that helps protect the fruit from insects and bacteria. Because of their hardier nature, blueberries can withstand a slightly longer vinegar soak (up to 2 minutes) and can handle the gentle cycle of a salad spinner without bursting. They also have a naturally longer shelf life, often lasting up to two weeks when stored properly in a vented glass container.
What to Do When Time is Money: Weekday Shortcuts
I get it. You are a busy professional. Sometimes, you come home from the grocery store on a Tuesday night at 7:00 PM, and the idea of setting up a diluted vinegar bath and lining trays with paper towels feels like an insurmountable chore. Time is money, and when you are exhausted, you need practical shortcuts.
The “Eat It First” Hierarchy
If you want to eliminate kitchen chaos and avoid wasting food when you simply do not have time to prep, you must adopt the “Eat It First” hierarchy. If you buy mixed berries and toss them straight into the fridge unwashed, you need to consume them in the exact order of their biological perishability.
- Raspberries: Eat these within 24 to 48 hours. They will not survive the week.
- Blackberries: You have about 2 to 3 days.
- Strawberries: You can usually push these to day 4 or 5 if they are kept dry.
- Blueberries: Save these for the end of the week. They will happily wait for you until Friday.
The Emergency Freeze
If you reach Thursday and realize you have a half-pint of strawberries and a handful of raspberries that are looking dangerously close to the edge, do not throw them away. Execute the emergency freeze.
Wash them quickly, dry them as best as you can, and hull the strawberries. Line a bare aluminum or stainless steel baking sheet with parchment paper. Spread the berries out in a single layer so they are not touching. Place the entire baking sheet into the freezer for two hours. This is called Individually Quick Freezing (IQF). Once they are frozen solid like little marbles, you can transfer them into a glass freezer-safe container or a heavy-duty silicone freezer bag. Because you froze them individually first, they will not clump together into a massive, unusable iceberg. You can scoop out exactly what you need for your weekend smoothies, oatmeal, or baking projects.
Conclusion: Reclaiming Your Grocery Budget
Cooking beautiful, mind-blowing food at home does not require a culinary degree, but it does require respect for your ingredients. Fresh berries are a luxury, a nutritional powerhouse, and a culinary delight. They deserve better than being left to rot in a suffocating plastic clamshell at the back of your crisper drawer.
By taking just ten minutes after your grocery run to implement a science-backed vinegar bath, thoroughly air-drying your fruit, and upgrading to breathable, non-toxic glass storage, you are actively fighting back against the staggering statistics of household food waste. You will save money, you will always have pristine garnishes for your weekend baking projects, and you will never have to experience the heartbreak of a fuzzy eight-dollar pint of raspberries ever again. Now, pour yourself a glass of wine, get out your glass containers, and go give your berries the spa treatment they deserve.






