
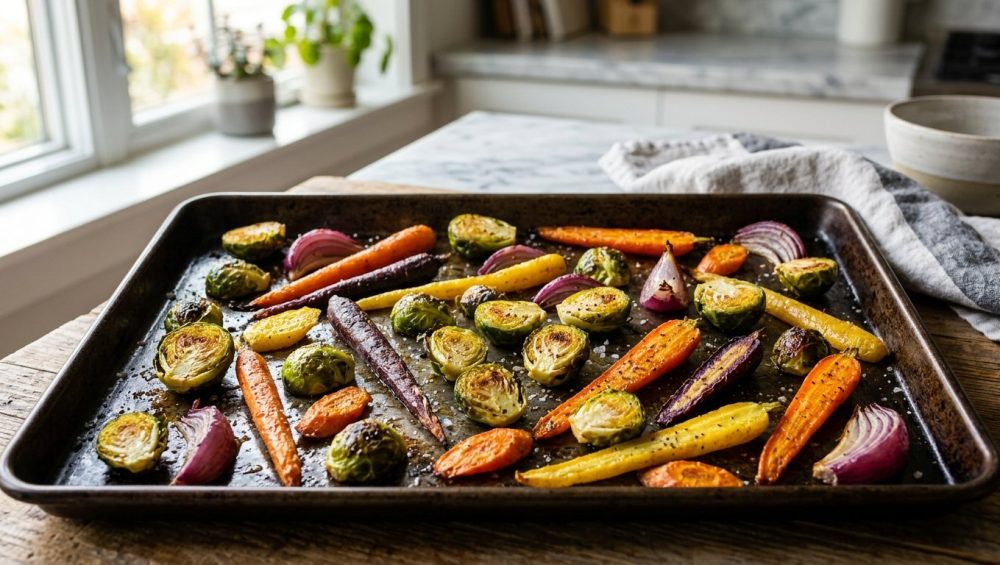
Listen up, weekend warriors and weeknight survivalists. We need to have a serious, intervention-style conversation about the sad, limp, depressing state of your side dishes. You went to the farmers market or the grocery store. You spent your hard-earned money on beautiful, vibrant produce. You chopped it up with the best of intentions, tossed it in the oven, and fully expected to pull out those glorious, caramelized, crispy-edged bites of heaven that you get at that overpriced farm-to-table restaurant downtown.
Instead, forty-five minutes later, you opened the oven door and pulled out a tray of mush. A watery, beige, uninspiring tragedy that looks less like a roasted vegetable and more like something that belongs in a hospital cafeteria.
I have zero patience for pretentious chef-speak, and I am not going to tell you to source artisanal, cold-pressed, single-origin finishing oils or spend four hours meticulously carving your carrots into perfect geometric shapes. We are everyday home cooks. Time is money, especially on a Tuesday night when you are just trying to get a decent meal on the table without wanting to pull your hair out. But here is the truth: you do not need a culinary degree to make mind-blowing food. You just need to understand basic, foundational kitchen science. If you are tired of throwing away sad veggies that your family refuses to eat, pull up a chair. Grab a glass of wine. We are going to permanently fix your roasting routine, banish the mush, and achieve absolute textural perfection.
The Soggy Veggie Epidemic: Why We Are All Suffering
The reason your vegetables are turning to mush has nothing to do with your cooking skills and everything to do with thermodynamics. You are fundamentally misunderstanding what is happening inside your oven. Most home cooks treat their oven like a magical hot box where raw things go in and cooked things come out. But roasting is an active, aggressive, and highly volatile chemical process.
When you complain that your vegetables are “soggy,” what you are actually complaining about is that they have been boiled in their own juices. You set out to roast, but you accidentally built a miniature steam room on your baking sheet. To fix this, we have to stop looking at recipes and start looking at the chemistry of heat transfer. We need to talk about the Maillard reaction, the cellular structure of produce, and why water is the ultimate enemy of flavor.
The Kitchen Science: Steaming vs. Roasting (and the Maillard Reaction)
Let’s get nerdy for a second, because understanding this single concept will transform you from a recipe-follower into a kitchen artist. The glorious, deep, savory flavor and crispy brown edges you want on your vegetables are the result of a chemical process called the Maillard reaction.
Discovered by French chemist Louis Camille Maillard in 1912, this is a complex non-enzymatic browning process where amino acids (the building blocks of proteins) and reducing sugars react under heat to create hundreds of entirely new, complex flavor compounds called melanoidins. This is the exact same reaction that makes a seared steak taste better than a boiled steak, and what makes a crusty loaf of baked bread taste better than raw dough.
But here is the catch—and it is a massive catch: The Maillard reaction does not kick into high gear until the surface temperature of the food reaches roughly 280°F to 330°F (140°C to 165°C). If your vegetables never reach this temperature, they will never brown. They will simply get hot, soft, and sad.
The Enemy of Crispiness: Water
So, what stops your vegetables from reaching 280°F? Water.
Water is the ultimate buzzkill for the Maillard reaction. As we all learned in middle school science class, water evaporates at 212°F (100°C) at sea level. As long as there is liquid water sitting on the surface of your food, the temperature of that surface physically cannot exceed 212°F. The thermal energy from the oven goes into turning the liquid water into steam, rather than raising the temperature of the vegetable’s surface.
Now, let’s look at the actual biological makeup of the produce you are trying to roast. Vegetables are essentially just structural cellulose holding together massive amounts of water. Zucchini is a staggering 95% water. Celery is 95% water. Broccoli and cauliflower hover around 91% to 92% water. Carrots are 87% water, and even dense, starchy potatoes are 79% water.
When you put these items in the oven, you are quite literally trying to roast water balloons. As the heat penetrates the vegetable, the cell walls break down and release all of that internal moisture onto the surface of the food and the surface of your pan. If you do not manage that moisture correctly, your vegetables will sit in a 212°F puddle, completely locked out of the 280°F Maillard browning zone.
The Maillard Reaction: Your Golden Ticket
To achieve that restaurant-quality char, we have to evaporate that surface moisture as violently and rapidly as possible so the temperature can break through the 212°F barrier and climb into the Maillard zone. Every single technique, trick, and strict rule I am about to teach you is designed to manipulate this one scientific principle. We are going to control the water, maximize the heat transfer, and force that browning reaction to happen.
Culprit #1: The Crowded Pan (Social Distancing for Vegetables)
The single most frequent mistake I see home cooks make is treating their sheet pan like a clown car. You chop up two massive heads of broccoli, a pound of carrots, and an entire onion, and you pile them all onto one standard baking sheet. They are overlapping, stacked on top of each other, and packed edge-to-edge.
One of the most common beginner cooking mistakes is ignoring the physical space required for evaporation. When vegetables are touching, the moisture that escapes from their cell walls gets trapped in the microscopic crevices between them.
The Micro-Climate of a Baking Sheet
When a water molecule transitions from a liquid to a gas, it expands massively in volume. If your vegetables are crowded, this rapidly expanding steam displaces the dry, hot air of your oven. You have essentially created a localized, high-humidity micro-climate right on top of your pan. The vegetables in the center of the tray are completely insulated from the oven’s dry heat; they are cooking in a 212°F steam envelope.
Vegetables need social distancing. You must leave at least a quarter-inch of empty metal space between every single piece of produce on that pan. The hot, dry air of the oven needs to circulate completely around each piece to carry the evaporated moisture away. If you have too many vegetables for one pan, use two pans. If you only have one good pan, roast in batches. Cramming them all together to save time is a false economy—you aren’t saving time, you are just guaranteeing a terrible dinner.
Culprit #2: Wimpy Oven Temperatures
I do not know who started the rumor that 350°F (175°C) is a good temperature for roasting vegetables, but I would like to have a strong word with them. 350°F is for baking delicate banana breads, setting custards, and gently warming up casseroles. It is absolutely useless for roasting produce.
Why 350°F is a Joke for Roasting
When you put a tray of cold, wet, 90%-water vegetables into a 350°F oven, the ambient temperature inside the oven plummets. The relatively low heat struggles to evaporate the massive influx of moisture leaking from the produce. By the time the oven recovers and the surface water finally evaporates, the internal structure of the vegetable has already turned to complete mush. You end up with something that is soft all the way through, with absolutely no surface browning.
You need high, aggressive heat. 400°F (200°C) is the absolute bare minimum for roasting, and for high-moisture vegetables, I regularly crank my oven to 425°F (220°C) or even 450°F (230°C). This blast of intense thermal energy flash-evaporates the surface moisture the second it bleeds out of the cell walls, allowing the exterior to rapidly reach the 280°F Maillard zone and crisp up before the interior has a chance to turn into baby food.
Culprit #3: The Wrong Oil and the Wrong Amount
Oil serves a very specific mechanical purpose in roasting. The surface of a cut vegetable is not perfectly flat; it is jagged and porous on a microscopic level. The surface of your baking pan is also not perfectly flat. If you place a dry vegetable on a dry pan, only the highest microscopic peaks of the food touch the metal. Air fills the gaps, and air is a terrible conductor of heat.
Oil acts as a thermal bridge. It fills in those microscopic gaps, creating a continuous, highly conductive link between the hot metal pan and the cold vegetable, accelerating heat transfer.
However, you must use the right fat. Because we are roasting at 425°F or higher, you cannot use unrefined oils with low smoke points (like extra virgin olive oil, which will smoke, burn, and taste bitter). Use avocado oil, light (refined) olive oil, or melted ghee.
More importantly, do not ever use cheap aerosol cooking sprays. Those cans are filled with propellants and emulsifiers like soy lecithin, which polymerize under high heat and form a sticky, impossible-to-remove lacquer on your cookware. If you are tired of ruining your nonstick pans and baking sheets with that brown, gummy residue, throw the aerosol cans in the trash immediately. Use real, liquid oil and toss your vegetables in a mixing bowl to coat them evenly.
Fat is Flavor, But Don’t Drown Them
There is a delicate balance here. If you use too little oil, the vegetables will stick to the pan and burn drily. If you use too much oil, the vegetables will act like sponges, absorbing the fat and becoming incredibly greasy and heavy. A good rule of thumb is 1 to 2 tablespoons of oil per pound of vegetables. You want them glistening and lightly coated, not swimming in a greasy pool.
Culprit #4: Cutting Inconsistencies
Let’s talk about knife skills. I am not asking you to become a Michelin-starred prep cook, but size consistency is non-negotiable. If you chop one piece of sweet potato into a massive two-inch boulder, and the next piece into a delicate quarter-inch sliver, they are going to cook at completely different rates. By the time the boulder is tender, the sliver will be a piece of blackened carbon.
If your kitchen knives go dull, you end up hacking and sawing your produce into wildly uneven, jagged shapes because you lack the control to make precise cuts. Keep your chef’s knife sharp, and take the extra two minutes to ensure your pieces are roughly the exact same size.
Surface Area is Everything
When you chop, you also need to think about geometry. The Maillard reaction happens where the food touches the hot pan. Therefore, more surface area touching the pan equals more crispy, caramelized goodness.
Do not leave your vegetables round. If you are roasting Brussels sprouts, cut them in half so they have a large, flat face to press against the metal. If you are roasting carrots, slice them on a sharp bias (diagonally) to elongate the cut and maximize the flat surface area. Invest in a razor-sharp carbon steel Y-peeler to quickly strip away tough outer skins, and then intentionally cut your produce to create large, flat geometric planes.
Culprit #5: Toxic, Warped, and Flimsy Baking Sheets
This is my absolute biggest pet peeve, and it is a hill I will gladly die on. If you are trying to roast vegetables on a cheap, flimsy, dark-colored, peeling non-stick baking sheet that you bought at a discount store ten years ago, you are setting yourself up for failure.
Throw Away Your Peeling Non-Stick Garbage
First of all, non-stick coatings (like PTFE/Teflon) are not designed for the aggressive 425°F to 450°F heat required for proper roasting. At these temperatures, cheap coatings begin to degrade, off-gas toxic fumes, and flake off into your food.
Secondly, those cheap pans are made of incredibly thin “mystery metals” or low-grade steel. When exposed to the thermal shock of a hot oven and cold, wet vegetables, the thin metal expands unevenly. If your baking sheets keep warping in the oven—twisting and popping with a loud bang that sounds like a gunshot—it means your pan is too thin. When a pan warps, the oil pools in the sunken corners, leaving half your vegetables to burn drily on the elevated ridges while the other half deep-fries in a puddle of grease.
Furthermore, dark-colored pans absorb too much radiant heat from the oven elements. A dark pan will aggressively scorch the bottoms of your vegetables long before the internal structure has had time to cook through.
The Heavy-Duty Aluminum Solution
You must use bare, uncoated, heavy-gauge aluminum baking sheets (specifically, 18-gauge, 13-gauge, or 10-gauge commercial half-sheet pans).
Here is the science: pure aluminum has a thermal conductivity of approximately 237 W/m·K. Stainless steel, depending on the specific alloy, hovers around a dismal 15 W/m·K. This means that heavy-duty aluminum transfers heat roughly 15 times faster and more efficiently than stainless steel.
When you place food on an aluminum pan, the metal rapidly and evenly pumps thermal energy across its entire surface, eliminating hot spots. More importantly, it has incredible thermal recovery. When you drop cold, wet vegetables onto the metal, the pan’s temperature drops. Aluminum rebounds almost instantly, recovering its heat to keep the evaporation process moving. Insulated or steel pans suffer from severe thermal lag; they stay cold for minutes, leaving your food to steam. Buy a commercial aluminum half-sheet pan. They cost less than twenty dollars, they will never peel toxic flakes into your food, and they will outlive you.
The Masterclass Technique: How to Get Restaurant-Quality Crispiness
Now that we have covered the science, the tools, and the prep, it is time to execute. This is the definitive, foolproof, step-by-step masterclass protocol for achieving shatteringly crisp, perfectly caramelized roasted vegetables every single time.
Step 1: The Pre-Heat Trick (The Ultimate Hack)
Do not put cold food on a cold pan and put it into a hot oven. That is a recipe for steaming. Instead, place your clean, empty heavy-duty aluminum sheet pan into the oven while the oven is preheating to 425°F. Let the pan sit in there for at least ten to fifteen minutes so it absorbs a massive amount of thermal energy.
When you carefully remove the blazing hot pan and immediately drop your oil-coated vegetables onto it, you will hear a loud, aggressive sizzle. This simple act of preheating the pan jumpstarts the moisture evaporation process instantly. The bottoms of your vegetables begin browning the exact second they make contact with the metal, shaving minutes off your cook time and preventing the internal mushiness that comes from lingering in the oven too long.
Step 2: The Cornstarch Dusting (For Extra Crunch)
This is the secret weapon that restaurants use and home cooks rarely know about. After you have tossed your dry, chopped vegetables in oil and your preferred spices, you are going to dust them with cornstarch. The golden ratio is exactly 1 tablespoon of cornstarch per pound of raw vegetables. Toss them thoroughly in the mixing bowl until the white powder completely disappears into the oil coating.
This isn’t a gimmick; it is food physics in action. Cornstarch is composed of two types of carbohydrates: amylose and amylopectin. It is the amylose molecules that do the heavy lifting. Even after you pat your vegetables dry with a paper towel, they retain up to 18% surface moisture. When the cornstarch granules hit that residual moisture and are exposed to the high heat of the oven, they absorb the water, expand, and gelatinize at around 140°F (60°C).
As the water evaporates, this gelatinized starch hardens into a microscopic, heat-stable matrix. This matrix physically inhibits steam from reabsorbing into the vegetable’s surface and drastically accelerates the Maillard reactions. The result is a thin, shatteringly crisp crust that mimics the texture of deep-frying.
Crucial Warning: Do not substitute regular wheat flour or baking powder. Wheat flour contains gluten proteins that will brown too quickly, burn, and form a brittle, gummy crust that falls off the vegetable. Cornstarch is pure starch with no gluten, making it the only reliable, scientifically proven option for this technique.
Step 3: The Flip (Or Lack Thereof)
Once your vegetables are on the hot pan and in the oven, leave them alone. I see so many nervous cooks opening the oven door every five minutes to aggressively stir and flip the pan. Every time you open the oven door, you let out massive amounts of heat, dropping the ambient temperature and stalling the evaporation process.
Furthermore, the Maillard reaction takes time and sustained, uninterrupted contact with the hot metal. If you constantly flip the vegetables, no single side gets enough continuous heat exposure to develop a deep, caramelized crust. Let them roast completely undisturbed for at least 15 to 20 minutes before you even think about checking them. When you see a deep, dark brown crust forming on the bottom edges, you can give them a single, gentle toss with a thin metal spatula to promote even cooking on the other sides.
Step 4: The Finishing Touch (Acid and Salt)
Timing your seasoning is critical. Salt is hygroscopic, meaning it draws water out of plant cell walls through osmosis. If you aggressively salt your vegetables in the mixing bowl and then let them sit on the counter for ten minutes while you prep other things, they will sweat. They will dump a massive amount of water into the bowl, washing away your oil and cornstarch coating and guaranteeing a soggy result. Toss your vegetables with salt at the very last possible second before they hit the hot pan.
Once they come out of the oven, perfectly crisp and deeply browned, they will taste incredibly savory and rich. To balance those heavy, roasted notes, you need acid. A squeeze of fresh lemon juice, a splash of sherry vinegar, or a drizzle of balsamic glaze applied right before serving will brighten the entire dish and elevate it from a basic side to a culinary masterpiece.
Vegetable-Specific Roasting Cheatsheets
Not all vegetables are created equal. You cannot treat a dense, dry potato the same way you treat a watery, delicate zucchini. Here is how to adjust the masterclass protocol for the three main categories of produce.
Root Vegetables (Potatoes, Carrots, Beets, Parsnips)
These are dense, starchy, and have a relatively low water content (ranging from 79% to 87%). Because they are so hard, they require a longer cooking time to soften the internal structure.
- Temperature: 400°F to 425°F (200°C to 220°C).
- Time: 30 to 45 minutes, depending on the size of your cuts.
- Strategy: You do not need a drawer full of useless gadgets to prep these; just a few reliable beginner kitchen tools like a sharp knife and a good peeler. Cut them evenly, use the cornstarch trick, and let them go long and slow enough for the starches inside to break down into sweet sugars.
Cruciferous Veggies (Broccoli, Cauliflower, Brussels Sprouts)
These vegetables hover around 91% water and have incredibly complex physical structures. Broccoli and cauliflower have tightly packed florets that are prone to burning long before the thick, fibrous stems are tender.
- Temperature: 425°F (220°C).
- Time: 20 to 25 minutes.
- Strategy: Cut flat faces into the stems to maximize pan contact. Be generous with the oil here, as the florets act like sponges and will dry out and incinerate if they are not properly lubricated.
High-Moisture Nightshades and Summer Squash (Zucchini, Bell Peppers, Eggplant)
This is the danger zone. Zucchini is an astonishing 95% water. Eggplant is 92% water. These are the vegetables that turn to mush if you look at them wrong.
- Temperature: 450°F (230°C).
- Time: 15 to 20 minutes.
- Strategy: You must use the absolute highest heat possible to flash-evaporate the water before the delicate flesh disintegrates. Cut them into much larger, thicker pieces than you think you need, because they will shrink drastically as they lose water. The pre-heated pan trick and the cornstarch dusting are absolutely mandatory here. Do not crowd the pan, or you will end up with vegetable soup.
The Weekday Time-Saving Strategy
I know what you are thinking. “This is great for a Sunday, but I don’t have time to meticulously manage moisture and pre-heat pans on a Tuesday night after a nine-hour workday.”
I hear you. Time is money, and weeknight cooking is about survival. But you can still achieve this texture with smart prep. The secret to weekday roasting is doing the knife work ahead of time without ruining the cellular structure of the produce.
Prepping Ahead Without Sacrificing Texture
You can chop all of your broccoli, cauliflower, carrots, and root vegetables on Sunday afternoon. However, you must store them completely dry. Line an airtight glass container with a dry paper towel, place the chopped vegetables inside, and put another paper towel on top before sealing the lid. The paper towels will absorb the ambient humidity in the fridge, keeping the surfaces of the vegetables bone-dry.
Never toss your pre-chopped vegetables in oil, salt, or cornstarch ahead of time. If you do, the salt will pull the moisture out, the cornstarch will turn into a gluey paste, and the oil will penetrate the flesh, turning them rancid and mushy.
When Tuesday night rolls around, your oven preheats (with the empty aluminum pan inside) while you change out of your work clothes. You pull the perfectly dry, pre-chopped vegetables from the fridge, dump them in a bowl, quickly toss them with oil, cornstarch, and salt, and throw them straight onto the hot metal. You have just achieved restaurant-quality, shatteringly crisp, perfectly caramelized roasted vegetables with exactly three minutes of active weeknight labor.
Stop accepting soggy, steamed, mediocre side dishes. Respect the science, respect your produce, and go roast something beautiful.






