
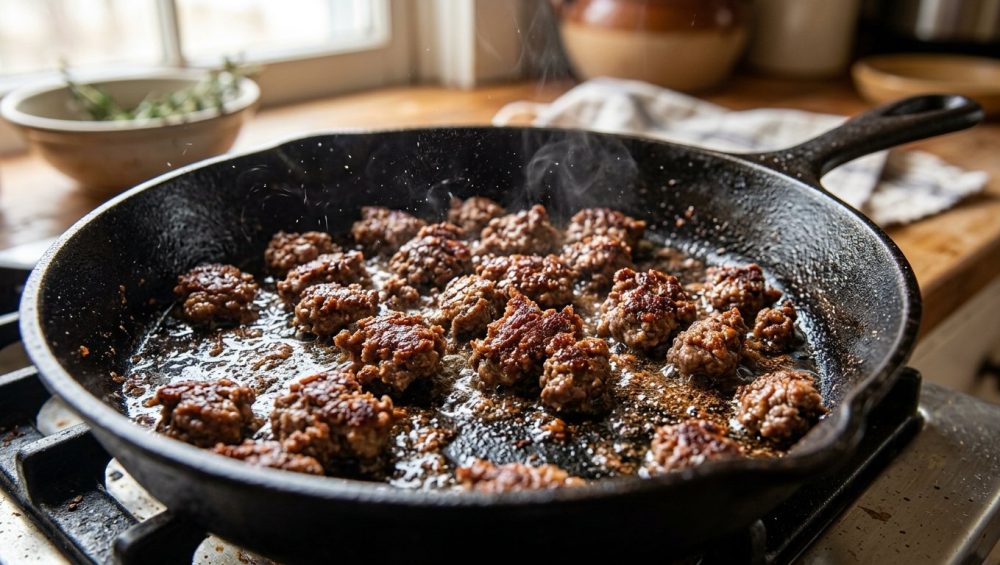
Let’s set the scene. It is a rainy Tuesday evening, you are exhausted from back-to-back meetings, and you just want to throw together a quick batch of tacos or a simple meat sauce for pasta. You grab a package of ground beef from the fridge, heat up a pan, and dump the meat in. You grab your spatula and start hacking away at it.
And then, the tragedy begins.
Instead of a satisfying, aggressive sizzle, you hear a sad, wet sputtering sound. Within seconds, your pan fills with a murky, grey pool of mystery liquid. Your beef isn’t searing; it is aggressively simmering in its own juices. By the time the liquid finally evaporates, your meat is a pile of bouncy, grey, flavorless crumbles that taste suspiciously like wet cardboard. You sigh, dump a packet of sodium-laden taco seasoning over the mess to hide your culinary sins, and call it dinner.
Grab a glass of wine and pull up a stool, because we need to have a serious intervention. As a home cook who has made every mistake in the book (and set off the smoke alarm enough times to traumatize my cat), I am here to tell you that it does not have to be this way. You do not need a culinary degree to make mind-blowing, steakhouse-quality ground beef on a random weeknight. You just need a basic understanding of kitchen physics, a heavy pan, and the patience to step away from the stove.
Today, we are going to completely deconstruct the science of why your ground meat turns into a swamp, and I am going to teach you the exact, foolproof techniques to achieve a deeply savory, caramelized, crispy crust every single time.
The Science of the Swamp: Why Your Meat is Boiling
To understand how to fix the problem, we first have to understand the chemistry of flavor. The deep, savory, roasted flavor we all crave in a good piece of meat comes from a magical little process called the Maillard reaction.
Named after French chemist Louis-Camille Maillard, who first described it in 1912, this is a complex non-enzymatic browning process where amino acids and reducing sugars react under high heat. This reaction creates thousands of brand-new flavor compounds, giving browned food its distinctive aroma and taste. It is the reason a seared steak tastes infinitely better than a boiled one, and it is the reason toasted bread tastes better than raw bread.
But here is the catch: the Maillard reaction requires high heat. Specifically, it only kicks into high gear when the surface temperature of the food reaches between 280°F and 330°F (140°C to 165°C).
Now, let us look at your pan of grey ground beef. Standard supermarket ground beef is packed with water—sometimes up to 20% or 30% by weight. When you dump that cold, wet meat into a pan, the water immediately begins to seep out. Because water boils at 212°F (100°C), the temperature of your pan physically cannot rise above 212°F as long as there is liquid water present. The thermal energy of your stove is being entirely wasted on forcing a phase change (evaporating water into steam) rather than browning your meat.
Until every last drop of that liquid evaporates, your meat is trapped in a 212°F sauna. It is thermodynamically impossible for the Maillard reaction to occur. This liquid barrier is the exact reason your steams instead of browning. By the time the water finally boils off, the proteins in the beef have already tightly contracted, turning the meat tough, rubbery, and completely overcooked.
Culprit #1: The Toxic Trap of Cheap Cookware
Before we even talk about cooking techniques, we need to talk about your equipment. If you are trying to brown ground beef in a flimsy, ten-dollar, peeling non-stick aluminum pan, you are setting yourself up for failure—and potentially poisoning yourself in the process.
I have a strict “no-go” rule in my kitchen when it comes to toxic gear, and I am a relentless advocate for banishing toxic kitchen gear from your life forever. Traditional non-stick pans are coated with PTFE, a synthetic polymer that belongs to a family of chemicals known as PFAS, or “forever chemicals”. Recent 2026 studies have only reinforced what we have suspected for years: these chemicals accumulate in the environment and the human body, and they are linked to a horrifying laundry list of health issues. Worse, when a non-stick pan gets even a single tiny scratch, it can release millions of microplastic and nanoplastic particles directly into your food.
Health hazards aside, cheap non-stick pans are structurally incapable of properly browning meat. Aluminum is a highly conductive metal, meaning it heats up fast, but it has terrible heat retention (thermal mass). When you drop a pound of cold, wet ground beef into a thin aluminum pan, the pan’s temperature instantly crashes. It lacks the stored thermal energy required to quickly evaporate the surface moisture and recover its heat. Furthermore, if you crank the heat on a thin pan to compensate, you will quickly find that your cheap frying pans keep warping, leaving you with a wobbly skillet that cooks unevenly.
And please, do not even get me started on the danger of aerosol cooking sprays. The soy lecithin and propellants in those cans polymerize onto the surface of your cookware under high heat, creating a sticky, impossible-to-remove residue that destroys whatever non-stick properties the pan originally had.
The Fix: You need cookware with massive heat retention. You need a pan that laughs in the face of cold meat. You need cast iron, thick carbon steel, or heavy-duty multi-clad stainless steel. These materials absorb and hold onto heat like a thermal battery. When the meat hits the pan, the temperature stays high, the moisture evaporates instantly, and the Maillard reaction begins almost immediately.
Culprit #2: The Overcrowding Epidemic
Let us assume you have a beautiful, heavy cast iron skillet. You heat it up, you drop in two pounds of ground beef, and… it still boils. Why? Because you committed the cardinal sin of pan-frying: you overcrowded the pan.
Surface area is the most valuable real estate in your kitchen. When meat cooks and releases moisture, that moisture needs an escape route. If the entire bottom of your skillet is covered by a wall-to-wall blanket of ground beef, the steam has nowhere to go. It gets trapped underneath the meat, forcing the beef to boil from the bottom up.
I know that when you are rushing to get a weeknight dinner on the table, the idea of cooking in batches sounds like a form of psychological torture. Time is money, and standing over a stove for an extra ten minutes is annoying. But I promise you, the flavor payoff is astronomical.
The Fix: If you are cooking more than one pound of ground beef, you must either cook it in two batches, or you must use a massive 12-inch or 14-inch skillet. You want at least 25% of the pan’s surface area to remain exposed so that steam can vent freely into the air rather than suffocating your food.
Culprit #3: The Compulsive Stirring Syndrome
There is a strange psychological phenomenon that occurs when home cooks stand in front of a stove. We feel an overwhelming, uncontrollable urge to do something. We think that if we are not actively prodding, flipping, tossing, and hacking at our food, we are not actually cooking.
Put the spatula down. Take a step back. Take a sip of your wine.
Every single time you move that ground beef, you are breaking its thermal contact with the hot metal. You are resetting the Maillard reaction clock back to zero. Browning takes time, and it requires sustained, uninterrupted heat. If you constantly stir the meat into tiny little pebbles the second it hits the pan, you are exposing every single side of the meat to the pan all at once, causing it to release all of its moisture simultaneously.
The Fix: You have to stop stirring your ground beef. When you first put the meat in the pan, treat it like one giant smash burger. Press it down into a flat, even layer, and then leave it completely alone for at least three to four minutes. Let a deep, dark, crusty bottom form before you even think about breaking it up.
The Ultimate Weeknight Hack: The Baking Soda Miracle
Now that we have covered the physics of the pan and the psychology of stirring, it is time to introduce you to a brilliant, borderline magical chemistry hack that will completely change your weeknight cooking routine.
If you want to guarantee that your meat stays incredibly juicy while developing a steakhouse-level crust, you need to use the baking soda trick. Also known as “velveting,” this technique has been used in Asian cuisines for decades to tenderize cheap cuts of meat, and it works absolute wonders on ground beef.
Here is the science: Meat is naturally slightly acidic. When acidic muscle proteins are exposed to high heat, they denature and tightly bundle together. Imagine a wet sponge being violently squeezed by a giant fist. That is what is happening to the proteins in your beef, which is why all the water gets forcefully expelled into your pan.
Baking soda is an alkaline powder (a base). When you toss your raw ground beef with a tiny amount of baking soda, you raise the pH level on the surface of the meat. In a higher pH environment, the proteins are chemically altered; they cannot bond together as tightly when heated. Because the proteins do not contract as violently, the meat acts less like a squeezed sponge and more like a locked vault, retaining its natural moisture.
Furthermore, the Maillard reaction actually occurs much faster and more efficiently in alkaline environments. So not only does the baking soda keep the water inside the meat where it belongs, but it also accelerates the browning process on the outside. Exactly how baking soda transforms your stir-fries, it will transform your chili, your tacos, and your ragu.
The Formula: For every one pound of ground beef, dissolve 1/4 to 1/2 teaspoon of baking soda in 1 tablespoon of water. Pour this slurry over the raw ground beef, gently mix it in with your hands, and let it sit on the counter for 15 minutes before cooking.
Step-by-Step Masterclass: Achieving the Perfect Sear
We have covered the theory. Now, let us put it into practice. Here is your definitive, step-by-step masterclass for cooking ground beef perfectly every single time, optimizing for maximum flavor and zero stress.
Step 1: Prep and the Baking Soda Treatment
Take your ground beef out of the fridge. Do not cook ice-cold meat straight from the refrigerator, as this will drop the temperature of your pan too drastically. Place the meat in a bowl, mix up your baking soda slurry (1/4 tsp baking soda + 1 tbsp water per pound of meat), and gently fold it into the beef.
Do not over-mix or knead the meat, or it will become tough and dense. Just toss it enough to distribute the liquid. Let the bowl sit on the counter for 15 minutes. Use this time efficiently to prep your aromatics—chop your onions, mince your garlic, and get your spices ready. And please, use a sharp knife and a proper wooden or plastic cutting board. Hard bamboo boards are notorious for ruining your knives by rolling the delicate microscopic edge of the blade.
Step 2: Preheating the Heavy Artillery
Place your heavy cast iron, carbon steel, or stainless steel skillet on the stove over medium-high heat. Let it preheat dry for a few minutes.
If you are using a stainless steel pan, you must ensure it is hot enough before adding any oil or meat, otherwise, the beef will fuse to the metal like superglue. Use the water drop test to check the temperature. Flick a few drops of water into the pan. If the water sizzles and evaporates instantly, the pan is too cold. If the water forms into perfect little mercury-like beads that glide and dance across the surface without evaporating, you have achieved the Leidenfrost effect. Your pan is perfectly preheated.
Add a splash of high-smoke-point cooking fat (like beef tallow, avocado oil, or clarified butter). Do not use extra virgin olive oil, as it will burn and turn bitter at these temperatures. Swirl the oil to coat the bottom of the pan.
Step 3: The Smash and Sear
Gently place your baking-soda-treated ground beef into the center of the hot pan. Using a stiff metal spatula, press the meat down firmly until it forms one large, flat, even patty that covers the pan (leaving some space around the edges for steam to escape).
Now, step away. Do not touch it. Do not poke it. Do not stir it.
Let the meat sear aggressively for 3 to 4 minutes. You will see the edges start to turn a deep, dark brown, and you will hear a sharp, crackling sizzle. Because you used the baking soda hack, you will notice an astonishing lack of liquid pooling in the pan. The moisture is staying inside the meat, and the surface is frying in the rendered beef fat.
Step 4: The Flip and Crumble
Once a gorgeous, mahogany crust has formed on the bottom, slide your metal spatula underneath the giant patty. If you are using stainless steel and the pan was preheated correctly, the meat will release effortlessly, proving that you can make a pan actually non-stick using just heat management.
Flip the patty over in large sections. Now, you finally have permission to use your spatula to break the meat apart into crumbles. Let the newly exposed raw sides sear for another 1 to 2 minutes until the pink is just barely gone.
Step 5: Seasoning at the Right Time
Notice how we have not added salt yet? That was intentional. Salt is a desiccant; it draws moisture out of cell walls through osmosis. If you heavily salt raw ground beef right before it hits the pan, you are actively encouraging the meat to release its water, creating the very swamp we are trying to avoid.
salting ground beef too early is a classic rookie error. Now that the meat is browned and the proteins have set, you can aggressively season it with kosher salt, freshly ground black pepper, and whatever spices your recipe calls for.
Advanced Flavor Building: Finishing the Beef
At this point, you have a pan full of deeply caramelized, incredibly juicy, perfectly browned ground beef. You could eat it straight out of the skillet, but since we are making a meal, let us build some complex layers of flavor.
If your beef rendered an excessive amount of fat (common with 80/20 or 73/27 blends), you can tilt the pan and spoon out the excess. However, leave at least a tablespoon or two of that liquid gold in the pan, because fat equals flavor, and fat carries fat-soluble flavor compounds (like those found in spices and aromatics).
Look at the bottom of your skillet. You will see a dark, sticky, brown residue clinging to the metal. In culinary terms, this is called the fond. It is pure, concentrated umami. Do not wash this away!
Lower the heat to medium. Push the browned beef to the edges of the pan to clear a space in the center. Drop in your diced onions and a pinch of salt. The moisture from the onions will begin to release, helping to loosen that fond. Sauté until the onions are translucent. Next, add a dollop of tomato paste and your dry spices (like cumin, chili powder, or oregano) directly to the hot fat in the center of the pan. Let them sizzle and “bloom” for 45 seconds. Cooking tomato paste and spices in fat before adding liquid removes their raw, metallic edge and unlocks a massive depth of flavor.
Finally, deglaze the pan. Pour in a splash of liquid—this could be beef broth, a glug of dry red wine, or even just a quarter cup of water. As the liquid hits the hot pan, it will instantly boil. Use your wooden spoon to scrape up all that beautiful brown fond from the bottom of the pan, dissolving it into the liquid to create a rich, glossy coating that wraps around every single crumble of beef.
The Wrap-Up
Cooking a phenomenal weeknight meal does not require expensive ingredients, hours of prep, or a stressful, chaotic kitchen environment. It simply requires working with the science of your food rather than fighting against it.
By ditching the toxic non-stick pans, managing your pan’s real estate, utilizing the baking soda chemistry hack, and having the sheer willpower to stop stirring your meat every five seconds, you have officially conquered one of the most common hurdles in home cooking.
No more grey puddles. No more steamed, rubbery crumbles. Just rich, savory, deeply caramelized beef that forms the perfect foundation for your chili, your tacos, and your pasta sauces. Now go pour yourself another glass of wine, plate up your masterpiece, and enjoy the fact that you just out-cooked your favorite takeout joint on a Tuesday night.






