
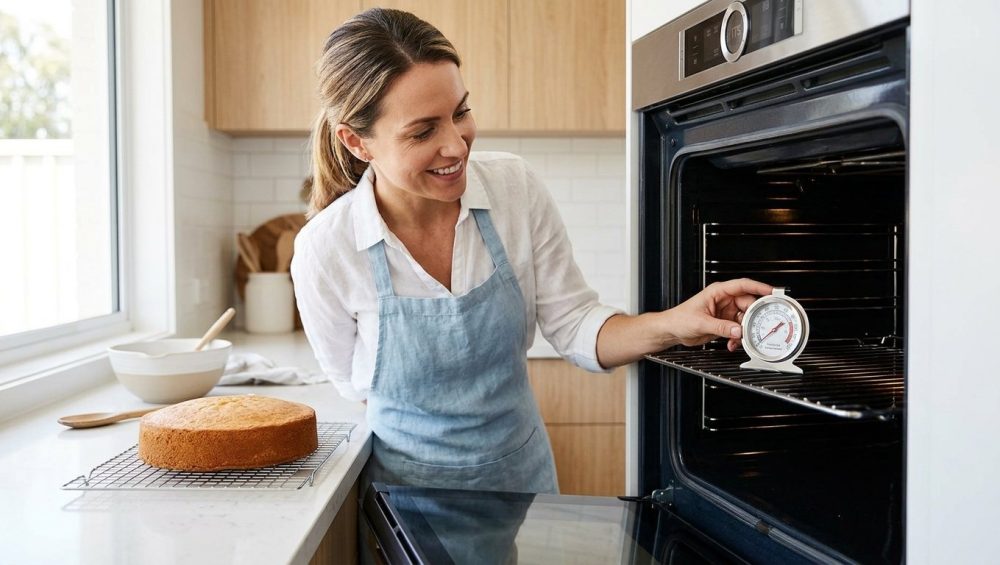
Let’s get one thing straight right out of the gate: your oven is a liar. I know, it hurts to hear. You paid good money for that sleek, stainless steel box. You wait patiently for it to chime, beep, or sing its little digital song to announce that it has reached a perfect 350°F. You slide your carefully prepared casserole or weekend baking project onto the rack, expecting culinary perfection. And then, 45 minutes later, you pull out a dish that is charred on the edges and aggressively raw in the center.
You blame yourself. You think you’re just a bad cook. But pour yourself a glass of wine and listen to me: it is not your fault. You do not need a culinary degree to make mind-blowing food, but you do need good data. And right now, the appliance you trust most in your kitchen is feeding you fabricated numbers.
The truth is, home ovens are notoriously inaccurate, often missing their target temperatures by up to 50 degrees. But before you start looking up the cost of a full kitchen remodel, take a deep breath. You can absolutely cook like an expert in a standard home kitchen, and the solution to your temperature woes costs less than your favorite bottle of weekend Pinot Noir. It’s time to talk about the unsung hero of the culinary world: the simple, inexpensive, and entirely mechanical oven thermometer.
The Great Appliance Lie: Why Your Oven’s Thermostat is a Fraud
To understand why your oven is betraying you, we have to look at how it actually functions. When you set your oven to 350°F, you are probably picturing a gentle, consistent wave of heat that brings the entire internal cavity to that exact temperature and holds it there perfectly.
That is a fairy tale.
In reality, your oven operates on a system of aggressive ambient heat cycling. When you turn it on, the heating element (whether gas or electric) blasts at full power. The internal thermostat sensor—which is almost always tucked away in the top rear corner of the oven cavity, nowhere near where your food actually sits—monitors the rising heat. Because heat rises, that top corner gets very hot, very fast.
Once that little sensor registers 350°F, it triggers the “preheated” beep and shuts the heating element off. Here is the massive problem: the air at the very top of the oven might be 350°F, but the heavy metal walls, the racks, and the bottom of the oven are still practically cold. Your oven contains anywhere from 40 to 75 pounds of steel and ceramic thermal mass. It takes a solid 20 to 30 minutes for that mass to absorb enough energy to radiate consistent heat. If you put your food in the second you hear that beep, you are dropping it into a cold zone.
Furthermore, once the heat shuts off, the temperature inside the oven immediately begins to plummet. It will drop 15, 20, or even 30 degrees below your target before the thermostat finally panics, clicks the heating element back on, and blasts the heat again. This means your oven temperature is constantly bouncing up and down like a hyperactive toddler on a sugar rush. This erratic cycling is exactly why your cakes are dense and underbaked.
The Physics of Betrayal: How Oven Sensors Actually Work (And Fail)
Let’s talk about that internal sensor for a moment. Most modern ovens use a thermistor or a thermocouple—electronic sensors that read the temperature of the air immediately surrounding them. They are designed to react instantly.
While that sounds great in theory, it’s terrible for practical cooking. The instant a blast of hot air from the heating element hits that sensor, it thinks the entire oven is a blazing inferno. Conversely, the second you open the oven door to check on your dinner, all the hot air escapes, cold air rushes in, and the sensor assumes you’ve suddenly relocated your kitchen to the Arctic Circle. It overcompensates by firing the heating element at maximum capacity, which inevitably scorches the bottom of whatever you are trying to bake.
To make matters worse, factory calibration is notoriously sloppy. Over time, the internal components degrade, and the sensor drifts. It is incredibly common for a home oven to run 50 degrees hotter or colder than what the digital display claims. When you are trying to quickly roast dinner on a Tuesday night, time is money. You cannot afford to wait an extra 25 minutes because your oven is secretly running at 310°F instead of 400°F. This is precisely why your chicken always turns out dry—you end up leaving it in longer to compensate for a weak oven, completely ruining the texture.
Enter the Hero: The Bimetallic Coil Oven Thermometer
If your oven’s built-in digital brain is a neurotic mess, how do you find out what the real temperature is? You rely on good, old-fashioned physics. You need a standalone bimetallic coil oven thermometer.
I know, it sounds like a piece of equipment from a steampunk novel, but it is actually a brilliantly simple and robust piece of technology. Inside the circular dial of the thermometer is a small coil made of two different metals—usually brass and steel—bonded together. These two metals have different coefficients of thermal expansion. In plain English, this means that as they get hot, one metal expands faster and stretches more than the other.
Because they are fused together, this uneven expansion forces the coil to physically curl or uncurl. That mechanical movement is directly attached to the needle on the face of the dial. As the temperature rises, the coil tightens or loosens, and the needle sweeps across the numbers to show you the exact heat.
Why is this simple mechanical device vastly superior to your oven’s fancy digital sensor? Because it is slow.
Yes, you read that right. The bimetallic coil takes a little time to absorb the heat and physically move. It does not react to sudden, momentary spikes or drops in air temperature. Instead, it measures the average ambient heat over time. It essentially smooths out the chaotic peaks and valleys of your oven’s heat cycles, giving you the true, functional temperature of the space where your food is actually cooking.
The “No-Go” Rule on Toxic Kitchen Gear
Now, before you run out and buy the first thermometer you see, we need to have a serious talk about kitchen safety. You know I have a strict, zero-tolerance policy for cheap, toxic kitchenware. I absolutely despise mystery metals, peeling non-stick coatings, and cheap plastics that off-gas noxious fumes the second they get hot.
When shopping for an oven thermometer, you must buy one made entirely of high-quality, food-grade stainless steel with a tempered glass face. Do not buy flimsy, imported junk with plastic housing or painted dials that will blister and smoke at 450°F. If you are going to put something inside a hot box where your food is cooking, it needs to be completely inert and safe. A solid stainless steel bimetallic thermometer will cost you maybe ten to fifteen dollars, and it will last a lifetime. Don’t cheap out on safety.
The Anatomy of a Ruined Meal (What Happens When You Cook Blind)
Cooking without an accurate thermometer is like driving down the highway blindfolded. You might get to your destination, but it’s going to be a stressful, messy ride. Let’s break down exactly how a lying oven sabotages your meals.
The Baking Disasters
Baking is chemistry, and chemistry requires precise thermal triggers. If your oven is running 25 degrees too cold, the butter in your dough will melt and spread out long before the flour proteins have a chance to set. This is the exact reason your cookies spread into giant puddles on the pan.
If your oven is running 40 degrees too hot, the outside of your baked goods will rapidly caramelize and form a hard crust, trapping the moisture inside. The leavening agents (like baking powder or yeast) will fire off too aggressively, causing a rapid rise that the structure cannot support. The result? The center collapses, which is exactly why your banana bread sinks into a dense, gummy brick. Furthermore, extreme unexpected heat spikes are the main reason your glass baking dish shattered into a million pieces during what was supposed to be a relaxing Sunday meal prep.
The Roasting Catastrophes
When you toss a pan of broccoli or Brussels sprouts into the oven, you want the high heat to rapidly evaporate the surface moisture, triggering the Maillard reaction to create those gorgeous, crispy, browned edges. But if your oven is secretly running cool, you aren’t roasting; you are steaming. The vegetables just sit there, stewing in their own juices. If you are constantly wondering why your roasted veggies are mushy, I can almost guarantee your oven isn’t hitting the 425°F you asked for.
The same goes for pastry. Making a beautiful, flaky crust requires the fat to hit a blast of high heat so it creates little pockets of steam. If the oven is weak, the fat just melts into the flour, which is a major reason your pie crust is always tough and greasy instead of light and shatteringly crisp.
The Weeknight Dinner Delay
I am a firm believer that on a Tuesday night, efficiency is everything. Time is money. If a recipe says a sheet pan dinner takes 25 minutes, it should take 25 minutes. But if your oven is running 30 degrees cold, you will pull that pan out, realize the potatoes are still rock hard, and have to shove it back in for another 15 minutes. Now the kids are whining, you are stressed, and the joy of cooking has completely evaporated. Knowing your true oven temperature allows you to adjust the dial before you put the food in, keeping your weeknight schedule strictly on track.
How to Actually Test and Calibrate Your Oven Like a Pro
Alright, you have your shiny new stainless steel bimetallic coil thermometer. Now it is time to put your oven to the test. We are going to map out exactly how your appliance behaves so you can take back control of your kitchen.
Step 1: The Proper Placement
Do not hang the thermometer in the very back corner, and do not shove it against the side wall. You want to place it exactly where your food is going to be. Position your oven rack right in the middle, and hang the thermometer from the wire directly in the center.
Step 2: The 30-Minute Preheat Test
Turn your oven on and set it to 350°F. Now, walk away. When the oven inevitably beeps ten minutes later to tell you it is “ready,” ignore it. Look through the glass door (do not open it!) and read the thermometer. I promise you, it will likely read somewhere around 275°F to 300°F.
Leave the oven running for a full 30 minutes. This gives the heavy metal walls time to absorb the heat and allows the ambient temperature to stabilize.
Step 3: Tracking the Heat Cycles
After 30 minutes, look at the thermometer through the glass. Let’s say it reads 340°F. Now, watch it over the next ten minutes. You will see the temperature slowly drop, perhaps down to 325°F. Then, you will hear the heating element click on, and the temperature will rise, perhaps shooting up to 365°F before the element clicks off again.
To find your oven’s true average temperature, you take the high number (365) and the low number (325), add them together, and divide by two. In this scenario, your oven’s true average is 345°F. It is running 5 degrees cool. That is actually incredibly accurate for a home oven! But if your average comes out to 310°F, you have a massive problem.
Step 4: The Bread Test for Hot Spots
Even if your average temperature is correct, ovens have notoriously uneven heat distribution. To map your oven’s hot and cold spots, buy a cheap loaf of sliced white bread. Lay the slices out flat, completely covering the middle rack of your oven. Turn the oven to 350°F and let them toast for 10 to 15 minutes.
When you pull the rack out, you will have a perfect thermal map of your oven. The slices that are burnt black reveal your aggressive hot spots (usually near the back or directly over the heating element). The slices that are still pale and soft reveal your cold zones. Knowing where these spots are allows you to rotate your pans intelligently, which is the secret to preventing uneven baking and is exactly why your baking sheets keep warping during long roasting sessions.
Step 5: Adjusting the Calibration
If your thermometer reveals that your oven is consistently running 25 degrees cold, you don’t necessarily have to call an expensive repair technician. You can simply do the math in your head and set the dial to 375°F when a recipe calls for 350°F.
However, if you have a modern digital oven, you can actually recalibrate the internal brain yourself! Check your owner’s manual (or Google your specific model number). Most digital ovens have a hidden menu—usually accessed by pressing and holding the “Bake” button or a combination of the “Settings” keys for a few seconds. This will bring up a calibration offset menu, allowing you to manually adjust the thermostat up or down by as much as 35 degrees. It is a five-minute fix that will permanently solve your baking woes.
The Toxic Trap: What NOT to Put in Your Oven
While we are discussing the environment inside your oven, I need to address a disturbing trend I see all over social media. People are constantly trying to “hack” their oven cleaning routines by lining the bottom of the appliance with cheap, non-stick silicone mats or aluminum foil.
Stop doing this immediately.
Your oven is a high-heat environment. Those cheap, imported non-stick liners are often coated with toxic chemicals (like PFAS or Teflon derivatives) that begin to break down and off-gas dangerous fumes when exposed to the extreme localized heat of the lower baking element. Not only are you risking your health, but these liners also block the radiant heat from the bottom element, severely disrupting the airflow and temperature accuracy we just worked so hard to fix.
Similarly, be incredibly wary of using aerosol cooking sprays inside your oven. The propellants and emulsifiers in those cans build up into a sticky, polymerized resin on the walls of your oven and on your cookware. This nasty residue is a nightmare to clean and is the number one culprit behind ruining your nonstick pans. Stick to high-quality, pure cooking oils, and let your oven operate exactly as it was engineered to.
And while we are talking about accurate tools, do not forget that ambient heat is only half the battle. If you are roasting a large cut of meat, the ambient air temperature doesn’t tell you when the meat is safe to eat. You need an accurate internal probe. If you are relying on an old, uncalibrated dial probe that you inherited from your grandmother, there is a very high chance your meat thermometer is lying to you just as badly as your oven is. Upgrade to an instant-read digital thermocouple for your food, and leave the bimetallic coil to monitor the ambient air.
Conclusion: Take Back Your Kitchen
Cooking should be a joy, not a stressful guessing game where you cross your fingers and pray that the center of your lasagna isn’t frozen solid. You do not need to be a Michelin-starred chef to produce incredible meals in your own home. You just need to stop trusting appliances that lie to you, and start relying on hard, verifiable data.
A simple, stainless steel bimetallic coil oven thermometer is the cheapest, most effective culinary upgrade you will ever make. It empowers you to take absolute control over your kitchen’s heat. It saves you from the frustration of ruined ingredients, it rescues your weeknight timeline, and it finally proves that those baking disasters weren’t your fault after all.
So pour that glass of wine, hang that little mechanical marvel on your center rack, and get back to cooking with absolute confidence. You’ve got this.






