
Look, let’s just address the elephant in the kitchen right out of the gate: nobody wants to bite into a piece of focaccia that has the structural integrity of a memory foam mattress. You’ve seen the viral videos. You’ve watched smug bakers on the internet effortlessly poke their fingers into a cloud of dough, producing a golden, bubbly, olive-oil-soaked masterpiece. Then, you try it on a Sunday afternoon, and your bread comes out looking like a pale, dense paving stone.
I know exactly why it happened. You rushed the process, you used the wrong flour, you starved the dough of water, and you probably baked it in a terrible pan. But don’t panic. Take a breath, pour yourself a glass of wine, and listen to me. You do not need a French culinary degree to make bread that makes people weep with joy. You just need to understand a few basic principles of baking science, ditch your fear of sticky dough, and completely rethink how you handle your ingredients.
Today, we are leaving the dense, heavy bread behind. We are going to break down the absolute, non-negotiable rules of high-hydration baking. More importantly, we are going to transform the act of making focaccia from a stressful kitchen chore into the ultimate centerpiece for a mindful, interactive weekend gathering. By the time we are done, you will be hosting bread board parties that will make your friends think you secretly apprenticed in a Ligurian bakery.
The Science of Hydration: Why Your Dough is a Brick
If there is one single secret to achieving that airy, open crumb with massive, cavernous bubbles, it is water. Focaccia is not a sandwich loaf. It is not a tight, structured roll. It is essentially a puddle of highly developed gluten suspended in hydration. If your bread is dense, it is because your dough was too dry.
Understanding Baker’s Math
In the baking world, we don’t measure things by volume. If you are still using cups to measure your flour, we need to have a serious intervention. Depending on how tightly packed your flour is, a “cup” can vary in weight by up to 30 percent. If you want professional results, you must ditch the measuring cups and start measuring ingredients by weight.
Bakers use a system called “Baker’s Percentages,” where the total weight of the flour represents 100%, and every other ingredient is calculated as a percentage of that flour weight. A standard sandwich bread might sit around 60% to 65% hydration. For a truly spectacular focaccia, we need to push that hydration to 80%, 90%, or even a terrifying 93%.
To put that into perspective: if you are using 500 grams of flour, an 85% hydration dough requires 425 grams of water. When you mix this, it will not look like dough. It will look like a shaggy, uncontrollable swamp monster. Your instincts will scream at you to add more flour. Ignore your instincts. That extreme moisture is exactly what turns into steam in the oven, forcing the dough to rapidly expand and creating those beautiful, airy pockets.
The Flour Factor: Stop Using the Weak Stuff
You cannot trap 85% hydration in a weak net. This brings us to your flour choice. Standard all-purpose flour typically hovers around 10% to 11.5% protein. While you technically can make focaccia with it, the resulting structure will be delicate, and it will struggle to hold onto massive amounts of water without collapsing.
If you want the chewy, robust texture of an authentic Italian focaccia, you need bread flour. Bread flour (often labeled as strong flour or baker’s flour) clocks in at 12.5% to 14% protein. When you mix this high-protein flour with water, two specific proteins—glutenin and gliadin—bond together to form gluten. Glutenin provides elasticity (the snap-back), while gliadin provides extensibility (the stretch). This strong, elastic gluten network acts like a million tiny balloons inside your dough, trapping the carbon dioxide produced by the yeast and the steam generated by the water.
The Art of the Proof: Patience is a Virtue You Don’t Have
Weekday cooking is all about efficiency, shortcuts, and getting dinner on the table before you collapse. Weekend baking is the exact opposite. Great bread requires time. If you try to mix, proof, and bake a focaccia in three hours, it will taste like slightly salty cardboard. Flavor development is a biological process, and you cannot rush biology.
The Cold Fermentation Miracle
Yeast (Saccharomyces cerevisiae) is a living organism. When it eats the starches in your flour, it burps out carbon dioxide gas (which makes the bread rise) and alcohol (which gives it flavor). If you let your dough rise on a warm kitchen counter, the yeast goes into a feeding frenzy. The dough will double in size in an hour, but it won’t have time to develop any complex flavors.
The secret to mind-blowing focaccia is the cold ferment. After you mix your shaggy dough, you are going to cover it and shove it into the back of your refrigerator for anywhere from 24 to 72 hours. Dropping the temperature severely slows down the yeast’s activity. As the yeast takes its sweet time, bacteria in the dough begin to produce organic acids—specifically lactic acid (which adds a rich, creamy flavor) and acetic acid (which adds that sharp, tangy sourdough-like punch).
Folding, Not Kneading
Because high-hydration dough is essentially a sticky mud pie, traditional kneading on a floured counter is impossible. Instead, we build gluten strength through a process called “stretch and folds.” Every 30 minutes for the first two hours of your bulk fermentation, you will wet your hands, grab the underside of the dough, stretch it up toward the ceiling, and fold it over itself.
This gentle stretching aligns the gluten strands without tearing them. If you find yourself constantly battling the mess when mixing high hydration doughs, just remember that water is your best tool. Always work with wet hands; dough sticks to dry skin, but it slides right off wet fingers.
The Toxic Trap: Why Your Baking Pan is Ruining Everything
We need to have a very serious conversation about your bakeware. I have a strict, zero-tolerance policy for cheap, toxic kitchen gear, and this is where most home cooks completely sabotage their bread.
Focaccia requires high heat to achieve that signature fried, crispy bottom crust. We are talking oven temperatures of 425°F to 450°F (220°C to 230°C). If you pour your beautiful, lovingly fermented dough into a cheap, scratched, lightweight non-stick baking pan, you are committing a culinary crime.
The Danger of Cheap Non-Stick
Traditional non-stick coatings are made from polytetrafluoroethylene (PTFE), commonly known as Teflon. While manufacturers claim these pans are safe for everyday cooking, the science tells a much more nuanced story. When PTFE is subjected to high heat—specifically temperatures nearing or exceeding 500°F (260°C)—the polymer begins to break down. As it degrades, it can release toxic fumes and per- and polyfluoroalkyl substances (PFAS), widely known as “forever chemicals”.
Even if your oven is set to 425°F, hot spots, uneven heating, or a pan that is too thin can easily push the surface temperature of the metal into the danger zone. The German Federal Institute for Risk Assessment (BfR) actively warns that overheating PTFE coatings can develop gases that are hazardous to your health. You do not want these chemicals off-gassing into your kitchen, and you certainly don’t want them leaching into a bread that is supposed to be a wholesome, communal meal. Stop ruining your nonstick cookware by blasting it in a roaring hot oven, and get it away from your bread.
The Gear You Actually Need
If you want a professional-grade crust, you need professional-grade thermal mass. Focaccia should be baked in a heavy-duty, uncoated pan.
- Anodized Aluminum: Thick, commercial-grade aluminum half-sheet pans are excellent conductors of heat. They won’t rust, and they provide the intense bottom heat necessary to fry the base of the bread in olive oil. To prevent pans from warping at 450°F, make sure you are buying 13-gauge or 18-gauge commercial pans, not the flimsy grocery store variants.
- Blue Carbon Steel: If you are lucky enough to own a carbon steel roasting pan or paella pan, use it. Carbon steel seasons beautifully, becoming naturally non-stick over time, and handles blistering heat like a champion.
- Cast Iron: A large cast-iron skillet will yield a thicker, slightly denser focaccia with a crust that shatters audibly when you bite into it. The immense thermal mass of cast iron guarantees a perfectly fried bottom.
Dimpling Dynamics and the Ligurian Brine
Once your dough has cold-fermented for a couple of days, it is time for the second proof. You will pour a generous glug of extra virgin olive oil into your heavy-duty pan, gently tip the dough into it, and let it sit in a warm spot for 2 to 4 hours. As it warms up, it will relax, spread out, and become incredibly jiggly. If you try to stretch it and find the dough snapping back like a rubber band, it means the gluten hasn’t relaxed yet. Walk away for 30 minutes and try again.
The Tactile Joy of Dimpling
This is the moment you’ve been waiting for. Dimpling is not just for aesthetics; it serves a crucial structural purpose. It degasses the largest, most unruly bubbles so your bread bakes evenly, while creating deep pockets for oil and salt to pool into.
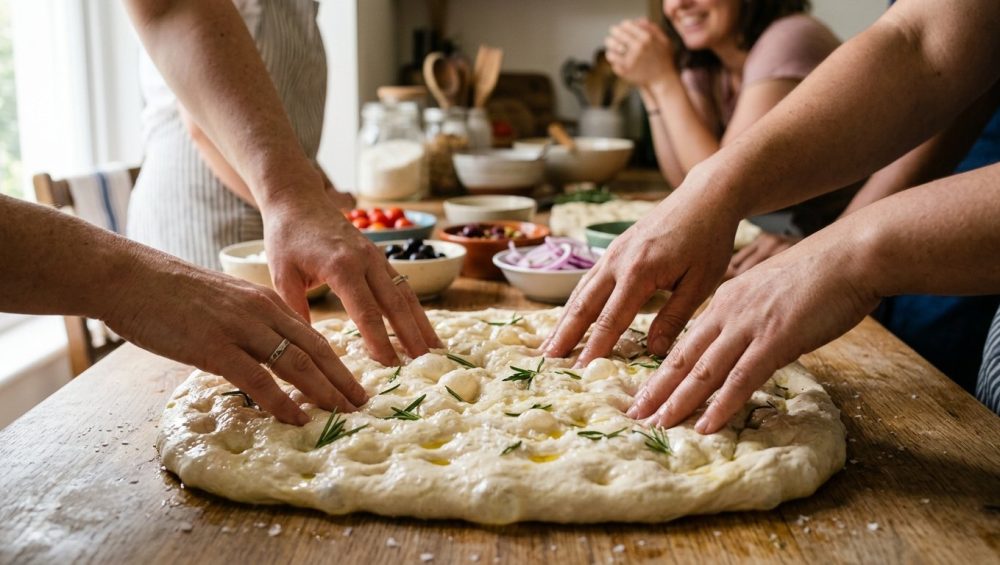
Coat your hands in olive oil. Spread your fingers wide like you are about to play a chord on a piano. Press your fingers straight down into the dough, pushing all the way until you feel the metal bottom of the pan. Do not tear the dough, and do not pop the bubbles on the surface. Just press and release. The sound it makes—a wet, bubbly, crackling sigh—is the most satisfying ASMR experience in the culinary world.
The Secret Brine Method
Here is where we elevate your focaccia from “pretty good” to “absolutely mind-blowing.” Most home cooks simply drizzle more olive oil and sprinkle flaky salt over the top before baking. But if you want to replicate the legendary texture of authentic Ligurian focaccia, you need to use the brine method popularized by chef and author Samin Nosrat.
After you dimple the dough, vigorously whisk together 1/3 cup of lukewarm water and 1.5 teaspoons of kosher salt until the salt dissolves. Pour this saltwater brine directly over the top of the dimpled dough.
I know what you are thinking. You want me to pour water over my oily dough? Won’t it be soggy? Trust the science. In the blistering heat of the oven, the water in the brine evaporates, creating a micro-climate of steam right on the surface of the bread. This steam prevents the top crust from setting too quickly, allowing the dough to achieve maximum “oven spring” (that final, massive rise in the oven). As the water boils off, it leaves behind the dissolved salt, seasoning the bread deeply and evenly, while the olive oil fries the bottom. The result is a focaccia with a crispy, golden, fried base and a profoundly tender, moist, and chewy interior.
The Mindful Bread Board: Hosting Without Losing Your Mind
Now that you have the science mastered, let’s talk about why you are baking this in the first place. Focaccia is not meant to be eaten alone in the dark over the kitchen sink (though I won’t judge you if you do). It is the ultimate communal food.
We are constantly stressed about entertaining. We think we need to plate five-course meals and perfectly time the searing of individual steaks. Stop doing that. The secret to stress-free weekend entertaining is tactile, interactive, communal dining. Enter: The Mindful Bread Board.
The Hosting Timeline
The beauty of a 72-hour cold-fermented focaccia is that all the hard work is done days in advance.
- Thursday Evening: Mix your dough. It takes exactly 10 minutes. Do your stretch and folds, cover the bowl, and throw it in the fridge.
- Friday: Do absolutely nothing. Let the yeast do the work.
- Saturday Morning: Pull the dough out of the fridge, plop it into your heavily oiled baking pan, and let it rise on the counter for 3 to 4 hours.
- Saturday Afternoon: Dimple, brine, and bake.
When your guests arrive, the house will smell intoxicatingly of toasted yeast and roasted olive oil. You don’t need to be sweating over a hot stove; you just need to pull a massive, golden slab of bread out of the oven and drop it directly into the center of the table.
Curating the Toppings Bar
Instead of baking the toppings directly into the bread (which can weigh down the dough and inhibit the rise), bake a classic sea salt focaccia and build a DIY toppings bar around it. This turns the meal into an interactive experience.
Surround the bread board with small, beautiful ceramic bowls filled with high-quality accompaniments:
- The Fats: Whipped ricotta drizzled with hot honey, high-quality salted cultured butter, and a robust, peppery extra virgin olive oil for dipping.
- The Acids: Marinated artichoke hearts, sharp cornichons, and balsamic glaze.
- The Savory: Thinly sliced prosciutto, spicy nduja spread, and roasted garlic cloves that have been cooked down until they are spreadable like butter.
- The Fresh: If you are serving fresh basil or arugula to tear over the warm bread, ensure you are keeping basil perfectly fresh by storing it at room temperature in a glass of water, never in the harsh cold of the fridge.
- The Umami: If you want to serve a rich, deeply savory dipping sauce alongside your bread, make sure you caramelize your tomato paste in a splash of olive oil first to remove that raw, tinny, metallic flavor before adding it to your crushed tomatoes.
Focaccia Art: Playing with Your Food
If you are feeling particularly ambitious and want to make your guests gasp when you pull the pan out of the oven, you can turn the surface of your unbaked focaccia into an edible canvas. Focaccia art became a massive trend for a reason—it is incredibly relaxing, highly creative, and requires zero actual artistic talent.
Once your dough is dimpled and brined, use fresh vegetables and herbs to create a botanical landscape pressed into the dough.
- Flowers: Thinly slice red bell peppers horizontally to create vibrant, red floral shapes. Halved cherry tomatoes make excellent tulip buds.
- Stems and Leaves: Fresh chives, scallions, and sprigs of rosemary or thyme are perfect for creating the stalks and leaves of your edible garden.
- Earth and Stones: Sliced black olives, capers, and sesame seeds can be scattered at the base to mimic soil and rocks.
A quick prep tip: When you are finely slicing dozens of vegetables for your bread art, do not scrape them off your cutting board with the sharp edge of your chef’s knife. Use a stainless steel bench scraper to scoop up your ingredients to protect your knife blades from rolling and degrading.
Push the vegetables firmly into the dough so they don’t pop off during the oven spring. Lightly brush the exposed vegetables with a tiny bit of olive oil so they roast rather than burn in the intense heat of the oven.
Troubleshooting Your Focaccia Disasters
Even with the best instructions, things can go wrong. Baking is a science, and variables like ambient kitchen temperature, humidity, and oven calibration can throw a wrench in your plans. If your focaccia didn’t turn out perfectly, do not throw in the towel. Diagnose the issue and fix it for next time.
Problem: Your Bread is Flat and Dense
If your dough never rose in the pan and baked into a heavy, gummy brick, you have one of two problems. First, your yeast might be dead. Always check the expiration date on your yeast, and if you are using active dry yeast, make sure it foams up in warm water before using it. Second, you may have under-proofed the dough. If your kitchen is incredibly cold, that second rise in the pan might take 4 or 5 hours instead of 2. The dough should look like a wobbly water balloon before you bake it. If it doesn’t jiggle, it isn’t ready.
Problem: The Bottom is Pale and Soggy
A great focaccia should have a base that looks like it was deep-fried. If yours is blonde and soft, your pan is the culprit. You either used a flimsy, thin baking sheet that couldn’t conduct enough heat, or you skimped on the olive oil. You need at least 3 to 4 tablespoons of oil in the bottom of the pan. Furthermore, make sure you are baking the bread on the lowest rack in your oven so it gets the most intense bottom heat. If your oven is notoriously weak, preheat a baking steel or pizza stone on the bottom rack for an hour, and place your baking pan directly on top of it.
Problem: The Bread is Glued to the Pan
There is nothing more heartbreaking than baking a beautiful loaf and realizing it is permanently welded to your baking sheet. This happens for three reasons. First, you didn’t use enough oil. Second, your pan has microscopic scratches that the dough baked into. Third, you tried to remove the bread while it was still piping hot. You must let the focaccia cool in the pan for at least 10 to 15 minutes. As it cools, the steam inside the bread condenses, slightly shrinking the loaf and naturally releasing it from the sides and bottom of the pan. Use a thin metal offset spatula to gently coax the edges free before sliding it onto a wire cooling rack.
Embrace the Process
Baking phenomenal focaccia is not about mastering complex, pretentious culinary techniques. It is about respecting the ingredients. It is about understanding that high hydration requires high-protein flour. It is about accepting that flavor takes time, and that the refrigerator does the hardest work for you. It is about aggressively rejecting toxic, cheap non-stick pans in favor of heavy, honest metal.
The next time you have friends coming over for the weekend, don’t stress over a complicated menu. Mix some flour, water, salt, and yeast. Let it sit. Dimple it with joy. Drench it in the best olive oil you can afford. Serve it warm, right in the center of the table, and watch as the simple act of tearing into a loaf of bread brings everyone together. You’ve got this. Now go get your hands sticky.






