
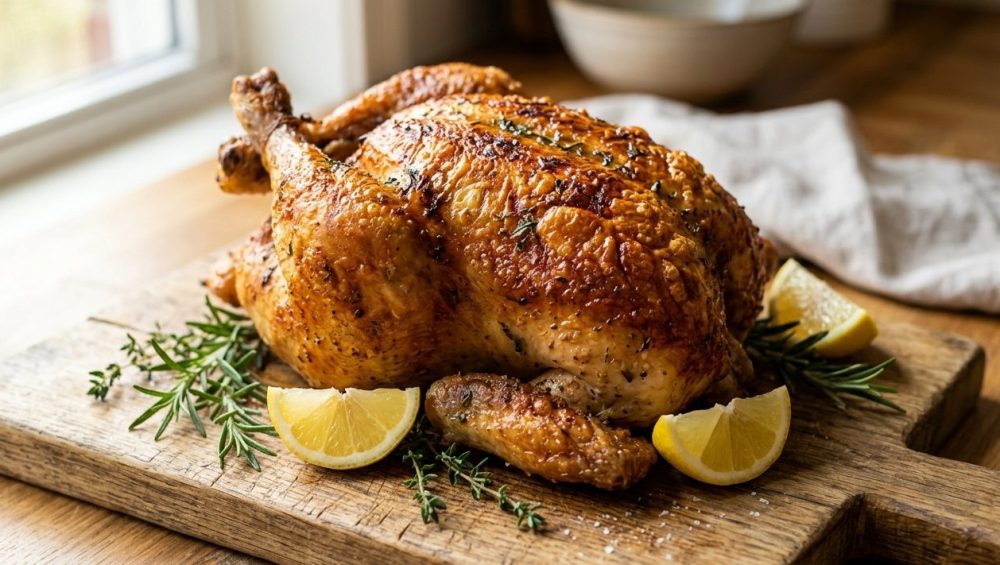
Listen, we need to have a serious talk about the state of your poultry. You spend your hard-earned money on a beautiful, pasture-raised bird. You meticulously season it, you baby it in the oven, and your kitchen smells like an absolute dream. But then, the moment of truth arrives. You carve off a piece, take a bite, and instead of a satisfying, shattering crunch, your teeth hit a flabby, chewy, thoroughly unappetizing barrier. If you are exhausted by the fact that your chicken skin is always rubbery, you are not alone. It is the universal curse of the home cook.
But here is the absolute truth: you do not need a culinary degree, a commercial deep fryer, or a vat of dangerously hot peanut oil to achieve restaurant-quality, blistered, perfectly crisp poultry. You just need to understand a little bit of basic kitchen chemistry and utilize a cheap, unassuming staple that is probably sitting in the back of your pantry right now. Today, we are going to master the science of aluminum-free baking powder. We are going to permanently banish soggy poultry from your kitchen, and we are going to do it with zero pretentious chef-speak.
The State of Our Chicken Dinners: A 2026 Reality Check
Before we dive into the molecular biology of your dinner, let us look at the sheer volume of poultry we are dealing with. According to the latest data from the United States Department of Agriculture, Americans are projected to consume a staggering 102.8 pounds of broiler meat per capita in 2026, making it the undisputed, most-consumed animal product in the country. To keep up with this insatiable demand, the U.S. is on track to produce more than 47.6 billion pounds of chicken this year alone.
We are eating chicken constantly. It is the undisputed king of simple weeknight dinners, the centerpiece of our Sunday roasts, and the ultimate game-day appetizer. Yet, despite this massive consumption, the vast majority of home cooks are still serving up birds with pale, leathery exteriors. We have been conditioned to believe that deep-frying is the only path to textural perfection. But deep-frying at home is a messy, chaotic, and often dangerous endeavor that leaves your house smelling like a fast-food joint for three business days. As someone who values efficiency—because your time is money—I refuse to accept that weeknight cooking requires a gallon of bubbling oil.
The Anatomy of a Poultry Disaster: Why Skin Gets Flabby
To fix a problem, you must first understand why it is happening. Chicken skin is not just a simple wrapper; it is a complex biological matrix composed primarily of water, fat, and tough connective proteins (collagen). When you place a chicken in a standard home oven, you are engaging in a thermodynamic battle against that moisture.
Water is the absolute, sworn enemy of crispiness. When water heats up, it turns into steam. If that steam cannot escape rapidly, it remains trapped within the protein matrix of the skin. Instead of frying in its own rendered fat, the skin essentially steams and boils itself. The collagen breaks down into gelatin, which is great for a rich stock, but an absolute nightmare for texture. This is exactly why a poorly roasted chicken breast turns out dry on the inside while remaining distressingly flabby on the outside. The meat overcooks while you wait in vain for the skin to crisp.
If you are cooking “low and slow”—say, in a backyard smoker at 225°F—the problem is magnified. At low temperatures, water does not evaporate quickly enough, and the subcutaneous fat does not render efficiently. The skin acts like a sponge, absorbing smoke and heat while remaining a chewy, rubbery sheet. To achieve a shattering crunch, we must aggressively force the moisture out of the skin and rapidly render the fat. And we are going to do that by hacking the pH level.
The Science of Shattering Crispness: How Baking Powder Changes the Game
Enter the hero of our story: baking powder. Yes, the exact same white powder you use to make fluffy pancakes and tender biscuits. When applied to raw poultry, baking powder initiates a fascinating chain of chemical reactions that fundamentally alters how the skin behaves under heat. This technique, heavily popularized and rigorously tested by culinary scientists like J. Kenji López-Alt, is the ultimate home kitchen cheat code,.
Here is exactly what happens when baking powder meets poultry skin:
1. The Power of Alkalinity and pH Manipulation
Raw chicken skin has a naturally neutral-to-slightly-acidic pH. Baking powder is alkaline. When you dust the skin with it, you significantly raise the surface pH. This alkaline environment is the crucial trigger for accelerating the Maillard reaction. The Maillard reaction is the complex chemical dance between amino acids and reducing sugars that gives browned food its distinctive, savory flavor and deep mahogany color. Normally, this reaction requires very high heat to occur rapidly. By raising the pH, you lower the temperature threshold required for browning, allowing the skin to develop a gorgeous, deeply roasted color long before the delicate meat underneath has a chance to dry out.
2. Breaking Down Peptide Bonds
Proteins in the skin are held together by strong peptide bonds. When exposed to the alkaline baking powder, these bonds weaken and break down much more easily. This structural breakdown is essential. Instead of remaining a tough, leathery sheet, the protein matrix relaxes, allowing the rendering fat to essentially “fry” the weakened skin structure from the inside out.
3. Aggressive Moisture Extraction
Baking powder is a desiccant. It actively draws hidden moisture from the subcutaneous layers of the skin up to the surface. Once the moisture is on the surface, the ambient heat of your oven can evaporate it instantly. By removing this water barrier, the skin’s fat can render properly, eliminating the soggy, steamed texture.
4. Micro-Blistering and Textural Magic
This is where the real magic happens. Baking powder is formulated to release carbon dioxide gas when it interacts with moisture and heat. As the chicken roasts, the baking powder reacts with the extracted poultry juices, creating thousands of microscopic carbon dioxide bubbles on the surface of the skin,. As the skin hardens and cooks, these tiny bubbles are locked into place, creating a massive increase in surface area. This micro-blistering effect perfectly mimics the shattered, craggy texture you usually only get from a vat of boiling frying oil.
The Crucial Distinction: Baking Powder vs. Baking Soda
I need you to pay very close attention to this section, because mixing up your pantry powders will result in an inedible disaster. You must use baking powder, not baking soda.
Baking soda (sodium bicarbonate) is purely alkaline. If you rub your chicken with straight baking soda, it will certainly raise the pH, but it will also leave your dinner tasting like a bitter, soapy, metallic nightmare,.
Baking powder, on the other hand, is a complete leavening system. It contains baking soda, but it also contains a powdered acid (like cream of tartar or monocalcium phosphate) and a starch (like cornstarch) to keep them separated,. The presence of the acid buffers the harsh alkalinity, giving you all the skin-crisping benefits without the horrific chemical aftertaste.
The “Aluminum-Free” Mandate
There is one more strict rule here: your baking powder MUST be labeled “aluminum-free”. Many commercial baking powders contain sodium aluminum sulfate, a compound that reacts with heat to provide a second rise in baked goods. When used as a dry rub on savory meats, this aluminum compound can impart a distinctly metallic, tinny taste to the chicken,. Always check your label. Brands like Rumford or Bob’s Red Mill are widely available, inexpensive, and completely free of aluminum,.
The “No-Go” Rule: Ditch the Toxic Roasting Gear
As your resident sassy sous-chef, I have zero patience for cheap, toxic kitchenware. You cannot execute high-level culinary techniques if you are battling garbage equipment. If you are still roasting chickens on flimsy, scratched, non-stick baking sheets from a big-box store clearance bin, we are putting an end to that today.
First of all, traditional non-stick coatings (PTFE/Teflon) are not designed for the high-heat roasting required to crisp poultry. When subjected to temperatures above 400°F, these coatings begin to degrade. Furthermore, if you coat them with aerosolized cooking sprays, the soy lecithin in the spray bakes into an impenetrable, sticky lacquer, completely ruining your nonstick pans.
Secondly, beware of cheap glass roasting dishes. While glass is fine for a low-temperature casserole, taking a cheap glass dish from a cold fridge to a blazing hot oven to roast a chicken can cause catastrophic thermal shock. I have seen far too many dinners ruined because a glass baking dish shattered into a thousand pieces mid-roast.
If you want to cook like a pro, you need durable, safe, high-thermal-mass equipment. For a whole roasted chicken, I strongly advocate for a heavy-duty cast iron skillet or a thick, fully-clad stainless steel pan. These materials hold heat beautifully, ensuring the bottom of the bird cooks evenly while the top crisps.
If you are cooking a massive batch of wings or thighs, you need a heavy-gauge aluminum half-sheet pan fitted with a stainless steel wire cooling rack. The wire rack is absolutely non-negotiable. It elevates the poultry, allowing the oven’s convection heat to circulate 360 degrees around the meat. If you just throw your wings flat on a pan, they will sit in their own rendered fat and juices, resulting in soggy bottoms. Furthermore, a heavy-gauge pan ensures you will never have to deal with the terrifying “pop” sound of thin metal warping under high heat. If your baking sheets keep warping, throw them out and invest in commercial-grade gear.
The Masterclass Method: The Golden Ratio and The Dry Brine
Now that we understand the science and have banished the toxic gear, let us execute the technique. The beauty of the baking powder method is its sheer simplicity. It requires only three ingredients: the poultry, kosher salt, and aluminum-free baking powder.
The Golden Ratio
Do not just dump a cup of baking powder onto your bird. You need a precise balance to draw out moisture without leaving a powdery residue. The golden ratio is 1 part aluminum-free baking powder to 3 or 4 parts kosher salt,,.
For a batch of chicken wings (about 2 to 3 pounds), you will need approximately 1 tablespoon of kosher salt mixed thoroughly with 1 teaspoon of aluminum-free baking powder,. For a whole spatchcocked chicken, scale up slightly, but maintain the ratio. You can also add black pepper, garlic powder, or other dry spices to this mix, but the salt and baking powder are the active chemical agents.
The Dry Brine Process (The Weekend Perfectionist Method)
If you want the absolute best results, you must plan ahead.
- Dry the Bird: Remove the chicken from its packaging and use paper towels to obsessively pat the skin completely dry. Moisture is the enemy; eliminate it at the source.
- Apply the Rub: Evenly sprinkle your baking powder and salt mixture over the entire surface of the skin. Do not cake it on; a light, even dusting is all you need.
- The Fridge Rest: Place the chicken on your wire rack over a baking sheet and put it in the refrigerator, completely uncovered, for 12 to 24 hours,,.
This overnight rest is the magic of dry brining. The cold, circulating air of the refrigerator acts as a powerful dehumidifier, aggressively drying out the skin. Meanwhile, the salt penetrates deep into the muscle fibers, breaking down the meat’s proteins so they retain more of their natural juices during cooking. By the next day, the skin will look tight, translucent, and slightly desiccated. It may look a bit unappealing raw, but it is primed for explosive crispness.
The Weeknight Shortcut
I get it. It is 5:30 PM on a Tuesday, and you did not prep a chicken 24 hours ago. Time is money, and we need dinner now. You can still use the baking powder trick with great success.
Pat the chicken as dry as humanly possible with paper towels. Apply the baking powder and salt mixture. Let it sit on the counter for just 15 to 30 minutes while your oven preheats,. The baking powder will immediately start drawing moisture to the surface. Right before it goes in the oven, take a fresh paper towel and gently dab away the beads of moisture that have formed on the skin. It will not be 24-hour perfect, but it will be vastly superior to a standard, untreated roast.
Cooking Execution: Thermodynamics and Temperature Control
You have chemically primed the skin. Now we must apply the correct thermal dynamics to bring it all together. The cooking method varies slightly depending on the cut of poultry you are tackling.
For Chicken Wings and Thighs
Wings have the highest skin-to-meat ratio of the entire bird, making them the ultimate canvas for this technique.
- Preheat your oven to 425°F (or 450°F if your oven runs a bit cool),.
- Arrange the wings on your stainless steel wire rack, ensuring there is space between each piece for air to circulate.
- Bake for 20 minutes, then flip the wings.
- Bake for another 20 to 30 minutes until the skin is deep golden brown and audibly tapping against your tongs.
Because wings and thighs are dark meat with high amounts of connective tissue, they actually benefit from being cooked to a higher internal temperature (around 175°F to 185°F). The meat remains succulent, while the extended time allows the fat to fully render and the baking powder to work its micro-blistering magic.
For a Whole Spatchcocked Chicken
Roasting a whole bird requires a bit more finesse because you have to balance the delicate breast meat with the tougher dark meat. Spatchcocking (removing the backbone and flattening the bird) is mandatory for even cooking.
- Preheat your oven to 450°F. High heat is essential to shock the skin into crisping.
- Place the spatchcocked, dry-brined bird skin-side up in your heavy cast iron or stainless steel pan.
- Roast until the breast meat registers exactly 150°F to 155°F. (Do not guess—use your meat thermometer to ensure absolute accuracy). Carry-over cooking while the bird rests will bring the breast to a safe, juicy 165°F.
The alkaline baking powder ensures that the skin achieves a deep, shattering mahogany finish in the exact amount of time it takes to perfectly cook the meat underneath.
Troubleshooting the Technique: What Went Wrong?
If you try this method and encounter issues, you likely committed one of the cardinal sins of the baking powder technique. Let us troubleshoot:
“My chicken tastes like a battery.”
You used baking soda instead of baking powder, or you used a baking powder containing aluminum,. Throw out the cheap powder, buy an aluminum-free brand, and double-check your labels.
“The skin is still flabby.”
You either skipped the paper towel drying phase, or you overcrowded the pan. If the chicken pieces are touching each other, they will trap steam and boil. Give your poultry room to breathe, and always use a wire rack.
“It burned before the meat was cooked.”
You applied way too much baking powder. Remember the golden ratio. A heavy, caked-on layer of powder will scorch in a hot oven and leave a dusty, unpleasant texture,. Less is more.
The Final Word
You do not need to be a classically trained chef to produce mind-blowing food. You just need to respect the ingredients, understand the basic chemistry of your kitchen, and refuse to settle for mediocre equipment. By harnessing the alkaline power of aluminum-free baking powder, you are taking control of the Maillard reaction and forcing your poultry to submit to your will.
Say goodbye to the deep fryer, banish the soggy skin to the history books, and start roasting with confidence. Your weekend dinner guests will think you spent hours slaving over a vat of hot oil, and your weeknight dinners will never be the same. Now go check your pantry, throw out that expired tin of aluminum-laced powder, and let’s get cooking.






