Picture this: You have just dropped a ridiculous amount of money on a gorgeous, artisanal, end-grain walnut cutting board. It is heavy, it is beautiful, and resting there on your countertop, it makes you feel like a rustic culinary god. You use it to prep a beautiful Sunday roast, you wash it in the sink, you leave it flat on the counter to dry, and two weeks later, it sounds like a gunshot just went off in your kitchen. You walk in to find a massive, heartbreaking crack straight down the middle of your prized wooden masterpiece.
Welcome to my world, and welcome to the harsh, unforgiving reality of wood hydro-dynamics. I am your Sassy Sous-Chef, and I am here to tell you that this tragedy was entirely preventable. I have zero patience for pretentious chef-speak, but we are going to have to get a little nerdy today because understanding why your board committed structural suicide is the absolutely essential first step to stopping it from happening again. Anyone can cook like an expert and maintain professional-level gear in a standard home kitchen, but you cannot fight the laws of physics. Consider this your ultimate survival guide for clumsy cooks who want to protect their kitchen investments without spending hours babying a piece of wood.
The Anatomy of a Kitchen Heartbreak
To understand why your cutting board cracked, you have to stop thinking of it as a solid, inert block of material. Wood is a biological marvel. Even after a tree is chopped down, kiln-dried, and glued into a checkerboard pattern by a guy named artisan Dave, it remains a dynamic, breathing cellular structure.
Wood is a Sponge (And That is the Problem)
Fundamentally, wood is a tightly packed bundle of microscopic cellulose straws—known to botanists as xylem and phloem, and tracheids in softwoods—that were originally designed by nature to pull water and nutrients from the roots of a tree all the way up to its canopy. When the tree is harvested, those microscopic tubes do not just disappear. They are emptied of their natural sap and moisture, leaving behind thousands of tiny, hollow capillary channels.
You have probably noticed that your wooden spoons keep cracking right around the same time your cutting boards start to splinter. This is because both tools share this exact same open-cell structure. Wood is highly hygroscopic, meaning it acts like a rigid sponge that constantly absorbs and releases water from its surrounding environment. When you introduce water to the surface of your board, those hollow tubes greedily suck it up. The wood fibers swell and expand. When the water evaporates, the fibers shrink back down. This constant swelling and shrinking creates massive microscopic tension.
The Equilibrium Moisture Content (EMC) Balancing Act
In material science, there is a concept known as Equilibrium Moisture Content (EMC). This is the state at which wood is perfectly balanced with the humidity and temperature of the surrounding air, meaning it is neither gaining nor losing moisture. For most indoor home environments, the ideal EMC for a wooden cutting board sits between 6% and 12%.
When the moisture content of your board wildly fluctuates outside of this equilibrium—say, when you soak it in the sink, or when the dry winter air from your central heating zaps the humidity in your kitchen—the wood goes into shock. If one part of the board is expanding while another part is shrinking, the physical stress eventually exceeds the tensile strength of the wood fibers. The result? A catastrophic structural failure. A crack.
The Impact of Grain Orientation: Face, Edge, and End Grain
Not all cutting boards handle this moisture exchange the same way, and it all comes down to how the wood was cut.
Face-grain boards show the beautiful, wide growth rings of the tree. They are cheap, but they warp easily and show knife marks terribly. Edge-grain boards are made by gluing long strips of the wood’s edge together. They are stable, heavy, and a great middle-ground for the everyday cook.
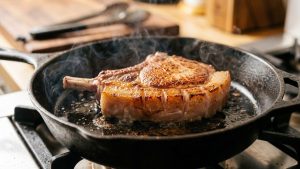
Then there is the holy grail: the end-grain cutting board. These are the gorgeous, checkerboard-patterned blocks where the wood fibers are pointing straight up at you. End-grain boards are coveted because they are “self-healing.” When your knife strikes the board, it slips between the vertical wood fibers rather than severing them. However, because those microscopic “straws” are pointing directly up at the surface, end-grain boards absorb moisture significantly faster than any other type of board. They require the most rigorous conditioning to prevent cracking. Using the wrong board material is exactly why bamboo boards ruin your knives; bamboo is technically a dense grass held together by rock-hard glues that completely lack this forgiving, self-healing cellular structure. Conversely, this lack of give is exactly why your knives get dull so fast when you subject them to glass, marble, or cheap plastic surfaces.
The Four Horsemen of Wood Board Destruction
If you want to stop your board from cracking, you need to understand its natural enemies. There are four primary culprits that cause the cellular tension responsible for splitting wood.
1. The Dishwasher (The Ultimate Death Sentence)
Let me be unequivocally clear: putting a wooden cutting board in the dishwasher is a culinary war crime. The dishwasher is a torture chamber of prolonged heat, aggressive alkaline detergents, and violent water pressure. The hot water causes the wood fibers to rapidly swell to their absolute maximum capacity. The heat then bakes the board, forcing a rapid, violently uneven evaporation cycle. Meanwhile, the harsh detergents strip away every single protective lipid (oil) from the wood’s surface. Your board will warp, the food-safe glues holding the wood strips together will melt and fail, and the board will split into pieces. Never, ever do this.
2. The Puddle Effect and Uneven Evaporation
This is the most common mistake home cooks make. You wash your board properly in the sink, wipe it down, and then leave it sitting perfectly flat on your kitchen counter to dry. What you have just done is created a severe moisture gradient.
The top of the board is exposed to the ambient air and dries quickly, causing the wood fibers on the top to shrink. However, the bottom of the board is trapped against the counter. Moisture pools underneath it, creating a microclimate of up to 92% relative humidity that prevents evaporation. The bottom fibers remain swollen with water. When the top shrinks and the bottom swells simultaneously, the board literally bows and cups. Over time, this intense opposing tension rips the wood fibers apart, resulting in a crack down the center.
3. The Desert Kitchen (Dry Air and Central Heating)
Wood boards often crack in the dead of winter. Why? Because when you turn on your central heating, the ambient humidity in your home plummets. The air becomes incredibly dry, and it aggressively pulls moisture out of your cutting board to compensate. If your board drops below its optimal Equilibrium Moisture Content (that 6% to 12% sweet spot), the wood becomes brittle, rigid, and prone to spontaneous splitting.
4. Lipid Depletion (Starving the Cells)
When a board is brand new, its cellular tubes are filled with conditioning oils that act as a hydrophobic (water-repelling) barrier. Every time you wash the board with dish soap, you strip away a tiny bit of that oil. Over weeks and months, the board becomes “lipid depleted.” The microscopic straws are now completely empty and fully exposed to the elements. Without oil to block the water, the board absorbs moisture instantly during washing, leading to the rapid swelling and shrinking cycles that cause cracks.
The “Toxic Gear” Rant: Why We Don’t Just Buy Plastic
At this point, you might be thinking, “This sounds exhausting. Why don’t I just buy a $10 plastic cutting board and throw it in the dishwasher?”
Do not even get me started. As a rule, I absolutely despise cheap, toxic kitchenware. If you want to banish toxic kitchen gear from your home, the very first thing you should throw into the garbage bin is that peeling, scarred plastic cutting mat.
The Microplastic Nightmare
Every time your sharp chef’s knife slices into a polyethylene or acrylic cutting board, it shears off microscopic fragments of plastic. Those microplastics stick to your diced onions, your minced garlic, and your beautiful steaks. They go directly into your pan, and subsequently, directly into your body. You are seasoning your family’s dinner with synthetic polymers. Wood, on the other hand, is a natural, biological material. If a microscopic fiber of walnut ends up in your stew, your digestive system handles it exactly the same way it handles the fiber in a celery stalk.
The Bacterial Reality: Wood Actually Kills Germs
The biggest myth pushed by the plastic industry is that plastic boards are more hygienic because they are non-porous. This is a blatant, scientifically disproven lie.
When you use a plastic board, your knife creates deep, jagged microscopic grooves in the surface. Bacteria from raw chicken or pork get shoved down into these jagged scars. Because plastic is completely hydrophobic, the bacteria sit in those dark, moist crevices and multiply. Even the violent heat of a dishwasher often fails to reach the bacteria trapped at the very bottom of these deep plastic scars. Just like how your plastic containers turn orange and permanently hold onto old food smells, plastic cutting boards permanently harbor dangerous microbes.
Wood, conversely, has a built-in biological defense mechanism. Studies from food safety laboratories have consistently proven that hardwoods like maple, walnut, oak, and acacia actually kill bacteria. When bacteria are introduced to a wooden board, the capillary action of the wood fibers pulls the pathogens deep beneath the surface. Once trapped inside the cellular structure, the bacteria are deprived of moisture and literally desiccated (dried out) until they die. Within hours, a contaminated wooden board will naturally return to a sanitary state, while a plastic board will still be teeming with viable pathogens.
The Chemistry of Conditioning: Why Cooking Oils Are a Disaster
So, we have established that we must protect our wooden boards from water by filling their microscopic cellular tubes with oil. But you cannot just grab whatever is sitting in your pantry.
The Oxidation Trap (Why Olive Oil Goes Rancid)
Just as your meat thermometer is lying to you if you haven’t calibrated it in five years, the internet is lying to you when it says you can condition a cutting board with olive oil, vegetable oil, or standard coconut oil.
Cooking oils are composed of long-chain triglycerides. These fats contain double bonds in their chemical structure that are highly unstable when exposed to oxygen, light, and ambient room temperatures. When you rub olive oil into a cutting board, it sits in the wood pores and undergoes a chemical reaction called oxidation. The fat molecules break down and release volatile compounds like aldehydes and ketones.
This is the exact chemical definition of rancidity. Within a few weeks, your beautiful cutting board will begin to smell like old crayons, dirty gym socks, and bitter regret. Worse, that foul, rancid flavor will transfer directly into whatever food you are chopping. We all know that ruining your nonstick pans is incredibly easy if you use harsh metal spatulas, but ruining a premium wood board is even easier if you smother it in unstable vegetable fats.
The Holy Grail: Food-Grade Mineral Oil and Beeswax
To protect your board, you need a non-drying, non-oxidizing oil. The absolute gold standard is food-grade mineral oil.
Mineral oil is a highly refined, inert hydrocarbon. It does not contain the unstable double bonds found in plant and animal fats, meaning it is chemically impossible for it to oxidize or go rancid. It is cheap, it is completely food-safe, and it is thin enough to penetrate deep into the cellular straws of the wood. (Note: Fractionated coconut oil, which has had its long-chain triglycerides chemically removed, is also an acceptable, stable alternative if you prefer a plant-based option, but mineral oil remains the industry standard).
For the ultimate protection, you follow the mineral oil with a layer of beeswax. While the mineral oil penetrates deep into the wood to hydrate the cells, the beeswax sits on the very top of the surface, creating a hard, hydrophobic shield that completely repels water and prevents the oil from washing out during cleaning.
The Sassy Sous-Chef’s Master Maintenance Protocol
I am a busy professional. Time is money, especially on a Tuesday night when I am just trying to get dinner on the table. I do not have time to coddle a piece of wood. But I also refuse to ruin my expensive gear. Here is the exact, no-nonsense protocol to keep your board pristine without losing your mind.
The Daily Wipe-Down (Time is Money)
When you are done chopping your veggies, do not immediately drag your board to the sink. Instead of scraping your board with the sharp edge of your chef’s knife—which is exactly why you need a bench scraper to safely scoop up ingredients—gently clear the board of debris.
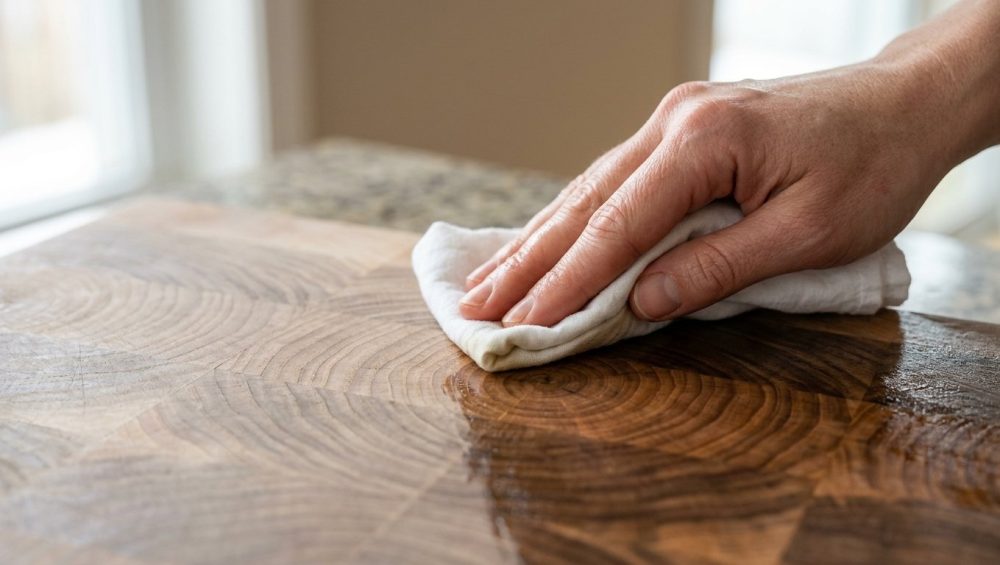
Take the board to the sink and wash it with warm (not scalding hot) water and a mild dish soap. Use a sponge or a gentle brush. Do not submerge the board. Do not let it soak. Wash it quickly, rinse it thoroughly, and immediately dry the surface completely with a clean microfiber cloth or a cotton kitchen towel.
The Vertical Drying Mandate
This is the most critical step of daily maintenance. Once you have towel-dried the board, you must stand it up vertically on its edge. You can lean it against the backsplash or place it in a wire dish rack.
By standing the board vertically, you expose both the front and the back of the board to the ambient airflow of your kitchen. This ensures that whatever trace moisture remains in the wood evaporates evenly at the exact same rate on both sides. No moisture gradient, no uneven swelling, no tension, no cracking.
The Monthly Deep Condition (Weekend Perfectionism)
Once a month—or whenever the board starts looking pale, dry, and thirsty—it is time for a deep condition. Think of this as a spa day for your wood.
- The Flood: Ensure the board is bone dry. Pour a generous amount of food-grade mineral oil directly onto the wood. Don’t be stingy; flood the surface.
- The Massage: Use a clean cloth or a paper towel to vigorously rub the oil into the wood, covering the front, the back, and the sides. The end-grain edges will soak up the oil the fastest, so pay special attention to them.
- The Rest: Let the board sit overnight. Give the capillary tubes time to drink the oil deep into their cellular structure.
- The Wax Seal: The next morning, wipe off any excess oil that hasn’t absorbed. Then, take a board cream (a mixture of mineral oil and beeswax) and buff it into the surface using circular motions. Let it sit for ten minutes, then buff it out to a gorgeous, water-repelling satin shine.
How to Resuscitate a Dying Board (Before It Splits)
What if your board is already looking terrible? It is dry, it is covered in deep knife scars, it smells faintly of last week’s garlic, but it hasn’t actually cracked yet. Can it be saved? Absolutely.
Step 1: The Deep Clean and Deodorize
Before you can condition a neglected board, you have to strip out the deeply embedded food odors. Sprinkle a generous layer of coarse kosher salt all over the dry board. Cut a lemon in half, and use the fleshy side of the lemon to aggressively scrub the salt into the wood. The coarse salt acts as a mechanical abrasive to lift stains, while the citric acid in the lemon neutralizes alkaline odor compounds (like the mercaptans in garlic and onions). Rinse the board quickly and towel it completely dry.
Step 2: The Sanding Reset
If your board is heavily scarred, those deep grooves are going to trap moisture and eventually lead to splitting. If you are tired of chopping onions with dull knives because your board is warped and uneven, you need to reset the surface.
Wait until the board is 100% bone dry. Take a piece of 120-grit sandpaper and sand the entire board following the direction of the grain. This will remove the top layer of scarred, lipid-depleted wood and expose fresh, healthy cellular tubes. Follow up with a finer 220-grit sandpaper to smooth the surface until it feels like glass. Wipe away all the sawdust with a slightly damp cloth, and then let it dry vertically.
Step 3: The Oil Flood
Because you have just sanded away the protective barrier, the board is going to be incredibly thirsty. You will need to apply three to four heavy coats of mineral oil, waiting a few hours between each coat, until the wood simply refuses to absorb any more oil. Finish with a heavy layer of beeswax, and your board will look literally brand new.
Final Thoughts: Respect the Wood
Cooking is an art, but the tools we use are governed by hard science. A wooden cutting board is not a delicate, fussy diva; it is a rugged, naturally antimicrobial, self-healing workhorse that will last for generations if you simply respect its cellular biology.
Keep it out of the dishwasher. Never let it sit in a puddle of water. Dry it vertically. Feed it mineral oil when it looks thirsty. Do these four simple things, and you will never have to listen to the heartbreaking sound of a $150 piece of artisanal walnut cracking in half on a random Tuesday night. Now, grab your freshly oiled board, sharpen your favorite chef’s knife, and go make something mind-blowing for dinner. You’ve got this.