Listen to me, you beautiful, well-intentioned culinary disasters. We need to have a serious talk about your appetizers.
We have all been there. You invited people over for a weekend gathering. You wanted to impress them. You bought the expensive olive oil, the imported balsamic glaze that costs as much as a tank of gas, and the crusty artisan baguette. You chopped your tomatoes, piled them high onto the bread, and set the platter on the coffee table. You felt like an absolute culinary goddess.
Thirty minutes later, you look down at your beautiful appetizer platter and realize you’ve created a tragedy. The bread has turned into a mushy, disintegrating sponge. The tomatoes are sliding off like they’re escaping a sinking ship. Your guests are politely trying to eat it over their napkins while tomato juice runs down their wrists, staining their sleeves and ruining the vibe. It is a textural nightmare.
If you want to master the art of effortless hosting, you have to stop letting your ingredients bully you. Bruschetta is supposed to be a celebration of texture—the shatteringly crisp crunch of toasted bread giving way to the cool, juicy, savory bite of a perfectly dressed tomato. When it becomes a wet, floppy mess, it is not just a culinary failure; it is a structural one.
Today, we are going to fix this. We are going to put on our lab coats, dive into the food science of osmosis and lipid barriers, and completely rethink how you serve this classic dish.
The Anatomy of a Tomato (And Why It Hates Bread)
Let’s get one thing straight: tomatoes are basically water balloons masquerading as vegetables. (Yes, I know they are botanically fruits, but let’s not be pedantic today; we have work to do). A standard tomato is composed of roughly 94% to 95% water. When you chop up a raw tomato and immediately throw it onto a piece of toasted bread, you are essentially pouring a glass of water onto a crouton. What did you think was going to happen?
To understand how to defeat the sog, we need to understand tomato anatomy. A tomato consists of the fleshy outer wall called the pericarp, and the inner seed cavities known as locules. The locules contain the seeds suspended in a jelly-like substance. This jelly is where the highest concentration of moisture and acidity lives.
When you take a knife to a tomato, you violently rupture its cell walls. The water inside those cells is immediately released. If you just toss those freshly chopped tomatoes with oil and vinegar and let them sit in a bowl, they will continue to bleed out. By the time that mixture hits your bread, it is swimming in a pool of its own juices.
The Food Science of Osmosis: Pre-Salting is Non-Negotiable
Here is where we bring in the science. The secret to perfect bruschetta isn’t a magical, expensive variety of tomato; it is the simple, undeniable science of osmosis.
Osmosis is the movement of water across a semipermeable membrane from an area of low solute concentration to an area of high solute concentration. When you toss your chopped tomatoes with a generous pinch of salt and let them sit, the salt draws the water out of the tomato cells. The water literally rushes out to dilute the salt on the surface.
This process takes about 15 to 20 minutes. Do not rush this. I know we are all busy professionals who rely on weekday shortcuts to survive, but weekend cooking requires patience. Let the salt do its job. After 20 minutes, you will see a massive pool of pale red tomato water in the bowl. That is the exact liquid that was going to ruin your bread.
By removing it, you concentrate the flavor of the tomato, making it taste sweeter, richer, and infinitely more “tomato-y.” Plus, you firm up the pectin in the cell walls, giving the tomato pieces a satisfying, meaty texture instead of a mushy one. It is exactly the same scientific principle behind why you should stop adding salt too early to a leafy green salad unless you want a wilted mess. But with bruschetta, we actively want that moisture gone before it ever meets the bread.
The Colander Technique
- Core and chop your tomatoes. Roma tomatoes are fantastic for this because they have a higher ratio of flesh to locule jelly, but a good heirloom works beautifully if you treat it right.
- Toss the chopped tomatoes with kosher salt. Use about 1/2 teaspoon of Diamond Crystal kosher salt per pound of tomatoes. Do not use iodized table salt; it is too fine, tastes metallic, and will brutally over-salt your food.
- Place them in a mesh strainer. Set the strainer or colander over a mixing bowl.
- Walk away. Go pour yourself a glass of Pinot Grigio. Check your email. Stare at the wall. Just leave them alone.
- Discard the liquid. After 20 minutes, dump the water (or save it to add to a bloody mary, I won’t judge).
- Dress the tomatoes. Now, and only now, do you dress the tomatoes with your high-quality extra virgin olive oil, a splash of vinegar, and fresh basil.
The Bread Foundation: Engineering a Lipid Barrier
Now that we have successfully dehydrated our tomatoes, we need to talk about the delivery vehicle. The bread.
You cannot just slice a baguette and serve it raw. You also cannot just lightly toast it in a toaster until it is mildly warm. We need to create a structural foundation capable of holding wet toppings without collapsing. We need to engineer a lipid barrier.
In food science, a lipid barrier is a hydrophobic (water-repelling) layer of fat that prevents moisture from migrating from a wet topping into a dry starch. Think of it as a heavy-duty raincoat for your bread. When you brush a slice of bread generously with olive oil or melted butter and bake it, the fat absorbs into the outermost layer of the crumb.
As the bread bakes, the Maillard reaction occurs. This is the complex chemical reaction between amino acids and reducing sugars that gives browned food its distinctive flavor and color. The heat dehydrates the surface of the bread, creating a rigid crust, while the olive oil polymerizes slightly, forming a literal waterproof shield.
If you just toast dry bread, the starch remains hydrophilic (water-loving). The second a damp tomato touches it, the starch acts like a sponge, pulling the water in and turning the bread into wallpaper paste. By applying a layer of fat and baking it until deeply golden, you ensure that the bread remains shatteringly crisp on the outside, slightly chewy on the inside, and completely impervious to sogginess.
Choosing Your Canvas
Not all bread is created equal. A standard grocery store “French loaf” that feels as squishy as a giant hot dog bun will not work. It lacks the complex gluten structure and crust development needed to hold up to toppings. Sourdough offers a beautiful tangy contrast, but the holes (the crumb) can sometimes be too large, letting your precious tomatoes fall right through onto your guests’ laps.
A traditional, high-quality bakery baguette is the gold standard because of its tight crumb and high crust-to-interior ratio. Ciabatta is also excellent, provided you slice it evenly. Slice your bread on a bias (diagonally) to give yourself maximum surface area for toppings.
The Garlic Rub: A Lesson in Restraint
Let’s talk about garlic. I love garlic. You love garlic. We all love garlic. But mincing raw garlic and tossing it directly into your delicate tomato mixture is a rookie mistake that will blow out the palates of everyone in your dining room. Raw garlic is aggressive, acrid, and overpowering. It will completely mask the subtle sweetness of the tomatoes and the floral notes of the fresh basil.
The authentic Italian method for bruschetta is an exercise in elegant restraint. You take a whole clove of raw garlic, peel it, slice it in half to expose the center, and gently rub the cut side over the surface of the hot, oil-toasted bread the exact second it comes out of the oven.
The rigid, abrasive surface of the toasted bread acts like a microplane, shaving off microscopic layers of the garlic clove. The residual heat from the bread instantly and gently cooks those microscopic layers, mellowing the harsh allicin compounds while leaving behind a perfectly distributed, fragrant garlic essence. It is brilliant, it is easy, and it ensures that every single bite has a whisper of garlic rather than a screaming, spicy chunk of it. If you have ever wondered why your tomato sauce tastes metallic or bitter, it is almost always because of mishandled, burnt, or overly aggressive raw garlic. Treat it with respect.
The Sassy Sous-Chef’s Gear Rant: Banish the Toxic Baking Sheets
I cannot in good conscience write a masterclass on toasting crostini without addressing the absolute state of the baking sheets in your kitchen. I know what you have in your cabinets. You have those flimsy, dark-coated, warped, peeling non-stick baking sheets that look like they survived a war in the 1990s.
Stop it. Throw them away right now. I am begging you.
The strict “No-Go” Rule in my kitchen is simple: we do not use cheap, toxic, mystery-metal non-stick cookware. Those dark non-stick baking sheets are almost certainly coated in PTFE (Teflon), which belongs to a class of chemicals known as PFAS (per- and polyfluoroalkyl substances). These are the infamous “forever chemicals” that build up in the human body and the environment.
When you crank your oven up to 400°F or 425°F to toast your crostini, those cheap, scratched non-stick coatings can begin to degrade, releasing toxic fumes into the air and leaching chemicals directly into your food. In fact, the health and environmental concerns are so severe that the EPA recently designated certain PFAS as hazardous substances, and several US states, including Minnesota, have enacted strict bans on intentionally added PFAS in cookware starting in 2025 and 2026. If the government is literally outlawing your baking sheet, why are you still cooking your family’s dinner on it?
Furthermore, thin non-stick pans are terrible for heat conduction. They warp violently in the oven—you know that terrifying “POP” sound your pan makes at 400 degrees?—leading to uneven browning. If you want to know why your baking sheets keep warping, it is because they lack the thermal mass to handle rapid temperature fluctuations.
What you need instead: Heavy-duty, uncoated, commercial-grade 18/0 or 18/10 stainless steel baking sheets, or thick aluminum half-sheet pans (if you use unbleached parchment paper). They will never peel. They will never warp. They do not contain forever chemicals. They will outlive you, and they conduct heat beautifully, ensuring your crostini toasts evenly from edge to edge. Start banishing toxic kitchen gear from your home today; your health, your peace of mind, and your food will thank you.
The Prep: Slicing Without Destroying
If you are going to slice a delicate, crusty baguette into 30 perfect crostini, you need the right tool. If you try to use a dull chef’s knife, you will crush the bread, ruin the crumb structure, and end up with misshapen, dense pucks of dough. You need a proper serrated bread knife. A serrated knife works like a saw, catching the hard crust and slicing cleanly through the soft interior without applying downward pressure.
And while we are on the subject of knives, if you are struggling to chop your tomatoes cleanly and instead are just squishing them into a pulpy mess on your cutting board, the hidden culprit is your dull knife. Tomatoes have a tough, slippery skin protecting a very delicate interior. A dull blade will slide right off the skin, putting your fingers at serious risk, and crush the flesh beneath. Keep your knives sharp, people. And if you are tired of dull blades, figure out why your kitchen knives get dull so fast (hint: stop putting them in the dishwasher and stop cutting on hard glass or bamboo boards).
Once you have finally chopped your tomatoes, use a bench scraper to scoop them up and transfer them to your colander. Using the sharp edge of your chef’s knife to scrape ingredients off the cutting board rolls the microscopic edge of the blade, ruining its sharpness instantly. If you don’t know why you need a bench scraper, spend the ten dollars to buy a stainless steel one and watch how much faster, cleaner, and more professional your prep work becomes.
The Mindful Crostini Bar: Deconstructing the Appetizer
Now we arrive at the ultimate hosting hack. You have perfectly toasted, garlic-rubbed, lipid-barrier-protected crostini. You have a perfectly osmotic-drained, flavor-packed tomato salad.
Do not assemble them.
I repeat: Do not build the bruschetta yourself.
If you pre-assemble the bruschetta in the kitchen, you are starting a ticking clock. Even with our brilliant lipid barrier and our drained tomatoes, moisture is relentless. Given enough time, water will always win. If your guests are running late, or if they fill up on wine and conversation before hitting the food, your perfectly engineered appetizers will slowly degrade into a sad, soggy memory.
Instead, we are going to completely deconstruct the appetizer. This is the secret to a DIY crostini bar.
The Concept of Communal Dining
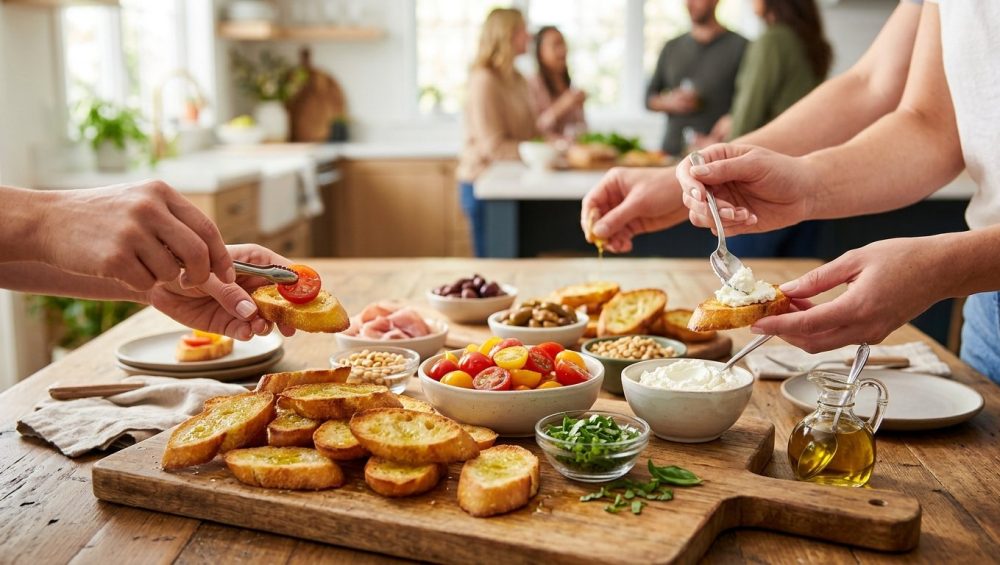
Set out a beautiful, massive wooden board or a platter piled high with your toasted crostini. Next to it, place an array of small, beautiful ceramic bowls containing your toppings. Provide small serving spoons for each bowl.
When guests arrive, they build their own bites. They take a piece of toast, spoon on the exact amount of topping they want, and eat it immediately.
This achieves three brilliant things:
- Zero Sog: The bread and the wet topping only meet milliseconds before consumption. The texture contrast between the shatteringly crisp bread and the juicy, cool tomato is at its absolute peak. Every single bite is perfect.
- Interactive Hosting: It gives your guests something to do with their hands. People love an interactive food station. It breaks the ice, sparks conversation, and makes the gathering feel relaxed, communal, and incredibly mindful.
- No Host Burnout: You are not standing in the kitchen sweating over a tray of appetizers while your friends are laughing in the living room without you. You did all the prep work in advance. Now, you get to pour yourself a drink and actually enjoy the party. If you want to host a relaxed dinner party, delegating the final assembly to your guests is the smartest, most efficient move you can make.
Beyond the Tomato: Curating Your Crostini Bar Toppings
The absolute beauty of the DIY Crostini Bar is that you are not limited to tomatoes. Once you have a mountain of perfectly toasted, garlic-rubbed bread, you can provide a symphony of flavors. It turns a simple appetizer into a full-blown grazing station. Here are a few foolproof, low-stress toppings to elevate your spread:
1. Whipped Ricotta and Hot Honey
Place whole milk ricotta in a food processor with a pinch of salt and a drizzle of olive oil. Whip it for two minutes until it is the texture of buttercream frosting. Serve it in a bowl with a bottle of chili-infused honey for drizzling. The creamy, cooling cheese paired with the sweet, spicy honey on a crunchy crostini is life-changing.
2. Olive Tapenade
A briny, salty, umami-bomb that requires zero cooking. Pulse pitted Kalamata and Castelvetrano olives in a food processor with capers, a tiny bit of garlic, lemon juice, and olive oil. It is deeply flavorful and lasts for weeks in the fridge, making it the ultimate make-ahead topping.
3. Caramelized Onion and Fig Jam
Sweet, savory, and complex. Slowly caramelize onions in a skillet (this takes 45 minutes of low heat, do not rush it) and fold them into a high-quality fig jam. Pair this station with some funky blue cheese or creamy brie for your guests to layer together.
4. Cannellini Bean and Rosemary Mash
For a hearty, protein-packed option, mash canned cannellini beans with roasted garlic, fresh rosemary, lemon zest, and plenty of extra virgin olive oil. It is rustic, cheap, naturally vegan, and incredibly satisfying.
5. Classic Prosciutto and Melon
Provide a plate of paper-thin prosciutto and small cubes of sweet cantaloupe. The salty, cured pork fat melts against the sweet, juicy melon, and the crostini provides the necessary crunch to tie it all together.
The Logistics of Cleaning Up
When the night is over, you will be left with a few empty bowls and a cutting board, rather than a massive platter covered in congealed, soggy bread mush. And because you listened to me and finally threw away your toxic Teflon pans, you can just toss your stainless steel bowls and heavy-duty baking sheets right into the dishwasher. No babying fragile non-stick surfaces, no scrubbing warped metal, and no worrying about the cleanup.
Final Thoughts: You Can Do This
Hosting a dinner party or a weekend gathering does not require a culinary degree from Le Cordon Bleu. It requires an understanding of basic food science, a few high-quality, non-toxic tools, and the confidence to let your ingredients shine.
By respecting the water content of the tomato, utilizing the power of osmosis, engineering a lipid barrier on your bread, and embracing the communal, slow-paced joy of a DIY crostini bar, you are guaranteeing a flawless appetizer experience. You are saving yourself from the stress of last-minute assembly, and you are serving food at its absolute textural peak.
So go buy some tomatoes, get out your kosher salt, and start toasting. Your friends are going to think you are an absolute genius, and you won’t even have to break a sweat. Now, if you’ll excuse me, I have a glass of wine waiting for me, and a mountain of garlic-rubbed carbs calling my name.


