Listen, I know exactly what your kitchen sink looks like after a standard Tuesday night dinner. It is a chaotic battlefield of greasy spatulas, half-empty wine glasses, and the ultimate villain of the evening: a skillet crusted with stubborn, stuck-on brown patches that look like they require a chisel and a blowtorch to remove. You are standing there, exhausted from a long workday, dreading the impending arm workout, and wondering why you didn’t just give up and order Thai food.
But before you reach for that abrasive sponge and a gallon of elbow grease, stop. Put the sponge down. Step away from the sink. You are about to wash the absolute best part of your dinner down the drain.
Those stuck-on, crusty brown patches are not a mistake. They are not a punishment for your lack of culinary prowess, and they certainly do not mean you ruined the meal. In the professional restaurant world, those crusty remnants are treated with the reverence of liquid gold. They are the secret weapon that chefs use to turn a sad, dry piece of meat into a thirty-five-dollar restaurant-quality masterpiece.
Welcome to your new favorite weeknight superpower: deglazing.
As a busy home cook, your time is your most valuable asset. You need maximum flavor with minimum cleanup. Today, we are going deep into the science of the skillet. We are going to transform those intimidating, burnt-looking bits into a glossy, flavor-packed pan sauce in less time than it takes to load the dishwasher. You will learn how to elevate your meals without ordering takeout, saving both your sanity and your wallet.
The Culprit: Why Your Food Sticks (and Why That’s a Good Thing)
Before we can make a phenomenal sauce, we need to talk about why food sticks to your pan in the first place. If you have ever tried to flip a steak only to have half of its beautiful crust remain fused to your stainless steel skillet, you have experienced this firsthand. It feels like a disaster, but chemically, it is exactly what is supposed to happen.
The Maillard Reaction: Your Kitchen’s Best Friend
At the heart of every great pan sauce is a magnificent chemical process called the Maillard reaction. Named after French chemist Louis-Camille Maillard, who first described the phenomenon in 1912, this is the complex non-enzymatic browning process that occurs when amino acids (the building blocks of proteins) and reducing sugars are subjected to high heat [1] [4].
This is not just about changing the color of your food; it is about a massive, microscopic explosion of flavor. The Maillard reaction is responsible for the golden crust on a perfectly seared scallop, the savory depth of a roasted coffee bean, the malty notes in dark beer, and the irresistible smell of freshly baked bread [4] [8].
But here is the catch: the Maillard reaction is incredibly picky about temperature. It strictly begins around 285°F (140°C) and reaches its peak efficiency between 330°F and 390°F (165°C–200°C) [10]. If your pan is too cool, your meat will simply steam in its own juices, leaving you with pale, rubbery protein. If your pan exceeds 390°F (200°C), you cross the line from beautiful browning into destructive burning, creating bitter, acrid chemical compounds that will completely ruin your dish [10].
Moisture is the mortal enemy of this reaction. Water boils and evaporates at 212°F (100°C), meaning that if your steak or pork chop is wet when it hits the pan, the surface temperature of the meat literally cannot rise high enough to trigger browning until every single drop of that water has evaporated [4] [11]. This thermodynamic reality is exactly why your chicken won’t brown if you do not aggressively pat it dry with paper towels before cooking.
When the Maillard reaction kicks off, it happens in three distinct stages. First, the amino acids and sugars condense to form glycosylamines. Second, these structures undergo the Amadori rearrangement to form ketosamines. Finally, Strecker degradation occurs, producing hundreds of new volatile flavor compounds, including pyrazines (which provide nutty, roasted aromas) and melanoidins (which provide the deep brown color) [1] [12].
Fond: The Culinary Gold Mine Hiding in Plain Sight
When you sear a piece of meat properly, the intense heat causes the proteins on the surface to denature and physically bond with the microscopic pores in the metal of the pan. As the food cooks and releases its natural sugars, fats, and juices, these liquids hit the hot metal and rapidly evaporate, leaving behind a highly concentrated, caramelized residue [1] [5].
In French culinary terminology, this magnificent residue is called fond, which literally translates to “base” or “foundation” [1] [2]. It is the absolute foundation of classical sauce-making. Auguste Escoffier, the legendary architect of traditional French cuisine, built his entire system of mother sauces on the back of this exact residue [1].
When you look at your pan and see a crusty, brown landscape, you are not looking at a cooking mistake. You are looking at pure, dehydrated flavor just waiting to be reactivated.
The Toxic Truth About “Non-Stick” Pans
Let me pause right here for a crucial, non-negotiable reality check. If you are reading this and thinking, “Well, my food never sticks because I use a non-stick pan,” we need to have a serious talk.
I have zero patience for cheap, toxic kitchenware. Those lightweight, peeling “non-stick” skillets you bought on clearance are actively sabotaging your food and your health.
Most traditional non-stick pans are coated with PTFE (polytetrafluoroethylene), which is essentially a PFAS-based plastic [18]. When you crank up the heat to get a good sear—which, as we just learned, requires temperatures between 330°F and 390°F—you are pushing that cheap chemical coating to its absolute limit [10]. At temperatures above 500°F (which a dry pan can easily reach in just a few minutes on a standard gas stove), PTFE begins to chemically break down and release highly toxic fumes [18].
These fumes are famously lethal to pet birds, and in humans, they cause a terrifying condition known as “polymer fume fever” or “Teflon Flu” [15] [18]. In 2024 alone, the Washington Post reported 267 severe cases of this flu-like illness linked directly to inhaling fumes from overheated non-stick pans [15]. Furthermore, as these cheap pans inevitably warp, scratch, and degrade, they release microplastics and nanoplastics directly into your dinner [15] [18]. A recent study by the Ecology Center found that a staggering 79% of tested non-stick cooking pans were coated with these hazardous PTFE polymers [17].
The situation is so dire that states are finally stepping in. Minnesota’s groundbreaking Amara’s Law is set to ban all intentionally added PFAS in cookware starting in 2025 [15]. But you shouldn’t wait for a legal mandate to start banishing toxic kitchen gear from your home immediately.
If you want to cook like a true professional and build a proper fond, you need a pan that allows food to stick just enough. You need high-quality, uncoated materials that can handle high heat safely without off-gassing into your lungs.
The Science of Deglazing: How Liquid Lifts Flavor
So, you have a beautiful, heavy-bottomed skillet coated in glorious brown fond. Now what? You deglaze.
Deglazing is the fundamental culinary technique of adding a cold or room-temperature liquid to a screaming hot pan to loosen and dissolve the caramelized bits stuck to the bottom [5]. It sounds like a pretentious culinary school term, but it is literally just pouring liquid into a hot pan and aggressively scraping it with a spatula.
Thermal Shock and Solubility
When the relatively cool liquid hits the hot metal of the skillet, it creates an immediate and violent thermal shock. The liquid rapidly boils and vaporizes, creating a massive burst of steam. This rapid physical reaction effectively breaks the strong physical bonds between the polymerized proteins and the metal pan [5]. This is the exact opposite of how you prevent protein sticking during the searing phase; here, we are using thermodynamics to force the stuck proteins to let go.
Simultaneously, the chemistry of solubility takes over. The caramelized sugars, rendered fats, and amino acids that make up the fond are highly soluble in water and alcohol. As the liquid bubbles, it acts as a powerful solvent, dissolving these concentrated compounds and suspending them in the liquid [1] [5]. You are essentially washing your pan on the stove, but instead of sending that incredible flavor down the drain, you are capturing it to pour over your food.
The Role of pH in Flavor Extraction
While you can technically deglaze a pan with plain tap water, using an acidic liquid (like wine, vinegar, or citrus juice) acts as a culinary cheat code for flavor extraction.
Acids are exceptional solvents. The lower pH of acidic liquids helps to break down the tough, polymerized proteins in the fond much faster and more efficiently than water alone [5]. Furthermore, heavy, savory dishes naturally crave balance. The bright, sharp bite of an acid cuts through the rich, fatty mouthfeel of seared meats, which is precisely why your dinner actually needs acid to taste complete and well-rounded.
The Deglazing Liquid Lineup: What to Pour in Your Pan
The liquid you choose to deglaze with will define the entire character, color, and flavor profile of your final sauce. Here is your ultimate weeknight arsenal.
Wine: The Classic Choice
Wine is the undisputed king of deglazing liquids. It provides water for steam, acid for dissolving stubborn proteins, and a massive array of complex flavor compounds that elevate the dish.
- Dry White Wine: (Think Sauvignon Blanc, Pinot Grigio, or an unoaked Chardonnay). This is the go-to choice for chicken, pork, and delicate seafood. It brings a bright, crisp acidity that lifts the dish without overpowering the natural flavors of the meat.
- Dry Red Wine: (Think Cabernet Sauvignon, Merlot, or Pinot Noir). This is the heavy hitter for beef, lamb, and venison. As red wine reduces, its natural tannins concentrate, providing a deep, robust, almost jammy backbone to the sauce [4].
- Fortified Wines: (Dry Vermouth, Marsala, or Sherry). These pack a massive punch of complex, oxidized flavors. Marsala is famously used with chicken and mushrooms, while a splash of dry vermouth is a chef’s secret weapon for an incredible pan sauce.
A quick note on alcohol: The intense heat of the pan will rapidly evaporate the ethanol, leaving behind only the concentrated flavor of the grape [5]. However, never pour alcohol directly from the bottle into a hot pan over an open gas flame. The vaporized alcohol can ignite, and unless you want to accidentally flambé your eyebrows off on a Tuesday, pour the wine into a measuring cup first, then into the pan.
Broth and Stock: The Savory Backbone
If you do not consume alcohol, or if you simply want a deeply savory, meaty sauce, broth is your best friend. Chicken, beef, veal, or high-quality vegetable stock will dissolve the fond beautifully.
For the absolute best results, use a homemade, gelatin-rich bone broth. As the liquid reduces, that natural gelatin will thicken the sauce organically, giving it a luxurious, lip-smacking texture that coats the back of a spoon perfectly. Store-bought boxed broths lack this gelatin, which is why sauces made with them often feel thin and watery unless you add a thickening agent.
Vinegars and Citrus: The Acidic Brighteners
Sometimes, you need a serious, unapologetic punch of acidity. Apple cider vinegar, balsamic vinegar, or a generous squeeze of fresh lemon juice can work absolute wonders.
Because vinegars are highly concentrated, you rarely want to deglaze with a full cup of straight vinegar (unless you enjoy the sensation of inhaling pure acetic acid vapor and coughing uncontrollably). Instead, use a splash of vinegar or lemon juice mixed with broth or water to balance the intense acidity while still reaping the flavor benefits.
The Unconventional Heroes: Beer, Cider, and… Water?
Do not be afraid to raid your fridge and get creative.
- Beer: A dark stout or porter makes an incredibly rich, earthy pan sauce for a seared steak or a hearty sausage. A light, hoppy pilsner is fantastic for bratwurst or chicken.
- Hard Cider: This is the absolute perfect pairing for seared pork chops. The sweet-tart apple flavor complements the savory pork fat flawlessly.
- Water: Yes, plain tap water. If your fond is incredibly rich, your meat was heavily seasoned, and you have already added aromatics like garlic and herbs, a splash of water is sometimes all you need to lift the bits without introducing competing flavors.
The Step-by-Step Masterclass: Building a Restaurant-Quality Pan Sauce
We have covered the history, the chemistry, and the ingredients. Now, let’s execute. This entire process takes roughly five minutes. By the time your meat is done resting on the cutting board, your sauce will be ready to pour.
Step 1: The Sear and the Fond Formation
To start, you need the right equipment. The essential tools every beginner needs must include a heavy-bottomed, multi-clad stainless steel skillet, a well-seasoned carbon steel pan, or an enameled cast-iron skillet. Heat the dry pan over medium-high heat. Pat your protein (let’s say, boneless skinless chicken thighs) completely dry with paper towels. Add a high-smoke-point oil, and lay the chicken down.
Let it sear completely undisturbed until a deep golden-brown crust forms. Do not poke it, do not prod it, and do not try to flip it prematurely. When it naturally releases from the metal, flip it, cook the other side, and then remove the cooked chicken to a cutting board to rest.
Look at your pan. You should see a beautiful, dark brown crust clinging to the metal. That is your fond.
Step 2: Fat Management
If you just cooked a fatty piece of meat like a ribeye steak or skin-on chicken, you might have a massive pool of rendered grease bubbling in the pan. You want a refined sauce, not a greasy oil slick. Carefully tilt the pan and use a spoon to scoop out the excess fat, leaving just about one tablespoon behind. Do not scrape the bottom while doing this; leave the precious fond untouched!
Step 3: The Aromatics
Return the pan to medium heat. Toss in your aromatics. Finely diced shallots, minced garlic, or a sprig of fresh thyme are perfect here. Sauté them in that remaining tablespoon of fat for about 60 seconds until they soften and become fragrant. If your garlic always burns and turns bitter, make sure you are adding it after the pan has cooled slightly from the high-heat searing phase, and keep it moving constantly.
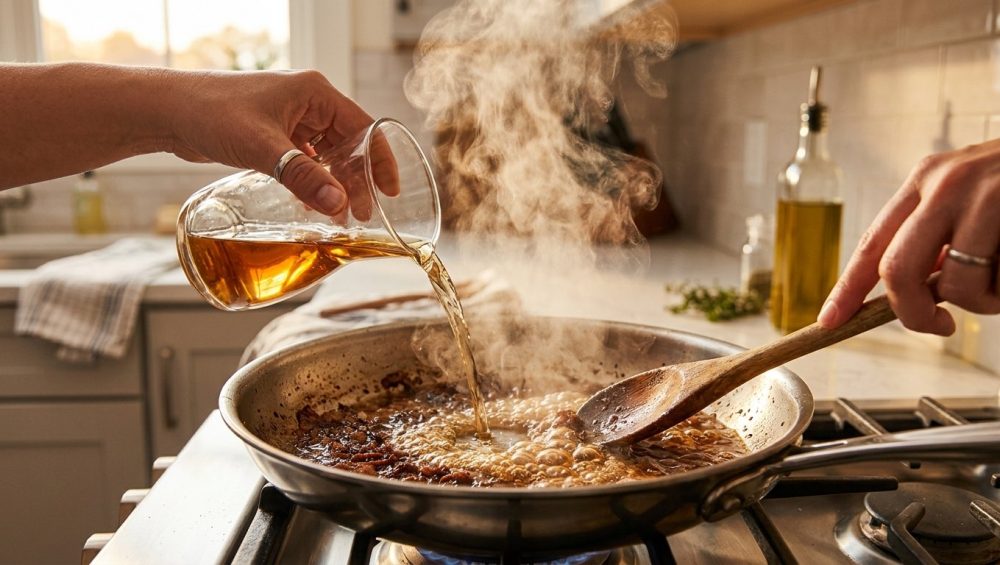
Step 4: The Deglaze
Here comes the magic. Pour in about half a cup of your chosen liquid (wine, broth, or cider).
Ssssssssssss.
The pan will immediately hiss, spit, and billow a cloud of aromatic steam. Grab a flat-edged wooden spoon, a stiff silicone spatula, or a metal fish turner, and aggressively scrape the bottom of the pan. You will feel the crusty bits magically release and dissolve into the bubbling liquid [5]. Make sure you get into the corners of the skillet.
Step 5: Reduction and Concentration
Now, we practice patience (but only for a minute or two). Let the liquid bubble and simmer vigorously. As the water evaporates, the flavors of the fond, the aromatics, and the deglazing liquid will concentrate and intensify dramatically [4]. You want the liquid to reduce by at least half. It should start to look slightly syrupy and coat the bottom of the pan. If your meat released any juices while resting on the cutting board, pour those directly into the reducing sauce.
Step 6: The Emulsion (Mounting with Butter)
This is the final, crucial step that separates amateur home cooks from professional chefs. Turn the heat completely off. Take a tablespoon of cold, unsalted butter and drop it straight into the reduced liquid.
Swirl the pan vigorously, or whisk constantly, as the butter melts. This technique, known in classical French kitchens as monter au beurre (mounting with butter), creates a temporary, stable emulsion.
The milk solids and fats in the cold butter bind with the water in the sauce, thickening it and giving it a glossy, velvety sheen. Because you turned the heat off, the butter melts gently without separating into a greasy mess, which is exactly how you prevent broken emulsions.
Taste it. Add a pinch of salt or a grind of black pepper if needed. Pour this glorious, savory nectar over your resting meat. You have just created culinary art.
Troubleshooting Your Pan Sauce Disasters
Even the best of us mess up occasionally. If your sauce isn’t turning out like a glossy magazine cover, here is how to diagnose the problem and fix it.
“My Fond is Pitch Black!”
There is a very fine line between deeply caramelized and completely carbonized. If your pan is coated in pitch-black, powdery soot that smells like a campfire gone wrong, you have burned your fond.
The Fix: Do not deglaze a burnt pan. The resulting sauce will taste like a bitter ashtray. Cut your losses, wipe the pan out with a paper towel, and make a quick vinaigrette instead. Next time, manage your heat better and do not let the pan exceed 390°F [10].
“My Sauce is a Greasy, Separated Mess!”
If your sauce looks like a broken salad dressing with pools of clear oil floating on top of a watery liquid, your emulsion broke. This usually happens for two reasons: you left way too much rendered fat in the pan during Step 2, or you boiled the butter over high heat in Step 6 instead of gently melting it off the heat.
The Fix: Whisk in a tiny splash of cold heavy cream or a half-teaspoon of Dijon mustard. Both of these ingredients contain powerful natural emulsifiers (lecithin in the cream, and mucilage in the mustard) that will violently force the fat and water back together into a smooth, cohesive sauce.
“My Sauce is Too Thin and Watery!”
If you used a boxed broth lacking gelatin, or if you just added too much liquid, your sauce might refuse to thicken.
The Fix: You can simply keep boiling it to reduce it further. If you are out of time, create a quick cornstarch slurry (equal parts cold water and cornstarch) and whisk a tiny drop into the boiling sauce. Alternatively, mash equal parts soft butter and all-purpose flour together to create a beurre manié, and whisk a pea-sized amount into the simmering liquid.
“My Sauce Tastes Boring!”
If your sauce looks great but tastes flat and uninspired, it lacks balance.
The Fix: It probably needs a pinch of finishing salt or a sharp hit of acid. Try a quick squeeze of fresh lemon juice or a tiny splash of apple cider vinegar right before serving. Acid wakes up dull, heavy flavors instantly.
The Ultimate Weeknight Hack: Zero-Waste Cooking and Effortless Cleanup
Let’s circle back to the real reason we are doing this. Yes, the flavor is incredible. Yes, you look like a culinary genius to anyone watching you cook. But the secret, underlying benefit of deglazing is that it is the ultimate, undisputed kitchen cleaning hack.
Reclaiming Your Evenings from the Sink
According to a recent survey commissioned by Birds Eye, Americans spend an average of 25 minutes a day standing at the kitchen sink washing dishes, which equates to over 6 full days a year wasted scrubbing plates and pans [14]. Other comprehensive time-use studies indicate that up to 80% of Americans will spend nearly a full year of their entire lifetime doing household chores [16]. Even conservative time-diary audits show that women average over an hour a week exclusively dedicated to dishwashing [13].
That is a staggering, depressing amount of your life wasted scrubbing pots and pans.
When you deglaze a skillet to make a pan sauce, you are chemically stripping the baked-on residue right off the metal. The rapidly boiling liquid and the firm scraping action of your spatula do 95% of the dishwashing for you. By the time you serve dinner, that stainless steel pan will be practically spotless. A quick wipe with a soapy sponge, a quick rinse, and it is completely clean. There is no soaking it overnight. There is no aggressive, sweat-inducing scrubbing. There are no ruined scouring pads.
This technique is the ultimate weapon against weeknight cooking anxiety. You get to utilize every single drop of flavor you paid for at the grocery store, elevating a basic Tuesday chicken breast into a gourmet meal, while simultaneously eliminating your absolute worst cleanup chore.
And let’s be brutally honest: those cheap non-stick pans you thought were saving you time? They eventually warp, scratch, and start losing their slip anyway, forcing you to scrub them just as hard before you inevitably throw them in the landfill and buy another one. A properly deglazed, high-quality stainless steel or carbon steel pan outlives and outperforms them every single time.
Conclusion
Cooking does not have to be a stressful, chaotic chore, and you certainly do not need a degree from Le Cordon Bleu to make food that makes your eyes roll back in your head. The secret to great cooking isn’t buying a pantry full of expensive truffle oils, investing in absurd single-use gadgets, or utilizing complicated molecular gastronomy.
The secret is simply understanding your pan.
It is about recognizing that the brown, crusty mess left behind after a good sear isn’t garbage—it is the literal foundation of flavor. It is about harnessing the hard science of the Maillard reaction, utilizing the thermal shock of deglazing, and mastering the simple, beautiful art of a butter emulsion.
So tonight, when you finish searing that pork chop, that chicken breast, or that steak, do not sigh and carry that hot pan over to the sink. Leave it on the stove. Pour in a splash of wine, scrape up that beautiful fond, and watch the culinary magic happen. You will never look at a “dirty” skillet the same way again. Now go pour yourself a glass of that deglazing wine—you have definitely earned it.


