Let me paint a picture you probably know all too well. The doorbell rings. You are covered in a light dusting of flour, sweating profusely over a pan of rapidly reducing sauce, and your kitchen looks like a culinary crime scene. You yell, “Just a minute!” while frantically trying to plate a side dish that actually needed to be served ten minutes ago. Your guests are awkwardly sipping wine in the living room, trying to make polite conversation over the sound of your smoke detector, while you have a minor, silent breakdown next to the stove.
We have all been sold a massive lie by lifestyle influencers and glossy food magazines. If you want to master the art of effortless hosting, you have to accept a hard, non-negotiable truth: you cannot cook a complex, multi-component, restaurant-quality meal from scratch while simultaneously entertaining human beings. It is a logistical nightmare. Even if you have a beautifully organized dream kitchen, trying to execute five hot dishes at the exact moment your guests are ready to eat is a recipe for an anxiety-induced disaster. You are a home cook, not a line cook working the Friday night rush at a Michelin-starred bistro. You do not have a sous-chef, an expeditor, or a dishwasher. You just have you.
The solution to this madness isn’t chopping faster, buying a $10,000 commercial stove, or growing a third arm. The solution is time-shifting. We are going to aggressively separate the act of cooking from the act of serving. By leveraging the hard science of flavor maturation (the overnight rest) and mastering precise thermal holding temperatures (the 140°F to 160°F sweet spot), you can eradicate day-of bottlenecks entirely. We are going to make the food work on your schedule, not the other way around.
The Science of Flavor Maturation: Why “Better the Next Day” is a Scientific Fact
We’ve all experienced it: that beef stew, chili, or complex curry that tastes infinitely richer, deeper, and more harmonious on Tuesday than it did when you cooked it on Monday. This isn’t your imagination, and it isn’t culinary magic or an old wives’ tale. It is hard, observable, quantifiable food science.
You don’t need a PhD in molecular gastronomy to decode pretentious recipe jargon, but understanding the basic biochemistry of your food will make you a significantly better, more confident cook. When we talk about flavor maturation, we are talking about macro-molecular integration. Let’s break down exactly what happens inside your Dutch oven while you are sleeping.
Macro-Molecular Integration: When Aromatics Finally Mingle
When you finish cooking a complex, heavily spiced dish, the flavor compounds are essentially yelling over each other. The dish is hot, the molecules are highly volatile, and the flavors haven’t had time to properly introduce themselves to the lipid (fat) and water molecules in the sauce.
During an overnight rest in the refrigerator, a fascinating process occurs. The extreme heat is removed, meaning volatile aromatic compounds stop evaporating into the air (which is why your kitchen smells great while cooking, but the food sometimes tastes bland—the flavor literally floated away). Enzymatic activity slows but doesn’t entirely stop. Slow, non-oxidative rearrangements take place.
Spices contain essential oils that are fat-soluble. Compounds like eugenol (found in cloves), cinnamaldehyde (cinnamon), and capsaicin (chilies) gradually disperse and dissolve throughout the dish’s lipids during the resting phase. This ensures that every single bite carries a unified, rounded flavor profile rather than disjointed, harsh spikes of individual spices. Recent food chemistry studies from institutions like Chulalongkorn University’s Institute of Nutrition have even confirmed measurable increases in complex aroma compounds—like β-damascenone (which provides deep, fruity, floral notes) and furaneol (caramel and sweet notes)—in spiced pastes and stews after a 24-hour resting period. The flavor isn’t just “settling”; it is actively transforming and multiplying.
The Gelatinization and Starch Retrogradation Factor
If your make-ahead dish includes starches—potatoes, beans, root vegetables, or a flour-thickened roux—the overnight rest is absolutely mandatory for textural perfection. During the initial cooking phase, starches absorb water and swell in a process known as gelatinization. But as the dish cools in the fridge, those starch molecules undergo a process called retrogradation. They realign and form a more stable, crystalline structure.
Why do we care about retrogradation? Because this structural realignment fundamentally changes the texture of the liquid. It transforms a thin, watery broth into a velvety, lip-smacking sauce that beautifully coats the back of a spoon. Furthermore, it allows the starches to absorb the surrounding seasoned liquid more deeply. This means your braised potatoes actually taste like the rich wine and beef stock all the way through to their core, rather than just being salty on the surface and bland in the middle.
Protein Relaxation and Umami Development
Let’s talk about meat. When you braise a tough cut of meat, the intense heat causes the muscle fibers to contract, violently squeezing out their internal moisture. If you serve a braise immediately after taking it out of the oven, the meat will often taste surprisingly dry, even though it is swimming in a gallon of liquid.
As the meat slowly cools down in its braising liquid overnight, those tightly wound protein fibers relax. As they relax, they reabsorb the flavorful liquid around them, much like a dry sponge soaking up spilled wine.
Furthermore, naturally occurring proteolytic enzymes in the meat continue to do subtle, brilliant work during the resting phase. These enzymes break down large, flavorless protein molecules into smaller peptides and individual amino acids. One of those specific amino acids is glutamate. Yes, that glutamate—the exact compound responsible for umami, the deep, savory, meaty flavor that makes our mouths water and triggers our brain’s reward centers. By letting your dish rest overnight, you are literally generating free glutamate, naturally amplifying the savory depth of your food without adding a single extra grain of salt or MSG.
The Art of the Make-Ahead Menu: What to Cook When
Now that we know the science, we need to apply it ruthlessly. Not all foods are candidates for time-shifting. Trying to sear ten steaks to a perfect medium-rare while your guests are standing around your island is one of the seven rookie kitchen mistakes that will send your cortisol levels through the roof and leave your home smelling like a tire fire. You must design a menu that inherently wants to be made in advance.
The Winners: Braises, Stews, and Complex Sauces
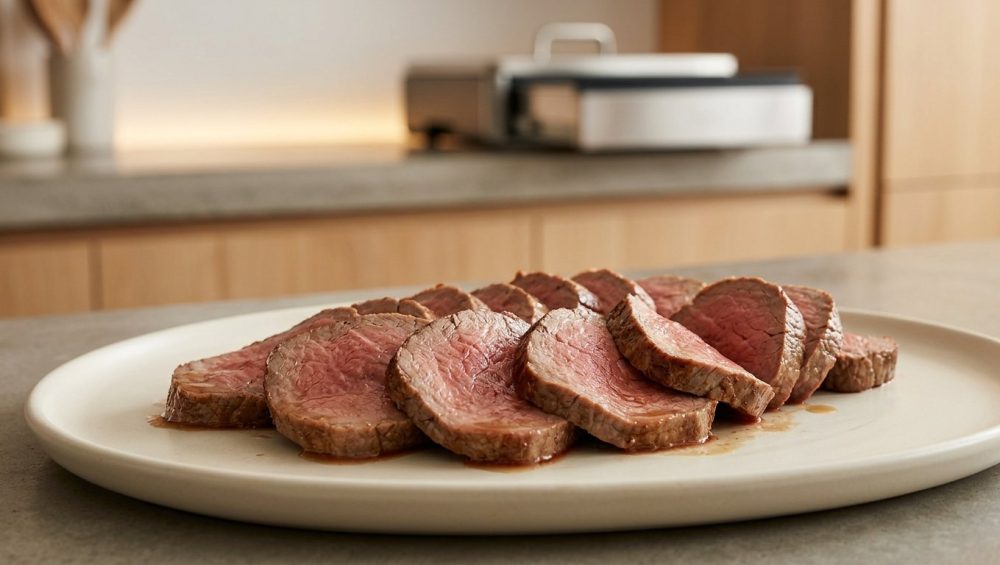
The absolute champions of the make-ahead, stress-free menu are meats rich in connective tissue. Think beef short ribs, pork shoulder, lamb shanks, brisket, oxtail, and heavily marbled chuck roast. These cuts are loaded with collagen. During a long, slow cook, the triple-helix structure of that collagen unwinds and melts into pure, liquid gelatin (a process that really kicks into high gear around 160°F to 180°F). This gelatin is what provides that unctuous, sticky, melt-in-your-mouth texture that makes restaurant food so good.
These dishes don’t just tolerate being made 24 to 48 hours in advance; they demand it. Not only do they benefit from the macro-molecular integration and umami development we just discussed, but chilling them overnight provides a massive logistical advantage: the rendered fat solidifies on the surface. You can easily lift off this solid fat cap the next day with a spoon, leaving you with a clean, intensely flavored sauce that isn’t greasy or heavy. Try doing that with a hot stew on the day of your party—you’ll be chasing oil slicks with a ladle for twenty minutes.
Other winners include deeply layered lasagnas, Indian curries, enchiladas, and robust soups. Anything that relies on the slow melding of wet ingredients is your best friend.
The Losers: What Actually Needs to be Cooked à la Minute
Do not try to make-ahead delicate proteins or volatile green vegetables. Scallops, shrimp, flaky white fish, and prime cuts of steak (like filet mignon, ribeye, or strip) degrade rapidly when held hot. Their protein structures are incredibly delicate, and they lack the protective, moisture-retaining collagen of braising cuts. If you hold a medium-rare steak in a warming drawer, it will inevitably carry over into a gray, well-done hockey puck.
Similarly, green vegetables like asparagus, green beans, broccoli, or snap peas contain chlorophyll. When exposed to prolonged heat and their own natural cellular acids, that bright, vibrant green chlorophyll degrades into pheophytin, turning your beautiful vegetables a depressing, swampy olive-gray. If you must serve these items, prep them completely in advance—trim the beans, season the steaks, make the garnishes—but apply the actual heat at the very last second.
The Thermal Holding Zone: 140°F to 160°F (Your Secret Weapon)
This is the most critical section of this entire masterclass. Read it twice. If you understand temperature control, you hold the keys to the culinary kingdom. You won’t need to frantically rescue a ruined dinner if you respect the absolute laws of thermodynamics and biology.
Beating the Danger Zone Without Ruining Dinner
The USDA is very clear about food safety: the “Danger Zone” for bacterial growth is between 40°F and 140°F (4°C to 60°C). In this range, nasty pathogens like Salmonella, E. coli, Campylobacter, and Staphylococcus aureus throw a massive, microscopic frat party, doubling in number every 20 minutes. Perishable food left in this zone for more than two hours must be thrown out. Period. Do not test your guests’ immune systems.
So, to keep food safe for a party, we must hold it above 140°F. But here is where well-meaning home cooks go terribly, tragically wrong: they blast their slow cookers, chafing dishes, or ovens to 200°F “just to be safe,” and end up boiling their carefully crafted meals into dry, stringy oblivion.
The 140°F Baseline: Preventing Bacterial Mutiny
Your absolute floor for holding hot food is 140°F (60°C). At this precise temperature, bacterial growth is completely halted. The food is safe to consume for hours on end. It is also a highly pleasant temperature for the human palate—hot enough to feel comforting and release aromatic vapors into the nasal cavity, but not so hot that it burns the tongue or masks subtle flavor notes (extreme heat actually numbs our taste buds).
When pulling your matured, make-ahead dish from the fridge on the day of the party, the USDA mandates that you first reheat the leftovers rapidly to an internal temperature of 165°F (74°C). This rapid reheat kills any vegetative bacteria that may have hitched a ride or multiplied slowly during the cooling down and warming up phases. Once the core of the dish hits 165°F, you can safely drop the temperature of your holding vessel to maintain that perfect 140°F baseline.
The 160°F Ceiling: Avoiding Protein Denaturation and the “Shoe Leather” Effect
If 140°F is the floor, 160°F (71°C) is your absolute, non-negotiable ceiling. Why? Because of the physical behavior of two specific muscle proteins: myosin and actin.
Myosin begins to denature (unfold and change shape) between 104°F and 140°F. This is a good thing. It turns raw, translucent meat opaque and gives it a pleasant, tender bite while still retaining its internal juices.
Actin, however, is the enemy of the dinner party. Actin proteins begin to aggressively denature between 150°F and 163°F. When actin denatures, the muscle fibers shrink violently, squeezing out all their internal moisture like a wrung-out sponge. If you hold your meat at 170°F or 180°F, it does not matter how much expensive wine or rich broth it is sitting in; the internal structure of the meat will expel its water into the surrounding liquid, resulting in dry, stringy, tough shoe leather that gets stuck in your teeth.
By strictly maintaining your holding environment between 140°F and 160°F, you keep the food perfectly safe from bacteria while completely preventing the actin from denaturing and ruining your expensive meat.
Equipment: The Good, The Bad, and The Toxic
You cannot execute precise thermal holding with garbage equipment. As your dedicated culinary advocate, I have zero patience for the cheap, dangerous junk being peddled to home cooks by big-box stores. Before we talk about chafing dishes and slow cookers, let me remind you about the importance of banishing toxic kitchen gear from your home entirely.
The Hard Truth About Cheap Non-Stick and Mystery Metals
Do not, under any circumstances, use cheap, scratched Teflon pans or flimsy, uncoated aluminum pots to hold hot food for hours. Traditional non-stick coatings are made with PFAS (per- and polyfluoroalkyl substances), often called “forever chemicals” because they bioaccumulate in the human body and do not break down in the environment. When these cheap coatings degrade, peel, or are subjected to prolonged heat, they can leach toxic compounds directly into your food.
Similarly, holding acidic foods (like a tomato-based ragù, a wine-heavy Coq au Vin, or a vinegar-spiked barbecue sauce) in reactive metals like cheap aluminum or unlined copper is a disaster. The acid will literally strip the metal molecules into your sauce over the course of a few hours. This gives your masterpiece a highly metallic, bitter, tinny taste and can potentially cause gastrointestinal distress. Throw that peeling pan in the trash right now. I mean it. Your health and your food deserve better.
Safe, High-Quality Holding Vessels
For safe, reliable thermal holding, you need materials with high thermal mass, excellent emissivity, and completely non-reactive surfaces.
- Enameled Cast Iron: The undisputed king of the kitchen. A heavy enameled Dutch oven retains heat beautifully and evenly due to its massive thermal density. The glass-enamel coating is completely non-reactive, meaning you can hold a highly acidic tomato sauce in it for 12 hours without a single off-flavor developing.
- Precision Portable Induction Cooktops: A high-quality portable induction burner is a game-changer for hosting. It allows you to set an exact temperature (like exactly 145°F) rather than relying on vague, useless “Low/Medium/High” dials found on traditional stoves. Paired with a heavy 18/10 stainless steel or cast-iron pot, this creates the ultimate, foolproof holding station right on your kitchen island or buffet table.
- High-End Slow Cookers with Probe Thermometers: If you must use a slow cooker, throw away the $15 one you bought in college. Invest in a model that allows you to set a specific target temperature. The archaic “Warm” setting on cheap models often creeps dangerously close to boiling (212°F), which, as we now know, will trigger actin denaturation and ruin your food.
- Sous-Vide Circulators: For the ultimate, scientifically perfect control, holding vacuum-sealed meats in a water bath set exactly to 140°F guarantees zero moisture loss, zero evaporation, and zero overcooking, even if your guests are three hours late because of traffic.
Moisture Management: Preventing the Dreaded Dry-Out
Even if you nail the 140°F-160°F temperature zone perfectly, prolonged holding presents another relentless physics problem: evaporation. As water turns to vapor and escapes your holding vessel, your sauce will reduce, thicken, and eventually turn into a salty, gluey paste. You must actively manage moisture.
Humidity Control: The Lid vs. The Vent
You must consciously control the micro-climate inside your holding vessel. If you are holding a braise, a stew, mashed potatoes, or a curry, keep the lid tightly sealed to trap the steam. The condensation will collect on the underside of the lid and rain back down into the food, maintaining the exact moisture equilibrium you established during the cooking phase. If you are worried about a skin forming on the top of a delicate sauce, press a piece of parchment paper (a cartouche) directly onto the surface of the liquid under the lid.
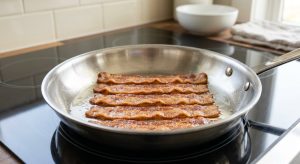
However, if you are holding something that relies on a crispy, crunchy texture (like roasted root vegetables, a breadcrumb-topped gratin, or fried chicken), a tight lid is a death sentence. The trapped steam will instantly turn your crispy crust into soggy mush. For these items, you must vent the lid slightly to allow steam to escape, while holding the food at the very lower end of the safe zone (140°F) to minimize aggressive moisture loss from the interior of the food.
The Power of the Finishing Splash
Here is a professional kitchen secret that separates good food from mind-blowing food: prolonged holding, even under absolutely perfect thermal conditions, can mute the high, bright, volatile flavor notes of a dish. The deep, savory umami notes will be incredible after the overnight rest, but the dish might taste a little “flat” or heavy on the palate.
To counteract this, you must apply a “finishing splash” literally seconds before the food goes to the table. Knowing that your dish is safely holding at 145°F and the hard work is done is guaranteed to cure cooking anxiety, but the food still needs a final wake-up call to achieve perfection.
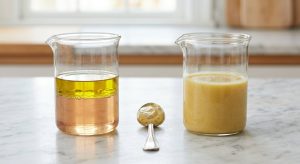
Stir in a splash of fresh acid (a heavy squeeze of lemon juice, a dash of sherry vinegar, or a spoon of Dijon mustard) to cut through the heavy richness of the gelatin and fat. Fold in a pat of cold, high-quality butter or a drizzle of expensive finishing olive oil to restore a glossy, luxurious mouthfeel. Toss in a massive handful of freshly chopped soft herbs (parsley, cilantro, tarragon, chives) to provide an aromatic, volatile punch that hits the guests’ noses the exact moment the plate is set down in front of them. This contrast between deep, matured flavors and bright, fresh finishes is the hallmark of expert cooking.
A Step-by-Step Timeline for the Stress-Free Host
Let’s put all of this science and theory into a concrete, actionable plan. Yes, you can actually throw a flawless dinner party without breaking a sweat, provided you follow a strict, uncompromising operational timeline.
48 Hours Out: The Heavy Lifting
This is when you do the dirty work. Do all of your grocery shopping today. Chop your mountains of onions, peel your garlic, wash your greens, and trim your meat. You can also execute the long, slow cooking phase of your braises, stews, or sauces today. By doing this two days early, you contain the mess, the grease splatters, the piles of dirty cutting boards, and the lingering smells to a day when absolutely no one is coming over. You can cook in your sweatpants, listen to a podcast, and make a mess without any performance anxiety.
24 Hours Out: Maturation Station
Your main dish is now resting comfortably in the refrigerator. The macro-molecular integration is happening. The starches are retrograding. The proteins are relaxing and generating umami. You are doing zero active cooking of the main course today.
Instead, today you handle the cold prep and the logistics. Make the vinaigrette and store it in a mason jar. Assemble the cheese and charcuterie board, wrap it tightly in plastic wrap, and place it in the fridge. Set the dining table. Polish the wine glasses. Fold the napkins. Pull out the serving platters and put sticky notes on them dictating what food goes where. These are the simple steps to culinary artistry that separate frazzled, reactive cooks from relaxed, elegant, proactive hosts.
The Day Of: Thermal Holding and Mindfulness
On the day of the gathering, your kitchen should be spotless, the dishwasher should be completely empty (ready to receive dirty plates), and the house should smell faintly of whatever expensive candle you lit, not of frying onions and bleach.
Here is your countdown:
- 3 Hours Before Guests Arrive: Take your matured main dish out of the fridge to take the chill off.
- 2 Hours Before: Place the Dutch oven on the stove and reheat it gently but steadily until a probe thermometer reads 165°F internally. Stir occasionally to prevent scorching.
- 1.5 Hours Before: Transfer the pot to your precision induction burner or set your high-end slow cooker. Set the temperature to exactly 145°F. Put the lid on. Walk away. Go take a shower and get dressed.
- 30 Minutes Before: Pull the cheese board from the fridge so it can come to room temperature (cold cheese is flavorless cheese). Open the red wine to let it breathe.
When the doorbell rings, you are holding a glass of wine, wearing clean clothes, and actually smiling. You can focus entirely on your guests, take their coats, and engage in real conversation because the food is safely suspended in a perfect, scientifically validated thermal state. When it is finally time to eat, you simply take off the lid, add your finishing splash of acid and fresh herbs, plate the food, and serve.
The Final Word: Pour the Wine and Actually Drink It
Cooking for people you care about should never feel like a punishment or a performance test. The culinary entertainment industry has spent decades convincing home cooks that they need to replicate the chaotic, high-adrenaline, fire-breathing environment of a professional restaurant line to produce good food. That is a toxic lie.
By understanding the simple biochemistry of flavor maturation and respecting the thermodynamic boundaries of protein denaturation and bacterial growth, you take back complete control of your kitchen. You force the food to work on your schedule. You eliminate the variables that cause panic.
Ultimately, we do all of this to create simple meals for mindful moments, engaging deeply with the people sitting across from us rather than staring at a ticking oven timer with a knot in our stomachs. So throw out that peeling Teflon pan, embrace the magic of the overnight rest, set your holding temperature to a perfect 145°F, and pour yourself a well-deserved glass of wine. You’ve earned it, your guests will be blown away, and your dinner is going to be spectacular.