Welcome to the reality of cooking, where the smoke alarm is just your kitchen’s highly aggressive way of cheering you on. If you are reading this, you have probably spent one too many evenings staring blankly into your refrigerator, hoping a gourmet meal will magically assemble itself while you hyperventilate over a recipe that demands you “julienne” a carrot. Listen to me: take a deep breath, put down the takeout menu, and pour yourself a glass of wine. You are in the right place.
I am here to tell you that it is entirely possible to master the art of the kitchen without a fancy culinary degree, a trust fund to blow on overpriced gadgets, or a natural-born gift for gastronomy. Cooking is not magic. It is a highly predictable combination of physics, chemistry, and a little bit of intuition that you build over time. Most people who hate cooking do not actually hate the act of preparing food; they hate the stressful, chaotic environment they have created for themselves. If you want to eliminate kitchen chaos for good, you have to stop treating your kitchen like a hostile territory and start treating it like a functional workspace.
This masterclass is your ultimate, no-fluff, brutally honest guide to transforming your daily culinary struggles into a streamlined, creative, and genuinely enjoyable process. We are going to purge the toxic garbage from your cabinets, equip you with the only tools that actually matter, organize your space like a professional line cook, and teach you the foundational techniques that will make your food taste like you actually know what you are doing. Grab your apron. We have work to do.
The Mindset Shift: From Kitchen Chaos to Culinary Confidence
Why You Don’t Need a Culinary Degree
Let us get one thing straight immediately: the food media industry has done a massive disservice to the home cook. Between the highly edited cooking shows, the pretentious restaurant documentaries, and the social media influencers who casually whip up a twelve-component meal on a Tuesday, it is no wonder you feel intimidated. They make it look like an innate talent, a divine gift bestowed upon a lucky few. It is not. Professional chefs rely on repetition, preparation, and heat control. That is the big secret.
You do not need to know how to perfectly brunoise an onion with your eyes closed. You just need to know how to chop it safely without losing a finger. The goal of a home cook is to produce delicious, nourishing food that brings joy to the table, not to earn a Michelin star. Once you lower your absurdly high expectations and accept that you are going to make a mess, the entire process becomes infinitely more enjoyable.
Embracing the Inevitable Smoke Alarm (And Moving On)
You are going to burn things. You are going to over-salt a soup. You are going to aggressively overcook a beautiful piece of chicken until it resembles a hockey puck. Congratulations, you are learning. The secret to surviving kitchen disasters is understanding that every ruined meal is simply a highly effective data point.
When you burn the garlic, you learn exactly what burnt garlic smells like (and that it turns incredibly bitter). When your sauce breaks and turns into a greasy, separated mess, you learn about the delicate nature of temperature and emulsions. Do not throw a tantrum and swear off cooking forever. Analyze what went wrong, order a pizza for the night, and try again tomorrow. Resilience is the most important skill you can cultivate in this space.
The “No-Go” Zone: Purging Toxic Kitchenware
The Truth About Cheap Non-Stick Pans
As your sassy but fiercely protective culinary guide, I have a strict, zero-tolerance policy for toxic, cheap garbage masquerading as cookware. When it comes to banishing toxic kitchen gear from your home, the absolute first thing to go must be that scratched, peeling non-stick pan you bought for ten dollars five years ago. I do not care if it has sentimental value; throw it in the trash immediately.
The modern kitchenware industry is rife with greenwashing. You will see pans proudly labeled “PFOA-free,” leading you to believe they are perfectly safe. This is a clever marketing trick. A comprehensive 2025 study by the Ecology Center found that an alarming 79% of non-stick cooking pans tested were still coated with PTFE (polytetrafluoroethylene), the primary chemical in Teflon. When these pans are heated past 500°F (260°C)—a temperature an empty pan can reach in just a few minutes on a standard residential stovetop—the coating begins to rapidly degrade, releasing toxic, potentially carcinogenic fumes into your home.
If the chemical fumes were not enough to deter you, let us talk about the physical degradation. A 2022 specialist imaging study revealed that a single, minuscule scratch on a standard non-stick surface can release approximately 9,100 microplastic and nanoplastic particles directly into whatever food you are cooking. If your pan is heavily scratched or flaking, you are quite literally seasoning your dinner with millions of synthetic plastics. Stop doing this to yourself.
Mystery Metals and Plastic Utensils: Into the Bin
While we are cleaning house, open your utensil drawer. Do you see those flimsy, black plastic spatulas with the melted, frayed edges? Bin them. Every time you use a melted plastic utensil in a hot pan, you are leaching chemicals into your food. Replace them immediately with solid wood spoons, a high-quality stainless steel fish spatula, and seamless, high-heat silicone spatulas.
Furthermore, avoid “mystery metal” baking sheets that warp the second they touch a hot oven. Flimsy aluminum foil roasting pans and reactive metals have no place in a serious home kitchen. You are an adult now; it is time to invest in materials that will not actively poison you or ruin your dinner.
Equipping Your Sanctuary: The Only Tools You Actually Need
The Holy Trinity of Knives
One of the greatest scams ever perpetrated on the home cook is the 15-piece knife block. You do not need a specialized tomato knife, a cheese knife, and a bizarrely shaped utility blade gathering dust on your counter. You only need three high-quality knives. If you invest your money wisely, these are the must-have tools you need to execute absolutely any recipe in existence:
- The 8-Inch Chef’s Knife: This is the workhorse of your kitchen. It does 90% of the heavy lifting, from dicing onions to breaking down a chicken. For beginners, I strongly recommend a German-style forged steel knife. German steel is slightly softer than Japanese steel, meaning it is more durable and less likely to chip when you inevitably drop it or accidentally hack into a bone. Learn the “pinch grip”—choking up on the handle and gripping the base of the blade with your thumb and index finger—for maximum control.
- The Paring Knife: A small, 3-to-4-inch blade meant for “off-board” work. You use this for delicate tasks: hulling strawberries, peeling apples, or mincing a single clove of garlic when you do not want to dirty a large board.
- The Serrated Bread Knife: A long, saw-like blade that is essential for slicing through crusty sourdough loaves without crushing the delicate crumb inside. It is also the secret weapon for slicing ripe tomatoes and leveling baked cakes.
Keep them sharp. A dull knife requires you to apply excessive force, which inevitably leads to the blade slipping and sending you to the emergency room.
Cookware That Will Outlive You
Since we have thrown your toxic non-stick pans into the abyss, what should you buy? You need cookware that relies on heat capacity and conductivity, not synthetic chemical coatings.
- Stainless Steel Tri-Ply Clad: You need at least one large (10-to-12-inch) stainless steel skillet and a couple of saucepans. “Tri-ply” means there is a core of aluminum sandwiched between layers of stainless steel. The aluminum conducts heat rapidly and evenly, while the stainless steel provides a durable, non-reactive cooking surface that is perfect for building pan sauces.
- The Cast Iron Skillet: This heavy, inexpensive beast has massive heat capacity. It takes a while to get hot, but once it is hot, it stays hot. This makes it the absolute best tool for getting a hard, crusty sear on a steak or a smash burger. Yes, you have to “season” it (bake thin layers of oil onto it to create a natural, polymerized non-stick surface), but the maintenance is vastly overstated. Wash it, dry it thoroughly on the stove, wipe it with a drop of oil, and it will last for generations.
- The Enameled Dutch Oven: A heavy cast-iron pot coated in glass enamel. It is the ultimate vessel for braising tough cuts of meat, simmering Sunday sauces, and baking crusty bread.
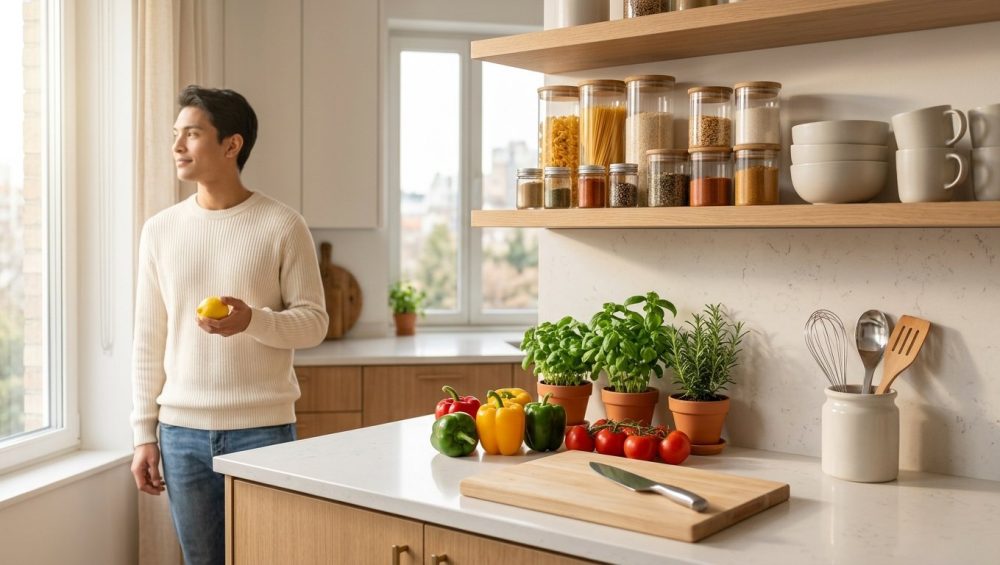
The Unsung Heroes: Prep and Organization Tools
Do not overlook the small, inexpensive tools that dramatically improve your efficiency.
First, get a digital instant-read meat thermometer. Guessing if a chicken breast is fully cooked by poking it with your finger is a fool’s errand. Cooking is science; measure the temperature.
Second, buy a digital kitchen scale. Baking by volume (using cups) is wildly inaccurate because a cup of loosely packed flour weighs significantly less than a cup of densely packed flour. Weigh your ingredients in grams, and your baking will instantly improve.
Finally, buy a metal bench scraper. Originally designed for bakers to divide dough, it truly is the kitchen’s unsung hero for prep work. Use it to scoop up massive piles of diced onions and transfer them to the pan in one swift motion, saving your knife blade from being scraped against the cutting board.
Organization: Setting Up Your Kitchen Like a Line Cook
Mise en Place: The French Term for “Get Your Act Together”
“Mise en place” translates to “everything in its place.” It is the foundational philosophy of professional kitchens. It means you do not turn on the stove until every single ingredient is washed, chopped, measured, and placed in little bowls ready to go. If you are frantically trying to mince garlic while your onions are actively burning in the pan, you have failed your mise en place. Prep first. Cook second. It will instantly cure your cooking anxiety.
Strategic Zoning for Maximum Efficiency
If you want to stop running around your kitchen like a headless chicken, you need to rethink your layout. Setting up a permanently organized kitchen requires ignoring cute, Pinterest-inspired aesthetics and focusing entirely on physics and ergonomics.
Recent 2026 ergonomic studies in kitchen workflow optimization have proven that the traditional “work triangle” is outdated. Instead, modern kitchens require a strict “3-Zone Workflow” consisting of a Prep Zone, a Cook Zone, and a Store-Clean Zone.
Here is why this matters: human visual search efficiency drops a staggering 63% when the tools you need exceed 18 inches from your primary work zone. If you have to walk across the room to grab a spatula while your eggs are cooking, you are losing time and focus.
- The Prep Zone: This should be the counter space between your fridge and your sink. It houses your cutting boards, knives, and prep bowls.
- The Cook Zone: Centered around the stove. Within arm’s reach (that magical 18-inch radius), you should have your cooking oils, salt cellar, pepper grinder, spatulas, and heavy pans.
- The Store-Clean Zone: The sink, dishwasher, and storage containers.
According to controlled workflow trials, participants who reorganized their kitchens into these strict, function-based zones reduced their daily meal prep time by an impressive 27% to 41%. Stop storing your spices across the room from the stove. Store items where you actually use them.
Decluttering Countertops for Sanity
Your countertops are a workspace, not a storage facility for appliances you use twice a year. If you do not use the blender every single day, put it in a cabinet. The visual noise of a cluttered counter directly contributes to decision fatigue and cooking avoidance.
Adopt the “22-Minute Daily Reset” protocol. Time-motion studies have proven that spending exactly 22 minutes performing a focused kitchen reset immediately after dinner cleanup—wiping counters, returning stray items to their proper zones, and running the dishwasher—reduces the following day’s meal prep time by up to 37%. Do your future self a massive favor and close down your kitchen properly every night.
Weekday Warfare: Time-Saving Hacks for the Exhausted Professional
Batch Prepping Without Losing Your Mind
Let us be realistic about weekday cooking. You come home exhausted, your patience is thin, and the temptation to order expensive takeout is incredibly high. Recent 2025 data shows that the average time spent cooking dinner on a weekday hovers between 30 and 45 minutes. We need to maximize every single minute of that window.
If you want to master simple weeknight dinners without losing your mind, you need to stop trying to cook elaborate meals from scratch at 6:30 PM. The secret is batch prepping components, not full meals. On Sunday afternoon, spend one hour doing the heavy lifting. Roast a massive tray of root vegetables. Cook a large batch of hearty grains like quinoa or brown rice (which take 45 minutes to cook from scratch—time you do not have on a Tuesday). Wash and dry your salad greens. When Wednesday rolls around, your “cooking” simply becomes an assembly process of reheating pre-cooked grains, tossing in roasted veggies, and quickly searing a piece of protein.
The Art of the One-Pan Miracle
The worst part of cooking is the cleanup. Minimize it by mastering the sheet pan dinner and the one-pot meal. A high-quality, heavy-duty aluminum half-sheet pan is your best friend. Toss chopped potatoes, broccoli, and chicken thighs in olive oil, salt, pepper, and smoked paprika. Spread them out evenly on the pan (do not crowd them, or they will steam instead of roast) and throw it in a 400°F oven. Thirty minutes later, dinner is ready, and you only have one pan to wash.
Flavor Bombs: Sauces and Condiments to Keep on Standby
Restaurant food tastes better than your food because restaurants utilize deeply developed sauces and condiments. You can cheat this system at home by keeping “flavor bombs” in your fridge.
Learn to make a basic vinaigrette emulsion (one part acid, three parts oil, and a dab of Dijon mustard to bind the two liquids together). It takes two minutes to shake up in a jar and will make any sad bowl of greens taste vibrant. Make a compound butter: soften a stick of butter, mash in roasted garlic, minced herbs, and lemon zest, roll it into a log, and keep it in the fridge. Drop a slice of that onto a freshly seared steak or a hot bowl of pasta, and you instantly elevate a basic weeknight meal into something spectacular.
Weekend Artistry: When You Have Time to Be a Perfectionist
Mastering Heat Control: The Difference Between Searing and Steaming
When the weekend arrives and you actually have the luxury of time, you can afford to slow down and practice the finer details of culinary artistry. The absolute key to fixing rookie kitchen mistakes is learning proper heat control and understanding the Maillard reaction.
The Maillard reaction is the chemical process where amino acids and reducing sugars brown under high heat, creating hundreds of complex, savory flavor compounds. It is what makes a seared steak taste like a steak, and a roasted carrot taste sweet and caramelized.
Here is the golden rule: moisture is the enemy of the Maillard reaction. If you take a wet piece of chicken straight from the packaging and throw it into a pan, the heat of the pan must first evaporate all that surface moisture before browning can begin. By the time the moisture is gone, your chicken is overcooked and rubbery. You have steamed it, not seared it.
Always deeply pat your proteins dry with paper towels before cooking. Get your stainless steel or cast iron pan ripping hot. Add your oil right before the food goes in. Lay the meat down away from you so the hot oil does not splash onto your shirt, and then leave it alone. Do not poke it, do not prod it, and do not try to flip it immediately. When a proper crust has formed, the meat will naturally release from the pan. If it is sticking, it is not ready to flip.
Developing Flavor Profiles: Salt, Fat, Acid, Heat (and Sass)
Beginners routinely under-season their food. If your home-cooked meal tastes flat and boring compared to a restaurant meal, it is almost certainly lacking two things: salt and acid.
You must season your food at every stage of the cooking process, not just at the very end. Salt draws out moisture, concentrates flavor, and reduces bitterness. Use kosher salt (its larger flakes are easier to pinch and control than dense table salt) and season from high up so the salt distributes evenly across the food.
Furthermore, if a dish tastes heavy, rich, or like it is “missing something,” do not add more salt. Add acid. A squeeze of fresh lemon juice, a splash of apple cider vinegar, or a dash of hot sauce right before serving will cut through the fat and brighten the entire flavor profile. Acid is the magic wand of the home kitchen.
Decoding Pretentious Chef-Speak
Translating Recipe Jargon into Plain English
The culinary world loves to use fancy French terminology to describe incredibly simple actions. It is gatekeeping, plain and simple. Before you can decode pretentious recipe jargon, you need a no-nonsense translation guide. Here is what those intimidating recipe instructions actually mean:
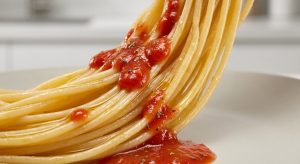
- Al Dente: Literally translates to “to the tooth.” It means your pasta should offer a slight, firm resistance when you bite into it. It does not mean crunchy, and it absolutely does not mean boiled into a mushy paste.
- Blanching: Dropping vegetables into heavily salted boiling water for just a minute or two, then immediately plunging them into a bowl of ice water (an “ice bath”). This stops the cooking process, locks in a vibrant, bright color, and keeps the vegetables crisp.
- Braising: A brilliant technique for turning cheap, tough cuts of meat into melt-in-your-mouth masterpieces. You heavily sear the meat in a hot pan to develop a crust, then partially submerge it in a flavorful liquid (like wine and broth), cover it, and cook it low and slow in the oven for hours until the connective tissues break down into gelatin.
- Deglazing: After you sear a piece of meat, there will be caramelized, brown bits stuck to the bottom of your stainless steel pan. This is called the “fond,” and it is pure flavor. To deglaze, you pour a cold liquid (wine, broth, or even water) into the hot pan while scraping the bottom with a wooden spoon. The liquid lifts the fond, creating the base for an incredible pan sauce.
- Folding: When a recipe tells you to “fold” ingredients together, they are usually referring to combining a light, airy mixture (like whipped egg whites) with a heavier mixture (like cake batter). You do not stir vigorously, or you will deflate all the air you just whipped in. You use a rubber spatula to gently scoop under the heavy mixture and lift it over the light mixture, repeating until just combined.
- Sweating: Cooking aromatics (like diced onions, celery, and carrots) in a pan with a little fat over low to medium heat. The goal is to draw out their moisture and soften them until they are translucent, without letting them take on any brown color.
- Julienne: A fancy knife cut that simply means slicing vegetables into thin, uniform matchsticks.
Conclusion: Your Kitchen, Your Rules
At the end of the day, your kitchen is your domain. It is a place of sustenance, creativity, and yes, occasional chaos. But by purging the toxic, low-quality gear that holds you back, investing in a few foundational tools, organizing your space for maximum ergonomic efficiency, and understanding the basic science of heat and flavor, you strip away the intimidation factor.
You do not need to be perfect. You do not need to plate your Tuesday night chicken and rice with a pair of surgical tweezers. You simply need to approach the stove with confidence, a sharp knife, and a healthy dose of sass. The smoke alarm might still go off every now and then, but next time, you will know exactly how to fix the dish anyway. Now, go sharpen your chef’s knife, throw out that peeling non-stick pan, and get cooking. You have got this.