Let’s have a brutally honest conversation about a culinary tragedy that is unfolding in kitchens across the globe right this very second. You have had a long, exhausting Tuesday. You fought traffic, you answered forty unread emails, and you just want a comforting, soul-warming plate of spaghetti and meatballs. You mix up your ground beef, roll it into neat little spheres, and toss them into the oven. But when you finally sit down and take a bite, your heart sinks. Instead of a tender, melt-in-your-mouth delicacy, you are chewing on a dense, arid, rubbery sphere that has the structural integrity of a golf ball and the moisture level of the Sahara Desert.
We have all been there. I learned to cook through a spectacular series of trial, error, and setting off the smoke detector a few too many times. But here is the good news: you do not need a culinary degree from a pretentious French institute to fix this. You just need a little bit of science and a very old, incredibly simple Italian-American grandmother trick.
Today, we are diving deep into the molecular biology of ground meat, the physics of moisture loss, and the absolute magic of the panade. We are going to transform your weeknight dinners from stressful chores into undeniable triumphs. Grab a glass of wine, pull up a cutting board, and let’s fix your food.
The Molecular Anatomy of a Meatball: Why Meat Dries Out
To understand how to save our food, we first have to understand how we are ruining it. When you buy a package of ground meat, you are not just buying a red blob of protein. You are buying thousands of microscopic muscle fibers that have been mechanically extruded and chopped through a heavy-duty meat grinder. Inside those muscle fibers are smaller bundles called fascicles, and inside those fascicles are tiny contractile units called sarcomeres.
The true stars of this microscopic biological show are two specific proteins: myosin and actin. In a raw state, these proteins are relatively relaxed. But when you introduce them to the screaming heat of a skillet or an oven, they absolutely freak out.
The Heat Reaction and Protein Cross-Linking
Science tells us that myosin begins to denature and unfold at relatively low temperatures, specifically between 122°F and 140°F. Actin, which is the more stubborn and resilient of the two proteins, begins to denature between 150°F and 163°F. As these proteins heat up and unfold, their molecular structures change, exposing reactive sites that desperately want to bond with neighboring proteins.
When they find each other, they link up in a process known as cross-linking, creating strong disulfide bonds. Imagine a microscopic game of Red Rover where thousands of protein strands suddenly lock arms and pull tight. As this three-dimensional protein web cross-links and contracts, it acts exactly like a sponge being aggressively wrung out by a pair of invisible hands.
The Wringing Sponge Effect
What gets squeezed out of that contracting protein sponge? Water and rendered fat. Ground meat is packed with natural moisture, but as the actin and myosin tighten, that moisture has nowhere to go but out. Depending on the fat percentage of your meat and the aggressiveness of your cooking method, ground beef can lose anywhere from 20% to 30% of its total weight during the cooking process.
That weight loss is not an illusion; it is pure, delicious moisture evaporating into the ether or pooling sadly at the bottom of your baking sheet. If you rely solely on ground meat and a binder like egg to hold your meatballs together, you are guaranteeing a tight protein matrix and a massive loss of moisture.
Enter the Panade: The Culinary Magic Trick
This is exactly where our secret weapon comes into play. A panade (derived from the French word for a bread mash) is simply a paste made of a starch and a liquid. In the context of meatballs and meatloaf, it usually consists of torn bread soaked in milk until it achieves the consistency of baby food.
It sounds deeply unappetizing in its raw state, but introducing this humble, soggy paste into your ground meat mixture is an act of sheer microscopic sabotage against those contracting proteins. This is the secret power of soaked bread.
The Chemistry of Starch Gelatinization
When you soak bread in milk, the starches in the wheat flour hydrate and swell, forming a thick, viscous gel. When you gently fold this hydrated panade into your raw ground meat, those swollen starch gels physically interpose themselves between the myosin and actin strands.
They act as a microscopic barricade. When the heat hits and the proteins try to link arms and contract, the starch gel physically gets in the way. It coats the protein strands, preventing them from forming a tight, moisture-expelling matrix. Because the proteins cannot cross-link tightly, the “wringing sponge” effect is halted in its tracks. The meatball retains its internal structure without squeezing out its natural juices.
If you want to stop making dry meatballs, you must abandon the amateur habit of dumping dry, unhydrated breadcrumbs directly into your meat bowl. Dry breadcrumbs act as a desiccant. They will aggressively suck the existing moisture out of the raw ground meat to hydrate themselves, leaving you with a dense, arid clump of protein. You must hydrate the starch first.
The “No-Go” Rule: A Brutally Honest Detour on Toxic Cookware
Before we get into the exact anatomy of the perfect panade, we need to have a serious chat about the equipment you are using. I advocate fiercely for the home cook, which means I have a strict, zero-tolerance policy for terrible, toxic kitchenware. Time is money, and your health is paramount.
If you are planning to sear these beautifully crafted, scientifically perfected meatballs in a scratched, peeling, lightweight non-stick skillet that you bought for ten dollars a decade ago, we are going to have words. I am on a lifelong mission of banishing toxic kitchen gear from the modern home. Those mystery chemical coatings (like older Teflon and PFAS) break down under high heat, leach forever chemicals into your beautiful food, and completely fail to produce the deep, caramelized crust we are trying to achieve.
The Beauty of Heavy-Bottomed Metals
You need to invest in a heavy-bottomed stainless steel skillet, a high-quality carbon steel pan, or a classic cast iron skillet. These materials offer superior thermal mass, meaning they hold onto heat and distribute it evenly, which is exactly what you need for a proper sear.
I know exactly what you are thinking: you are terrified of your food sticking to your stainless steel pan. Let me introduce you to the beautiful physics of the Leidenfrost effect. If you preheat your stainless steel pan properly, the moisture in the meat will instantly vaporize upon contact, creating a microscopic, levitating cushion of steam that prevents the proteins from bonding to the metal.
You can easily check if your pan is ready by using the water drop test. Flick a few drops of water into the preheated pan; if they immediately bead up into tight spheres and dance around the surface like mercury, your pan is perfectly heated and completely non-stick.
And if you are using traditional cast iron and you notice that your cast iron leaves black specks on your food, stop blaming the pan. That simply means your polymerized oil seasoning is dirty, thick with burnt carbon, and flaking off because you have been too afraid to wash it with soap and water. Clean your pans, maintain your gear, and respect your ingredients.
The Anatomy of the Perfect Panade
Now that we have cleared the air regarding your cookware, let’s build the perfect panade. The golden ratio for a standard batch of meatballs is roughly 1/2 cup of starch to 1/2 cup of liquid for every one pound of ground meat. But the specific ingredients you choose will wildly alter the final texture.
The Bread Breakdown: Choosing Your Starch
Not all bread is created equal when it comes to gelatinization.
White Sandwich Bread: This is the undisputed, unsung champion of the panade. You want the softest, most highly processed, squishiest white sandwich bread you can find. Remove the crusts, tear the soft white crumb into small pieces, and you have the perfect blank canvas. It dissolves into a smooth paste almost instantly.
Panko Breadcrumbs: If you do not keep fresh bread in the house, Japanese panko is a brilliant pantry staple. Panko is made by running an electrical current through dough to bake it without traditional heat, resulting in an incredibly airy, crustless crumb that absorbs liquid beautifully.
Artisanal Sourdough: Avoid it. I know it looks beautiful on your counter, but the crust is too tough, the crumb structure is too irregular, and the natural wild yeast acidity can actually interfere with the protein denaturation of the meat.
The Gluten-Free Dilemma: If you are cooking for someone with Celiac disease, you can use gluten-free bread or gluten-free panko. However, GF starches (like rice flour, potato starch, and tapioca) absorb liquid differently than wheat flour. You may need to increase your liquid ratio slightly to ensure the paste becomes sufficiently mushy.
The Liquid Element: Hydration Station
Whole Milk: This is the gold standard. Whole milk brings two crucial elements to the panade: water for starch hydration, and milk fat for richness. The fat coats the protein strands, offering a secondary layer of lubrication to prevent cross-linking.
Buttermilk: A fantastic wild card. The lactic acid in buttermilk gently tenderizes the meat fibers and adds a beautiful, subtle tang that cuts right through the heavy richness of the beef and pork.
Stock or Broth: If you are dairy-free, a high-quality, gelatin-rich chicken or beef bone broth is magnificent. It hydrates the bread perfectly while injecting a massive dose of savory umami directly into the center of the meatball.
Water: If you are in an absolute emergency, water will technically hydrate the starches and stop the proteins from seizing. However, it offers zero flavor and zero fat. It is a strictly utilitarian choice.
The Meat Matrix: Selecting and Mixing Your Proteins
A solitary pound of 90/10 lean ground beef will make a functional diet burger, but it will absolutely not make a proper, Sunday-dinner-worthy meatball. You need a curated blend of proteins and fats.
The Holy Trinity: Beef, Pork, and Veal
The classic Italian-American meatball relies on a three-meat blend, and each component plays a highly specific scientific role.
Beef: You want an 80/20 lean-to-fat ratio. The beef provides the robust, savory foundation and the dominant flavor profile. If you go leaner than 80/20, you are sacrificing flavor compounds that are uniquely fat-soluble.
Pork: Ground pork brings a sweeter flavor profile and, crucially, a softer fat composition. Pork fat melts at a slightly lower temperature than beef tallow, creating a perception of incredible juiciness and a smoother mouthfeel as it renders.
Veal: Veal is the secret textural weapon. Because it comes from a younger animal, the meat is incredibly rich in collagen. During the cooking process, that tough collagen breaks down and converts into liquid gelatin, giving the interior of the meatball a luxurious, silky, lip-smacking quality that beef and pork alone cannot achieve.
The Mixing Technique: Handle With Care
When it comes time to mix your meat, panade, and seasonings together, you must treat the mixing bowl like it contains a live explosive. Overmixing is the cardinal sin of ground meat preparation.
If you aggressively knead the meat mixture like you are working a tough bread dough, you will force the myosin proteins to bind prematurely. This mechanical manipulation creates a highly emulsified, bouncy, dense texture that belongs in a bratwurst, not a tender meatball.
Use your hands, keep your fingers spread wide like a claw, and gently fold the hydrated panade and seasonings into the meat just until they are uniformly combined. Stop immediately once it comes together. Furthermore, be extremely careful about salting ground beef too early. Salt actively dissolves myosin, drawing it out to the surface of the meat and making it extra sticky. Only add your salt to the mixture right as you are actively folding the ingredients together and preparing to shape them.
Aromatics and Flavor Builders: Don’t Be Lazy
Do not insult your beautiful, scientifically optimized meat blend by dumping raw, crunchy onions and harsh, pungent raw garlic directly into the bowl.
Raw onions contain a massive amount of water. As the meatball cooks, that raw onion will release its water, effectively steaming the meatball from the inside out and leaving you with weird, crunchy, sulfurous pockets of allium. You must take the time to finely dice your onions and gently sauté them in extra virgin olive oil until they are soft, translucent, and sweet. Cooking them breaks down their cellular walls and mellows their bite.
As for the garlic, if you find that your garlic always burns and turns acrid when you sauté it, it is because you are throwing it into a screaming hot pan at the exact same time as your moisture-heavy onions. Minced garlic cooks in about thirty to forty-five seconds. Add it to the pan at the very end of the onion’s cooking time, just until it becomes fragrant.
Crucially, you must let this aromatic mixture cool completely before adding it to your raw meat. If you dump hot, oily onions into cold ground meat, the ambient heat will melt the beef and pork fat prematurely. The fat will smear, ruining the delicate texture and causing the fat to leak out immediately upon hitting the oven or skillet.
The Art of Shaping and Resting
Once your mixture is gently combined, put the entire bowl in the refrigerator for at least thirty minutes. I know that time is money during a busy workweek, but this resting period is non-negotiable for true kitchen artistry. Resting allows the starches in the panade to fully hydrate, the salt to penetrate the meat evenly, and the flavors of the aromatics to meld. Furthermore, chilling the fat ensures it stays solid while you shape the meatballs.
When you are ready to shape, do not ruthlessly roll the meat between your palms like you are making a clay snake in kindergarten. Pack it gently. I highly recommend using a spring-loaded stainless steel ice cream scoop to portion the meat. This ensures every single meatball is the exact same size, which means they will all cook at the exact same rate.
Keep a small bowl of cold water or a little olive oil nearby to lightly coat your hands while shaping. This prevents the sticky, salt-dissolved myosin from adhering to your skin, allowing you to form a smooth exterior without tearing the surface of the meatball.
The Cooking Process: Searing, Baking, and Braising
We have arrived at the final hurdle. You have two primary options for the initial cook: searing or baking.
Baking: The Weeknight Hero
If it is a busy Wednesday and you are prioritizing efficiency, grab a heavy-duty, bare aluminum baking sheet. Do not line it with aluminum foil (which causes sticking), and absolutely do not spray it with aerosol cooking spray. Those commercial sprays contain soy lecithin that polymerizes under high oven heat, meaning you are slowly ruining your nonstick pans and baking sheets with an impossible-to-remove, sticky brown residue.
Instead, line the sheet with unbleached parchment paper or give it a light rub with pure olive oil. Bake the meatballs at 400°F (200°C) for 15 to 20 minutes. The high convection heat sets the exterior quickly, while the panade works its magic internally to lock in the moisture.
Pan-Searing: The Weekend Perfectionist
If it is the weekend and you are chasing absolute culinary perfection, you must pan-sear. Heat your stainless steel or carbon steel pan over medium-high heat, add a high-smoke-point oil (like avocado or grapeseed), and gently place the meatballs in the pan.
Do not overcrowd the pan! If you greedily cram twenty cold meatballs into a ten-inch skillet, the thermal mass of the pan will be overwhelmed. The temperature will plummet, the meat will release its juices into the pan, and your ground beef steams instead of developing that gorgeous, deeply savory, caramelized Maillard crust. Sear them in batches, giving them plenty of breathing room.
The Final Braise
Whether you baked or seared them, the ultimate finishing move for an Italian-American meatball is a gentle braise. Drop your browned meatballs into a gently simmering pot of high-quality marinara or San Marzano tomato sauce for thirty to forty-five minutes.
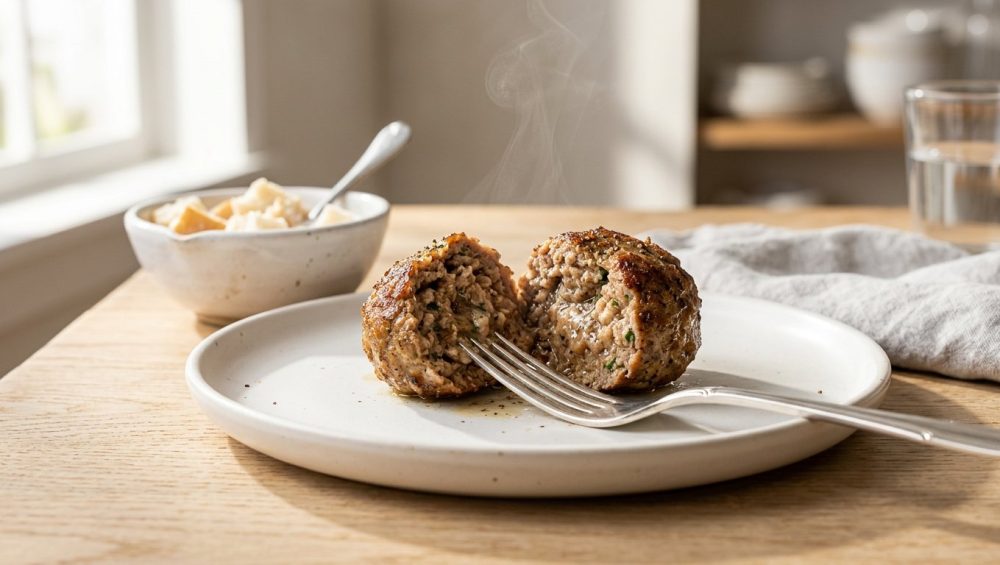
Because you used a panade, the meatball is structurally secure but texturally porous. The swollen starches prevent the proteins from seizing up, allowing the meatball to literally drink in the acidic, sweet tomato sauce without drying out. The collagen from the veal will melt into the sauce, enriching it, while the meatball itself becomes so tender you can cut it with a spoon.
Troubleshooting Your Meatballs: Rookie Mistakes
Even with the science laid out, things can occasionally go sideways. Let’s troubleshoot the most common issues:
Why are my meatballs falling apart in the sauce?
You likely added too much milk to your panade, making the mixture too wet to hold its shape, or you skipped the egg. While the panade provides moisture and tenderness, you still need the albumin in a whole egg to act as a gentle binder to hold the matrix together as it cooks.
Why are my meatballs bland?
You under-seasoned them. Ground meat requires a surprisingly aggressive amount of kosher salt to taste properly seasoned. Furthermore, you skipped the umami boosters. A generous handful of freshly grated Parmigiano-Reggiano or Pecorino Romano cheese folded into the raw mixture adds a massive hit of glutamates and salt, elevating the entire flavor profile.
Why are my meatballs tough even with a panade?
You overmixed the meat, or you used a meat blend that was far too lean. If you try to make meatballs out of 95/5 ground turkey or extra-lean beef without significantly upping the fat content via your liquid (like using heavy cream in the panade) or adding a drizzle of olive oil directly to the mix, you will inevitably end up with a dry result. Fat equals perceived moisture.
The Final Bite
Cooking is not inexplicable magic; it is chemistry, physics, and a little bit of patience. By understanding how proteins react to heat and how simple starches can manipulate that reaction to your advantage, you have just elevated your cooking from basic weeknight survival to true kitchen artistry.
You absolutely do not need a culinary degree to make mind-blowing, restaurant-quality food in your own home. You just need good ingredients, safe and reliable cookware, and the willingness to mash some milk and white bread together into a sloppy paste. Now go pour yourself a generous glass of Chianti, get your hands dirty, and show that ground beef exactly who is boss.