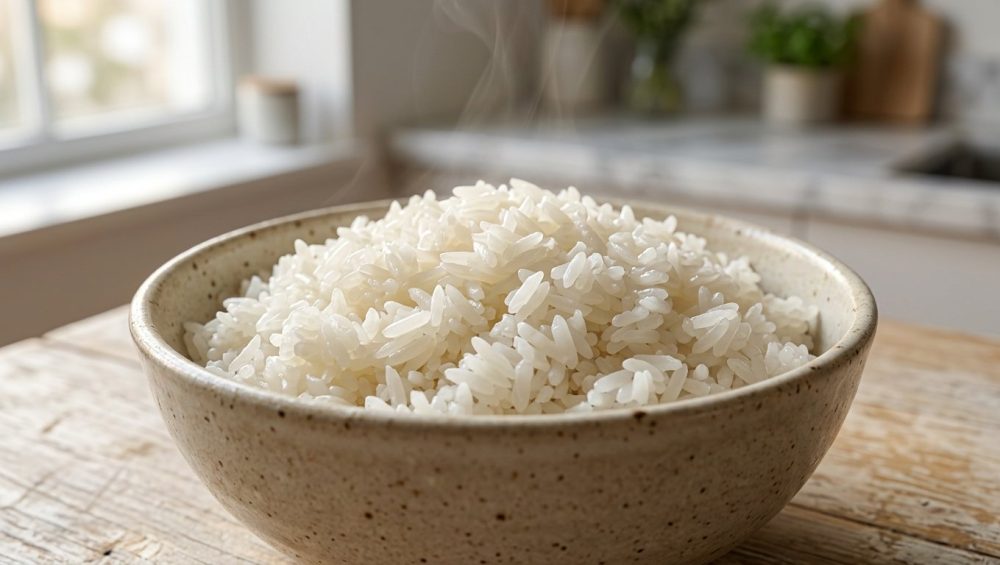
Listen, Susan. We need to have a serious chat about what is happening in your kitchen at 6:15 PM on a random Tuesday. You have just nailed a beautiful, expensive piece of pan-seared salmon. You have perfectly blistered some asparagus. You are feeling like an absolute culinary deity. And then, you turn to the stove, lift the lid off your saucepan, and are immediately greeted by a dense, waterlogged, paste-like brick of starch that looks more like industrial wall adhesive than a side dish.
It is a culinary tragedy, and frankly, you deserve better. I know you are tired. I know you just want to put a decent meal on the table without ordering takeout for the third time this week. But here is the brutally honest truth: your gummy, mushy rice is not a curse placed upon your bloodline, nor is it a reflection of your worth as a home cook. It is simply a chemical reaction that you have not yet learned how to control.
The good news? You do not need a degree from Le Cordon Bleu to fix this. You just need a basic understanding of starch chemistry, a little bit of patience, and the willingness to unlearn every terrible habit your mother taught you about boiling grains. We are going to break down the exact molecular science of why your rice turns into sludge, and I am going to give you the fail-proof, science-backed masterclass on how to guarantee perfectly fluffy, distinct grains every single time.
The Science of the Sludge: Amylose vs. Amylopectin
Before we start throwing things into a pot, we need to talk about what rice actually is. At its core, a grain of rice is just a tightly packed biological suitcase of carbohydrates. But not all carbohydrates behave the same way when they meet boiling water. To understand why your rice is currently masquerading as glue, we have to look at the two primary types of starch molecules fighting for dominance inside that grain: amylose and amylopectin.
Even for absolute beginners, understanding these two molecules will completely change how you view cooking.
Amylose is a long, straight-chain polymer of glucose. Because of its linear structure, it packs together very tightly and does not dissolve easily in water. When cooked, rice with a high amylose content remains firm, dry, and distinct. Think of Basmati or Jasmine rice; these long-grain varieties typically contain upwards of 20% to 22% amylose, which is why they naturally cook up fluffy and separate.
Amylopectin, on the other hand, is a highly branched, bulky polymer. Because of its open, tree-like structure, it absorbs water incredibly fast. When it hits hot water, it swells rapidly, bursts, and creates a highly viscous, sticky gel. Short-grain rice, like sushi rice or Arborio, is absolutely packed with amylopectin (and has very low amylose), which is exactly why it clumps together to form creamy risotto or perfectly moldable sushi rolls.
Here is where the disaster happens: when you apply heat and water to rice, the starch granules undergo a process called gelatinization. They swell up like microscopic water balloons. As they swell, that sticky amylopectin leaches out of the grain and into the surrounding water. If there is too much free-floating amylopectin in your pot, it forms a literal glue that coats every single grain, binding them together into a solid, mushy block.
To get fluffy rice, your entire goal as a cook is to manage and mitigate that free-floating amylopectin. And that starts before the heat even turns on.
Step 1: The Wash (And Why Skipping It Is a Culinary Crime)
Let me be crystal clear: if you are taking white rice straight out of the plastic bag, dumping it into a pot of water, and turning on the stove, you are committing a culinary crime.
When white rice is processed at the mill, the tough outer bran and germ are mechanically stripped away to reveal the polished endosperm. This aggressive polishing process leaves behind a fine, microscopic dust of pure starch coating the exterior of every single grain. This dust is almost entirely composed of highly soluble amylopectin.
If you do not wash this dust away, the moment it hits hot water, it instantly gelatinizes. Before the inside of the grain has even begun to cook, the outside has turned into a thick starch soup. The sheer, undeniable magic of rinsing your grains cannot be overstated. It is the single most important mechanical step in preventing gummy rice.
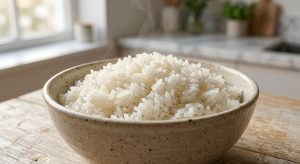
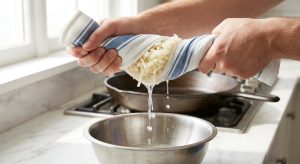
You cannot just run it under the tap for three seconds and call it a day. You need friction. Place your measured rice into a bowl, cover it with cold water, and use your hand like a claw to vigorously swish and gently scrub the grains against each other. The water will immediately turn a milky, opaque white. That is the enemy. That is the glue.
Carefully drain the starchy water and repeat the process. You will need to do this four to five times. You are looking for the water to run mostly clear—it doesn’t have to be perfectly transparent like glass, but you should easily be able to see the grains at the bottom of the bowl. Investing in a dedicated Japanese wash bowl will literally change your life here, as the micro-perforations allow you to scrub and drain simultaneously without watching half your dinner fall down the sink drain.
Step 2: The Golden Ratio (Ditch the 1:2 Myth)
If you want to permanently cure your weeknight cooking anxiety, you have to stop trusting the back of the rice bag. For decades, the standard American culinary advice has been to cook rice using a 1:2 ratio. One cup of rice to two cups of water.
I need you to take that ratio, write it on a piece of paper, and set it on fire. It is a lie perpetrated by mid-century home economics that fundamentally misunderstood the thermodynamics of evaporation.
Here is the scientific reality: regardless of whether you are cooking short-grain, long-grain, Jasmine, or Basmati, every single type of white rice absorbs water in exactly a 1:1 ratio by volume. One cup of raw rice will absorb exactly one cup of water to become perfectly hydrated and cooked.
So why does every recipe tell you to add more? Because of evaporation. The extra water you add to the pot is not for the rice to absorb; it is strictly there to account for the water that will turn into steam and escape into the atmosphere while the pot is coming to a boil, and the minor amount of vapor that escapes through the lid during the simmer.
The Evaporation Factor
If you use a 1:2 ratio, you are assuming that a full cup of water is going to evaporate during a 15-minute simmer. In a modern kitchen, using a standard saucepan with a tight-fitting lid, you are only going to lose about 0.1 to 0.2 cups of water to evaporation.
If you put one cup of rice and two cups of water into a sealed pot, the rice absorbs its one cup, the pot vents 0.2 cups of steam, and your delicate, perfectly cooked grains are left drowning in 0.8 cups of excess boiling water. The cellular structure of the rice over-hydrates, the cell walls collapse, the starches explode, and you are left with a waterlogged, gummy disaster.
The golden standard for stovetop cooking with a tight lid is a 1:1.1 ratio. One cup of rice to 1.1 cups of water. If your pot is exceptionally wide (which increases surface area and evaporation), you might push it to 1:1.2. But you must stop drowning your side dishes. Measure precisely.
Step 3: Temperature Control and the Simmering Zone
Cooking rice is a delicate thermodynamic balancing act. It is not pasta. You cannot just blast it with a rolling boil and hope for the best. There are three distinct phases to cooking rice: the boil, the simmer, and the steam.
Phase one is the boil. You combine your washed rice and your precisely measured water in a saucepan and place it over medium-high heat. You want to bring it to a boil to jumpstart the gelatinization process. But the absolute second you see aggressive bubbling, you must intervene.
Phase two is the simmer. You must immediately drop the heat to the absolute lowest setting your stove can manage, and put the lid on tight. Why? Because boiling water is violent. If you leave the heat on high, the aggressive rolling bubbles will physically smash the fragile, swelling rice grains against each other and against the walls of the pot. This mechanical damage tears the grains apart, releasing a flood of internal amylopectin into the water, instantly creating that dreaded starch paste. You want a gentle, lazy simmer.
Phase three is the steam. Once the lid is on, the trapped vapor creates a slightly pressurized environment inside the pot, cooking the rice gently from the top down. During this phase, you must observe the most sacred rule of the kitchen: do not touch the lid.
Every time you lift the lid to “check on it” or give it a stir, you are committing two massive errors. First, stirring wet, hot rice crushes the grains and releases more starch. Second, lifting the lid vents the exact steam you specifically calculated for in your 1:1.1 ratio. You are throwing off the hydration math. Leave it alone for 15 to 18 minutes. If you are planning to make a stir-fry later, remember that you need day-old rice for the best texture, so getting this initial steaming phase right today is critical for tomorrow’s dinner.
Step 4: The 10-Minute Off-Heat Rest (The Ultimate Secret)
This is the exact moment where 90% of home cooks sabotage their own success. The timer goes off, indicating the 15 minutes of simmering are up. The hungry, impatient cook rips the lid off the pot, grabs a heavy serving spoon, and immediately starts digging in. They are met with wet, fragile, gummy rice that clumps together in a miserable paste.
What went wrong? You didn’t let it rest.
When the heat is turned off, the cooking process is not actually finished. Inside that pot, the moisture distribution is highly uneven. The bottom layer of rice, which was in direct contact with the heat source, is significantly hotter and wetter than the top layer. Furthermore, the starch molecules inside the grains are in a highly volatile, swollen, and fragile state.
You must turn off the heat, slide the pot off the hot burner, and walk away for exactly 10 minutes. Do not remove the lid. During this 10-minute off-heat resting phase, a beautiful scientific process occurs. The residual steam and internal pressure slowly equalize, redistributing moisture perfectly from the bottom of the pot to the top.
More importantly, as the temperature slowly begins to drop from boiling, the starches undergo a mild form of retrogradation. This means the gelatinized starch molecules begin to slightly recrystallize and firm up, setting the structural integrity of the grain’s cell walls. This skipped step is the exact reason why your fried rice is always mushy when you try to repurpose it the next day; if the grain structure isn’t set properly on day one, it will never fry properly on day two.
Only after this 10-minute rest is it safe to remove the lid. And when you do, do not use a spoon. Use a fork or a specialized rice paddle to gently slice through the grains and fold them over, allowing the final excess steam to escape.
The “No-Go” Zone: Toxic Cookware Ruining Your Rice (And Your Health)
Now, I am going to step onto my soapbox for a moment, because this is non-negotiable. I do not care how perfectly you wash your rice, or how precisely you measure your water, if you are cooking it in a scratched, peeling, $12 non-stick aluminum pot you bought at a discount store five years ago.
It is time to take a hard look at your cabinets and banish that toxic kitchen gear straight to the dumpster.
Traditional non-stick coatings are manufactured using PFAS (per- and polyfluoroalkyl substances). These are widely known as “forever chemicals” because the carbon-fluorine bonds are so incredibly strong that they simply do not break down in the environment, nor do they break down in the human body. When you heat cheap non-stick pans, especially if they have been scratched by metal utensils, the coating degrades and leaches these synthetic chemicals directly into your food.
The regulatory landscape is finally catching up to this nightmare. The FDA and EPA have recently escalated their warnings, and sweeping legislative action is taking place. Starting in 2025 and 2026, states like Minnesota and California have enacted strict laws banning intentionally added PFAS in cookware and food packaging.
When you use a cheap, degraded non-stick pot to cook rice, you are subjecting your food to chemical off-gassing. And don’t even get me started on the horrors of aerosol cooking sprays that bake into those scratched surfaces and create an un-cleanable, polymerized nightmare. You are quite literally poisoning yourself to save a few dollars on a saucepan. I have zero patience for this. Throw the toxic pans away.
Safe Alternatives That Actually Work
If you want to cook rice safely and perfectly, you need cookware with high thermal mass and non-toxic surfaces.
Your best option for stovetop cooking is a heavy-bottomed, fully clad stainless steel saucepan. Clad stainless steel has an aluminum or copper core sandwiched between layers of steel, which provides superior heat conductivity. This means the pot holds that ultra-low simmer perfectly evenly, preventing the dreaded hot spots that scorch the bottom layer of your rice. You can easily master a stainless steel pot by utilizing the water drop test to gauge your surface temperature when searing, though for rice, the heavy lid and even heat distribution are the real stars.
Enameled cast iron (like a French cocotte) is also a phenomenal choice because the heavy lid traps steam exceptionally well, and the cast iron retains heat beautifully during that crucial 10-minute resting phase. Alternatively, if you prefer the convenience of a countertop appliance, invest in a high-quality rice cooker that features an uncoated stainless steel or pure ceramic inner pot.
Troubleshooting Your Rice Disasters
Even with the science laid out, things can occasionally go sideways. Let’s troubleshoot the most common weeknight disasters so you know exactly how to pivot.
The rice is crunchy in the middle, but all the water is gone.
Your heat was too high during the simmer, or your lid is not tight enough. The water evaporated into the atmosphere before the core of the rice grains had enough time to fully hydrate and gelatinize.
The Fix: Add two tablespoons of boiling water, put the lid back on tight, and let it sit on the lowest possible heat for another 5 minutes, followed by a rest.
The bottom is scorched and burnt, but the top is fine.
Your pot is too thin, lacking the thermal mass required to distribute heat evenly, or your stove’s “low” setting is simply too powerful.
The Fix: Upgrade your cookware to fully clad stainless steel. If your stove runs hot, invest in a cheap heat diffuser (a metal plate that sits between the burner and the pot) to tame the flame.
The rice is wet, gummy, and tastes like starch soup.
You either skipped the washing step, leaving all the surface amylopectin intact, you used the cursed 1:2 ratio and drowned the grains, or you impatiently skipped the 10-minute off-heat rest.
The Fix: There is no saving this batch for a side dish. Turn it into a rice porridge (congee) by adding chicken broth and ginger, and try again tomorrow.
Weeknight Efficiency: Hacking the Rice Routine
I know that taking 30 minutes to wash, simmer, and rest rice can feel like a lifetime when it is a busy Tuesday and the kids are screaming. Time is money, and efficiency is the only way we survive the workweek.
The ultimate hack for perfect weeknight rice is batch cooking and utilizing your freezer. Starch retrogradation (the firming up of the grains) happens rapidly in the refrigerator, which is why leftover fridge rice feels hard and dry. But freezing halts this process entirely.
On Sunday, make a massive batch of perfectly cooked rice using the 1:1.1 ratio and the 10-minute rest. While the rice is still warm and steaming, portion it into airtight, freezer-safe glass containers and put them directly into the freezer. Freezing it while warm traps the internal moisture.
On Tuesday night, when you need a side dish in exactly three minutes, pop that frozen block of rice into the microwave with the lid slightly vented. The trapped moisture will turn into steam, perfectly re-hydrating the grains. It will taste identically fresh, fluffy, and distinct, with zero gummy texture and zero active cooking time.
The Final Fluff: You’ve Got This
Cooking perfect rice is not a mystical art form reserved for restaurant chefs. It is a highly predictable, easily managed scientific process.
Wash away the excess amylopectin. Respect the 1:1.1 hydration ratio. Drop the heat to a whisper to protect the fragile grains. Do not touch the lid. And for the love of all things culinary, give the starches 10 minutes to rest and redistribute their moisture before you attack them with a fork.
You have the knowledge. You have the science. Now go upgrade your cookware, step up to the stove, and show that side dish exactly who is boss. You’ve got this.