
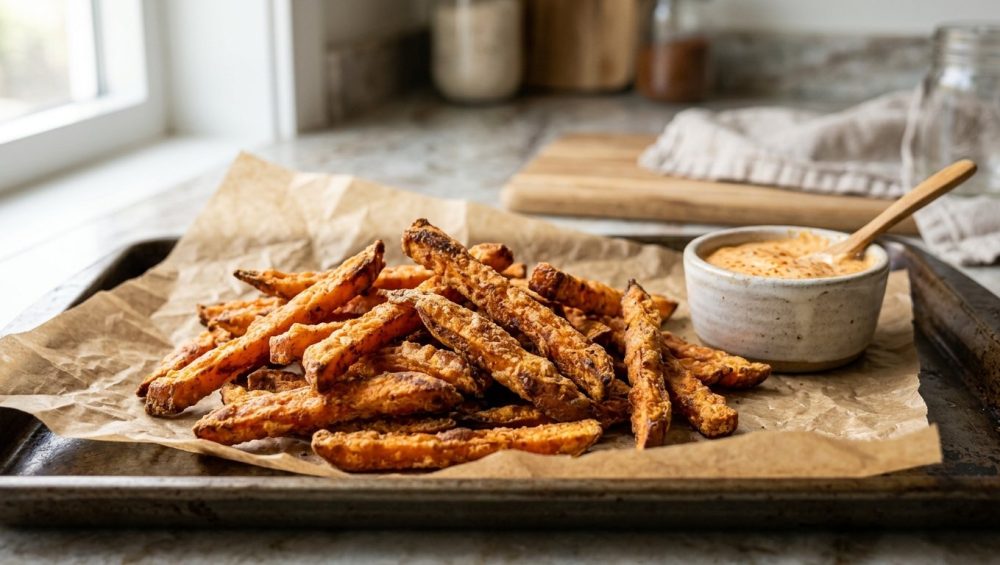
Listen, we need to have a serious heart-to-heart about your side dishes. I know exactly what you are doing on your weeknights. You are coming home exhausted, craving the shatteringly crisp, perfectly seasoned sweet potato fries you pay nine dollars for at your favorite trendy bistro. You chop up a sweet potato, toss it in olive oil, throw it on a baking sheet, and thirty minutes later, you pull out a tray of sad, limp, soggy orange noodles.
They flop over when you pick them up. They taste like steamed baby food. You eat them anyway over the kitchen sink, quietly cursing your oven and wondering if you should just give up and buy a commercial deep fryer.
Put the deep fryer down. You do not need a culinary degree, and you certainly do not need to deal with the hazardous, messy nightmare of a vat of boiling oil on a Tuesday night. You can achieve absolute fry perfection in a standard home kitchen. The secret does not lie in a magical oven setting or a complex culinary technique. The secret lies in a ninety-nine-cent box of cornstarch and a basic understanding of food chemistry.
We all love the power of a slow roast when we want a tender, caramelized, melt-in-your-mouth whole sweet potato on a chilly Sunday evening. But when we want a crispy fry, that natural tendency to turn into mush is our absolute worst enemy. Today, we are stripping away the pretentious chef-speak and diving deep into the definitive, highly-researched masterclass on exactly why your sweet potato fries are currently a disaster, and how a quick dusting of cornstarch will mathematically guarantee a rigid, crunchy exterior every single time.
The Anatomy of a Sweet Potato: Why Your Fries Are Currently Sad and Floppy
To understand the cure, we must first diagnose the disease. Why is it so incredibly difficult to get a sweet potato to crisp up in the oven compared to a standard Russet potato? The answer comes down to biological makeup, cellular structure, and the cruel reality of thermodynamics.
First of all, sweet potatoes are not even true potatoes. While your standard white Russet is a tuber in the nightshade family, the sweet potato is actually a swollen root vegetable belonging to the morning glory family. Because of this entirely different botanical lineage, their internal composition is vastly different in three critical ways: moisture, sugar, and starch.
The Moisture Problem
Sweet potatoes are essentially delicious water balloons. Research shows that a standard sweet potato consists of roughly 75% to 80% water by weight [2]. When you place a freshly cut, naked sweet potato baton into a 400°F (200°C) oven, that internal water rapidly heats up and attempts to escape as steam. Because there is so much water, the fry essentially boils itself from the inside out. The surface remains damp for the majority of the baking time, making it physically impossible for a crust to form. By the time enough moisture has evaporated for the exterior to finally dry out, the inside of the fry is completely hollowed out and overcooked.
The Sugar Trap
As their name implies, sweet potatoes are loaded with natural sugars. When cooked, sweet potatoes can contain up to fourteen times the amount of sugar found in a regular boiled white potato [2]. In the culinary world, sugar is a double-edged sword. On one hand, it facilitates the Maillard reaction—the chemical process between amino acids and reducing sugars that gives browned food its distinctive, complex flavor. On the other hand, sugar burns incredibly fast. If you leave a sweet potato in the oven long enough to dry out its massive water content, those abundant surface sugars will cross the line from beautifully caramelized to acrid, black, and bitter. You are constantly fighting a losing battle between evaporating the water and burning the sugar.
The Starch Deficit
This is the nail in the coffin. Standard Russet potatoes are famous for their high starch content, specifically a type of starch called amylose [1]. Amylose molecules are long, straight chains that pack tightly together. When a Russet potato cooks, this amylose forms a dense, rigid structure on the surface—a natural crust. Sweet potatoes, however, contain a much lower ratio of amylose and a higher ratio of amylopectin, which is a branched, bushy starch molecule that does not pack tightly [1]. Amylopectin is great for creating a creamy, soft interior, but it is entirely useless for building a rigid, crispy exterior.
In summary: your sweet potato fries are soggy because they are too wet to crisp, too sugary to leave in the oven for a long time, and biologically lack the specific starch required to build a crust.
Enter Cornstarch: The Unsung Hero of the Crispy Crust
If the sweet potato refuses to build its own crust, we are simply going to build a synthetic one for it. This is where cornstarch enters the chat, wearing a cape and ready to save your dinner.
Cornstarch is a pure carbohydrate extracted from the endosperm of a corn kernel. Unlike wheat flour, which contains proteins (gluten) that can turn gummy and heavy, cornstarch is 100% pure starch. When you dust your raw sweet potato fries in a microscopic layer of cornstarch, you are fundamentally altering the chemistry of the fry’s exterior.
The Science of Starch Gelatinization
When you coat the fries, the powdery cornstarch clings to the residual moisture on the surface of the sweet potato. As the fries enter the hot oven, a fascinating thermodynamic process called starch gelatinization occurs.
Scientific studies show that cornstarch gelatinizes at a very specific temperature threshold, generally between 144°F and 161°F (62°C to 72°C) [3]. As the surface of the sweet potato heats up and releases its internal water as steam, the cornstarch granules absorb that escaping moisture. The granules swell up, melt, and burst open, forming a thick, viscous gel that coats the entire fry [3].
But the magic does not stop there. As the oven continues to blast the fries with high heat (well above that 161°F / 72°C threshold), the water inside that newly formed starch gel rapidly evaporates. Because cornstarch is incredibly efficient at dehydrating and recrystallizing under high heat, the gel hardens into a rigid, glass-like network.
You have just created a microscopic exoskeleton. This synthetic crust locks the creamy, fluffy interior of the sweet potato safely inside, while providing a shatteringly crisp barrier on the outside. Furthermore, this cornstarch barrier acts as a thermal insulator, protecting the sweet potato’s natural surface sugars from the direct, harsh heat of the oven, preventing them from burning before the fry is fully cooked.
The Step-by-Step Masterclass: Achieving Fry Perfection
Now that you understand the chemistry, we need to talk about execution. You cannot just blindly throw cornstarch at a potato and expect a miracle. Making the perfect weeknight sweet potato fry requires a meticulous, step-by-step methodology. Do not skip these steps. I am watching you.
Step 1: The Prep and The Soak (Yes, You Have to Soak)
Before we even talk about the actual cooking process, please, for the love of all things culinary, toss those scarred, splintering bamboo cutting boards into the nearest fireplace. You need a stable, heavy-duty cutting board and a razor-sharp chef’s knife. Sweet potatoes are incredibly dense and notoriously difficult to cut safely.
You must cut your fries into uniform, 1/4-inch batonnets (sticks). Consistency is non-negotiable here. If you have thick, chunky wedges sitting on the same baking sheet as thin, wispy shoestrings, the thin ones will incinerate into bitter carbon sticks while the thick ones remain raw and crunchy in the center. Take your time.
Once your potatoes are cut, you might be tempted to scoop them up by dragging your knife blade sideways across the board. This lateral scraping is exactly why kitchen knives get dull so infuriatingly fast. Instead of ruining your expensive German steel, you need a bench scraper to efficiently transfer those orange sticks from the board to a large mixing bowl.
Fill the bowl with cold water and let the fries soak for a minimum of 30 minutes (or up to 24 hours in the fridge if you are doing meal prep). Why? Because as we discussed, sweet potatoes are packed with surface sugars and simple starches. Soaking them in cold water draws out those excess sugars through osmosis. By removing the surface sugar, you drastically raise the burning point of the fry, buying yourself the crucial oven time needed to develop a crispy crust.
Step 2: The Aggressive Drying Phase
Once the soak is complete, drain the fries. Now comes the most important, make-or-break step of the entire process: you must dry them. I do not mean a gentle pat. I mean you need to aggressively dry these potatoes until they feel like bone-dry chalk.
Lay them out on a clean, lint-free kitchen towel or a thick layer of paper towels. Roll them around. Press down on them. If your fries are wet when you add the cornstarch, the powder will immediately clump up into a thick, gummy paste. You do not want a wet batter; you want a microscopic, dry dusting. Moisture is the enemy of crispiness. Eradicate it.
Step 3: The Cornstarch Coating Technique
Transfer your aggressively dried fries to a large, dry mixing bowl. It is time for the magic powder.
The biggest rookie mistake here is using too much cornstarch. If you dump a half-cup of starch into the bowl, you are going to end up with fries that taste like raw flour and have a weird, chalky, white film on them. You only need about 1 to 1.5 tablespoons of cornstarch per large sweet potato.
Sprinkle the cornstarch over the fries. Now, toss them vigorously. Use your hands. You want to massage the starch into every single crevice of the potato. Keep tossing until the white powder completely disappears, leaving the fries looking slightly matte and frosted.
CRUCIAL RULE: Do this before you add any oil. If you mix the oil and the cornstarch together at the same time, you create a weird, greasy slurry that will simply slide off the potato and burn onto your baking sheet. Starch first, always.
Step 4: Oil, Seasoning, and the Salt Trap
Once the fries have their matte cornstarch finish, it is time for the fat. You need an oil with a high smoke point because we are going to be blasting these in a hot oven. Extra virgin olive oil will smoke, burn, and taste bitter at these temperatures. Instead, use avocado oil, grapeseed oil, or a light vegetable oil. Drizzle about 1 to 2 tablespoons of oil over the fries and toss them gently until they are evenly coated and glossy.
Now, listen to me very carefully: Do not salt your fries yet.
Salt is a desiccant. It draws moisture out of plant cell walls through osmosis. If you salt your raw sweet potato fries before they go into the oven, the salt will immediately pull the internal water to the surface. This water will destroy your carefully crafted cornstarch barrier, turning it back into a soggy paste. You will salt your fries the absolute second they come out of the oven, while the residual oil is still hot and glistening, allowing the salt crystals to adhere perfectly to the hardened crust.
You may, however, add dry spices at this stage. A dusting of smoked paprika, garlic powder, or cayenne pepper works beautifully, as the oil will help bloom these fat-soluble spices in the oven.
The Oven Dynamics and The “No-Go” Gear
You have prepped the perfect fry. Now, you can easily ruin all of your hard work by using the wrong kitchen equipment. I have zero patience for toxic, cheap kitchenware.
If you are still using cheap, peeling Teflon pans, you aren’t just ruining your nonstick pans with aerosol sprays; you are actively leaching forever chemicals into your food. Those dark, thin non-stick pans also absorb heat poorly and unevenly, leading to burnt bottoms and soggy tops. Furthermore, if your flimsy baking sheets keep warping the second they hit 400 degrees, creating a terrifying metallic BANG that scares the dog and sends your fries flying into each other, it is time to upgrade.
You need a heavy-gauge, bare aluminum half-sheet pan, or a high-quality, thick stainless steel baking sheet. These materials conduct heat brilliantly and will not warp under pressure.
The Preheated Pan Trick
Set your oven to 425°F (220°C). If you have a convection setting (the fan), use it. Convection air circulation actively blows away the halo of steam that forms around the baking potatoes, accelerating the dehydration of the cornstarch crust.
Place your empty, heavy-duty baking sheet into the oven while it preheats. Just like you wouldn’t throw a cold steak into a cold skillet, preheating the pan in the oven before the sweet potatoes even touch it gives them an immediate, aggressive sear. The moment the oiled fries hit the hot metal, the gelatinization process begins instantly. While you might rely on the water drop test to check if your stainless steel skillet is ready on the stovetop, in the oven, a preheated heavy-duty sheet pan does the heavy lifting for you.
The Golden Rule of Spacing
Carefully remove the blazing hot pan from the oven. Arrange your fries in a single, even layer.
Here is the absolute most critical rule of roasting anything: Do not overcrowd the pan. When vegetables release moisture in a crowded environment, they steam. This exact phenomenon is why your roasted veggies are mushy instead of blistered and caramelized. There must be at least a 1/4-inch of visible metal space between every single fry. If they are touching, they will steam each other and become soggy. If you have too many fries for one pan, do not pile them up. Use two pans. Period.
The Mid-Bake Flip and The Crucial Cooldown
Bake the fries for 15 minutes. At this point, the bottoms touching the hot metal will be beautifully browned, but the tops will still be pale. You must flip them.
Remove the pan from the oven and use a thin, flexible metal spatula (like a fish turner) to carefully flip each fry. Be gentle. The cornstarch crust is still in its fragile, gelatinous state and hasn’t fully hardened yet. Once flipped, return them to the oven for another 10 to 15 minutes. Keep a close eye on them during the last 5 minutes, as the high sugar content in sweet potatoes means they can go from perfectly caramelized to burnt in the blink of an eye.
The Resting Phase
When the fries are deeply browned and crispy, pull the pan from the oven. Immediately hit them with a generous shower of fine sea salt or kosher salt.
Now, do not leave them on the hot baking sheet. The hot metal will continue to cook them, and as they sit, the residual steam escaping from the fluffy interiors will get trapped against the flat pan, making the bottoms soggy again. To preserve that delicate, glass-like crust, you must transfer them to a wire cooling rack immediately so the residual steam can escape from all sides. Let them rest for just 3 to 5 minutes. This brief resting period allows the temperature to drop just enough for the cornstarch gel to fully crystallize and harden into its final, rigid structure.
Troubleshooting Your Fry Failures
Even with a masterclass, things can go wrong if you lose focus. If your fries did not turn out perfectly, let’s do a rapid-fire troubleshooting session to diagnose your specific kitchen crime.
Why did my fries burn on the outside but stay raw on the inside?
You committed one of three sins. First, your oven was too hot (every oven calibrates differently, which is why you should own an independent oven thermometer). Second, you skipped the 30-minute cold water soak, leaving massive amounts of surface sugar on the potato that instantly caramelized and burned. Third, your knife skills need work; if you cut your fries too thick, the heat cannot penetrate the center before the exterior incinerates.
Why do my fries taste like raw flour or have a chalky texture?
You were far too heavy-handed with the cornstarch. You are not breading a chicken breast for deep frying; you are creating a microscopic moisture barrier. One tablespoon of starch per large potato is plenty. Alternatively, you did not toss them thoroughly enough, leaving clumps of dry starch stuck in the crevices of the fries.
Why did my fries stick to the pan and tear when I tried to flip them?
You likely used a cheap, ungreased pan, or you didn’t let the pan preheat in the oven first. Furthermore, you might have tried to flip them too early. When roasting, food will naturally release from the hot metal once a proper crust has formed. If you have to forcefully scrape the fry off the pan, it is not ready to be flipped yet. Give it another two minutes.
Why are my fries STILL soggy?
I can almost guarantee you overcrowded the pan. If you cannot see the metal of the baking sheet between each individual fry, you are boiling them in their own steam. Alternatively, you may have salted them before baking, drawing out moisture and destroying your cornstarch crust. Or, you were too lazy to dry them thoroughly after their soak.
Conclusion: You Are Now a Fry Master
Cooking is not magic. It is just applied physics and chemistry wrapped in an apron. You do not need to settle for mediocre, floppy side dishes, and you certainly do not need to rely on the drive-thru when the craving for fries hits.
By understanding the high moisture and sugar content of the sweet potato, utilizing the gelatinization properties of cornstarch, and respecting the thermodynamic rules of your oven, you have completely hacked the system. You have taken a vegetable that desperately wants to be mushy and forced it into a state of shatteringly crisp perfection.
So pour yourself a glass of wine, preheat that heavy-gauge aluminum pan, and go show those sweet potatoes who is boss. You’ve got this.






