
The Global Hummus Obsession and Your Sad, Gritty Reality
Let’s be brutally honest for a second. You love hummus. I love hummus. The entire world is currently obsessed with hummus. The global hummus market was valued at over $4.3 billion recently and is projected to skyrocket anywhere from $8 billion to over $12 billion by the early 2030s. Millions of people are actively reducing their meat intake, pivoting to plant-based proteins, and happily paying a premium for tiny, overpriced plastic tubs of pureed chickpeas at the grocery store.
But because you are a weekend culinary hobbyist who refuses to pay $6 for a dip you can make for $1.50, you decided to make it yourself. You bought a can of chickpeas, dumped them into your food processor with a glob of tahini, squeezed in some lemon, and hit the power button. And what did you get? You got a dense, pasty, gritty bowl of despair that tastes like sesame-flavored spackle. If your hummus is always grainy, you probably assume you need a culinary degree or a $2,000 commercial-grade food processor to achieve that restaurant-quality velvet texture.
You don’t. You just need a basic understanding of culinary chemistry and a splash of ice water.
I am a firm believer that absolutely anyone can cook like an expert in a standard home kitchen. You do not need to be a Michelin-starred chef to make mind-blowing food, but you do need to stop blindly following bad recipes. Today, we are going to dive deep into the thermodynamic magic of ice water, the great chickpea peeling delusion, and the exact science of why your tahini keeps seizing up on you. Grab a glass of wine, turn on your food processor, and let’s fix your dip.
The Anatomy of a Perfect Emulsion
Before we can fix your gritty mess, we need to understand what hummus actually is. At its core, hummus is an emulsion. An emulsion is simply a mixture of two liquids that absolutely hate each other and normally refuse to mix—specifically, oil and water.
When you look at the ingredient list for authentic hummus, you are dealing with a delicate balancing act of fats and water-based liquids. Tahini is packed with natural sesame oil, and you are likely drizzling in extra virgin olive oil as well. On the other side of the battlefield, you have water-based lemon juice, the residual moisture inside the chickpeas, and whatever liquid you add to thin the mixture out.
To force these opposing forces to play nice and form a stable, creamy, homogenous sauce, you need two things: intense mechanical shearing force (provided by the rapidly spinning metal blades of your food processor) and precise temperature control. If you fail to manage the temperature, the fat molecules will melt, separate from the water, and leave you with a broken, greasy, grainy puddle.
The Great Chickpea Peeling Delusion
If you have ever Googled “how to make smooth hummus,” you have undoubtedly stumbled across pretentious food blogs telling you that the secret is to manually peel the skins off of every single chickpea. I have zero patience for this kind of tedious, soul-crushing prep work. I timed this process once. Going as fast as humanly possible, it took 15 minutes to peel a single 15.5-ounce can of chickpeas. Time is money, people. I am not spending my precious weekend peeling legumes like a medieval peasant just to make a snack.
The reason people tell you to peel the chickpeas is because the skins are loaded with pectin, a structural carbohydrate that doesn’t break down easily and leaves a gritty texture behind when blended. But we have science on our side, which means we can dissolve that pectin without ever using our hands.
The secret weapon is sodium bicarbonate, commonly known as baking soda. When you add baking soda to boiling water, it drastically raises the pH level, creating a highly alkaline environment. This alkaline water attacks and breaks down the pectin in the chickpea skins incredibly fast.
The Baking Soda Boil Method
Even if you are using pre-cooked, canned chickpeas (which I highly recommend for weekday shortcuts), you should still boil them. Drain and rinse your canned chickpeas, throw them into a saucepan, cover them with a few inches of water, and add a half teaspoon of baking soda. Boil them aggressively for about 15 to 20 minutes.
You will notice the water turning cloudy and foaming up. That is the baking soda obliterating the skins. By the time you drain them, the chickpeas will be bloated, mushy, and falling apart. This is exactly what you want. Using the wrong cutting board for your prep work is exactly how knives get dull before their time, but with this alkaline boiling trick, you don’t even need a knife to achieve a perfectly smooth puree. The skins literally melt away into the boiling water, completely eliminating the need for manual peeling.
The Science of Seizing: Why Your Tahini Turns to Cement
Now that we have perfectly mushy chickpeas, we have to talk about the most misunderstood ingredient in your pantry: tahini. Tahini is a paste made from toasted, ground sesame seeds. Structurally, it is a suspension of dry carbohydrate and protein particles floating in natural sesame oil.
When you mix raw tahini with a tiny amount of water-based liquid—like fresh lemon juice—something terrifying happens. It seizes. It instantly transforms from a runny, pourable paste into a thick, unyielding block of sesame cement. I’ve seen rookie home cooks throw entire batches into the garbage because they thought they ruined it.
The Molecular Breakdown of Seized Tahini
Why does this happen? It all comes down to intermolecular forces. The dry carbohydrate and protein particles suspended in the tahini are highly hydrophilic (water-loving). When you introduce a small splash of water or lemon juice, those dry particles are instantly attracted to the moisture.
However, because you only added a small amount of liquid, there isn’t enough water to go around. The particles clump tightly together around the limited water droplets. There is no longer enough lubrication for the particles to freely slide past one another, causing a massive phase separation that thickens the entire mixture. It is the exact same chemical reaction that occurs when you accidentally drop a tiny splash of water into a bowl of melted chocolate, causing it to seize into a dull, grainy lump.
If you stop here and just throw your chickpeas into this seized cement, your hummus is doomed to be dense and chalky. You have to push through the seizing phase to invert the emulsion.
The Magic Bullet: The Thermodynamic Power of Ice Water
To fix seized tahini, you must add more liquid and agitate it vigorously. Once enough water is introduced, the clumps of carbohydrates and proteins finally have enough moisture to fully hydrate, separate, and glide past each other, turning that stiff cement into a thin, pale, smooth liquid.
But you cannot just add room-temperature tap water. You must add ice-cold water.
Why Temperature Dictates Texture
Friction is the enemy of a stable emulsion. Your food processor’s metal blades spin at thousands of revolutions per minute, creating an immense amount of mechanical shearing force. This intense friction generates a significant amount of heat inside the bowl.
If your chickpea and tahini emulsion gets too warm, the delicate network of fat molecules will melt, separate from the water, and break the emulsion entirely. When an emulsion breaks, the oil pools on the surface, and the solids clump together, leaving you with a greasy, split, grainy mess. Just like when your morning smoothies are chunky because you didn’t manage your liquid-to-ice ratio properly, failing to control the temperature in your food processor will ruin the final texture of your dip.
By slowly streaming ice water into the food processor while it runs, you accomplish two crucial scientific feats at once:
- Hydration: You provide the exact amount of moisture needed to invert the seized tahini, turning it into a light, whipped, airy cloud.
- Thermodynamics: You drastically drop the ambient temperature of the mixture, actively counteracting the heat generated by the friction of the spinning blades. This locks the fat and water molecules together in a perfectly stable, velvety emulsion.
The Sassy Sous-Chef’s Step-by-Step Masterclass Method
Alright, enough theory. Let’s put this science into practice. This is my foolproof, strictly tested method for achieving mind-blowing, restaurant-quality hummus on a busy weekday without losing your mind.
Step 1: The Acid Soak
Start by mincing two cloves of fresh garlic. If your raw garlic is overpowering the entire dish and leaving a burning sensation in your mouth, it is because you didn’t neutralize the harsh allicin compounds first. Place your minced garlic into a small bowl and submerge it in a quarter cup of freshly squeezed lemon juice. Let it sit for 10 to 15 minutes. The high acidity of the lemon juice will chemically cook the garlic, mellowing its bite and leaving you with a smooth, sweet garlic flavor.
Step 2: The Alkaline Boil
While the garlic is soaking, open a 15.5-ounce can of high-quality chickpeas. Drain them, rinse them, and toss them into a saucepan with enough water to cover them by two inches. Add a half teaspoon of baking soda. Boil them aggressively for 15 to 20 minutes until they are bloated, falling apart, and the skins have dissolved into the cloudy water. Drain them in a fine-mesh strainer and rinse them with cold water to stop the cooking process.
Step 3: Whipping the Base
Set up your food processor. Pour your garlic-infused lemon juice through a small strainer directly into the bowl, discarding the solid garlic bits. Stop wasting citrus juice by squeezing lemons with your bare hands; use a proper heavy-duty enameled press to get every last drop of liquid gold. Add a half cup of high-quality, well-stirred tahini and a generous pinch of kosher salt to the lemon juice. Turn the food processor on and let it run for one full minute.
When you open the lid, the mixture will look like a disaster. It will be thick, seized, and chunky. Do not panic. The chemistry is working.
Step 4: The Ice Water Drip
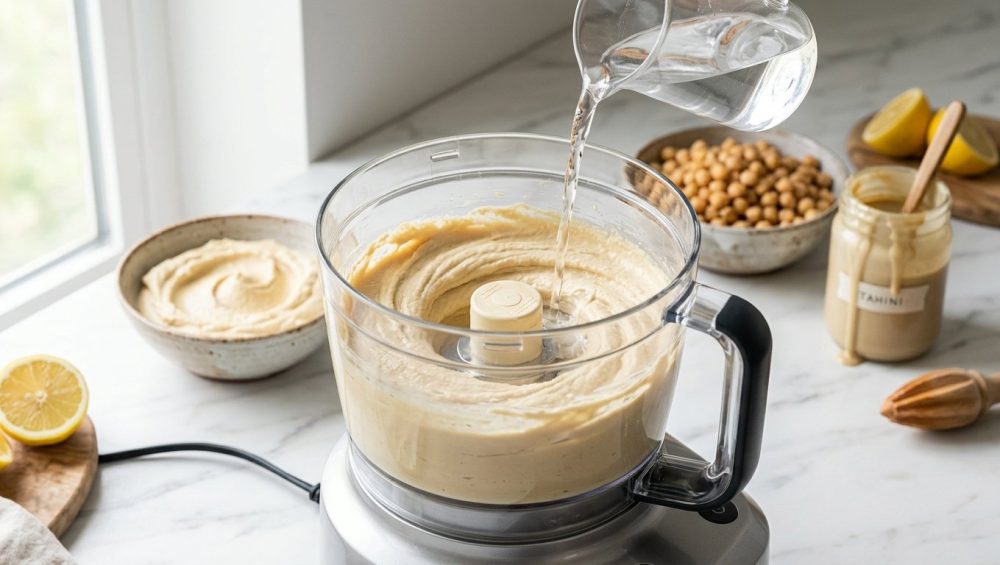
This is where the magic happens. Turn the food processor back on. While the blades are spinning, slowly drizzle in 2 to 3 tablespoons of ice-cold water (make sure no actual ice cubes fall in). Watch the transformation. The friction of the blades combined with the chilling effect of the ice water will force the seized tahini to invert. Within 60 seconds, it will transform from a stiff, ugly paste into a pale, fluffy, whipped cream-like sauce.
Step 5: The Long Blend
Now, add your overcooked, mushy chickpeas into the whipped tahini base. Turn the food processor on and walk away. I mean it. Go pour yourself another glass of wine, wipe down your counters, or stare blankly at the wall for a minimum of 4 to 5 minutes.
Most home cooks get impatient and only blend their hummus for 60 seconds. That is a rookie mistake. You need sustained mechanical shearing to completely pulverize the chickpea solids and whip air into the emulsion. If the mixture looks too thick while it’s blending, drizzle in one more tablespoon of ice water.
When the 5 minutes are up, turn off the machine. You will be staring at a vortex of the lightest, silkiest, most ethereally smooth hummus you have ever seen in your life.
Gear Check: Stop Using Toxic Garbage in Your Kitchen
We need to have a serious talk about the equipment you are using to make this. I firmly believe that you can achieve professional-level results at home, but you absolutely cannot do it if you are using cheap, toxic, degrading kitchenware. I have a strict “No-Go” rule on garbage gear.
If you are trying to make a stable emulsion in a flimsy, $15 plastic food processor that rattles across your counter and smells like burning ozone after 30 seconds of blending, you are setting yourself up for failure. Invest in a heavy-duty food processor with a solid motor base and a BPA-free or glass work bowl.
When it comes time to scrape that beautiful hummus out of the processor bowl, use a high-quality, platinum-grade silicone spatula. There is nothing more infuriating than realizing your cheap dollar-store utensils are leaching mystery chemicals and making your spatulas taste like soap. You are an adult; buy kitchen tools that don’t actively poison your food.
The same rule applies to your cookware and prep tools. Just like you are ruining your nonstick pans by coating them in toxic aerosol cooking sprays that polymerize into a sticky, un-washable residue, you are ruining your food by using cheap gadgets. For example, using a cheap metal garlic crusher violently destroys the cell walls of the garlic, which releases excess sulfur and makes food bitter. Take the extra 30 seconds to mince your garlic gently with a sharp chef’s knife. Treat your ingredients with respect, and they will reward you with incredible flavor.
Troubleshooting Your Hummus Disasters
Even with the perfect science-backed method, things can occasionally go sideways. Here is how to troubleshoot common issues without throwing the whole batch in the trash.
“My Hummus is Too Runny!”
You got impatient and added the ice water too quickly, or you added too much of it. Emulsions require a delicate balance. If you flood the tahini with water before the mechanical shearing can incorporate it, the emulsion won’t hold. To fix this, add another tablespoon of tahini and let the machine run for another two minutes to help bind the excess liquid.
“My Hummus Tastes Bland!”
Hummus is a dish that relies heavily on proper seasoning. If it tastes like wallpaper paste, it needs one of three things: more kosher salt, more lemon juice, or a better brand of tahini. Not all tahini is created equal. If you bought a jar that has been sitting on a dusty supermarket shelf for three years, the sesame oils have likely gone rancid. Spend the extra few dollars on a high-quality, single-origin tahini from a reputable Middle Eastern grocer.
“I Want to Make Roasted Garlic Hummus, but It Tastes Burnt!”
Roasted garlic hummus is a fantastic weekend project, but it requires precision. If your garlic tastes bitter and acrid, your oven is lying to you. Stop trusting your oven to magically hold a perfect 400°F without verifying it. Buy a cheap oven thermometer. If your oven runs 50 degrees too hot, you are incinerating the natural sugars in the garlic rather than caramelizing them.
“How Do I Store This Without Ruining It?”
Once you have achieved the perfect emulsion, you need to protect it. Transfer your hummus to a glass airtight container and drizzle a generous layer of high-quality extra virgin olive oil over the top. This oil acts as a protective seal, preventing the hummus from oxidizing and forming a crust in the fridge.
Do not store this in a cheap plastic Tupperware container. If your plastic containers stay greasy no matter how many times you run them through the dishwasher, it is because the porous plastic has permanently absorbed the sesame oil and garlic odors from past meals. Glass is non-toxic, non-porous, and the only acceptable way to store your culinary masterpieces. Let the hummus rest in the fridge for at least 90 minutes before serving; this allows the emulsion to stabilize and the flavors to meld together perfectly.
Final Thoughts: Reclaiming Your Weekend Culinary Projects
You do not need to settle for mediocre, gritty dips, and you certainly do not need to waste your precious time peeling individual chickpeas. By leveraging the alkaline power of baking soda, understanding the molecular quirks of tahini, and utilizing the thermodynamic magic of ice water, you can whip up a batch of ethereally smooth hummus in under 30 minutes.
Cooking is not magic; it is just edible science. Once you understand the “why” behind the techniques, the kitchen stops being a stressful chore and transforms into a playground. So throw out your toxic plastic gear, buy a good jar of tahini, and let your food processor do the heavy lifting. You’ve got this.






