
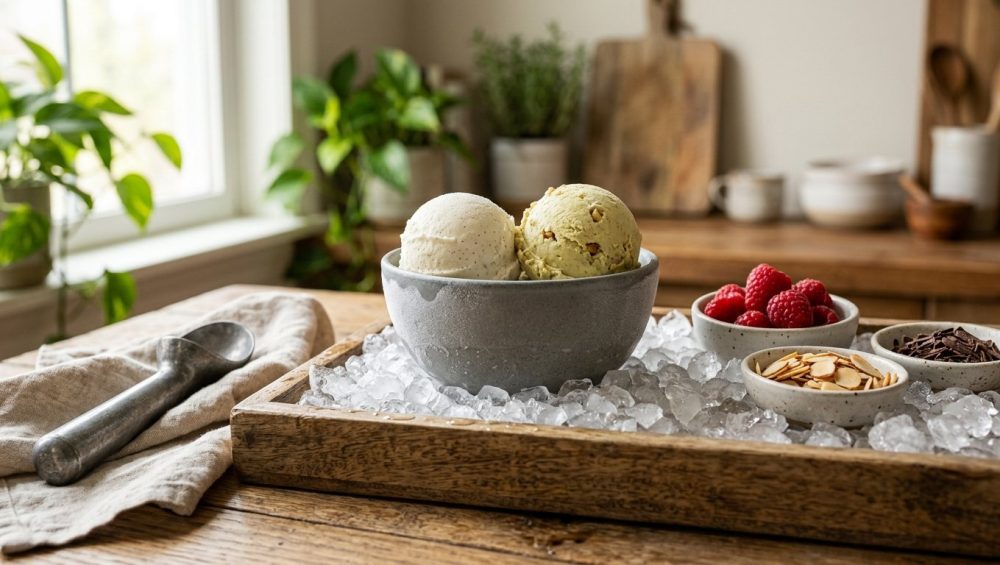
Listen up, weekend warriors. We need to have a serious conversation about one of the most universally beloved, yet catastrophically mismanaged, desserts in the history of home entertaining: the DIY sundae bar.
Picture this: It is a gorgeous, warm Saturday evening. You have invited your favorite people over. You have spent good money on premium, artisanal pints of vanilla bean, dark chocolate ganache, and salted caramel. You proudly carry them out to the patio table, alongside a smorgasbord of toppings. You envision a relaxed, elegant dessert experience. But within exactly four minutes, reality strikes. The pints have turned into a sticky, soupy, dairy puddle. Your guests are panic-scooping, rushing to assemble their bowls before the entire spread liquefies. Instead of a peaceful end to a lovely meal, you are hosting a high-stakes, sugar-fueled race against the thermodynamic clock.
I have zero patience for kitchen stress, especially when it comes to weekend entertaining. During the week, my motto is “time is money”—I will take every efficient shortcut in the book to get a meal on the table. But the weekend? The weekend is when we slow down. The weekend is when we do things right. You do not need a culinary degree to master the art of effortless hosting. You just need a basic understanding of kitchen science and the right equipment.
If you are tired of the dreaded ice cream soup and want to actually enjoy your own parties, you are in the right place. Today, we are diving deep into the practical temperature control methods for serving frozen desserts at home. We are going to eliminate the stressful melt-clock so you can focus on hosting mindful gatherings where your guests can build their sundaes at their own leisurely pace. Grab a notebook, and let us get into the science of the melt.
The Science of the Melt: Why Your Pints Turn to Soup
Before we can fix the problem, we have to understand the enemy. And to do that, we need to strip away the marketing fluff and look at what ice cream actually is on a molecular level.
Ice cream is not a solid block of ice. It is a highly complex, delicate emulsion of water (in the form of microscopic ice crystals), liquid syrup (unfrozen sugar water), milk fat globules, and trapped air cells. When you pull a pint out of the freezer and subject it to room temperature, you are forcing that delicate emulsion to break down. But not all ice creams melt at the same rate, and understanding why is the first step to taking back control of your dessert table.
Understanding Overrun and Fat Content
If you have ever noticed that a cheap, generic tub of vanilla melts significantly faster than a premium, artisanal pint, you are not imagining things. The secret lies in a culinary industry term called “overrun.”
Overrun refers to the amount of air that is whipped into the ice cream base during the churning process. Budget-friendly commercial ice creams often have an overrun of up to 100%, meaning the final product is literally half air. Air is a terrible insulator of cold. When you expose a high-overrun ice cream to warm ambient air, there is simply less physical mass and fat to retain the cold temperature, causing the structure to collapse rapidly into a foamy puddle.
On the flip side, premium ice creams have a much lower overrun (often around 20% to 30%) and a significantly higher butterfat content. The rich fat globules create a dense network that stabilizes the air cells and ice crystals. This higher fat content creates a smoother texture and a much slower melting rate, allowing the ice cream to retain its structural integrity far longer when exposed to heat. If you are hosting a sundae bar, do yourself a favor and invest in the good stuff. The extra fat is literally buying you time.
The Ideal Scooping Temperature (And Why Your Freezer Is Lying to You)
Here is a brutal truth that trips up almost every home cook: your home freezer is set to the wrong temperature for serving ice cream.
The FDA strictly recommends storing ice cream at 0°F (-18°C) or below to prevent the growth of large, gritty ice crystals over time. However, the ideal serving temperature for ice cream is actually between 6°F and 10°F (-14°C to -12°C). At this slightly warmer temperature range, the ice cream is cold enough to hold its shape perfectly, but soft enough to release its optimal flavor profile and allow for effortless scooping without bending your spoon.
Because your freezer is running at 0°F (or colder), pulling a pint directly from the freezer and immediately trying to serve it is a recipe for disaster. The ice cream is too hard to scoop, so you leave it on the counter to “soften.” But resting it on a 75°F kitchen counter causes the outer edges to melt into soup while the center remains a brick of ice. We are going to fix this staging problem shortly, but first, we need to address the biggest mistake you are making with your servingware.
Mistake #1: The Room-Temperature Serving Bowl
I see this all the time, and it drives me absolutely up the wall. You go through the trouble of buying expensive ice cream, you set up a beautiful toppings bar, and then you serve the ice cream in room-temperature glass or thin plastic bowls pulled straight out of the cupboard.
Listen to me carefully: serving -10°F ice cream in a 75°F bowl is an act of culinary sabotage.
When a freezing substance meets a room-temperature surface, the heat from the bowl immediately transfers to the ice cream through conduction. Glass, in particular, is a nightmare for this. Thin glass has very little thermal mass, meaning it does not hold temperatures well, and it will rapidly transfer the ambient heat of the room directly into your dessert. Plastic is equally useless. By the time your guest has walked from the sundae bar to the patio chair, the bottom half of their dessert is already liquid.
The Secret Weapon: Pre-Chilling Natural Stoneware
If you want to completely eliminate the melted mess, you need to leverage the power of thermal mass. And the undisputed king of thermal mass in the kitchen is dense, high-fired ceramic stoneware.
Stoneware is made from dense clay that is fired at incredibly high temperatures (typically between 2,200 and 2,400 degrees Fahrenheit). This intense firing process creates a vitrified, heavy body that acts as a thermal battery. It absorbs temperature, holds it tightly, and releases it incredibly slowly. Professional chefs rely heavily on thermal retention in natural stoneware to keep hot food hot on the pass, but it works exactly the same way in reverse for cold foods.
Here is your new golden rule: 30 minutes before your guests arrive, place your heavy stoneware serving bowls directly into the freezer. Because of the dense clay’s thermal mass, those bowls will absorb the sub-zero temperatures. When you serve your ice cream into a frozen stoneware bowl, the bowl actively fights against the ambient heat of the room, keeping the ice cream perfectly solid and scoopable for up to 20 minutes longer than a standard glass or plastic vessel. It is a zero-effort, science-backed trick that completely changes the pace of your dessert party.
Mistake #2: The Cheap, Toxic Ice Cream Scoop
Now that we have fixed your bowls, we need to have a very serious talk about the tool you are using to get the ice cream out of the carton. If you open your kitchen drawer right now and pull out a lightweight, aluminum scoop that looks like the metallic coating is flaking off, I want you to throw it directly into the garbage bin.
I am fiercely passionate about banishing toxic kitchen gear from the home, and cheap ice cream scoops are some of the worst offenders on the market.
Many budget scoops are made from cheap cast aluminum and are filled with a mysterious, heat-conductive “anti-freeze” fluid inside the handle. The problem? Aluminum is highly reactive. If you accidentally put one of these cheap scoops into the dishwasher, the harsh alkaline detergents react with the metal, oxidizing it. The next time you use it, you will notice your ice cream scoop turned gray and is leaving a powdery, dark metallic residue all over your hands and, worse, directly into your food. It is disgusting, it is unsafe, and it has absolutely no place in a mindful kitchen.
Why You Need a Heat-Conductive, Solid Metal Scoop
You do not need toxic chemicals to scoop frozen dairy. You just need proper engineering.
If you want to glide through a pint of premium, low-overrun ice cream without spraining your wrist, you need to invest in a solid, heavy-duty heat-conductive ice cream scoop. The best models are cast from a single piece of high-grade stainless steel or heavily plated, sealed zinc alloy.
These materials rely on their own natural density and thermal conductivity to transfer the ambient heat from the palm of your hand down through the handle and into the edges of the scoop. A heavy, solid metal scoop with a sharply tapered leading edge will carve through 0°F ice cream like butter, creating beautifully rolled, professional-looking spheres without relying on peeling chemical coatings. Buy a good one once, and it will outlive you.
Creating the Ultimate Insulated “Cold Zone”
We have addressed the bowls and the tools, but we still have to solve the main event: staging the pints on the table. You cannot just leave cardboard cartons of ice cream sitting on a warm tablecloth and expect them to survive. If you want your guests to take their time, mingle, and build their sundaes without rushing, you need to build an insulated “Cold Zone.”
This is where we borrow scientific food staging techniques from the catering world. Caterers do not rely on luck; they rely on thermodynamics.
The Magic of the Rock Salt Ice Bath
You might think that filling a large metal tub with regular ice cubes is enough to keep your pints cold. It is not. Standard ice cubes sit at exactly 32°F (0°C). As they melt, the water remains at 32°F. Remember what we learned earlier? The ideal serving temperature for ice cream is between 6°F and 10°F. A standard ice bath is actually warmer than the ice cream, meaning it will slowly melt your dessert.
To create a true cold zone, we have to hack the freezing point of water using rock salt.
This is a classic principle of chemistry known as freezing point depression. When you mix coarse rock salt (sodium chloride) into crushed ice, the salt molecules dissolve into the thin layer of liquid water on the surface of the ice. This dissociation into sodium and chloride ions physically disrupts the water molecules, preventing them from forming a solid crystalline lattice.
Because the salt forces the ice to melt, the phase change from solid to liquid absorbs heat from the surrounding environment (an endothermic reaction). The result? The temperature of the salty slush plummets well below the normal freezing point of water. By mixing a ratio of roughly one part rock salt to three parts crushed ice, you can reliably drop the temperature of your ice bath down to a staggering 14°F to 10°F (-10°C to -12°C).
This is one of the most brilliant thermodynamic food holding strategies you can utilize at home.
How to build it:
- Take a large, deep, double-walled stainless steel beverage tub (or a thick ceramic basin).
- Fill the bottom with a 2-inch layer of crushed ice.
- Generously sprinkle a heavy layer of coarse rock salt over the ice.
- Place your open pints of ice cream into the tub.
- Pack the empty space between the pints with more crushed ice, layering more rock salt as you go, until the ice reaches the top rim of the cartons.
This super-chilled brine will envelope the cartons, keeping the ice cream suspended at the perfect 10°F scooping temperature for over an hour, even on a warm summer evening. Your guests can casually stroll up to the bar, scoop perfectly firm ice cream, and take their time.
Managing the Toppings: The Hot vs. Cold Dilemma
A sundae bar is not complete without toppings, but introducing warm elements like hot fudge and toasted nuts creates a volatile temperature clash. If you mismanage this contrast, you will instantly undo all of your hard work.
Staging Hot Fudge and Caramel
There is a very fine line between a luxurious drizzle of warm fudge and a boiling-hot liquid that instantly scorches your ice cream into soup. Conversely, if your ice cream is too cold and your fudge is not warm enough, the hot fudge seizes the moment it hits the dairy, turning into a waxy, unchewable bullet that gets stuck in your teeth.
The secret to perfectly flowing hot toppings is a gentle, ambient water bath. Do not microwave your fudge or caramel in their jars right before serving—the glass will develop localized hot spots that burn the sugars, and the sauce will cool down rapidly once placed on the table.
Instead, plug in a small, inexpensive slow cooker (often sold as a “Little Dipper” or fondue pot) on your serving table. Fill the basin with an inch of warm water, and place your heat-safe jars of fudge and caramel directly into the water bath. Leave the slow cooker on the “Warm” setting. This gentle, indirect heat will keep the sauces at a perfectly fluid 110°F to 120°F for the entire duration of the party. It is warm enough to pour beautifully, but not so hot that it instantly destroys the ice cream’s emulsion.
A quick warning regarding chocolate-based sauces: be incredibly careful not to let any water from the bath splash into the fudge. Chocolate and water are mortal enemies. Even a single drop of water will bind with the cocoa starches, causing a catastrophic chemical reaction where your melted chocolate turns clumpy and grainy. Keep a clean kitchen towel next to the water bath so guests can wipe the bottom of the jar if they lift it out.
The Step-by-Step Mindful Sundae Bar Timeline
We have covered the science, the gear, and the staging. Now, let us put it all together. A relaxed host is a prepared host. If you follow this exact timeline, you will never sweat over melting dairy again.
2 Hours Before Serving:
- Wash and thoroughly dry your heavy stoneware serving bowls. Stack them neatly in the freezer. (Do not skip the drying step, or they will freeze together in a block of ice).
- Place your solid stainless steel ice cream scoops in the refrigerator (not the freezer—you want them cool, but not so freezing that they stick to the ice cream).
1 Hour Before Serving:
- Set up your dry toppings. Place chopped nuts, sprinkles, crushed cookies, and toasted coconut into small, matching ceramic ramekins.
- Set up your slow-cooker water bath for the hot fudge and caramel sauces. Turn it to the “Warm” setting and let the sauces gently come up to temperature.
20 Minutes Before Serving:
- Build your rock salt ice bath in your insulated metal or ceramic tub. Use the 1:3 ratio of coarse rock salt to crushed ice. Let the mixture sit for 5 minutes so the freezing point depression can take effect and the temperature can plummet to 10°F.
10 Minutes Before Serving:
- Remove the pints of ice cream from your 0°F deep freeze.
- Remove the lids and nestle the open cartons deeply into the rock salt ice bath.
- Allow the ice cream to temper in the bath for 10 minutes. The super-chilled brine will protect the sides and bottom of the carton, while the exposed top layer gently softens to the ideal 6°F to 10°F scooping temperature.
0 Minutes (Showtime):
- Pull the frosted stoneware bowls out of the freezer and stack them at the start of the sundae bar.
- Set out your heavy-duty metal scoops.
- Pour yourself a glass of wine, step back, and watch your guests marvel at a perfectly executed, stress-free dessert presentation.
Final Thoughts: Embrace the Melt-Free Zone
Hosting a weekend gathering should never feel like a frantic shift on a restaurant line. By ditching the cheap, toxic plastic gear, embracing the thermal mass of natural stoneware, and utilizing a simple chemical reaction with rock salt, you completely change the dynamic of your party.
You do not need to be a professional pastry chef to serve a flawless dessert. You just need to stop fighting against the laws of thermodynamics and start using them to your advantage. When you take the time to set up an insulated cold zone, you eliminate the frantic rush. Your ice cream stays perfectly scoopable, your toppings stay warm and fluid, and most importantly, you actually get to sit down and enjoy the sundae you built.
So, banish the room-temperature glass bowls. Throw away that peeling, gray aluminum scoop. Buy the good, high-fat ice cream, and let the science do the heavy lifting. Your weekends are meant for mindful moments, great conversations, and perfectly chilled, melt-free sundaes. Now get out of here and go set up that ice bath.






