
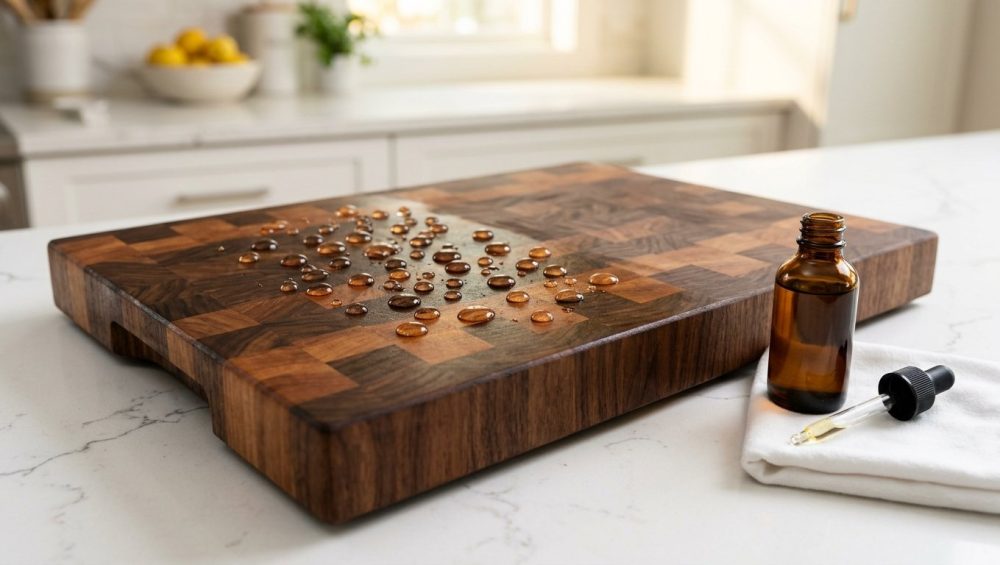
Listen up, weekend culinary warriors. We need to have a serious, sit-down conversation about the wooden slab currently suffering on your kitchen counter. You know exactly the one I am talking about. It is dry, it is splintering, and it looks like it just survived a minor localized earthquake. You spent good money on that beautiful, heavy butcher block, yet you are treating it with the same level of disrespect usually reserved for cheap, disposable takeout containers. It is time to stage an intervention.
As a home cook, your cutting board is the foundation of every single meal you make. It is your primary workspace, your prep station, and occasionally, your impromptu serving platter. Yet, despite its importance, it is universally the most abused tool in the modern kitchen. You toss it in the sink to soak, you scrub it with harsh chemicals, and then you wonder why it suddenly looks like a potato chip and rocks back and forth when you try to dice an onion.
I firmly believe that anyone can cook like an absolute expert and turn out mind-blowing food without a fancy culinary degree. But part of being a great cook is respecting your tools. You cannot execute a perfect julienne or break down a chicken safely if your cutting surface is actively trying to spin off the counter. Today, we are taking a deep dive into the actual material science of your wooden cutting boards. We are going to break down exactly why they warp, why they crack, and how you can stop accidentally murdering your kitchenware investments. Consider this your definitive, no-nonsense masterclass in wood maintenance.
The Anatomy of a Wooden Cutting Board: A Crash Course in Wood Science
Before we can fix the damage you have done, you need to understand what you are actually working with. Wood is a natural, living, breathing material. Even after a tree has been chopped down, milled, kiln-dried, and glued into a gorgeous checkerboard pattern, it never truly stops interacting with its environment.
The Hygroscopic Nature of Wood
Wood is hygroscopic. In non-pretentious terms, this means it acts exactly like a giant, dense sponge. Its cellular structure is full of open microscopic pores that are constantly absorbing and releasing moisture from the surrounding air and any liquids it comes into contact with. When the ambient humidity in your kitchen is high, the wood absorbs moisture and the cellular fibers swell. When the air is dry—like in the dead of winter when your central heating is blasting—the wood releases that moisture and the fibers shrink.
This constant expansion and contraction is referred to as “wood movement.” It is an unavoidable law of physics. As a cook, your job is not to stop the wood from moving, but to manage that movement so it happens evenly across the entire board. If you fail to manage it, that is when the catastrophic cracking begins. Learning to navigate these basic material properties is a cornerstone of any essential kitchen survival guide.
End-Grain vs. Edge-Grain vs. Face-Grain
Not all cutting boards are constructed the same way, and the orientation of the wood fibers plays a massive role in how susceptible your board is to cracking.
Face-Grain Boards: These are made by gluing wide planks of wood together side-by-side. The grain runs horizontally along the top surface. They are beautiful because they show off the natural arching patterns of the wood, but they are the most prone to showing knife marks and warping. Because the fibers are lying flat, your knife slices directly across them, severing the wood fibers with every chop.
Edge-Grain Boards: These are constructed by turning those planks on their side and gluing the narrower edges together. They are thicker, heavier, and more stable than face-grain boards. They offer a great middle-ground for home cooks who want durability without spending an absolute fortune.
End-Grain Boards: This is the undisputed holy grail of cutting boards. End-grain boards are made by cutting wood into blocks and arranging them so the exposed ends of the wood fibers face upward, creating a checkerboard pattern. Imagine a bundle of drinking straws standing straight up. When your knife hits an end-grain board, the blade slides between the vertical wood fibers (the straws) rather than severing them. When you lift the knife, the fibers naturally close back up. This “self-healing” property keeps your knives razor-sharp and prevents deep scratches. However, because those open “straws” are facing straight up, end-grain boards are incredibly thirsty. They absorb moisture significantly faster than edge-grain boards, making them highly susceptible to warping if you do not condition them properly.
The Kitchen Crimes Murdering Your Wooden Board
Now that we understand the biology of the board, let us talk about the horrific abuse you are putting it through. If your board is currently cupping or splitting down the middle, I can almost guarantee you are guilty of at least one of these kitchen crimes.
The Dishwasher: A Guaranteed Death Sentence
I have zero patience for people who put wooden kitchenware in the dishwasher. It is the ultimate act of culinary laziness. A standard dishwasher cycle blasts your dishes with water temperatures reaching 60 to 70 degrees Celsius, completely saturating the wood. Simultaneously, it attacks the board with highly alkaline, abrasive detergents that strip away every single drop of natural protective oil.
Then comes the heated dry cycle. The dishwasher rapidly bakes the hyper-saturated wood. This extreme, violently fast transition from soaking wet to bone dry forces the wood fibers to swell massively and then shrink so rapidly that the internal tension literally tears the board apart. The intense heat also melts and degrades the food-safe glues holding the wood strips together. If you want to know why your wooden spoons keep cracking and your boards are splitting in half, look no further than your dishwasher. Keep wood out of it. Period.
The “Soak and Scrub” Delusion
You make a messy roast, your board is covered in juices, and you decide to let it “soak” in a sink full of soapy water for a few hours. Absolutely not. Submerging a wooden board in water is fatal. Even ten minutes of total submersion pushes water deep into the core of the wood fibers. When the wood becomes internally waterlogged, it expands dramatically. When it eventually dries, the outer layers will dry and shrink much faster than the wet inner core, creating massive internal stress that leads to severe warping and structural failure.
The Flat-Drying Trap
This is the most common mistake I see among weekend hobbyists. You actually take the time to hand-wash your board, but then you lay it flat on your kitchen counter to dry. Here is the physics problem: the top of the board is exposed to the open air and dries quickly, causing the wood fibers on top to shrink. Meanwhile, the bottom of the board is trapped against the damp countertop, remaining wet and swollen.
Because the top is shrinking while the bottom remains expanded, the board physically curls upward, creating a “cupped” shape. If you have ever wondered why your board spins around like a turntable when you try to use it, it is because you dried it flat. You are essentially creating an unbalanced moisture gradient. This is the exact same uneven thermal and moisture stress that explains why your cheap baking sheets keep warping in the oven.
The “No-Go” Gear: Toxic Glues, Mystery Woods, and Bamboo
As a staunch advocate for the home cook, I have a strict “No-Go” rule when it comes to toxic, cheap, and actively harmful kitchen gear. The market is flooded with garbage products masquerading as high-end culinary tools. We need to talk about the elephant in the room: bamboo.
Why Bamboo is Actually the Enemy
Bamboo cutting boards are marketed heavily as the ultimate eco-friendly, sustainable choice. They are cheap, they look decent, and they are everywhere. But here is the ugly truth that the marketing departments do not want you to know: bamboo is not wood. It is a grass.
To turn hollow stalks of grass into a solid flat board, manufacturers have to slice the bamboo into tiny strips and glue them all together under immense pressure. Because the strips are so small, a bamboo cutting board is heavily reliant on adhesives. In fact, the glue volume fraction in a bamboo board can exceed 30 percent. You are essentially cutting on a synthetic polymer composite resin board that just happens to have some grass mixed into it. Lower-quality bamboo boards often use brittle, cheap adhesives that can contain formaldehyde and other toxic compounds that have no business touching your food.
Furthermore, bamboo is incredibly hard on your knives. On the Janka hardness scale, which measures the resistance of wood to denting, bamboo sits around 1,380 to 1,460 lbf. Compare that to a premium cutting board material like walnut, which sits at a much more forgiving 1,010 lbf. But it gets worse. Bamboo naturally draws high amounts of silica from the soil as it grows. Silica is essentially microscopic sand. When you chop on a bamboo board, you are dragging your expensive, finely honed chef’s knife across a surface made of hard glue and literal sand.
Every time you prep a meal on bamboo, you are dulling your blade significantly faster than you would on a proper hardwood board. If you are constantly frustrated by why knives dull so fast, throw your bamboo board in the trash immediately. Reserve bamboo strictly for serving charcuterie, and keep your sharp blades far away from it.
Spotting Cheap, Toxic Boards
When shopping for a real wooden board, you want solid hardwoods. Maple, walnut, cherry, and teak are the gold standards. Avoid anything labeled with vague terms like “hardwood blend” or boards coated in mysterious, shiny lacquers. A quality cutting board should be finished with nothing but food-grade oil and natural waxes. If a board has a shiny, peeling laminate coating, it is toxic junk. I am incredibly passionate about banishing toxic kitchen gear from your home, and your cutting surface should be the very first place you start.
The Science of Cracking and Warping
To truly stop your board from cracking, you must understand the mechanical forces at play. Wood warping is defined as a deviation from flatness caused by internal residual stress due to uneven shrinkage.
Cupping, Bowing, and Splitting
When a board takes on moisture unevenly, or is allowed to return to its dry equilibrium state too quickly, it warps. There are several types of warp, but the most common in cutting boards are the “cup” (a warp across the width of the face) and the “bow” (a warp along the length).
When the internal stress of this uneven expansion exceeds the structural integrity of the wood fibers, the board physically tears itself apart to relieve the pressure. This is what causes a crack. Once a board splits down the middle, the structural integrity is permanently compromised. Furthermore, cracks become deep ravines where food particles and moisture get trapped, creating a breeding ground for nasty pathogens.
The Microbe Myth: Why Wood is Actually Safer Than Plastic
For decades, health departments and government agencies pushed a massive myth: they claimed that because wood is porous, it must harbor dangerous bacteria, and therefore, non-porous plastic boards were the only safe option for kitchens. This led to a generation of home cooks throwing out heirloom wooden boards in favor of cheap, ugly plastic.
There was only one problem with this advice: it was completely wrong.
In the 1990s, a renowned food safety scientist named Dr. Dean Cliver at the University of California, Davis, decided to actually test this theory. He contaminated both wooden and plastic cutting boards with massive amounts of dangerous foodborne pathogens, including Escherichia coli (E. coli), Salmonella, and Listeria.
The results shocked the scientific community. Within just three minutes of applying the bacteria to the wooden boards, 99.9 percent of the bacteria had died. When the boards were left overnight at room temperature, the wooden boards had absolutely no recoverable bacteria left. On the plastic boards, however, the bacteria survived, thrived, and actually multiplied overnight.
The Capillary Action Phenomenon
Why does wood completely obliterate bacteria? The science is brilliantly simple. Because wood is porous and hygroscopic, it absorbs moisture through capillary action. When bacteria-laden juices hit the board, the wood actively pulls the bacteria deep down beneath the surface, trapping them inside the cellular structure. Once trapped inside the wood fibers, the bacteria cannot multiply, they cannot resurface to cross-contaminate your food, and they gradually die off as the board dries.
Plastic boards do not have this superpower. While a brand-new plastic board is easy to sanitize, the moment you use a knife on it, you create microscopic scratches and gouges. These jagged plastic scars become safe havens for bacteria. Even running a heavily scarred plastic board through a dishwasher will not reliably kill the pathogens hiding deep within those crevices. If you have ever struggled with cleaning orange stained plastic containers, you know how tenaciously plastic holds onto residues and odors. Wood is naturally hygienic; scarred plastic is a biological hazard.
Conditioning 101: Hydrating Your Wood the Right Way
If wood needs to be protected from extreme moisture fluctuations, how do we seal it? We hydrate the fibers with oil. But not just any oil. Using the wrong oil is the fastest way to ruin a perfectly good board.
Why Cooking Oils Are Disgusting
At some point, almost every home cook gets the seemingly logical impulse to condition their dry cutting board with whatever oil is sitting next to the stove. You grab the extra-virgin olive oil, the canola oil, or the unrefined coconut oil, and you rub it into the wood. Congratulations, you have just ruined your board.
Here is the chemistry lesson: vegetable and animal cooking oils are composed primarily of unsaturated fatty acids. These fatty acid chains are highly chemically reactive. When they are exposed to oxygen at room temperature over a prolonged period, they undergo a chemical process called oxidative polymerization. The oil begins to break down, cross-linking into longer chains that become sticky, gummy, and eventually rancid.
As the fatty acids degrade, they produce short-chain aldehydes and ketones. This is what causes that distinctively sour, pungent, rancid dough smell that permeates a ruined board. Once a cooking oil goes rancid inside the pores of your wood, it is nearly impossible to wash out because the foul-smelling polymers have penetrated deep into the grain. This sticky residue is the exact same polymerized sludge you are fighting when you realize you are ruining your nonstick pans with aerosol cooking sprays. Never, ever put edible cooking oils on your wooden cutting boards.
The Holy Grail: Food-Grade Mineral Oil
The only correct choice for hydrating a wooden cutting board is 100% food-grade mineral oil (sometimes sold as liquid paraffin). Mineral oil is a highly refined petroleum derivative. Unlike cooking oils, it is composed entirely of saturated hydrocarbon chains.
Because it is fully saturated, it is chemically inert. It does not react with oxygen, it does not undergo oxidative polymerization, and it physically cannot go rancid. It is completely food-safe, colorless, odorless, and tasteless. When you apply mineral oil to a wooden board, it penetrates deep into the thirsty wood fibers, filling up the cellular voids. By saturating the wood with stable oil, you physically displace water and prevent the board from absorbing ambient humidity or meat juices. The oil acts as a hydrophobic barrier, keeping the internal moisture level of the wood perfectly balanced.
The Power of Beeswax and Carnauba Wax
While mineral oil penetrates the wood to hydrate the fibers, it does not create a hard surface seal. Every time you wash your board with soap, you strip away a little bit of that surface oil. To lock the mineral oil inside the wood and create a highly water-resistant barrier, you need a board cream or wax.
The best board conditioners are a blend of food-grade mineral oil mixed with natural beeswax or carnauba wax. The wax sits on the very top layer of the wood grain, creating a smooth, protective seal that causes water to bead up and roll right off the surface.
The Step-by-Step Masterclass to Board Maintenance
You now have the scientific knowledge. It is time to execute. Maintaining a wooden cutting board is incredibly easy if you build it into your routine. Follow these exact steps to ensure your board lasts for decades.
Step 1: The Proper Wash
Speed is your best friend. The moment you are done prepping your food, take the board to the sink. Use warm water and a mild dish soap. You must scrub the board to remove food residues, but do it quickly.
Here is the most critical rule of washing: You must wash both sides of the board every single time, even if you only cut on one side. If you only wet the top surface, the top fibers will swell while the bottom stays dry, instantly triggering the warping process. Wet the top, flip it over, wet the bottom, soap it all down, and rinse it off immediately. Never let it sit in the sink.
Step 2: The Critical Drying Phase
Once rinsed, take a clean kitchen towel and wipe off all the excess surface water. Do not let the water evaporate on its own.
Next, you must stand the board completely upright on its edge to dry. Lean it against your backsplash or place it in a plate rack. By standing the board vertically, you allow 360-degree airflow around both the front and the back of the wood. Both sides will dry at the exact same rate, completely eliminating the uneven moisture gradient that causes cupping and bowing.
Step 3: Deep Cleaning and Deodorizing
If you have been chopping pungent ingredients like raw garlic or onions, your board might hold onto those odors. To deep clean the board, sprinkle a generous layer of coarse kosher salt over the surface. Cut a lemon in half and use the fleshy side of the lemon to aggressively scrub the salt into the wood.
The mild citric acid from the lemon neutralizes odors and breaks down stubborn organic residues, while the coarse salt acts as a natural, safe abrasive to lift stains out of the grain. Once you have scrubbed the board, use a bench scraper to squeegee the salty, lemony sludge into the sink. There are countless uses for a bench scraper, and acting as a board-cleaning squeegee is one of the best. Rinse the board quickly and stand it upright to dry.
Step 4: The Oil Soak
When your board looks dull, dry, or light in color (usually once a month for edge-grain, and twice a month for thirsty end-grain boards), it is time to oil. Ensure the board is completely bone-dry before you start.
Pour a generous puddle of food-grade mineral oil directly onto the wood. Do not be shy; the wood is thirsty. Use a clean cloth or a paper towel to rub the oil evenly across the entire surface. You must oil the top, the bottom, and all four sides. If you only oil the top, you create a moisture imbalance, which—say it with me now—causes warping.
Let the oil soak in for at least a few hours, or ideally overnight. The wood will drink up exactly what it needs. In the morning, use a dry cloth to buff away any excess oil that is pooling on the surface.
Step 5: The Wax Seal
Once the oil has fully penetrated the board, apply a high-quality board wax (a beeswax and mineral oil blend). Scoop out a small amount and massage it into the wood using a circular motion, just like you are waxing a car. Let the wax sit for about fifteen minutes to haze over, and then take a clean microfiber cloth and buff the board vigorously. The friction will slightly melt the wax, driving it into the microscopic pores and leaving you with a gorgeous, satin, water-repellent finish.
By implementing this simple, highly effective maintenance routine, you will dramatically eliminate kitchen chaos and stop wasting money replacing ruined gear every six months.
Rescuing a Ruined Board: Is It Too Late?
Let us say you are reading this a little too late. Your board is already cupped, covered in deep knife gouges, and looking incredibly sad. Do you have to throw it away? Not necessarily.
Sanding Away the Damage
Because solid wood boards are the same material all the way through, they can be completely resurfaced. If your board has deep knife scars (which can trap moisture) or a sticky layer of rancid olive oil on the surface, you can literally sand the problem away.
Start with a coarse 80-grit sandpaper wrapped around a sanding block. Sand evenly across the entire surface of the board, always moving in the direction of the wood grain, never across it. The coarse grit will remove the knife marks, the stains, and the rancid surface oils. Once the board is leveled out and the scars are gone, move up to a 120-grit paper to smooth out the scratches left by the coarse grit. Finally, finish with a fine 220-grit sandpaper to polish the wood until it feels as smooth as glass.
After a heavy sanding, the wood will be incredibly raw and thirsty. You will need to apply three or four heavy coats of mineral oil over a few days to properly re-hydrate the exposed fibers before sealing it with wax. Bringing a dead board back to life is one of the most satisfying aesthetic kitchen upgrades you can do for your workspace.
When to Throw It in the Fireplace
There is, however, a point of no return. If your board has physically cracked down the middle, or if the glued joints have split open and separated, the board is dead. You cannot safely clean inside a deep, structural crack, which means moisture and rotting food particles will accumulate inside the fissure. No amount of oil or sanding will fix a broken glue joint.
If your board is cracked, accept your failure, throw it in the fireplace (or the trash), and invest in a new, high-quality, solid hardwood board.
Final Thoughts from the Sous-Chef
Cooking should be an absolute joy, not a stressful battle against your own equipment. A heavy, well-maintained wooden cutting board is the anchor of a functional kitchen. It protects your expensive knives, it naturally neutralizes dangerous bacteria, and it provides a stable, gorgeous surface for you to create incredible meals.
Stop treating your gear like disposable garbage. Keep it out of the dishwasher, stop drowning it in the sink, banish the sticky cooking oils, and buy a ten-dollar bottle of food-grade mineral oil. Treat your wood with a little bit of respect, and it will reward you with a lifetime of flawless performance. Now get off the internet, go oil your board, and go cook something amazing.






