
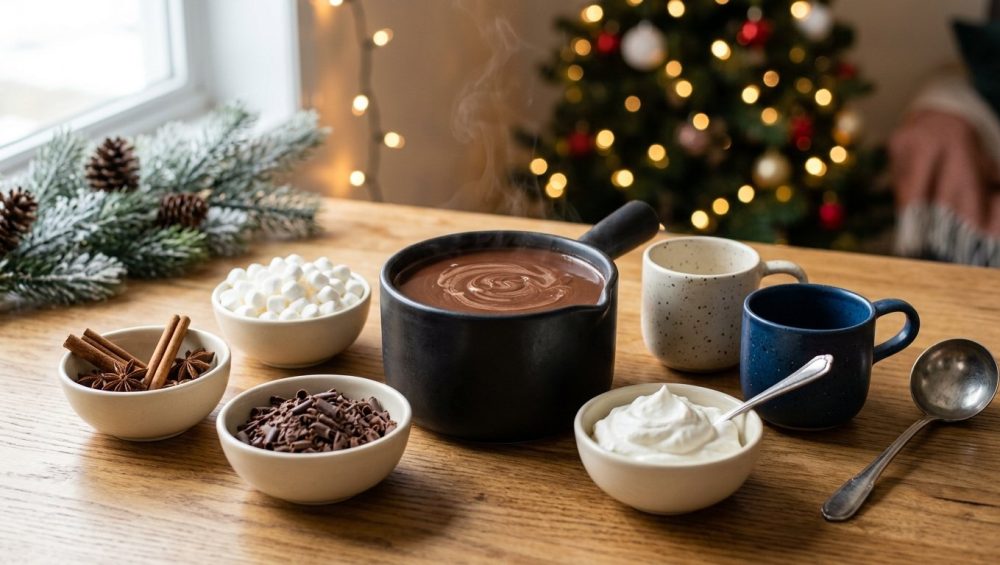
Let’s get one thing straight right out of the gate: if you are boiling tap water in a microwave, ripping open a paper packet of dusty, dehydrated chocolate-flavored powder, and calling it “hot chocolate,” we need to have a serious culinary intervention. You are a grown adult, and you deserve better than a mug of gritty, watery, artificially flavored sadness.
Real, luxurious hot chocolate—the kind that coats the back of a spoon, warms your soul, and makes you briefly forget about your inbox—is a masterpiece of kitchen science. It is a delicate, velvety emulsion of high-quality cocoa butter, milk fats, and hydrated starches. But as any home cook who has attempted to make a large batch for a winter gathering knows, this liquid gold can turn into a grainy, separated, sludgy nightmare in the blink of an eye.
You do not need a culinary degree to fix this. You do not need a commercial kitchen. You just need to understand a few basic principles of thermal dynamics and protein behavior. Today, we are going to dissect exactly why your hot chocolate breaks, how to effortlessly prevent it, and how to translate that foolproof science into a stunning, interactive DIY cocoa bar for your next holiday party.
The Science of the Sludge: Why Your Hot Chocolate Gets Grainy
To understand how to fix a broken beverage, you must first understand the microscopic warfare happening inside your saucepan. When your hot chocolate turns gritty, it is rarely an issue with the recipe itself. Instead, it is almost always a catastrophic failure of temperature control and hydration.
The Milk Protein Mutiny (Denaturation and Scalding)
Milk is not just a liquid; it is a complex biological fluid made up of water, fat globules, sugars (lactose), and proteins. The proteins in milk are divided into two main camps: casein and whey. Casein proteins are highly heat-stable—they don’t care if you boil them. Whey proteins, however, are the divas of the dairy world.
Specifically, a whey protein called beta-lactoglobulin is highly sensitive to thermal stress. When milk reaches approximately 158°F (70°C), these whey proteins begin to denature. Their tightly coiled molecular structures unfold, exposing hydrophobic (water-repelling) reactive sites. Because these exposed sites hate water, they frantically seek out other unfolded proteins to bond with, coagulating into microscopic, tough little curds.
If you’ve ever wondered why your cheese sauce turns grainy when left on a rolling boil, the exact same scientific mutiny is happening in your mug. If these denatured proteins rise to the surface of the milk and the water evaporates, they link together to form that horrible, rubbery skin on top of your cocoa. If they sink, they create a sandy, gritty texture at the bottom of the pot.
Seized Chocolate: The Moisture Trap
If you are making true drinking chocolate, you are likely melting solid chocolate bars into your milk. Chocolate is a beautifully engineered, moisture-free suspension. It consists of dry, microscopic particles of cocoa solids and sugar suspended in a continuous matrix of fat (cocoa butter).
Here is the golden rule of melting chocolate: water is the enemy. We’ve talked before about why melted chocolate turns clumpy, and the culprit is almost always rogue moisture. Lab trials utilizing dynamic light scattering have demonstrated that introducing a mere 0.8% water by weight to melted dark chocolate increases its viscosity by nearly 370% in under four seconds.
When a tiny drop of water—or even condensation from the steam of a violently boiling double boiler—infiltrates your melting chocolate, it acts as a molecular glue. The water selectively hydrates the sugar and cocoa particles just enough to make them sticky. They immediately clump together into a rigid, paste-like mass, while the cocoa butter separates and pools into a greasy slick. If you dump seized chocolate into your milk, it will never fully integrate, leaving you with a grainy, oily beverage.
The Cocoa Powder Clump (Hydrophobic Nightmares)
Perhaps you are using cocoa powder instead of solid chocolate. Cocoa powder presents its own unique set of physical challenges. Cocoa powder is inherently hydrophobic—it actively resists mixing with water. Furthermore, it contains a significant amount of starch.
If you simply dump a mound of dry cocoa powder into a pot of hot milk, the outermost layer of the powder instantly gelatinizes. The starches swell and form a waterproof, gelatinous seal around the dry powder inside. You can whisk until your arm falls off, but those dry pockets will remain intact, floating to the surface like stubborn, bitter little life rafts.
The Foolproof Fix: Achieving Liquid Silk in Your Kitchen
Now that we know exactly how we are ruining our hot chocolate, we can implement the smart, efficient techniques required to fix it. Professional results are entirely achievable in a standard home kitchen if you respect the ingredients.
Temperature Control is Everything
The most critical rule of hot chocolate is this: never, ever let it boil. You must keep the liquid below the denaturation point of the whey proteins. Your target temperature zone for the perfect, silky hot chocolate is between 140°F and 150°F (60°C to 65°C).
At this temperature, the milk is hot enough to melt the cocoa butter and hydrate the starches, but cool enough to keep the beta-lactoglobulin proteins perfectly intact. Do not guess the temperature by hovering your hand over the pot. Use an instant-read digital thermometer. This is where having precise temperature control becomes your absolute best friend in the kitchen.
The Slurry Method (Hydrating Cocoa)
To defeat the hydrophobic nature of cocoa powder, you must pre-hydrate it using a technique called the slurry method.
Before you heat your main batch of milk, place your cocoa powder, sugar, and a pinch of salt into a bowl. Add just a few tablespoons of warm water or warm milk. Use a whisk to vigorously mash the liquid into the powder. At first, it will resist, looking dry and crumbly. Keep mixing. Within thirty seconds, the friction and concentrated liquid will break the surface tension, hydrating the starches evenly to form a thick, glossy, pudding-like paste.
Once you have this smooth slurry, you can gradually whisk in the rest of your hot milk. Because the starches are already hydrated and separated, they will seamlessly dissolve into the larger volume of liquid without a single clump.
Emulsification: The Secret Weapon
If you want that mind-blowing, coffee-shop-level foam and silkiness, a standard balloon whisk is fine, but an immersion blender is a game-changer.
Hot chocolate is an emulsion of fat (cocoa butter and milk fat) and water. Over time, or if held at a warm temperature for a party, these fats naturally want to separate and float to the top. An immersion blender applies intense mechanical shearing force, shattering the fat globules into microscopic droplets and forcing them to stay suspended within the liquid. A quick thirty-second blitz with an immersion blender right before serving guarantees a velvety, homogenized texture that will hold its structure for hours.
Ditching the Chocolate Chips
If you are melting solid chocolate into your milk, you must read the label. Do not use standard chocolate chips. You don’t need to decode pretentious recipe jargon to understand that quality matters.
Chocolate chips are engineered with a lower percentage of cocoa butter and a higher percentage of stabilizers, such as soy lecithin. They are chemically designed to hold their shape when exposed to high oven temperatures inside a cookie. Because they resist melting, they will stubbornly refuse to emulsify into your milk, leaving a waxy, grainy residue. You must use high-quality baking bars, couverture chocolate, or specialized melting callets.
Banishing Toxic Gear: What You Actually Need to Brew Safely
I have zero patience for cheap, toxic kitchenware that actively sabotages your food and your health. If you are heating milk and whisking vigorously, the vessel you use matters immensely.
The Problem with Cheap Non-Stick Saucepans
If you are still using a scratched, peeling, $15 non-stick saucepan from a big-box store, throw it in the trash immediately. Traditional non-stick coatings are formulated with PFAS (per- and polyfluoroalkyl substances), commonly known as “forever chemicals.”
When subjected to heat, or when scratched by a metal whisk, these coatings degrade and leach microplastics and toxic compounds directly into your food. The regulatory landscape is finally catching up to this nightmare. With strict bans on intentionally added PFAS in cookware taking effect in 2026 across states like Colorado and California, not to mention sweeping regulatory changes in the EU, I am a firm believer in banishing toxic kitchen gear from your home forever.
Safe Cookware Alternatives
For heating milk and melting chocolate, you need a vessel with exceptional thermal mass to prevent hot spots. A heavy-bottomed, fully clad stainless steel pan or an enameled cast iron pot is ideal.
Even better, a heavy-bottomed curved saucier pan is the ultimate weapon here. Unlike a standard saucepan, which has a sharp 90-degree angle at the base, a saucier features a smoothly sloped interior. This ensures your whisk effortlessly glides across every square inch of the bottom, completely eliminating those dreaded dead zones where milk proteins settle and scorch.
Odor-Free Utensils
When scraping down the sides of your pot, use a high-quality, platinum-grade silicone spatula. Cheap, filler-laden silicone is highly porous and eagerly absorbs the pungent odors of whatever you cooked last. Nobody wants their luxurious drinking chocolate ruined because their silicone spatulas taste like soap, garlic, or yesterday’s curry.
Translating the Science into a Mindful Cocoa Bar
Now that you have mastered the underlying chemistry of a flawless, silky hot chocolate, it is time to scale it up. The true test of a home cook isn’t just making a good recipe; it’s serving it to a crowd without losing your mind.
According to recent corporate and event hosting trends, guests are overwhelmingly demanding interactive, immersive food experiences over passive, plated affairs. A highly customizable, visually stunning DIY hot cocoa bar is the perfect low-stress, high-impact centerpiece for a winter gathering.
Batching and Holding: The Slow Cooker Strategy
To truly master the art of effortless hosting, you need to step away from the stove before your guests arrive. You cannot spend your own party anxiously babysitting a saucepan of milk.
This is where the slow cooker shines. Prepare your master batch of hot chocolate on the stovetop using the slurry method and immersion blender techniques described above. Once it is perfectly smooth and heated to 145°F, transfer the entire batch to a pre-warmed slow cooker.
Set the slow cooker to the “Warm” setting. Most modern slow cookers on the “Warm” function will hold liquids between 145°F and 155°F—safely below the 158°F whey protein denaturation point, but hot enough to remain food-safe and comforting. Employing proper batch preservation techniques will save your sanity and allow you to actually enjoy the company of your friends. Keep a ladle resting on a saucer nearby, and give the pot a gentle stir every thirty minutes to prevent any minor separation.
The Aesthetic Setup (The Hot Chocolate Charcuterie Board)
Ditch the boring lineup of plastic tubs and ripped bags. We are building a visual experience.
Clear off a deep counter space, a kitchen island, or a sturdy sideboard. Anchor the station with your slow cooker on one end, and a stack of eclectic, cozy ceramic mugs on the other. In the center, lay down a large, beautiful wooden cutting board or marble slab to serve as your “Hot Chocolate Charcuterie Board”.
Use small glass jars, ceramic ramekins, and vintage teacups to hold your various toppings. The key to an aesthetically pleasing bar is varying the heights. Place some bowls directly on the board, elevate others on small cake stands, and use tall, slender glasses for items like stirring sticks and rolled wafers.
Customization Station: Elevating the DIY Hot Cocoa Experience
The magic of a DIY bar is that it empowers your guests to become their own mixologists. You provide the flawless, silky canvas; they provide the artistic flair.
The Marshmallow Matrix
Standard, chalky, store-bought mini marshmallows are fine in a pinch, but if you want to elevate your station, source massive, artisanal marshmallows or make your own (they are shockingly easy to make with just gelatin, sugar, and a stand mixer).
To make the station truly interactive, set up a mini toasting zone. Place a small, food-safe chafing fuel can (like Sterno) inside a decorative ceramic bowl filled with coarse salt or pebbles to keep it stable. Provide long bamboo skewers. Allowing guests to fire-roast their own marshmallows brings the nostalgic vibe of a relaxed s’mores night right into your living room.
Syrups, Spices, and Stir-ins
A great cocoa bar balances the intense sweetness of the chocolate with salt, spice, and texture. Your board should include:
- The Crunch: Chocolate-covered espresso beans, crushed peppermint candies, toasted coconut flakes, and pirouline rolled wafers.
- The Spice: Freshly grated nutmeg, high-quality cinnamon, and a shaker of cayenne pepper or ancho chili powder for those who want a warming, Mexican-style hot chocolate.
- The Salt: This is non-negotiable. A small dish of flaky Maldon sea salt is imperative. A pinch of finishing salt cuts through the cloying richness of the chocolate and amplifies the complex roasted notes of the cocoa.
- The Swirl: Squeeze bottles of salted caramel sauce, dark chocolate ganache, and perhaps a high-quality fruit syrup, like raspberry or blood orange, which pair beautifully with dark chocolate.
The Adult Section (Spiked Cocoa)
If you are hosting an evening gathering with adults, a spiked cocoa option is always a crowd-pleaser. Do not add the alcohol directly to the slow cooker. Alcohol evaporates quickly when heated, and forcing a single spiked flavor on the entire party defeats the purpose of customization.
Instead, set up a small tray next to the mugs with a few curated spirits and jiggers for measuring. Excellent pairings include:
- Irish Cream (Baileys): Adds a creamy, vanilla-whiskey depth.
- Coffee Liqueur (Kahlúa): Enhances the roasted, bitter notes of the cocoa.
- Peppermint Schnapps: The classic winter warmer.
- Aged Bourbon or Dark Rum: For a sophisticated, oaky warmth that cuts right through the sweetness.
Troubleshooting the Cocoa Bar Disasters (Because Things Still Go Wrong)
Even with the best preparation, the chaos of hosting can occasionally result in a kitchen mishap. If you notice your hot cocoa bar going sideways, here is how to triage the situation without breaking a sweat.
“My Chocolate Still Separated and Looks Greasy!”
If you look into your slow cooker and see a slick of oil pooling on the surface, your emulsion has broken. This usually happens if the slow cooker runs a bit too hot, causing the cocoa butter to separate from the water.
The Fix: Do not panic. Unplug the slow cooker. Grab your immersion blender, submerge it fully beneath the surface of the liquid to avoid splashing, and blend on high for 45 seconds. The intense mechanical force will smash the fat droplets back into the liquid, restoring the emulsion instantly.
“The Milk Formed a Skin!”
If your guests abandoned the station for an hour and left the lid off the slow cooker, evaporation will cause the proteins on the surface to dry out and form a skin.
The Fix: Do not stir the skin back into the hot chocolate! It will not dissolve; it will simply break into dozens of slimy, unpleasant pieces. Use a slotted spoon or a fine-mesh skimmer to carefully lift the skin off the surface and discard it. To prevent it from returning, keep the lid on the slow cooker when not in active use to trap the humidity.
“My Base Recipe is Too Sweet!”
If you test your batch and realize it is cloyingly sweet, you need to balance the flavor profile before your guests arrive.
The Fix: Do not add plain water, which will dilute the luxurious texture. Instead, whisk in a slurry made of unsweetened dark cocoa powder and a little warm milk. Alternatively, add a generous pinch of kosher salt and a shot of highly concentrated, freshly brewed espresso. The bitterness of the coffee and the salinity of the salt will immediately neutralize the excess sugar without compromising the rich mouthfeel.
Final Thoughts from the Sous-Chef
Hosting a gathering should be an act of joy, not an exercise in stress-management. By understanding the simple kitchen science behind denatured milk proteins and seized chocolate, you completely eliminate the guesswork from your prep. You don’t need to be a professional pastry chef to produce a flawless, velvety beverage—you just need a thermometer, a decent whisk, and a strict ban on boiling your dairy.
So, ditch the toxic non-stick pans, throw away those depressing powdered packets, and set up a cocoa bar that actually deserves to be the centerpiece of your party. Your guests will be blown away by the quality, and you’ll get to spend your evening actually enjoying their company instead of scrubbing scorched milk off the bottom of a cheap saucepan. Now go melt some chocolate, and do it right this time.






