
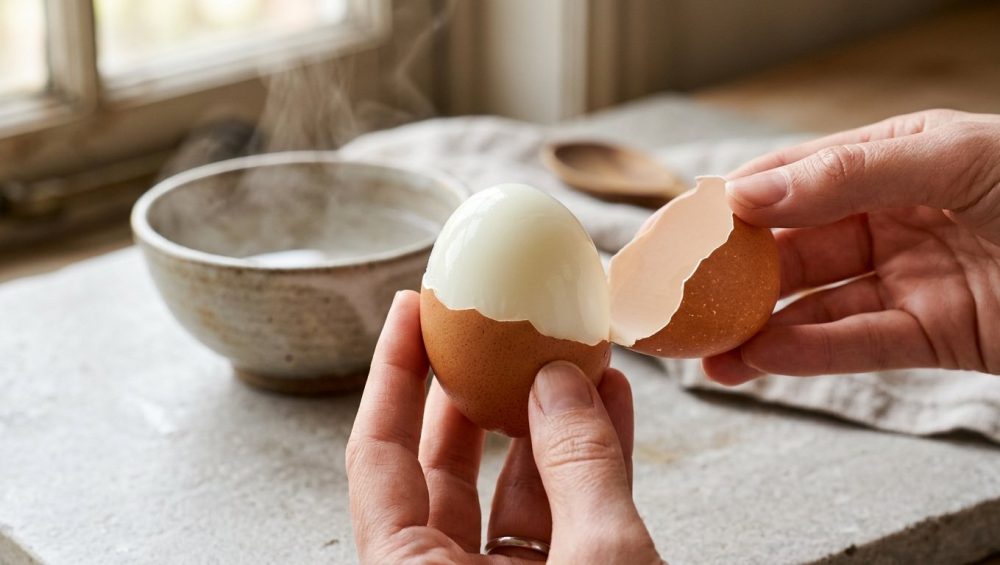
You are standing at your kitchen island, staring down at a massacre. What was supposed to be a flawless, protein-packed snack has turned into a mangled, pockmarked tragedy. You are meticulously picking microscopic shards of calcium carbonate off a cratered orb that looks like the surface of the moon, losing half the egg white in the process. You were just trying to prep some components for simple weeknight dinners, and now your cutting board looks like a crime scene.
I have been there. We have all been there. But pour yourself a glass of wine and listen to me very carefully: it is not your fault. You are not cursed by the culinary gods, and you do not lack basic kitchen finesse. The reason your boiled eggs refuse to peel is that you have been lied to your entire life. For generations, well-meaning grandmothers, outdated home economics teachers, and obsolete cookbooks have peddled the exact same disastrous advice: “Start your eggs in a pot of cold water and bring them to a boil slowly so the shells don’t crack.”
That cold water start is a hidden trap. It is the culinary equivalent of industrial superglue. Today, we are putting an end to the madness. We are going to dive deep—molecularly deep—into the food science of eggs. I firmly believe that anyone can cook like an absolute expert without a culinary degree, provided you understand the actual chemistry of what is happening in your pots and pans. We are going to dismantle the cold-water myth, explore the thermodynamic miracle of the hot-water shock, and guarantee that you never mutilate another deviled egg again.
The Anatomy of an Egg: Food Science 101
To understand why your eggs are stubbornly clinging to their shells, we first have to understand the architecture of the ingredient. An egg is not just a rock you throw into boiling water; it is a marvel of natural engineering and a highly complex biological ecosystem. If we want to manipulate it to do our bidding, we have to know its parts.
The Porous Fortress
Let’s start with the shell. It feels like a solid, impenetrable wall of calcium carbonate, but it is actually highly porous. A standard chicken egg contains anywhere from 7,000 to 17,000 microscopic pores. These pores are designed by nature to allow the developing chick to exchange gases with the outside world—taking in oxygen and expelling carbon dioxide. In the kitchen, these pores are the reason eggs absorb pungent odors from your fridge, and they play a massive role in the internal pH shifts that dictate how easily an egg will peel.
The Keratin Membranes
Directly inside the shell lie two incredibly thin, remarkably strong layers known as the outer and inner shell membranes. They are composed primarily of keratin—the exact same tough, fibrous protein that makes up human hair, animal horns, and fingernails. The outer membrane clings to the shell, while the inner membrane encases the egg white. When you struggle to peel an egg, it is because the egg white has chemically bonded to this inner keratin membrane.
The Albumen (Egg White)
The albumen makes up about 60% of the egg’s total weight. It is roughly 90% water and 10% protein. But it is not just one simple type of protein; it is a complex matrix of over forty different proteins, the most prominent being ovalbumin, conalbumin, ovomucoid, and ovomucin. In their raw state, these proteins are tightly folded up like microscopic balls of yarn, floating peacefully in water. When exposed to heat, they denature (unfold) and coagulate (tangle together), transforming from a translucent liquid into a solid white mass.
The Air Cell
At the fat, rounded end of the egg, there is a small pocket of air between the inner and outer membranes. When an egg is freshly laid, this air cell is tiny. As the egg ages and internal moisture slowly evaporates through the porous shell, the air cell grows larger. This pocket is your best friend when it comes to peeling, as it provides a natural starting point to crack the shell and slip your thumb underneath the membrane.
The Cold Water Trap: Why the Old Advice is Complete Garbage
Now that we know the players, let’s talk about the crime scene. Why does starting eggs in cold water result in a permanent, inseparable bond between the egg white and the shell?
It all comes down to the speed of protein denaturation and a chemical concept known as interfacial adhesion.
When you place a raw egg into a pot of cold tap water and slowly turn up the heat on your stove, the temperature of the egg rises gradually. The proteins in the albumen begin to warm up slowly. As they reach around 140°F to 150°F (60°C to 65°C), they start to denature, lazily uncoiling their complex amino acid chains.
Because this heating process is slow and leisurely, these uncoiling ovalbumin proteins have plenty of time to look around their environment for something to grab onto. And what is sitting right next to them at the outermost edge of the egg white? The inner shell membrane, made of tough keratin.
The uncoiled albumen proteins reach out and form strong chemical bonds (specifically, disulfide cross-links) with the keratin in the membrane. They literally fuse together on a molecular level. By the time your pot of water finally reaches a rolling boil, the damage is permanently done. You have cemented the egg white to the membrane, which is firmly attached to the shell. You have created a unified, solid structure.
No amount of peeling finesse, no special spoons, and no amount of praying will save you now. When you pull the shell away, the membrane comes with it, and because the membrane is chemically fused to the white, it takes massive chunks of your egg with it. The cold water start is an absolute trap.
The Hot Water Shock: The Ultimate Secret to a Flawless Peel
If slow heating causes the proteins to bond with the membrane, what is the solution? You have to shock them.
When you take a cold egg straight from the refrigerator and plunge it directly into a fiercely boiling environment, the thermodynamics of the pot change completely. The sudden, violent blast of 212°F (100°C) heat instantly penetrates the shell and hits the outermost layer of the albumen.
Instead of slowly uncoiling and reaching out to bond with the keratin membrane, these outer proteins panic. The massive spike in kinetic energy forces them to rapidly unfold and immediately bond to each other. They coagulate instantly, forming a tight, smooth, solid jacket around the rest of the liquid egg white inside.
Because they have bonded to themselves so incredibly fast, they completely ignore the inner shell membrane. They form a distinct physical barrier, shrinking ever so slightly away from the keratin. When it comes time to peel the egg, the membrane stays happily adhered to the calcium carbonate shell, and the cooked egg white slides out perfectly smooth and unblemished.
This isn’t just an anecdotal theory; it is rigorously tested food science. Culinary experts and food scientists have conducted massive, double-blind experiments boiling thousands of eggs under strictly controlled variables. The data is overwhelmingly conclusive: the starting temperature of the water is the single most important factor in determining how easily an egg will peel. A hot start yields a clean peel; a cold start yields a cratered disaster.
Age and pH: The Secondary Culprits
You have probably heard the age-old wisdom that older eggs peel easier than fresh farm eggs. Unlike the cold-water myth, this piece of advice is actually deeply rooted in accurate chemistry. It all comes down to the pH scale.
When a hen first lays an egg, the internal environment is relatively neutral, boasting a pH of about 7.6. At this lower, slightly acidic pH, the proteins in the egg white (specifically ovomucin) are highly reactive and structurally rigid. They are extremely prone to bonding tightly with the keratin membrane during the cooking process.
However, as an egg sits in your refrigerator, it ages. Remember those thousands of microscopic pores in the shell? Over time, dissolved carbon dioxide—which exists in the egg white as a weak carbonic acid—slowly escapes through those pores and off-gasses into the air.
As the acidic carbon dioxide leaves the egg, the pH of the albumen begins to rise, eventually reaching a highly alkaline level of around 8.7 to 9.2 after a week or two. In this highly alkaline environment, the chemical bonds between the albumen proteins and the keratin membrane are significantly weakened. The proteins repel each other slightly more during coagulation, resulting in a cleaner break.
This is why a two-week-old grocery store egg will almost always peel more cleanly than an egg you just collected from a backyard chicken coop.
Debunking the Additive Myths
Because pH plays a role, the internet is flooded with viral “hacks” claiming you should add baking soda or vinegar to your boiling water. Let me save you the trouble: do not bother.
Vinegar (acetic acid) lowers the water’s pH, while baking soda (sodium bicarbonate) raises it. People theorize that the baking soda will penetrate the shell and make the egg white more alkaline, thus easier to peel.
The reality? It is a complete placebo. While the shell is porous, a ten-minute boil is simply not enough time for the alkaline water to penetrate the calcium carbonate shell, cross the double keratin membranes, and actually alter the internal pH of the coagulating egg white. Furthermore, baking soda in boiling water can leave your eggs tasting distinctly metallic and sulfury.
Temperature trumps age, and it certainly trumps baking soda. Even a farm-fresh egg will peel beautifully if you give it a violent hot-water shock.
Steaming vs. Boiling: The Ultimate Showdown
Okay, so the science is settled: we absolutely must start with a hot environment. But should you drop your cold eggs into a giant stockpot of rolling, boiling water, or should you steam them?
I am officially declaring steaming as the undisputed, scientifically superior champion of egg cookery. Here is exactly why you should ditch the deep boil.
The Violence of the Boil
When you drop cold eggs into a massive pot of violently boiling water, you are subjecting them to extreme physical trauma. The thermal currents and rolling bubbles bounce the eggs around, smashing them into each other and against the hard metal sides of the pot. This is the primary reason your eggs crack and leak white streamers into the water before they are even cooked.
The Gentle Power of Steam
Steaming, on the other hand, is incredibly gentle. The eggs sit stationary in a basket while the steam envelops them. But do not mistake gentle for weak. Steam is actually a far more efficient conductor of heat than boiling water due to a thermodynamic principle called the latent heat of vaporization.
When water turns into steam, it absorbs a massive amount of energy. When that steam touches the cold surface of your eggshell, it condenses back into water, instantly releasing all of that stored energy directly into the egg. This provides an incredibly fast, uniform thermal shock that denatures the outer proteins instantly, guaranteeing a flawless peel.
Time is Money
As a busy professional, I ruthlessly prioritize efficiency. Waiting fifteen minutes for a giant pot of water to come to a rolling boil on a Tuesday night is completely unacceptable. Building a minimalist kitchen setup is all about maximizing your time and minimizing your effort.
To steam eggs, you only need to boil a single inch of water at the bottom of a saucepan. It takes less than three minutes to reach a boil. You save time, you save water, you save energy, and you get vastly superior results.
The Ice Bath: The Crucial Finish Line
Cooking the egg perfectly is only half the battle. How you cool it down is equally critical to your peeling success.
If you take a hot egg out of the steamer basket and simply leave it on the counter to cool, you have just ruined it. The residual heat trapped inside the shell will cause “carryover cooking.” The egg will continue to cook internally for another ten minutes, turning your perfectly creamy yolk into a dry, chalky, overcooked mess.
You must plunge the eggs immediately into a highly concentrated ice bath. This step is non-negotiable, and it accomplishes three vital scientific tasks:
1. Halting the Cooking Process
Water is an exceptional thermal conductor. Submerging the eggs in ice water instantly drops their surface temperature, halting the kinetic energy and stopping the carryover cooking dead in its tracks. This preserves the exact texture you timed your cook for.
2. Thermal Contraction
Things expand when they are heated and shrink when they are cooled. When you shock a hot egg in ice water, the cooked egg white rapidly contracts. This microscopic shrinking pulls the egg white ever so slightly away from the inner shell membrane, creating a tiny gap of space. When you crack the shell, water from your sink seeps into this gap, lubricating the egg and allowing the shell to fall off in massive, satisfying sheets.
3. Preventing the Dreaded Green Ring
Have you ever bitten into a hard-boiled egg and been confronted with a sickly, grayish-green ring surrounding the yolk? That unappetizing ring is a chemical compound called ferrous sulfide.
Egg whites contain sulfur (specifically in their amino acids), while egg yolks contain iron. When an egg is heated for an extended period, the sulfur in the white degrades and releases hydrogen sulfide gas. Because the outside of the egg is hotter than the inside during cooking, this gas is driven inward, toward the cooler center. There, it reacts with the iron in the yolk to form ferrous sulfide, which looks green and smells faintly of a high school chemistry lab.
An immediate ice bath rapidly cools the outside of the egg, lowering the pressure at the exterior and drawing that hydrogen sulfide gas outward, away from the yolk. The result? A perfectly bright, sunshine-yellow yolk with absolutely no green ring.
The Sassy Sous-Chef’s Foolproof Master Method
We have covered the molecular biology, the thermodynamics, and the chemistry. Now, let’s put it all together into an actionable, no-nonsense masterclass guide. Print this out, tape it to your fridge, and never look back.
Step 1: The Setup
Place exactly one inch of water into the bottom of a saucepan. Insert a collapsible steamer basket. Put the lid on the pot and place it over high heat until the water comes to a vigorous, rolling boil and steam is billowing out.
Step 2: The Shock
Take your eggs straight from the cold refrigerator. Do not let them come to room temperature; you want the maximum temperature differential for the thermal shock. Place the eggs gently into the steamer basket in a single layer. Do not stack them into a wobbly mountain, as this will impede the steam circulation. Immediately replace the lid to trap the heat.
Step 3: The Timer
Precision is everything. Start your timer the exact second the lid goes back on.
- 6 Minutes: A completely liquid, runny yolk with barely set whites. (Perfect for dropping into a bowl of hot ramen).
- 7 to 8 Minutes: A jammy, fudgy, gooey yolk with fully set whites. (The ultimate sweet spot for toast or salads).
- 9 to 10 Minutes: A firm but creamy yolk.
- 11 to 12 Minutes: A fully hard-boiled egg with a pale, opaque yolk. (Ideal for classic deviled eggs or egg salad).
Never exceed 12 minutes, or you risk rubbery whites.
Step 4: The Ice Bath
While your eggs are steaming, prepare your ice bath. Fill a large bowl with cold tap water and dump in two massive handfuls of ice cubes. The moment your timer goes off, instantly transfer the eggs from the steamer directly into the ice bath. Leave them fully submerged for a minimum of 15 minutes. Do not rush this step; the thermal contraction takes time.
Step 5: The Peel
Once the eggs are thoroughly chilled, it is time for the magic. Tap the egg firmly on your countertop to shatter the shell all over. I like to gently roll the egg under the palm of my hand to create a web of microscopic fractures.
Start peeling at the fat end of the egg, where the air cell is located. This gives your thumb an easy entry point beneath the membrane. Peel the egg while keeping it submerged in the ice water, or hold it under a gentle stream of cold running tap water. The water will slip underneath the membrane, acting as a lubricant, and the shell will slide off effortlessly.
Once you are done, use a bench scraper to quickly scoop all those shattered shells off your cutting board and directly into the compost bin.
Kitchen Gear for Egg Perfection (The “No-Go” Rule)
You do not need a Michelin-starred kitchen to make perfect eggs, but you absolutely must have equipment that isn’t actively poisoning you or ruining your food. As always, I have a strict, uncompromising “no-go” rule on cheap, toxic kitchenware.
If you are still boiling water in cheap, scratched non-stick pans where the Teflon coating is flaking off into your meals, I need you to throw them in the trash immediately. I have zero patience for mystery metals and degrading chemical coatings that release toxic fumes at high heat.
Invest in high-quality, heavy-bottomed stainless steel pans. They are virtually indestructible, completely non-toxic, and they distribute heat evenly without warping.
For the steaming process, a basic, inexpensive stainless steel collapsible steamer basket is the only gadget you need. To safely and quickly transfer your eggs from the boiling pot to the ice bath without dropping them, a long-handled spider skimmer is an absolute lifesaver. It drains the boiling water instantly and holds multiple eggs at once.
When prepping your ice bath, stick to non-reactive glass or stainless steel mixing bowls. If you are storing your peeled eggs in cheap, stained plastic containers that harbor old odors and greasy residues, it is time for a serious kitchen upgrade. Glass food storage is the only way to go.
Similarly, make sure you aren’t using flimsy silicone spatulas to fish your eggs out of the water if they have degraded to the point where they taste like soap or harbor lingering bacteria. Quality tools yield quality food.
And please, for the love of all things culinary, ignore the viral Pinterest hacks that tell you to bake your eggs in the oven. Not only do oven-baked eggs develop brown spots and a tough, rubbery texture, but the thermal shock of moving from a hot oven to a cold counter can be dangerous. Do not try to bake your eggs in the oven in a cheap glass baking dish that isn’t rated for extreme thermal shifts, or you will be cleaning up shattered glass instead of eating breakfast. Stick to the stovetop steam.
Troubleshooting Common Egg Disasters
Even with the perfect, scientifically backed method, clumsy cooks might occasionally run into a hiccup. Here is how to diagnose exactly what went wrong so you never repeat the mistake.
The Shells Cracked While Cooking
If your eggs are cracking in the pot and leaking white streamers into the water, your environment is too violent. Either you dropped them into the pot too aggressively, or you used the boiling method instead of the steaming method. Steam keeps the eggs stationary. If you must boil, lower them in gently with a skimmer. Also, ensure your eggs don’t have micro-fractures from the grocery store before you cook them.
The Egg Whites Are Rubbery and Tough
You simply overcooked them. The proteins in the albumen squeeze tighter and tighter the longer they are exposed to heat, eventually wringing out all their moisture like a kitchen sponge. Twelve minutes is the absolute maximum time a large egg should spend in the steam. If you live at a very high altitude (where water boils at a lower temperature), you may need to add a minute or two, but at sea level, watch that timer like a hawk.
The Yolk is Off-Center
This is a purely aesthetic issue, but if you are making deviled eggs for a dinner party, you want the yolk perfectly centered. As eggs sit in the carton in your fridge, the yolk can slowly drift toward the bottom through the albumen. To fix this, store your egg carton on its side for 12 to 24 hours before cooking. This centers the yolk inside the shell.
The Eggs Still Will Not Peel Cleanly
If you used the hot steam method and the eggs are still tearing, you failed at the finish line. You either did not use enough ice in your ice bath (meaning the water warmed up too quickly and failed to halt the cooking), or you did not leave the eggs in the cold water long enough. Fifteen minutes is mandatory for the physical thermal contraction to occur. Do not rush the chill.
The Final Verdict
Cooking is not magic; it is applied physics and chemistry. Once you understand the fundamental rules of the game—how proteins denature, how pH affects chemical bonds, and how thermal dynamics dictate texture—you can manipulate your ingredients to do exactly what you want them to do.
By ditching the outdated cold-water myth and embracing the thermodynamic power of the hot-water shock, you will never have to scrape a mutilated, half-destroyed boiled egg into the garbage ever again. You are now armed with the exact scientific knowledge required to execute flawless, slide-off peels every single time, without fail.
Now get out of here, go steam some eggs, and make the most aggressively perfect batch of potato salad your weekend culinary heart desires. You’ve completely got this.






