
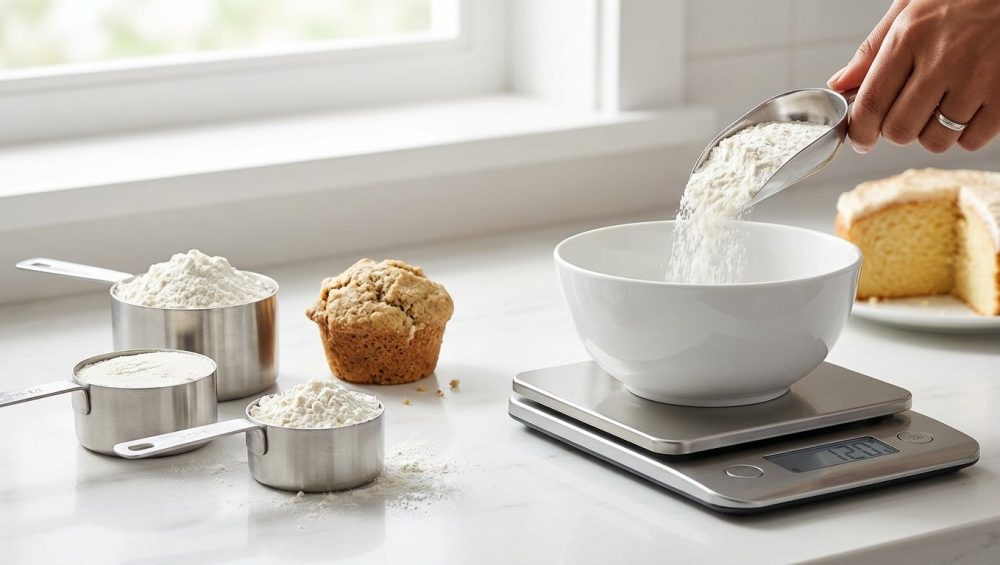
Let’s get one thing straight right out of the gate: you do not need a fancy culinary degree, a massive commercial kitchen, or a pastry chef’s innate intuition to bake a mind-blowing, perfectly fluffy cake. You really don’t. What you do need, however, is to stop sabotaging yourself with outdated, wildly inaccurate measuring tools that belong in a museum rather than your kitchen.
If you have ever followed a baking recipe to the absolute letter, only to pull a dense, heavy, rubbery brick out of the oven, I can almost guarantee I know exactly what went wrong. You measured your flour with a volume cup.
We have all been there. You scoop, you sweep, you dump it into the bowl, and you cross your fingers. But baking is not a guessing game, and it certainly isn’t a casual weekend craft project where you can just eyeball the glitter. Baking is a precise, chemical equation. Today, we are going to decode pretentious recipe jargon and break down the exact culinary science of why measuring by volume is ruining your desserts. More importantly, I am going to show you how a simple, inexpensive digital kitchen scale will completely revolutionize your weekend baking projects, saving you time, saving you dishes, and guaranteeing perfectly light, airy cakes every single time.
The Great Measuring Cup Lie (And Why Your Cakes Are Suffering)
To understand why your cakes are turning out like doorstops, we first have to address the emotional betrayal of the standard American measuring cup. For generations, home cooks have been taught that a cup is a cup is a cup. If a recipe calls for one cup of flour, you grab that little plastic or metal scoop with the “1 Cup” handle, fill it up, and assume you have successfully added the correct amount of ingredient to your mixing bowl.
This is a culinary lie of epic proportions.
While volume measurements work perfectly fine for liquids—a cup of water is going to take up the exact same amount of space and weigh the exact same amount whether you pour it gently or aggressively—dry ingredients are an entirely different beast. Dry ingredients like flour, cocoa powder, brown sugar, and powdered sugar are highly compressible. They are composed of millions of microscopic particles with air trapped between them. Depending on how those particles settle, how they are stored, and how you physically transfer them into your measuring cup, the actual amount of food you are getting can vary drastically.
Think about it like packing a suitcase. If you casually toss your clothes into the bag, it fills up quickly. That is your aerated flour. If you sit on the suitcase, compress the clothes, and shove more into the corners, the suitcase still looks full, but it contains twice as much fabric. That is your compacted flour. When you use a measuring cup, you are completely blind to how much “fabric” is actually in the suitcase. You are only measuring the space it takes up, not the actual mass of the ingredient.
The Culinary Science of Flour: Aeration, Compaction, and Chaos
Let’s dive into the microscopic physics of your pantry. When flour is milled at the factory, it is light and powdery. It gets pumped into paper bags, stacked onto shipping pallets, loaded into rumbling trucks, and eventually sits on your grocery store shelf. During this entire journey, the flour is settling. The air is being squeezed out. By the time that bag makes it into your pantry, the flour is tightly packed and dense.
When you bake a cake, the ratio of flour to liquid to fat is the most critical element of the recipe. Flour provides the structure through gluten development and starch gelatinization. If you add too much flour, the gluten network becomes overly tight and rigid. The liquid in the recipe (milk, water, or eggs) is no longer sufficient to hydrate the dry ingredients properly. The leavening agents (baking powder or baking soda) struggle to create the gas bubbles needed to lift that heavy, dry batter. The result? A cake that is dense, crumbly, and tastes like sweetened drywall. Avoiding this fate is one of the most critical steps in fixing rookie kitchen mistakes that plague everyday home bakers.
The “Scoop and Sweep” Delusion
The most common way people measure flour is the “scoop and sweep” method. You take your measuring cup, plunge it directly into the flour bag, use the side of the cup to pack it in, and then sweep off the excess with a butter knife.
Here is the terrifying reality of that method: King Arthur Baking, one of the most respected authorities in the culinary world, states that one standard cup of all-purpose flour should weigh exactly 120 grams. However, a recent widespread culinary experiment asked home cooks around the world to measure one cup of flour using their normal methods and then weigh the result. The recorded weights ranged from 120 grams all the way up to 178 grams.
Let that sink in for a moment. By plunging your measuring cup into the bag, you could be accidentally adding up to 178 grams of flour instead of the intended 120 grams. That is nearly a 50% increase in flour! If a cake recipe calls for three cups of flour, and you are over-measuring by 50% on every single cup, you are essentially adding an entire extra cup and a half of flour to your batter. It is an absolute mathematical certainty that your cake will be ruined.
Even if you use the “spoon and level” method—where you gently whisk the flour in the bag to aerate it, carefully spoon it into the measuring cup, and level it off—you are still leaving your baking up to chance. Are you spooning it from a high distance? Are you tapping the side of the cup? Every tiny movement changes the compaction.
Humidity: The Invisible Saboteur
If the physical act of scooping wasn’t chaotic enough, we also have to talk about the weather. Flour is hygroscopic, meaning it acts like a sponge, actively absorbing moisture from the air around it. If you live in a humid climate, or if it has been raining for three days straight, your flour has absorbed water from the atmosphere.
When flour absorbs moisture, it swells. It takes up more physical space. Therefore, a volume cup of flour measured on a humid day in July will actually contain less actual flour (and more water weight) than a cup measured on a bone-dry day in January. When you measure by volume, you cannot account for this atmospheric swelling. When you measure by weight using a digital scale, a gram is a gram. The scale cuts through the environmental variables and gives you the exact mass of the ingredient you need.
Why a Digital Kitchen Scale is Your Ultimate Kitchen Wingman
I have zero patience for pretentious chef-speak, but I will passionately defend the digital kitchen scale until my dying breath. It is not a snobby, overly technical gadget reserved for people who wear tall white hats. It is, without a doubt, the single most empowering tool you can own as a home cook. It removes the anxiety, it removes the guesswork, and it practically guarantees that your weekend baking projects will turn out exactly the way the recipe developer intended.
Precision Equals Perfection (and Fluffiness)
When you switch to a digital scale, the chaos of aeration, compaction, and humidity completely vanishes. If a recipe calls for 250 grams of flour, you pour flour into the bowl until the little digital screen reads 250. It does not matter if the flour was tightly packed at the bottom of the bag. It does not matter if you sifted it beforehand. It does not matter if it is raining outside. Two hundred and fifty grams is two hundred and fifty grams.
This precision is the secret to bakery-level fluffiness. Because you are no longer accidentally over-flouring your batter, the ratio of liquid to dry ingredients remains perfectly balanced. Your baking powder can easily lift the batter, resulting in a crumb that is tender, moist, and incredibly light.
The Time-Saving Magic of the Tare Button
Beyond the science of perfection, we need to talk about efficiency. My weekday cooking philosophy is built entirely around saving time, and the digital scale is a masterclass in kitchen efficiency. The secret weapon is the “Tare” (or Zero) button.
When you bake with measuring cups, your kitchen counter quickly looks like a disaster zone. You have the one-cup measure for the flour, the half-cup for the sugar, the tablespoon for the baking powder, and the teaspoon for the salt. They are all coated in sticky residue or white powder, waiting to be painstakingly washed by hand. This is the kind of mess that makes people hate baking.
With a digital scale, you can execute a one-bowl wonder and completely eliminate kitchen chaos. You place your mixing bowl on the scale and press the Tare button to zero out the weight of the bowl. You pour in your flour until you hit the target weight. You press Tare again, resetting the scale to zero. You pour in your sugar until you hit the target weight. Press Tare. Add your cocoa powder. Press Tare.
You have just measured four different dry ingredients with absolute, scientific precision, and you haven’t dirtied a single measuring cup. You just saved yourself ten minutes of scrubbing plastic cups in the sink. Time is money, my friends, and the scale pays for itself in dishwashing labor alone.
The Metric System is Not Your Enemy (It’s Your Best Friend)
I know that for my American readers, the metric system can feel like learning a foreign language. We grew up with ounces, pounds, cups, and teaspoons. But when it comes to the chemistry of the kitchen, you need to embrace grams.
Grams vs. Ounces: The Showdown
Why grams and not ounces? It comes down to granularity and precision. An ounce is a relatively large unit of measurement in the context of a cake batter. One ounce is equivalent to approximately 28.3 grams.
If a recipe calls for a small amount of an ingredient—say, baking powder or salt—measuring that in ounces is an exercise in frustration. Your scale might struggle to toggle between 0.1 and 0.2 ounces, and that tiny fractional difference can actually have a massive impact on the taste and rise of your cake. Grams, on the other hand, are beautifully granular. Measuring out 4 grams of salt is incredibly easy and highly accurate on a standard digital scale.
Most modern, high-quality baking recipes are written with metric weights for this exact reason. By switching your scale to grams, you are unlocking the ability to follow international recipes, professional bakery formulas, and the most reliable food blogs on the internet. It is one of the most simple secrets for kitchen artistry that immediately elevates your output from amateur to expert.
Ditching the Toxic Plastic: Upgrading Your Gear
Now, we need to have a serious, brutally honest conversation about the gear currently sitting in your kitchen drawers. If you have been following me for any amount of time, you know I have a strict “no-go” rule on cheap, toxic kitchenware. I absolutely despise peeling non-stick coatings, mystery metals, and flimsy plastics that leach chemicals into our food.
If you are still clinging to a set of scratched, warped, black plastic measuring cups that you bought for two dollars at a discount store ten years ago, I need you to throw them in the garbage immediately.
Recent environmental and health studies have exposed a horrifying reality about cheap kitchen plastics, particularly black plastic utensils and containers. Because infrared sorting systems at recycling facilities cannot properly read black plastics, a massive amount of electronic waste (think old computer housings, television casings, and appliance parts) gets mixed into the recycled plastic supply chain. This e-waste is heavily treated with toxic flame retardants.
When that recycled e-waste is melted down and turned into a cheap black plastic measuring cup or spatula, those flame retardants come along for the ride. Studies have found these contaminants at terrifyingly high levels in everyday kitchen tools. Worse, as these cheap plastics degrade, get scratched by metal spoons, or are exposed to heat in the dishwasher, they shed microplastics and endocrine-disrupting chemicals directly into your ingredients.
We are actively banishing toxic kitchen gear from our homes. You do not want flame retardants from a 2005 computer monitor leaching into your organic flour. By ditching the plastic measuring cups and upgrading to a high-quality digital scale, you are not only improving your baking accuracy, but you are also taking a massive step toward a safer, non-toxic food prep environment.
What to Look for in a High-Quality Scale
When you are ready to make the switch, do not buy the cheapest, flimsiest plastic scale you can find on the internet. A good digital scale is an investment, but thankfully, it is a very affordable one. It is truly one of the non-negotiable beginner cooking essentials for anyone who wants to take their food seriously.
Here is exactly what you need to look for:
- A Glass or Stainless Steel Surface: You want a surface that is completely non-porous, easy to wipe down, and free of cheap plastic coatings that will degrade over time. Tempered glass or high-grade stainless steel is the gold standard.
- A High Weight Capacity: Look for a scale that can handle at least 11 pounds (5 kilograms). When you are baking a large batch of dough, the weight of your heavy ceramic mixing bowl plus all the ingredients can easily exceed a flimsy scale’s 5-pound limit, resulting in an annoying “ERROR” message mid-pour.
- A Responsive Tare Button: The tare button should register instantly. If there is a lag, you will end up over-pouring your ingredients while waiting for the screen to catch up.
- Granularity to 1 Gram: The scale must be able to read in 1-gram increments. Anything less precise defeats the purpose of weighing your ingredients in the first place.
How to Convert Your Favorite Cup-Based Recipes to Weight
I know what you are thinking. “This all sounds great, but my grandmother’s famous chocolate cake recipe is written in cups! I can’t abandon it!”
You don’t have to abandon your family heirlooms or your favorite old cookbooks. You just need to translate them into the language of science. Converting a volume-based recipe to a weight-based recipe takes a few minutes of upfront work, but once you write the gram measurements in the margins of your cookbook, you will never have to guess again.
The Standard Flour Weight Baseline
Because we have established that a cup of flour can weigh anywhere from 120g to 178g depending on the user’s aggression level, we need a standardized baseline. In the professional baking world, the most widely accepted standard for a cup of properly aerated, spooned-and-leveled all-purpose flour is 120 grams.
Here is a cheat sheet for converting the most common baking ingredients from standard US cups to grams:
- All-Purpose Flour: 1 Cup = 120 grams
- Cake Flour: 1 Cup = 114 grams (Cake flour is lighter and finer than AP flour)
- Granulated White Sugar: 1 Cup = 200 grams
- Brown Sugar (Packed): 1 Cup = 213 grams (Because of the molasses content and the fact that it is meant to be packed into the cup, it is significantly heavier)
- Powdered (Confectioner’s) Sugar: 1 Cup = 113 grams (Highly aerated and extremely light)
- Unsweetened Cocoa Powder: 1 Cup = 85 grams
- Butter: 1 Cup (2 sticks) = 227 grams
Liquids vs. Solids on the Scale
Can you weigh your liquids, too? Absolutely. In the metric system, water is the baseline for everything. One milliliter of water weighs exactly one gram. This means if a recipe calls for 240ml of water (roughly one cup), you can just pour 240 grams of water directly into your bowl on the scale.
Milk is slightly denser than water due to the milk solids and fats, so one cup of whole milk weighs about 242 grams. Cooking oil is slightly lighter than water, so a cup of oil weighs around 215 grams.
Once you get comfortable weighing your liquids, you can ditch your liquid measuring cups entirely. Knowing these conversions is an absolute lifesaver for surviving kitchen disasters when you are in the middle of a recipe and realize your glass measuring jug is sitting dirty in the dishwasher.
The Masterclass: Baking a Cake by Weight (A Step-by-Step Guide)
Theory is wonderful, but execution is where the magic happens. Let’s walk through exactly how you are going to bake your next cake using your new digital scale. We are going to treat this like a proper culinary exercise, mastering the art of the home kitchen with zero stress and maximum efficiency.
Setting Up Your Station
Before you even touch a bag of flour, you need to set up your mise en place (a fancy French term that just means “put your stuff in place”).
- Clear a clean, flat, completely level spot on your counter. If your scale is sitting on a crumb or a slight incline, it will not read accurately.
- Turn the scale on and make sure it is set to “Grams” (g).
- Place your primary mixing bowl onto the center of the scale.
- Press the “Tare” or “Zero” button. The screen should read 0g, completely ignoring the weight of the heavy bowl.
Executing the One-Bowl Wonder
Let’s say your recipe calls for 240g of flour, 200g of sugar, and 10g of baking powder.
- The Flour: Open your bag of flour. Using a spoon or a scoop, gently transfer the flour from the bag directly into the mixing bowl sitting on the scale. Watch the digital readout. As you get close to 240g, slow down. Gently tap the spoon to let small dustings of flour fall into the bowl until you hit exactly 240g.
- The Reset: Do not remove the bowl. Simply reach out and press the “Tare” button. The screen instantly drops back to 0g.
- The Sugar: Grab your sugar container. Pour the sugar into the bowl right on top of the flour. Sugar is heavy and pours quickly, so be careful. Stop exactly when the screen hits 200g.
- The Reset: Press “Tare” again. Screen reads 0g.
- The Baking Powder: Because baking powder is used in such small amounts, I recommend pouring it into your hand first or using a small spoon to gently tap it into the bowl until the scale reads 10g.
You have just measured the entire dry base of your cake with flawless, scientific accuracy. No flour dust all over the counter. No dirty plastic cups in the sink. It is a completely streamlined process that is essential for conquering weeknight cooking anxiety when you want to whip up a quick dessert without turning your kitchen into a war zone.
Troubleshooting Common Scale Rookie Mistakes
Even with the best tool in the world, there is a slight learning curve. Here are the most common pitfalls new scale users encounter and how to avoid them:
1. The Mid-Pour Auto-Shutoff:
Most digital scales have an auto-shutoff feature to save battery life. If you take too long searching your pantry for the cocoa powder while your bowl is sitting on the scale, the scale might turn off. When you turn it back on, it will read 0g, and you will have lost the cumulative weight of the ingredients already in the bowl. To prevent this, always gather all your ingredients before you start weighing. If you must step away, jot down the total current weight on a piece of scrap paper just in case.
2. Forgetting to Tare:
If you forget to press Tare between ingredients, you will have to do mental math on the fly. If you have 120g of flour in the bowl, forget to tare, and need 100g of sugar, you have to pour until the scale reads 220g. If math isn’t your strong suit, this can lead to panic. Always make pressing Tare an automatic reflex before picking up the next ingredient.
3. The Low Battery Lag:
When the batteries in your scale start to die, the digital readout will become sluggish. You will pour in flour, the scale will read 100g, you will stop pouring, and three seconds later the scale will jump to 130g. This lag is infuriating and ruins your precision. Keep spare batteries in your kitchen drawer at all times. Do not let a dying battery force you to rescue a ruined dinner because you accidentally added an extra 30 grams of salt to a recipe.
4. Weighing Incredibly Small Amounts:
Standard kitchen scales are great for anything over 5 grams. However, they can struggle to accurately register 1 or 2 grams of highly lightweight ingredients, like yeast or strong spices. For these microscopic amounts, it is perfectly acceptable to fall back on your stainless steel measuring spoons (a teaspoon of yeast is perfectly fine to measure by volume, as the variance won’t ruin the bread).
Final Thoughts: Weigh Your Ingredients, Elevate Your Baking
Baking does not have to be a stressful, unpredictable chore where you cross your fingers and pray to the oven gods that your cake doesn’t turn out like a dense hockey puck. The science of baking is entirely within your control.
By understanding the chaos of aeration and compaction, you can see exactly why the traditional volume measuring cup has been lying to you your entire life. By embracing the digital kitchen scale, you are rejecting the guesswork, ditching the toxic plastic gear, and adopting a method that guarantees precision, consistency, and a whole lot less dishwashing.
You do not need a culinary degree to make a masterpiece. You just need to respect the ingredients enough to measure them properly. Buy the scale, switch it to grams, use the tare button aggressively, and watch as your cakes transform from heavy, dry disappointments into the lightest, most perfectly textured triumphs you have ever pulled out of an oven. Happy baking, and please, throw those old black plastic measuring cups in the trash where they belong.






