
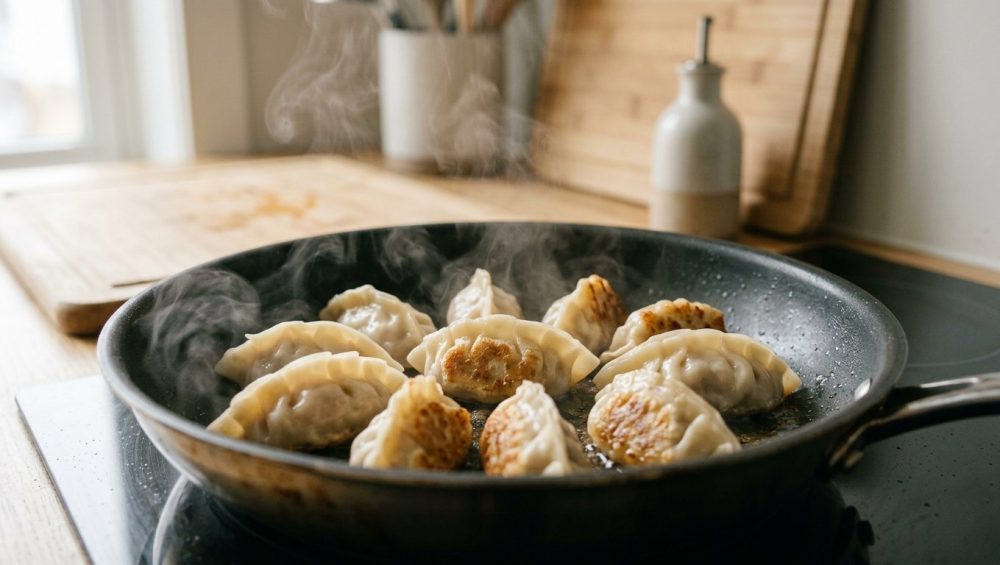
Picture this: It’s Saturday night. You’ve successfully convinced a group of your friends to come over for a highly aesthetic, interactive culinary evening. You’ve spent the better part of your afternoon meticulously mincing pork, grating ginger, and assembling a small mountain of beautifully pleated dumplings. You’re feeling like an absolute kitchen god. You drop your pristine little masterpieces into a pan or a pot of boiling water, eagerly awaiting the moment of triumph.
And then… disaster strikes.
The bellies of your dumplings swell up like tragic little balloons. The seams split. The wrappers disintegrate into a sad, slimy sludge. Your gorgeous filling spills out into the water, transforming your elegant dinner into a murky, chaotic soup of floating meatballs and torn dough.
Look, we have all been there. I have personally ruined more dinner parties than I care to admit by serving what can only be described as “deconstructed dumpling stew.” But you don’t have to stay stuck in this cycle of culinary heartbreak. You don’t need a fancy culinary degree, and you certainly don’t need to surrender to the freezer aisle. You just need to understand the practical science behind what makes a dumpling hold together under pressure.
I am going to walk you through the exact thermodynamics, structural engineering, and biochemical wizardry required to make bulletproof dumplings. We are going to leave absolutely no stone unturned. Grab a glass of wine, roll up your sleeves, and let’s get into the definitive masterclass on why your dumplings burst—and how to ensure they never, ever do it again.
The Anatomy of a Dumpling Disaster: Why They Explode
To fix the problem, we first have to understand the crime scene. When a dumpling bursts, it is rarely due to a single catastrophic error. It is usually a cascading failure of physics and structural integrity.
The Science of Steam Pressure and Dough Elasticity
Let’s talk about what actually happens inside that little dough pocket when it hits the heat. Your dumpling filling is packed with moisture—juices from the meat, water from the vegetables, and whatever liquid seasonings you added. As the dumpling cooks, the internal temperature rapidly climbs. When that moisture hits 212°F (100°C), it undergoes a phase change and turns into steam.
Steam, as you might remember from high school physics, expands. It requires significantly more volume than liquid water. This creates a massive buildup of internal pressure pushing outward against the wrapper. If your dough lacks the necessary elasticity to stretch and accommodate this expanding steam, it will simply rupture.
Think of your dumpling like a balloon. If the rubber is old and brittle, blowing air into it will cause it to pop. If the rubber is fresh and stretchy, it expands. We need your dough to be the fresh rubber.
The Moisture Migration Problem (Wet Fillings)
But elasticity is only half the battle. The other half is controlling the payload. If your filling is excessively wet, you are essentially loading your dumpling with a high-yield steam bomb. When you fold a watery filling into a wrapper, that moisture immediately begins migrating into the dough, turning the inner layer of your wrapper to mush before it even hits the pan. A soggy wrapper is a weak wrapper. When the pressure builds, a soggy wrapper is the first thing to blow. We will discuss exactly how to dry out your filling later, but for now, just remember: excess moisture is the enemy of structural integrity.
Mastering the Wrapper: Store-Bought vs. Homemade
You have two choices when hosting a dumpling night: make the dough from scratch, or buy the pre-made wrappers from the store. I strongly advocate for making your own. It is vastly cheaper, infinitely more delicious, and gives you total control over the structural integrity. But I will teach you how to succeed with both.
Hydration Ratios for Bulletproof Homemade Dough
If you are making your own dough, the flour you choose dictates your success. Do not reach for the flimsy cake flour. You need protein. Specifically, you need a high-protein wheat flour—ideally bread flour with at least a 10% to 12% protein content. Gluten is formed when two proteins naturally found in wheat (glutenin and gliadin) combine with water. Glutenin provides the strength and structure, while gliadin provides the stretch and extensibility. When you knead the dough, you are physically aligning these proteins into a microscopic, three-dimensional web. If you use a low-protein flour, that web is weak, and the steam pressure will shred it to pieces.
The golden rule of dumpling dough is the hydration ratio. For standard, bulletproof wrappers, you want exactly a 50% hydration dough by weight. This means for every 100 grams of flour, you add exactly 50 grams of water. Do not measure by volume. Measuring flour with measuring cups is a chaotic guessing game that leads to sticky, unworkable disasters. Use a digital kitchen scale.
Now, temperature matters. If you are planning to boil your dumplings, use cold or room-temperature water. This keeps the gluten network incredibly strong and snappy, allowing the dumpling to survive the violent turbulence of boiling water. If you are planning to pan-fry or steam your dumplings (potstickers), use hot boiling water. The hot water partially cooks and denatures the proteins in the flour, resulting in a softer, more pliable dough that won’t turn tough and chewy when seared.
Once you mix the dough, you must knead it until it is smooth, and then—this is non-negotiable—you must let it rest for at least 30 to 60 minutes. Resting allows the hydration to evenly distribute and gives the stressed-out gluten strands time to relax. If you try to roll out un-rested dough, it will aggressively snap back like a rubber band and tear.
Rescuing Store-Bought Wrappers from Cracking
Look, I get it. Sometimes it is a random Tuesday, you are exhausted, and making dough from scratch is not happening. Store-bought wrappers are a lifesaver, but they come with a massive flaw: they are coated in starch and notoriously dry.
When you try to fold a dry wrapper, the edges refuse to stick together. If your dumplings always tear at the seams while cooking, it is almost certainly because you didn’t create a hermetic seal. To fix this, you must act as a mason laying bricks. You need mortar.
Keep your stack of store-bought wrappers covered with a damp paper towel while you work so they don’t dry out further. Dip your finger in a small bowl of water and trace the outer edge of the wrapper before folding. If water isn’t cutting it, upgrade your culinary glue: use a lightly beaten egg white. The proteins in the egg white act as a powerful binder that will lock those edges together and prevent a blowout in the pan.
The Filling Formulation: Flavor Without the Flood
We have secured the perimeter. Now we must address the payload. The filling is where most enthusiastic home cooks accidentally sabotage themselves. A great filling should be incredibly juicy when you bite into it, but it must be tight, cohesive, and relatively dry when you are folding it.
The Cabbage Salt-and-Squeeze Technique
Let’s talk about vegetables. Napa cabbage is the classic choice for a traditional pork dumpling, but cabbage is a deceptive ingredient. A standard head of cabbage is composed of roughly 92% water. If you simply chop raw cabbage and toss it into your ground meat, you are making a fatal error. As the dumpling cooks, the heat will break down the cell walls of the cabbage, releasing all that trapped water. Your filling will turn to soup, the steam pressure will skyrocket, and the dumpling will explode.
To prevent this, we must harness the power of cellular biology. Specifically, we are going to use osmosis.
Finely mince your cabbage. If your wooden chopping board keeps cracking under the sheer force of your prep work, please invest in a proper, heavy-duty end-grain block—you need a stable surface for this much chopping. Place the minced cabbage in a large bowl, toss it generously with kosher salt, and walk away for 15 to 20 minutes.
The salt creates a hypertonic environment outside the plant cells, drawing the water out through the permeable cell walls. When you return, the cabbage will be sitting in a pool of its own extracted liquid. Now, you must squeeze it. Do not just lightly press it. Transfer the salted cabbage to a clean kitchen towel, roll it up, and wring it out with the furious intensity of someone trying to squeeze the last drop of toothpaste from a tube. You will be shocked by how much water pours out. Doing this guarantees concentrated flavor and eliminates the risk of mushy veggies ruining your filling’s texture.
Fat Binding and the “Stir in One Direction” Rule
Now for the meat. If you read traditional dumpling recipes, you will often see a peculiar instruction: “Stir the filling continuously in one direction.”
To the uninitiated, this sounds like a pretentious, superstitious old wives’ tale. I assure you, it is not. It is hardcore food science.
When you mix ground meat (like pork or beef), you are dealing with complex protein structures, primarily a protein called myosin. If you just gently toss your meat with your seasonings, the meat will cook up like a standard Italian meatball—crumbly, loose, and prone to leaking its juices into the wrapper.
By adding salt and vigorously stirring the meat mixture continuously in one single direction (using a pair of chopsticks or a sturdy spatula), you subject the meat to mechanical shearing force. This physical stress causes the myosin proteins to unravel, stretch out, and cross-link with one another. You are essentially creating a powerful meat emulsion. As you stir, the mixture will transform from a loose pile of ground meat into a sticky, cohesive, bouncy paste.
This sticky matrix acts as a sponge, trapping the fat, the liquid seasonings (like soy sauce and sesame oil), and the natural juices tightly within the protein web. Because the moisture is locked into the emulsion, it won’t flood out and burst your wrapper during cooking. The result? You get tender meat that bursts with juice only after it reaches your mouth, not in the frying pan.
Structural Integrity: Folding Techniques That Actually Hold
You have a highly elastic wrapper. You have a perfectly emulsified, moisture-controlled filling. Now, you have to put them together without sabotaging the structural integrity.
The Pleat-to-Seal Ratio
Do not let the internet intimidate you. You do not need to execute a flawless, intricately pleated fold to make a great dumpling. Pleats are beautiful, and they do help the dumpling stand upright in a pan, but they are entirely secondary to the primary goal: the seal.
If your seal is weak, the dumpling will fail. Period. When you bring the edges of the wrapper together, you must pinch them with genuine authority. If you are using store-bought wrappers, remember your water or egg wash. Press the dough between your thumb and index finger until the two separate layers effectively fuse into a single, seamless piece of dough.
Purging Air Pockets (The Silent Killer)
Here is the silent killer of dumpling night: trapped air.
As you are folding your wrapper over the filling, it is incredibly easy to accidentally trap a bubble of air inside the pocket. Why is this a disaster? Because gases expand under heat at a much more violent and rapid rate than liquids or solids. If you leave an air pocket inside your dumpling, that air will heat up, expand massively, and blow a hole straight through your dough before the meat even has a chance to cook.
To prevent this, you must gently but firmly press the wrapper closely against the filling, working from one side to the other, actively squeezing out every last microscopic pocket of air before you make that final, sealing pinch.
The Cooking Matrix: Steaming, Boiling, and Pan-Frying
The final hurdle is the application of heat. You can do everything right during the prep phase, but if you mishandle the cooking process, you will still end up with a disaster. Let’s break down the thermal dynamics of the three primary cooking methods.
Boiling Dynamics: The Cold Water Shock Trick
Boiling is the traditional method for thick-wrapped, cold-water dough dumplings. But if you just drop them into a pot of violently rolling boiling water and walk away, you are going to destroy them.
Here is the problem: The wrapper is thin and in direct contact with 212°F water. The filling is a dense ball of raw meat sitting in the center. If you maintain a hard, continuous boil, the starch in the wrapper will fully gelatinize, overcook, and disintegrate into mush long before the dense meat center reaches a food-safe 165°F. Starch gelatinization happens rapidly around 140°F to 145°F, requiring sustained, gentle heat for structural integrity.
The solution is a brilliant, centuries-old technique known as the “cold water shock.” Bring a large pot of water to a rolling boil. Drop your dumplings in and give them a gentle stir so they don’t stick to the bottom. Wait for the water to return to a vigorous boil. Just as it looks like the water is about to bubble over, pour in one cup of cold tap water.
This immediately drops the temperature of the cooking environment. The boiling stops, allowing the ambient heat to gently penetrate the center of the dumpling and cook the meat, while simultaneously saving the delicate wrapper from being pulverized by the violent bubbles. When the water comes back to a boil, add another cup of cold water. Repeat this process three times. By the third boil, your dumplings will be floating at the top, perfectly cooked inside, with wrappers that are intact, chewy, and glorious.
The Potsticker Method (Fry-Steam-Fry)
If you want that irresistible, crispy, golden-brown bottom, you are making potstickers. This requires a hybrid cooking method that balances the Maillard reaction (browning) with steam convection (cooking the filling).
Start by heating a couple of tablespoons of oil in a flat-bottomed skillet over medium-high heat. Place your dumplings in the pan, flat side down. Let them sizzle undisturbed for 2 to 3 minutes until the bottoms develop a beautiful, deep golden crust.
Now comes the dangerous part. You are going to pour about a third of a cup of water directly into the hot, oily pan. It will instantly spit, sputter, and erupt into a massive cloud of steam. Immediately slap a tight-fitting lid onto the pan to trap that steam. Lower the heat to medium and let them steam for about 5 to 6 minutes. This steam environment operates at near 100% humidity, rapidly transferring heat into the dumpling to cook the raw filling and gelatinize the wrapper.
Once the time is up, remove the lid. There will likely still be a bit of residual water in the pan. Let the pan continue to cook uncovered until every last drop of water evaporates. The oil that was left behind will re-fry the bottom of the dumplings, crisping them back up to perfection.
Safe Gear Only: Ditch the Toxic Pans for Dumpling Night
I cannot write a masterclass on cooking without addressing the equipment, because bad gear will sabotage your skills every single time.
Why Cheap Non-Stick is Ruining Your Sear (and Your Health)
Listen to me very carefully: you cannot achieve a proper, professional-level sear on a cheap, flimsy non-stick pan. The potsticker method requires high, aggressive heat to trigger the Maillard reaction. Traditional non-stick coatings (like Teflon and other PFAS-laden materials) are simply not designed to withstand high-heat searing.
When you blast a cheap non-stick pan with high heat, the chemical coating begins to break down, off-gassing highly toxic fumes into your kitchen and leaching forever chemicals into your food. Not to mention, the extreme temperature fluctuations of the fry-steam-fry method (dumping cold water into a hot pan) will cause cheap pans to warp instantly. There is nothing more infuriating than a warped pan losing their slip and causing your beautiful potstickers to fuse permanently to the metal. Throw the toxic, peeling pans in the trash where they belong.
The Carbon Steel and Stainless Steel Solution
If you want to cook like an expert, you need to use the materials the experts use. For high-heat searing and steaming, you have two elite options.
The first is carbon steel. A flat-bottomed carbon steel wok or skillet is the traditional, authentic choice. Carbon steel is relatively lightweight, heats up incredibly fast, and when properly seasoned with polymerized oil, it develops a naturally slick, non-toxic, non-stick surface that releases dumplings beautifully.
The second option is a heavy-clad stainless steel skillet. People are terrified of cooking dumplings in stainless steel because they think everything will stick. This is only true if you don’t understand thermal dynamics. To make stainless steel non-stick, you must master the water drop test. Preheat your dry stainless pan over medium heat. Flick a few drops of water into the pan. If the water sizzles and evaporates instantly, the pan is too cold. If the water forms a cohesive, mercury-like bead that glides effortlessly across the surface without evaporating, you have achieved the Leidenfrost effect.
The Leidenfrost effect occurs when a liquid comes into contact with a surface that is significantly hotter than the liquid’s boiling point. The moment the dumpling hits the perfectly heated stainless steel, the microscopic layer of moisture on the exterior of the dough instantly vaporizes. This creates a microscopic cushion of steam that physically levitates the dumpling a fraction of a millimeter above the metal. It never actually touches the pores of the steel, which is why it cannot stick. Add your oil, add your dumplings, and they will sear to a perfect crisp without clinging to the pan.
Hosting a Mindful Dumpling Night (Without Losing Your Mind)
We have covered the science, the structural engineering, and the metallurgy. Now, let’s talk about the actual event. Hosting a dumpling folding night is one of the most enjoyable, interactive ways to feed your friends, but it can quickly spiral into a chaotic, flour-covered nightmare if you aren’t prepared.
Pre-Staging and Workflow Efficiency
Time is money, and stress is the enemy of good food. Do not try to make the dough, prep the filling, and host the party all at the same time. You will be miserable.
Make your filling the morning of the party, or even the night before. This allows the flavors to meld, and more importantly, it allows the filling to chill in the refrigerator. Cold filling is firm, cohesive, and infinitely easier to fold than warm, greasy filling.
Set up your kitchen in zones before anyone arrives. Lay out your kitchen essentials: a stack of wrappers covered by a damp towel, a small bowl of water or egg wash for sealing, a tray lined with parchment paper and dusted with flour to hold the finished dumplings, and plenty of small spoons for portioning.
While your guests are folding, whip up a vibrant dipping sauce. A rich, fatty dumpling needs acid to cut through the richness. Whisk together some high-quality soy sauce, a generous splash of Chinese black vinegar (Chinkiang), a drizzle of toasted sesame oil, minced garlic, and a spoonful of crispy chili oil. It takes two minutes and elevates the entire meal.
Embracing the Ugly Dumpling
Finally, as the host, you must set the tone. When your friends start folding, they are going to make some truly hideous dumplings. Some will look like mangled tortellini. Some will look like abstract art.
Do not hover over them with a ruler. Do not critique their pleat work. Remind them of the only rule that matters: as long as the seal is tight and the air is purged, it will taste phenomenal. The entire point of this endeavor is to host a relaxed dinner party where people can disconnect from their screens, get their hands dirty, and create something delicious together.
You now possess the scientific knowledge to conquer the dumpling. You understand the thermodynamics of steam pressure, the molecular power of myosin, the magic of osmosis, and the thermal properties of safe cookware. You are officially ready to banish the bursting dumpling from your kitchen forever. Now get in there, start mincing that cabbage, and show that dough who is boss.






