
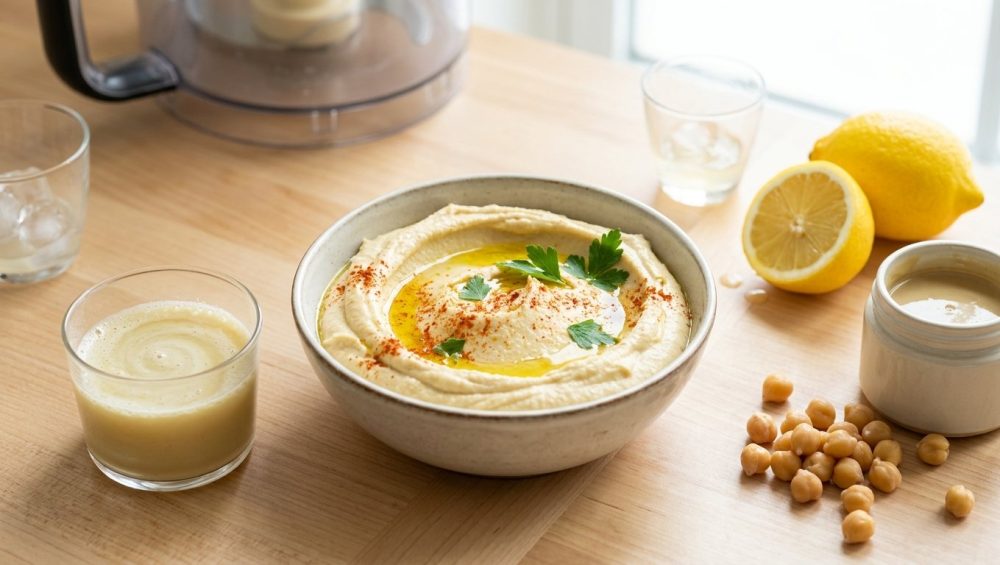
The Tragedy of Gritty Hummus (And Why You Are Doing It Wrong)
We have all been there. You invite some friends over, you set out a beautiful platter of crisp vegetables and warm pita, and you proudly present a bowl of homemade hummus. But the moment you take a bite, your heart sinks. Instead of a velvety, cloud-like Mediterranean dream, your dip has the exact texture of wet sand. It is dense, it is heavy, and it leaves a chalky, gritty residue on your tongue. You smile through the pain, but deep down, you might think you are destined to keep ruining your dinners with subpar, disappointing dips.
You probably blame the chickpeas. You probably think you bought the wrong brand, or that you didn’t boil them long enough. Or worse, you fell down an internet rabbit hole that told you the only way to achieve restaurant-quality hummus is to manually pinch the skins off of every single individual chickpea.
Let me stop you right there. Put down the tweezers. We are not peeling chickpeas today, tomorrow, or ever.
As a home cook who has made every mistake in the book so you do not have to, I am here to tell you that the secret to mind-blowing, ultra-smooth hummus has absolutely nothing to do with peeling legumes. The real secret lies in the science of emulsification and a strict, non-negotiable order of operations in your blender. If you just dump all your ingredients into a food processor and hit the “on” button, you are actively sabotaging your own food. Today, we are going to unpack the exact chemistry of why your hummus is gritty, and how whipping your tahini and cold lemon juice first will change your culinary life forever.
The Chickpea Peeling Delusion: Put Down the Tweezers
If you search for hummus recipes online, you will inevitably encounter the masochistic advice to peel your chickpeas. The theory is that the translucent, fibrous skins are responsible for the grainy texture of the final dip. Proponents of this method will tell you to sit at your kitchen counter for forty-five minutes, gently squeezing hundreds of garbanzo beans until their little jackets pop off.
Time is Money: The Weekday Reality
I have zero patience for this kind of pretentious, time-wasting nonsense. I firmly believe that professional-level results are achievable in a standard home kitchen without sacrificing your sanity. When you want to master simple weeknight dinners, you cannot afford to waste forty-five minutes doing manual labor on a legume. Time is money, my friends. We need ruthless efficiency.
While it is true that removing the skins reduces the amount of insoluble fiber in the mixture, it is entirely unnecessary if you understand how to properly utilize your kitchen equipment. If you are cooking dried chickpeas from scratch, you can simply add a teaspoon of baking soda to the soaking or boiling water. The alkalinity of the baking soda breaks down the pectin in the chickpea skins, rendering them incredibly soft and mushy. But even if you are using standard canned chickpeas—which I do 90% of the time because I am a busy professional—you can achieve a flawlessly silky texture simply by mastering the tahini emulsion.
The Science of the Emulsion: Why Order of Operations is Everything
I know I promised no pretentious chef-speak, but if you want to cure cooking anxiety, you have to understand the foundational science of what is actually happening inside your mixing bowl. Making hummus is not just about pulverizing ingredients into a paste; it is about creating a stable colloidal suspension.
What Actually is Tahini?
Tahini is a paste made from ground, roasted sesame seeds. If you look at a jar of high-quality tahini sitting on the shelf, you will notice that the oil often separates and floats to the top, leaving a dense, chalky sludge at the bottom. This is because tahini is essentially a mechanical suspension of sesame carbohydrates and proteins floating in sesame oil.
When you introduce water (or water-based ingredients like lemon juice and chickpea liquid) to tahini, something bizarre happens. If you add just a tiny splash of liquid and stir, the tahini will suddenly seize up. It transforms from a pourable, runny liquid into a stiff, ugly, grainy cement. Most rookie cooks panic at this stage. This seizing happens because the small amount of water acts like a glue, hydrating the carbohydrate particles and causing them to clump together while pushing the oil out.
The Lecithin Miracle
However, if you push through the panic, keep the blender running, and add more liquid, a magical phase inversion occurs. The stiff cement suddenly relaxes, lightens in color, and whips into a pale, fluffy, cloud-like cream.
This happens because sesame seeds contain natural lecithin, a powerful phospholipid that acts as an emulsifier. Lecithin molecules are amphiphilic, meaning they have a hydrophilic (water-loving) head and a hydrophobic (water-hating, fat-loving) tail. When you apply intense mechanical shear force—like the spinning blades of a food processor—the lecithin molecules arrange themselves around microscopic droplets of sesame oil, suspending them perfectly within the water phase.
If you dump your chickpeas into the blender before you have established this whipped, aerated tahini emulsion, the heavy, starchy beans will interfere with the process. The oil and water will never properly bind, the air will never get trapped, and you will be left with a dense, gritty paste. You must build the fluffy foundation first.
The Sassy Sous-Chef’s Mandatory Gear Warning: Banishing Toxic Blenders
Before we get to the exact step-by-step technique, we need to talk about banishing toxic kitchen gear from your life forever. I have a strict “no-go” rule when it comes to cheap, dangerous kitchen equipment, and blending a thick hummus emulsion will push your appliances to their absolute limit.
Creating a stable emulsion requires serious mechanical shear force, meaning your blender or food processor motor is going to be working incredibly hard, spinning at thousands of revolutions per minute. If you are using a cheap, flimsy plastic blender pitcher, the friction and heat can cause the plastic to degrade, potentially leaching endocrine-disrupting chemicals and microplastics directly into your beautiful, healthy dip.
Worse yet are the bargain-bin food processors with mystery-metal blades coated in cheap, peeling non-stick finishes. The sheer density of the seizing tahini will scrape those toxic black flakes right off the blade and into your food. I absolutely despise toxic kitchenware. You cannot create pure, vibrant food in a vessel that is slowly poisoning you.
If your equipment is scratched, peeling, or cloudy, throw it in the garbage immediately. You must invest in a food processor or high-speed blender made from heavy-duty borosilicate glass, BPA-free Tritan, or food-grade stainless steel. A high-quality food processor is one of the essential tools every beginner needs to achieve culinary perfection safely and efficiently.
The Ice Water Hack: Thermodynamics in Your Food Processor
Now that you have safe equipment, let’s talk about the second biggest secret to flawless hummus: ice-cold water.
Most traditional recipes tell you to thin your hummus with the reserved liquid from the chickpea can (aquafaba) or plain tap water. But award-winning chefs and culinary scientists know that ice water is the ultimate game-changer.
Why Heat is the Enemy of Fluffiness
When your food processor blades spin at high speeds, they generate a massive amount of friction, and friction creates heat. If you run your blender for the three to five minutes required to achieve an ultra-smooth texture, the temperature inside the bowl rises significantly.
Heat is the absolute worst enemy of a delicate emulsion. As the temperature rises, the kinetic energy of the fat droplets increases, causing them to smash into one another, melt together, and separate from the water. When an emulsion breaks, your hummus turns into a greasy, oily, heavy mess.
By slowly drizzling ice water into the food processor while it runs, you drop the ambient temperature of the mixture. This keeps the sesame oil droplets cool and semi-solid, allowing the lecithin to maintain a vice-grip on the emulsion. Furthermore, the freezing temperature increases the viscosity of the tahini just enough to trap microscopic air bubbles being folded in by the blades. This aeration is what transforms your dip from a flat paste into a voluminous, whipped cloud. If you ever need to fix your food on the fly when a sauce looks like it is about to break and turn greasy, a quick splash of ice water is your absolute best friend.
The Garlic Mellowing Protocol: Stop Burning Your Tongue
Have you ever eaten homemade hummus that tasted so strongly of raw, aggressive garlic that it actually burned the back of your throat? That is a chemical failure, not a flavor preference.
Raw garlic contains an amino acid called alliin and an enzyme called alliinase. When you crush, chop, or blend raw garlic, you rupture its cell walls, allowing the alliin and alliinase to mix. This chemical reaction produces allicin, the highly volatile sulfur compound responsible for that harsh, spicy, metallic burn. Understanding why your garlic always burns or turns bitter is crucial here.
If you toss raw garlic cloves into the blender with your chickpeas, the allicin will overpower the entire dish. To prevent this, we utilize a brilliant technique popularized by chef Michael Solomonov: the citric acid steep.
Before you blend anything else, you mince your garlic and let it sit in your freshly squeezed lemon juice for about ten minutes. The high acidity (low pH) of the lemon juice completely denatures the alliinase enzyme, stopping the production of harsh allicin in its tracks. What you are left with is the bright, sweet, aromatic essence of the garlic, without any of the aggressive bite. Once the ten minutes are up, you strain the garlic chunks out of the lemon juice and discard them. The juice is now perfectly infused.
The Definitive, Foolproof Masterclass: Step-by-Step
We have covered the botany, the chemistry, and the thermodynamics. Now, it is time to put it all together. This is my definitive, no-nonsense order of operations. Follow these steps exactly, and I promise you will never eat gritty hummus again. It helps you decode pretentious recipe jargon like ‘shear force’ and ‘colloidal suspension’ into practical, everyday actions.
Phase 1: The Citric Acid Steep
Start by juicing two large, fresh lemons. Do not even think about using that sad, concentrated lemon juice from a plastic squeeze bottle. Mince three cloves of fresh garlic and toss them into the lemon juice with a generous pinch of kosher salt. Let this mixture sit undisturbed for exactly ten minutes to neutralize the allicin. After ten minutes, pour the mixture through a fine-mesh strainer into the bowl of your high-quality food processor. Discard the leftover garlic pulp.
Phase 2: The Tahini Whip (The Most Important Step)
Add one full cup of premium, well-stirred tahini to the lemon juice in the food processor. Do not skimp on the tahini; it is the fatty, luxurious backbone of the dish. Turn the machine on and let it run.
At first, the mixture will look disastrous. It will seize, clump, and look like a bizarre, grainy paste. Do not panic. Let the machine run for about a minute. The acid is beginning to brighten the sesame, and the mechanical shear is starting the emulsification process.
Phase 3: The Aeration Stage
With the food processor still running, grab a glass of ice water. Slowly—and I mean drop by drop, drizzle by drizzle—pour the ice water through the feed tube of the food processor.
Watch the magic happen. As the ice water hits the seized tahini, the temperature drops, the lecithin binds the fat and water, and the mixture undergoes a phase inversion. It will suddenly lighten in color, turning a beautiful pale ivory. It will puff up, doubling in volume as the cold fat traps the air bubbles. Keep drizzling the ice water (usually about 1/4 to 1/2 cup total) until the tahini base looks like fluffy, whipped buttercream frosting.
Phase 4: The Legume Integration
Only now, once your emulsion is flawlessly stable and aerated, do you introduce the chickpeas. Drain and thoroughly rinse two cans of high-quality chickpeas. Add half of the chickpeas to the whipped tahini base, along with a teaspoon of ground cumin.
Turn the machine on and let it run for a full two minutes. Do not rush this. The blades need time to completely obliterate the chickpea skins and fold the heavy starches into the airy emulsion. Stop the machine, scrape down the sides of the bowl with a silicone spatula, and add the remaining chickpeas. Blend for another two to three minutes. If the mixture looks too thick, add one more tablespoon of ice water.
Phase 5: The Finishing Touch (Do Not Blend the Oil!)
Here is another rookie mistake: pouring expensive extra virgin olive oil directly into the blender while the motor is running.
Extra virgin olive oil is packed with bitter polyphenols. When you subject these delicate compounds to the violent, high-speed shear force of a blender blade, you actually tear the polyphenols apart, releasing a harsh, incredibly bitter flavor that will ruin your entire batch. Furthermore, blending heavy oil into the final stage can break the delicate water-tahini emulsion you worked so hard to build, resulting in a greasy texture.
Instead, taste your flawlessly smooth, oil-free hummus. Adjust the salt and cumin if necessary. Then, transfer the hummus to a serving bowl.
Troubleshooting Your Hummus Disasters
Even with the best instructions, kitchen reality can sometimes throw you a curveball. Here is how to fix common issues without throwing the whole batch in the trash:
- If your hummus is too runny: You likely added too much ice water during Phase 3. Do not panic. Simply add another spoonful of tahini or a small handful of reserved chickpeas and blend until the starches absorb the excess liquid.
- If your hummus breaks and looks greasy: Your food processor got too hot, and the emulsion collapsed. Stop the machine immediately. Add two literal ice cubes directly into the bowl and pulse on high. The sudden drop in temperature and the violent shear will force the lecithin to re-emulsify the fat.
- If it tastes bland: You are probably under-salting. Chickpeas are notorious flavor sponges. Add kosher salt a half-teaspoon at a time until the lemon and garlic flavors suddenly “pop” on your palate.
Also, a quick note on storage: nobody wants to wonder why your plastic containers stay greasy after storing oil-slicked leftovers. Always store your homemade hummus in airtight glass containers. It will keep in the fridge for up to a week, and the flavors will actually deepen and meld together beautifully by the second day.
The Art of the Swirl: Plating Like a Professional
You eat with your eyes first. If you just slop your glorious, scientifically perfected hummus into a bowl like a pile of mashed potatoes, you are doing it a disservice.
When you host a relaxed dinner party, this hummus should be the undisputed star of the show. Spoon the hummus into a wide, shallow bowl. Take the back of a large spoon and press it gently into the center of the dip. While applying light pressure, slowly rotate the bowl with your other hand, spiraling the spoon outward toward the edges. This creates a beautiful, deep swoosh—a canyon just waiting to be filled with flavor.
Now, take your most expensive, peppery extra virgin olive oil and pour it generously into the swirl. The oil will pool in the ridges, creating a stunning visual contrast. Sprinkle the top with vibrant red sumac, smoked paprika, toasted pine nuts, and finely chopped fresh parsley. Serve it alongside warm, pillowy pita bread and crisp, icy radishes.
You did it. You bypassed the tedious, soul-crushing chore of peeling chickpeas, and instead, you used the brilliant science of emulsification to force your ingredients into submission. You whipped your tahini, you respected the thermodynamics of ice water, and you protected your garlic from turning bitter. You have successfully created a restaurant-quality, ultra-smooth, cloud-like dip in the comfort of your own home. Now go pour yourself a glass of wine, dip a piece of warm pita into that masterpiece, and bask in your newfound culinary genius.






