
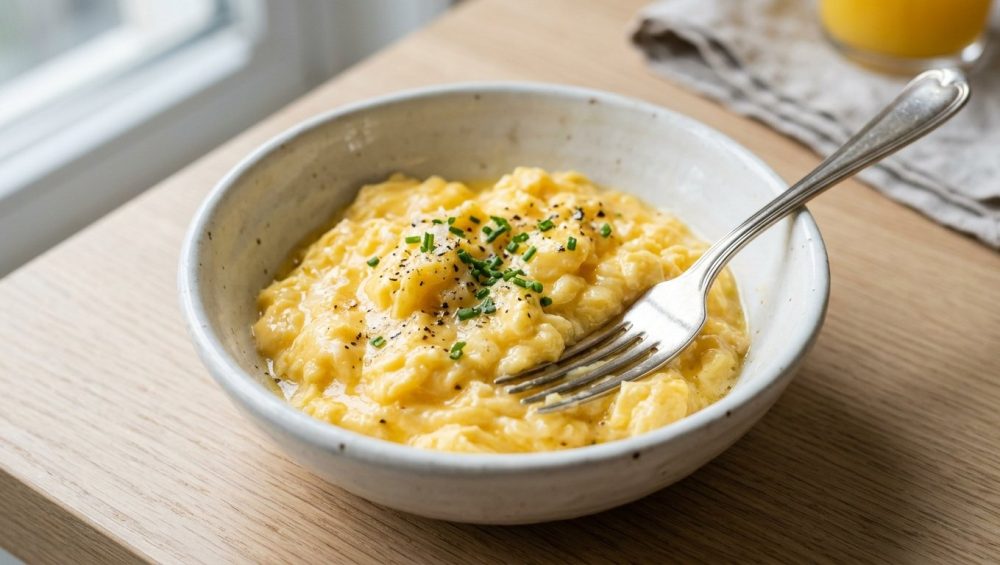
The Breakfast Betrayal: Why You Are Chewing on Yellow Rubber
We have all been there. You wake up on a Saturday morning, feeling optimistic and perhaps a little ambitious. You decide to treat yourself to a proper, civilized breakfast. You crack a few beautiful, expensive farm-fresh eggs into a bowl, whisk them up, and pour them into a hot skillet. You follow all the rules you have ever heard on television. You stir them around, you wait until they look done, and you slide them onto your plate.
And then, the disappointment sets in.
You look down, and instead of a luxurious, velvety mound of golden curds, you are staring at sad, dense, spongy yellow pencil erasers. Worse yet, as they sit on the plate for thirty seconds, a mysterious, unappetizing puddle of tepid, cloudy water begins to pool around the edges of your toast. It is infuriating. It is a betrayal of your morning.
If this scenario sounds familiar, I need you to listen to me very carefully: It is not your fault. You have been lied to by generations of classically trained chefs, television personalities, and well-meaning grandmothers.
For decades, the undisputed, golden rule of the culinary world—shouted by famous British chefs with a penchant for throwing pans—has been this: Never, ever salt your eggs before you cook them. They claim with absolute, terrifying certainty that adding salt to raw eggs “breaks down the proteins.” They warn you that early salting will draw out the moisture, ruin the texture, and leave you with a watery, weeping mess. They insist you must wait until the very last second, right before the eggs hit the plate, to sprinkle your seasoning.
Grab a cup of coffee and pull up a stool, because we are going to dismantle this pretentious culinary dogma brick by brick. As a home cook who learned how to survive the kitchen by setting off the smoke detector more times than I care to admit, I have absolutely zero patience for chef-speak that makes our daily lives harder. I survive my busy weekdays using clever, science-backed hacks so that I can be a perfectionist on the weekends, and this particular myth is my ultimate pet peeve.
We are going to dive deep into the molecular physics of an egg. I am going to prove to you, using verifiable food science, that salting your eggs early is the ultimate, foolproof cheat code for the creamiest, softest, most luxurious scramble of your life. By the time we are finished, you will understand protein coagulation better than most restaurant line cooks, and you will never eat a rubbery breakfast again.
The Anatomy of an Egg: A Microscopic Look at Your Breakfast
Before we can fix the problem, we need to understand what we are actually throwing into the frying pan. Let us strip away the culinary romance for a moment and look at an egg through the cold, calculating lens of a biochemist.
An egg is, for all intents and purposes, a highly complex biological water balloon. The overall composition of a standard chicken egg is roughly 75% water, 12% fat (which is almost entirely housed within the rich, dense yolk), and 13% protein. Those proteins are the master architects of your breakfast. While the egg white alone contains over forty different distinct types of proteins, the heavy hitters that dictate the texture of your meal are ovalbumin (which makes up about 54% of the white) and ovotransferrin.
In their raw, natural, uncooked state, these proteins are tightly coiled up like microscopic, tangled balls of yarn. They float peacefully suspended in the water of the egg white. Crucially, they are repelled by one another because they carry slight electrical charges. Because these protein coils are actively pushing away from each other, the raw egg remains a fluid, somewhat slimy liquid.
The Thermodynamics of the Skillet: Denaturation
When you dump those happy, floating protein coils into a hot skillet, all hell breaks loose on a molecular level. The sudden introduction of intense thermal energy causes the water molecules and the proteins to bounce around violently. As the internal temperature of the egg rises, those tight little balls of yarn can no longer hold their shape. They begin to violently unfurl, stretch out, and lengthen. In the scientific community, this physical unraveling is known as denaturation.
Once the proteins are fully denatured and stretched out, they stop repelling each other. Instead, they start bumping into one another, tangling up, and linking hands to form a complex, three-dimensional web. This linking process is called coagulation. As this intricate microscopic web forms, it traps the water and the fat inside its newly built matrix, physically transforming the liquid, runny egg into a soft, solid, opaque curd.
So far, everything is going according to plan. This is exactly how cooking is supposed to work. But here is where the disaster strikes.
The Squeeze: Understanding the Nightmare of Syneresis
If you continue to apply heat, or if the proteins are allowed to bond without any chemical interference, those linked protein strands do not just hold hands. They start to embrace. Then, they squeeze. And they keep squeezing tighter, and tighter, and tighter.
As the protein web contracts and shrinks, there is no longer any physical room for the water that was previously trapped inside the matrix. The protein network literally wrings itself out like a wet kitchen sponge being crushed in a fist. The scientific term for this tragic, moisture-expelling phenomenon is syneresis. In the kitchen, we just call it “weeping.”
This aggressive squeezing is the exact reason why your eggs leak water all over your plate. The moisture that was supposed to make your breakfast soft, creamy, and luscious has been forcibly evicted. The result? The remaining protein structure becomes incredibly dense, tough, and rubbery. You are left chewing on a dry sponge while a puddle of sad egg-water ruins your perfectly toasted sourdough.
The Great Salt Myth: Why the Experts Got it Completely Backwards
For decades, classic French culinary training dictated that you must never salt your eggs until the very moment they are finished cooking. The logic behind this myth, at a cursory glance, sounds vaguely scientific.
The old-school chefs argued that salt draws out moisture through the process of osmosis. We see this happen all the time in the kitchen. If you salt a raw steak, a piece of zucchini, or a slice of eggplant, water almost immediately beads up on the surface, right? Therefore, the chefs concluded, salting raw liquid eggs must pull the water out of the proteins, ruining the emulsion, breaking down the structure, and causing them to weep uncontrollably in the pan.
It sounds brilliant, but it is fundamentally flawed because it completely ignores how sodium chloride actually interacts with liquid proteins on a molecular level. Thankfully, brilliant food science minds and culinary researchers, like J. Kenji López-Alt in The Food Lab, have spent years rigorously testing and debunking this nonsense.
The Magic of the Electrical Buffer Effect
When you whisk salt (sodium chloride) into a bowl of raw eggs, it does not just sit there acting as a microscopic sponge drawing out water. It dissolves. The salt breaks down into positively charged sodium ions and negatively charged chloride ions.
Remember how we established that those raw egg proteins carry their own electrical charges? When the salt dissolves, those free-floating sodium and chloride ions act like a swarm of microscopic bouncers at a nightclub. They cluster tightly around the charged parts of the unfurled protein strands, essentially masking them and altering their electrical landscape.
When the salted eggs hit the heat of the frying pan, the proteins denature and try to bond together to form their web. But because the salt ions are crowding the space and neutralizing the charges, they physically get in the way. The salt provides a robust electrical buffer that prevents the proteins from binding too tightly to one another.
Because the proteins are physically blocked from forming a super-tight, contracted web, they coagulate at a slightly lower temperature, but the resulting matrix is incredibly loose, relaxed, and tender. And because the web never gets the chance to squeeze tightly, the water remains safely and permanently trapped inside the curds.
In plain, non-pretentious English: Salting your eggs before cooking physically prevents them from turning into rubber and squeezing out their water. It is the ultimate, scientifically verified insurance policy against syneresis. The TV chefs had it entirely backward.
The 15-Minute Rule: Why Timing is Absolutely Everything
Now that you know the secret, you cannot just grab your salt shaker, aggressively dump salt into the bowl, and instantly throw the eggs into the hot pan. If you do that, you are completely wasting the science.
For the salt to do its miraculous buffering job, it needs time. It needs time to fully dissolve into the liquid, distribute evenly throughout the egg mixture, and allow those ions to find their proper places along the protein strands. If you salt the eggs two seconds before they hit the heat, the salt crystals will still be intact. You will get absolutely zero buffering benefits, and you will still end up with rubbery eggs.
The Pre-Salting Protocol
Here is your new, non-negotiable morning protocol for the perfect scramble:
- Crack: Crack your eggs into a mixing bowl.
- Season: Add your salt. (Please, for the love of all things culinary, use a good pinch of kosher salt or flaky sea salt. Never use that metallic-tasting, ultra-fine iodized table dust).
- Whisk: Whisk them vigorously until the yolks and whites are completely homogenous and uniform in color.
- Walk Away: This is the most important step. Walk away from the bowl.
You must let the bowl sit undisturbed on the counter for at least 15 minutes. Use this mandatory waiting period to grind your coffee beans, pop your bread into the toaster, slice some avocado, or simply stare blankly out the window contemplating the day ahead.
If you pay close attention, you will actually see the chemistry happening in real-time. After 15 minutes, the egg mixture will change visually. It will become slightly darker, taking on a more deeply orange or rich yellow hue. It will also become noticeably more translucent and look slightly thinner in consistency. This is the visual, undeniable proof that the salt has fully dissolved and the proteins have relaxed their tight coils.
If you are someone who likes to meal-prep or host elaborate weekend brunches, you can even salt your eggs an hour in advance. However, do not leave them salted overnight, as prolonged exposure (over several hours) can eventually cause excessive osmotic water migration out of the whites, which dilutes the albumen concentration. The 15-minute window is the absolute sweet spot. Mastering this timing is one of those incredibly simple beginner cooking mistakes that you can fix with literally zero extra effort.
The Liquid Fallacy: Stop Watering Down Your Breakfast
While we are in the business of busting persistent kitchen myths, we need to have a very serious, brutally honest conversation about the carton of milk currently sitting on your counter.
Generations of home cooks have been taught by their mothers and grandmothers to add a splash of milk, heavy cream, or—heaven forbid—plain tap water to their scrambled eggs in order to make them “fluffy.” I need you to stop doing this immediately.
When you add milk or water to your raw eggs, you are artificially and unnecessarily increasing the overall water content of the mixture. Yes, the steam generated by this extra liquid evaporating in the hot pan can create a temporary, fleeting illusion of fluffiness. But remember our enemy, syneresis? By adding more water to the protein matrix, you are just providing more ammunition for the proteins to squeeze out when they inevitably contract.
Furthermore, adding dairy actively dilutes the rich, natural, savory flavor of the egg itself. If you properly pre-salt your eggs using the 15-minute rule, the proteins will retain their own natural moisture perfectly. You absolutely do not need to water them down to keep them soft.
The Only Acceptable Additive
If you are dead-set on adding a buffer to your eggs because you prefer a hyper-creamy, almost diner-style texture, there is only one scientifically sound addition. If you whisk in a little cornstarch (mixed with a tiny splash of milk just to help it dissolve), the starch molecules will swell when heated. These swollen starch granules physically block the egg proteins from linking together, acting as a secondary physical buffer alongside the salt. This creates a custardy, incredibly stable texture. But for a pure, unadulterated, everyday scramble, trust the salt alone. It is all you need.
Heat: The Silent, Violent Killer of Good Eggs
We have fixed your seasoning, and we have eliminated the unnecessary liquids. But we still need to fix your stove. The second biggest reason your eggs taste like a Michelin tire tread is that you are cooking them with the fiery, uncontrolled intensity of a blacksmith’s forge.
Egg proteins are incredibly delicate and highly heat-sensitive. Ovotransferrin, one of the primary proteins, begins to coagulate and set at around 140°F (60°C). Ovalbumin follows shortly after, coagulating at around 180°F (80°C). For context, water boils at 212°F (100°C), and a standard frying pan heated on a medium-high burner can easily exceed 400°F (200°C) in a matter of minutes.
When you blast your delicate, perfectly salted eggs with high heat, the proteins seize up violently and instantly. The outside layer of the egg overcooks and turns rubbery before the inside even has a chance to gently warm up.
The Low and Slow Philosophy
Patience is a virtue, especially in the kitchen before you have had your morning coffee. You want to cook your eggs over medium-low to low heat. Yes, it will take three to four minutes instead of thirty seconds. Get over it. The phenomenal result is worth the wait.
By applying gentle, ambient heat, you allow the entire mass of the egg mixture to warm up evenly. The proteins coagulate slowly and gracefully, creating soft, luxurious, velvety folds rather than hard, dry, crumbly nuggets.
The Physics of Carryover Cooking
Here is the most critical, unbreakable rule of heat management in the kitchen: Eggs continue to cook long after they leave the pan.
Frying pans, especially high-quality ones, are heavy, and they hold onto thermal energy. Even if you turn the burner off completely, the pan is still actively radiating intense heat. Furthermore, the dense mass of the eggs themselves retains internal heat. This phenomenon is known as carryover cooking.
If your eggs look perfectly done, dry, and set in the pan, they will be dreadfully overcooked, dry, and rubbery by the time you walk them over to the dining table. You must, without exception, pull the eggs off the heat when they still look slightly wet, glossy, and a tiny bit underdone. The residual heat trapped within the curds will finish setting them perfectly as they rest on your plate.
The Gear: A Brutally Honest Intervention
I cannot teach you how to cook like an expert if you are working with absolute garbage tools. As a passionate advocate for the everyday home cook, I have a very strict, uncompromising “no-go” rule when it comes to cheap, toxic kitchenware.
If you are currently cooking your eggs in a flimsy, $10 non-stick pan that you bought at a discount grocery store five years ago—the one where the black Teflon coating is actively scratched, flaking, and peeling off into your food—I need you to throw it in the trash right now. I mean it. Stop reading this, go to your kitchen, put it in the garbage bin, and come back. I will wait.
You are actively ingesting microscopic flakes of forever chemicals, and it is entirely unnecessary. We are officially banishing toxic kitchen gear from our lives starting today. You deserve better.
Choosing the Right Skillet
For cooking flawless eggs, you really only have two acceptable options:
- A High-Quality Ceramic Non-Stick: If you want absolute convenience for your busy weekday mornings, invest in a heavy-bottomed, reputable ceramic non-stick skillet. But remember, non-stick coatings are fragile. If you use aerosol cooking sprays (which contain chemical propellants and emulsifiers that bake into an impenetrable, sticky, gummy residue under high heat), you are actively ruining your nonstick pans. Throw the spray away and use real butter or a high-quality oil.
- Carbon Steel or Stainless Steel: Yes, you can absolutely cook scrambled eggs on a stainless steel or carbon steel pan without them hopelessly sticking to the bottom. It just requires proper heat management and an understanding of the water drop test. This is where you pre-heat the dry pan until a drop of water glides and dances across the surface like a hockey puck (the Leidenfrost effect) before you add your fat and your eggs.
The Spatula Situation
Do not ever touch a metal fork, spoon, or whisk to your skillet. You need a heat-resistant, seamless, one-piece silicone spatula. A proper silicone spatula allows you to scrape the very bottom of the pan cleanly and thoroughly, ensuring no thin layers of egg get left behind to overcook, turn brown, and ruin the texture of the scramble.
If you are cooking an omelet, frying eggs, or working on a well-seasoned carbon steel pan, a flexible, stainless steel slotted fish turner is an absolute godsend. These types of implements are non-negotiable beginner kitchen tools that will instantly elevate your daily cooking from a frustrating chore to a seamless experience.
The Fat: Why Real Butter is Non-Negotiable
We have our perfectly pre-salted eggs resting on the counter. We understand the importance of low heat. We have a safe, high-quality skillet ready to go. Now, we need fat.
Do not use extra virgin olive oil for scrambled eggs; the flavor is too grassy and overpowering. Do not use generic vegetable oil; it lacks soul. And as we already established, absolutely ditch the cooking oil sprays entirely. You need butter. Specifically, you need high-quality, unsalted butter (since we already perfectly controlled the sodium level by seasoning our eggs 15 minutes ago).
Butter is a natural emulsion consisting of butterfat, water, and milk solids. When it melts in the hot pan, the water content evaporates (which causes the characteristic foaming action), and the milk solids begin to gently toast. This toasting provides an incredibly rich, complex, nutty flavor profile that complements the slightly sulfurous notes of the egg perfectly.
The Foaming Indicator
Butter is not just a flavoring agent; it acts as your built-in visual thermometer. Place a generous knob of butter into your cold pan and turn the heat to medium-low. Watch the butter closely. As it melts, it will begin to bubble and foam. The exact moment the foaming subsides, the water has successfully cooked out, and the pan is at the absolute perfect, gentle temperature to receive the eggs.
If you drop your butter into the pan and your butter always splatters aggressively, hisses violently, and turns dark brown instantly, your pan is way too hot. Take it off the burner immediately, let it cool down, and try again.
The Cold Butter Hack
If you want to take your scramble from “really good” to a Michelin-star level of decadence, steal a brilliant trick from the legendary French chefs. After you pour your pre-salted, rested eggs into the pan, drop a few small cubes of ice-cold butter directly into the liquid egg mixture.
As the eggs slowly cook, the cold butter gently melts into the matrix, creating localized microscopic pockets of cooler temperature. This brilliant technique slows down the protein coagulation process even further and emulsifies the rich butterfat directly into the forming curds. The result is a sauce-like, velvety, mind-blowing texture that will ruin diner eggs for you forever.
The Technique: Mastering the Fold
Cooking the eggs is a highly active, engaged process. You cannot pour the eggs into the pan and walk away to check your phone. The ultimate size, shape, and texture of your curds are entirely dependent on how you agitate the eggs while they are in the pan.
There are generally two acceptable styles of scrambled eggs, and both require different techniques:
The American Diner Style (Large, Fluffy Curds):
If you prefer large, pillowy ribbons of egg, pour the mixture into the pan and let it sit completely undisturbed for about 10 to 15 seconds, just until a very thin layer sets on the bottom. Take your silicone spatula and gently push the eggs from the outside edge of the pan directly into the center. The uncooked liquid egg will naturally flow into the empty space you just created. Repeat this slow, deliberate, sweeping motion around the dial of the pan. Do not chop or aggressively stir. You will be rewarded with gorgeous, large, fluffy folds of egg.
The French Style (Tiny, Custardy Curds):
If you prefer a soft, incredibly creamy, almost spreadable texture, the technique changes entirely. The moment the eggs hit the pan, start stirring constantly. Make small, rapid circles with your spatula while simultaneously shaking the pan back and forth over the burner. This constant, aggressive agitation physically breaks the protein bonds as quickly as they form, resulting in tiny, ricotta-like curds that are impossibly rich and custardy.
Whichever method you choose, remember the golden rule: pull them off the heat while they are still wet and glossy.
Troubleshooting Your Breakfast Disasters
Even with the rigid laws of food science on your side, things can occasionally go sideways in the kitchen. Let’s do a quick diagnostic check on some common scrambled egg failures so you know exactly how to pivot next time:
The Eggs Have a Green or Gray Tint
If your eggs look slightly gray or have a sickly greenish tint, this is a classic, undeniable sign of severe overcooking. Eggs contain iron in the yolk and hydrogen sulfide gas in the white. When subjected to high, prolonged heat, the sulfur and iron chemically react to form ferrous sulfide. This compound has a distinct greenish-gray color and smells faintly of a high school chemistry lab. To fix this, simply lower your heat and drastically reduce your cooking time.
The Eggs Are Tough and Crumbly
You ignored my lecture on carryover cooking. You left the eggs in the hot pan until they looked completely dry and finished, and then they continued to cook on the hot plate. Next time, pull them 30 to 45 seconds earlier than your instincts tell you to. Trust the residual heat.
The Eggs Taste Bland and Flat
You either forgot to salt them entirely, or you didn’t let the salt sit for the full 15 minutes to dissolve and penetrate the proteins. A surface sprinkle of crunchy salt on top of fully cooked eggs hits the tongue sharply, but it does not season the egg internally. Pre-salting gives you a deeply, evenly seasoned dish from the inside out.
Elevating the Everyday: The Philosophy of the Home Cook
At the end of the day, making a plate of scrambled eggs is one of the most fundamental, basic culinary tasks imaginable. But it is also a perfect microcosm of what cooking is truly all about.
Mastering the art of the kitchen is not about buying a $400 Japanese chef’s knife, wearing a pristine white apron, or learning how to pronounce sous-vide with a flawless, pretentious French accent. It is about understanding the “why” behind the food. It is about rejecting blind dogma—even when it comes from famous, Michelin-starred chefs—and empowering yourself with practical, accessible, everyday science.
You do not need a culinary degree to make mind-blowing, restaurant-quality food in your pajamas. You just need a little bit of patience, a decent, non-toxic skillet, and the willingness to let your salt do its chemical job.
So this weekend, when you step into your kitchen, leave the milk in the fridge. Toss out that peeling, toxic frying pan. Whisk your eggs, add a generous pinch of kosher salt, and then walk away for 15 minutes.
Your patience will be rewarded with the softest, creamiest, most luxurious scrambled eggs you have ever tasted. And the best part? There will not be a single drop of weeping, sad water in sight. Now, go make some breakfast. You’ve got this.






