
Listen up, my weekend culinary warriors. We need to have a serious talk about the state of your Sunday dinners. Grab a glass of wine, stand by your cutting board, and let’s get brutally honest for a second. We have all been there: you spend your precious evening mixing, rolling, and searing a beautiful batch of meatballs, only to sit down at the table and discover you have accidentally manufactured a plate of bouncy, rubbery hockey pucks. You chew, and you chew, and you wonder why your homemade ground meat dishes never quite taste like the melt-in-your-mouth masterpieces from that overpriced Italian restaurant downtown.
I have zero patience for pretentious chef-speak, so I am going to give it to you straight. You do not need a culinary degree from Le Cordon Bleu to make mind-blowing food. Professional-level results are completely achievable in your standard home kitchen, provided you understand a tiny bit of basic food science. The reason your meatballs, meatloaf, and burger patties are turning out dense and dry has nothing to do with your cooking skills and everything to do with how meat proteins behave under heat. Consider this technique a non-negotiable chapter in your essential kitchen survival guide. We are going to fix your food right now with a foolproof, science-backed technique that takes exactly sixty seconds of prep time: the panade.
The Tragic Anatomy of a Meat Puck: The Science of Tough Ground Meat
To understand why we need a solution, we first have to understand the problem. When you buy a package of ground beef, pork, or veal, you are essentially looking at millions of microscopic muscle fibers that have been mechanically chopped up and mashed together.
The Myosin and Actin Matrix
Meat is primarily composed of water, fat, and protein. The two major proteins we care about in the kitchen are myosin and actin. In their raw state, these proteins are relatively relaxed. However, the moment you add salt to raw ground meat, you begin to dissolve some of that myosin. This dissolved myosin acts like a cellular glue, making the meat mixture sticky. To a certain extent, this is exactly what you want; that stickiness is what keeps your meatball from completely disintegrating into a loose meat sauce when it hits the hot pan.
But there is a dark side to this protein matrix. When you apply heat to the meat, these proteins undergo a process called denaturation. According to food scientists, myosin begins to denature and tightly cross-link at temperatures between 104°F and 140°F (40°C to 60°C). As the internal temperature continues to climb, the actin proteins join the party, denaturing and contracting violently around 158°F to 176°F (70°C to 80°C).
The Moisture Squeeze
As these proteins denature, they bond together and form a tight, interconnected web. Imagine a giant net being pulled taut. As the protein network shrinks and tightens, it acts exactly like a sponge being wrung out by a giant, invisible hand. The natural moisture and rendered fats trapped inside the meat are aggressively squeezed out into your skillet, leaving behind a dry, dense, contracted lump of protein. Much like how a quick velvet marinade transforms your stir-fries, a panade works on a microscopic level to physically intervene in this violent protein contraction, saving your dinner from ruin.
Enter the Panade: Your Culinary Secret Weapon
Put down the sad, dry breadcrumbs. It is time to introduce you to the unsung hero of the savory kitchen. A panade (pronounced pah-NAHD) is a simple paste made from a starch and a liquid. That is it. It sounds incredibly fancy because it is a French culinary term, but I promise you, it is literally just soggy bread.
A Brief, Non-Boring History of the Panade
Historically, the word panade referred to a humble, rustic bread soup consumed by peasants in Western Europe as far back as the Middle Ages. It was a brilliant, frugal way to utilize stale, rock-hard loaves of bread by boiling them into a thick, nourishing pulp with water, milk, or broth. Over the centuries, resourceful French chefs realized that this starchy, gelatinous paste had miraculous binding properties. They began incorporating it into forcemeats, quenelles, and pâtés.
Eventually, this technique trickled down into everyday home cooking as a clever way to stretch expensive meat during lean economic times. If you only had half a pound of ground beef to feed a family of six, bulking it up with milk-soaked bread was a matter of survival. But in doing so, our ancestors accidentally stumbled upon a brilliant food science hack. Today, high-end restaurant chefs don’t use a panade to save money; they use it because it is the undisputed secret to achieving a remarkably tender, airy, and juicy texture in ground meat.
The Microscopic Magic: How a Panade Actually Works
So, what exactly happens when you mix wet bread into your ground pork and beef? Why does it prevent the dreaded meat puck phenomenon? The magic lies in the physical chemistry of hydrated starches.
Starch Gelatinization and Protein Coating
When you soak bread in a liquid like milk, the complex carbohydrates (amylose and amylopectin) in the bread absorb the moisture and swell up. When mashed, this creates a thick, lubricating starch gel. As you gently fold this gel into your raw ground meat, it coats the individual muscle fibers and protein strands.
Remember that tightening protein net we talked about earlier? When the meat hits the hot skillet and the myosin and actin attempt to cross-link and contract, the panade physically gets in the way. The starch gel acts as a microscopic barrier, preventing the meat proteins from binding too tightly to one another. Because the proteins cannot form a dense, impenetrable matrix, the meatball remains physically tender and yields easily to the bite.
The Internal Sponge Effect
The benefits of the panade do not stop at protein lubrication. The starch gel also acts as a highly absorbent internal sponge. As the meat cooks and inevitably releases some of its natural juices and rendered fat, those flavorful liquids have nowhere to go. Instead of leaking out into the bottom of your baking sheet or frying pan, they are immediately absorbed and trapped by the hydrated starches of the panade. The moisture is locked inside the meatball, guaranteeing a juicy, succulent mouthfeel even if you accidentally overcook them by a few degrees.
Bread Selection: Not All Carbs Are Created Equal
If you want to master this technique, you need to understand your ingredients. Not all breads behave the same way when introduced to liquid, and choosing the wrong starch can leave you with a gummy, uneven mess.
The Case for Basic White Sandwich Bread
I am usually a massive advocate for high-quality, artisanal ingredients, but this is the one glaring exception. The absolute best bread to use for a panade is cheap, squishy, mass-produced white sandwich bread. Why? Because it has a fine, uniform crumb and dissolves almost instantly into a perfectly smooth paste when introduced to milk. It leaves no hard lumps and completely disappears into the background of the dish, providing all of the textural benefits with none of the visual evidence. Just be sure to tear the crusts off first, as the crusts hydrate at a different rate and can leave chewy, dark specks in your meatballs. There’s no need to saw through rock-hard baguettes until your kitchen knives get dull; standard sandwich bread works flawlessly.
Sourdough, Artisanal Loaves, and Panko
If you only have a beautiful, crusty sourdough loaf on the counter, you can absolutely use it. In fact, the natural tang of the sourdough can add a lovely depth of flavor to Italian meatballs. However, artisanal bread has a much tighter, chewier crumb. You must remove all of the crust, dice the interior crumb very finely, and allow it to soak in the liquid for at least ten to fifteen minutes to fully hydrate.
What about store-bought panko or Italian breadcrumbs? While dry breadcrumbs are great for breading chicken cutlets, they are not ideal for a panade. They often contain anti-caking agents and do not form the same cohesive, lubricating gel that fresh or slightly stale bread does. If you must use panko in a pinch, you will need to significantly increase your liquid ratio and give it ample time to soften.
Navigating Gluten-Free Options
For my gluten-free home cooks, you are not left out of the panade magic. However, gluten-free breads are heavily reliant on rice, potato, and tapioca starches, which absorb liquid far more aggressively than wheat flour. If you are using gluten-free bread, you will likely need to increase your milk ratio by about twenty percent to achieve the correct paste-like consistency.
The Liquid Component: Why Milk Trumps Water
The traditional French panade pairs bread with whole milk, and for very good reason. While you technically could use tap water, doing so would be a tragic missed opportunity to build flavor and richness.
Dairy Fat and Lactic Acid
Whole milk brings water for hydration, but it also brings milk solids and dairy fat. This extra fat coats the meat proteins even further, doubling down on the tenderizing effect. If you want to take your meatballs to the absolute stratosphere of tenderness, take a page out of the modern food science playbook and use buttermilk, or a 50/50 mixture of whole milk and plain yogurt. The mild lactic acid present in cultured dairy gently denatures the meat proteins before they even hit the heat, resulting in a texture so soft it practically melts on your tongue.
If you want to elevate the flavor profile even further, try warming the milk with your aromatics first, which is just as effective as blooming them in oil for releasing fat-soluble compounds. Simply heat the milk in a small saucepan with a smashed clove of garlic, a pinch of red pepper flakes, and a sprig of fresh basil, let it steep for ten minutes, and then strain it over your bread.
Broth, Stock, and Dairy-Free Alternatives
If you are strictly dairy-free or cooking for an allergy, do not panic. A high-quality, collagen-rich beef or chicken bone broth is a phenomenal substitute. It lacks the fat of whole milk, but it compensates by injecting a massive dose of savory umami directly into the core of your meatballs. Unsweetened oat milk or almond milk can also work for hydration, but they lack the flavor-enhancing properties of broth or dairy.
The Foolproof Masterclass: Step-by-Step Panade Technique
We have covered the science, the history, and the ingredients. Now, let’s talk execution. Time is money, especially on a Tuesday night, so the beauty of this technique is that you can prep your panade in the exact amount of time it takes your skillet to preheat.
The Golden Ratios
The golden rule for a perfect panade is simple: For every one pound of ground meat (whether that is beef, a beef/pork/veal mix, or ground turkey), you need approximately 1/2 cup of panade.
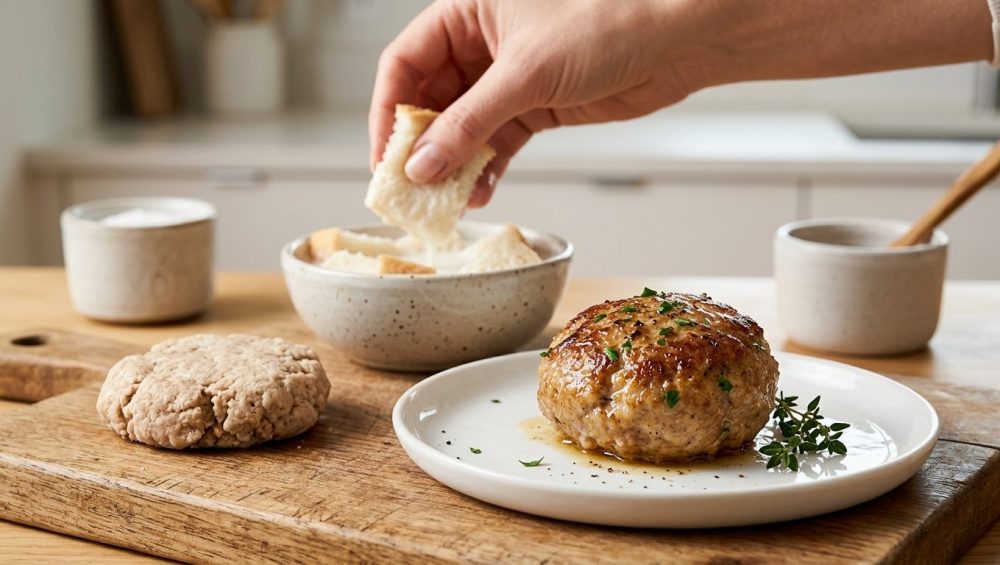
To achieve this, take one standard slice of white sandwich bread, tear off the crusts, and rip the crumb into small, half-inch pieces. Place the torn bread into a wide mixing bowl. Pour two to three tablespoons of whole milk directly over the bread.
Execution: Mashing and Mixing
Let the bread and milk sit undisturbed for about three to five minutes so the starches can fully hydrate. Once the liquid is absorbed, it is time to create the gel. Use a fork or a sturdy, odor-free silicone spatula to mash the soaked bread into a thick, uniform paste. You want to completely obliterate any dry spots or lumps. It should look like a thick, sticky porridge.
Once your panade is perfectly smooth, add your ground meat, your lightly beaten eggs, your grated Parmigiano-Reggiano, your minced garlic, and your salt and pepper directly into the same bowl.
The “Claw Hand” Mixing Method
This is where most home cooks ruin their dinner. You have just created a beautiful, tenderizing panade, but if you overwork the meat mixture, you will trigger massive myosin cross-linking and defeat the entire purpose. You are making meatballs, not kneading sourdough bread.
To mix properly, keep your ingredients as cold as possible to prevent the fat from melting and smearing. Form your hand into a loose “claw” shape. Gently fold the meat, panade, and seasonings together using a light, lifting motion. Stop the exact second the ingredients are evenly distributed. Do not squeeze, compress, or aggressively mash the meat. When rolling the mixture into balls, oil your hands lightly and use a gentle touch; do not pack them into tight, dense golf balls.
Cooking Your Meatballs: Heat, Gear, and Avoiding Toxicity
You have executed the perfect panade and rolled the most delicate, tender meatballs of your life. Now, you must cook them with the respect they deserve.
The Searing Method (And a Warning About Your Pans)
Searing meatballs in a skillet develops a glorious, deeply browned crust via the Maillard reaction. However, I need to make something abundantly clear. As someone who is fiercely passionate about banishing toxic kitchen gear, I implore you to ditch the flaky, mystery-metal skillets. Do not subject your beautiful, handcrafted meatballs to a cheap, scratched-up Teflon pan that is actively leaching forever chemicals (PFAS) into your food.
You should be searing your meat in a heavy-bottomed, fully clad stainless steel skillet, a well-seasoned carbon steel pan, or an enameled cast iron braiser. These materials offer superior heat retention, zero toxic coatings, and the ability to develop a proper fond (those delicious browned bits stuck to the bottom of the pan) which will form the flavor base of your sauce. Before adding your meatballs to a stainless steel pan, always perform a quick water drop test to guarantee the surface is properly preheated. If the water beads up and dances across the surface like mercury, you are ready to add your oil.
Use a high-smoke-point oil like avocado or grapeseed, and step away from the aerosol cans that are actively ruining your nonstick pans with polymerized residue. Sear the meatballs undisturbed for two to three minutes per side until a deep mahogany crust forms. Give them plenty of breathing room; if you overcrowd the skillet, the temperature plummets and your ground beef steams in its own juices instead of developing a gorgeous, caramelized crust.
The Oven-Baking Shortcut for Weekdays
If it is a busy Wednesday night and you are prioritizing efficiency, skip the messy stovetop sear entirely. Arrange your panade-infused meatballs on a heavy-duty stainless steel or aluminum baking sheet lined with parchment paper. Bake them at 400°F (200°C) for 15 to 20 minutes. The high ambient heat of the oven will still trigger the Maillard reaction on the exterior, while the panade works its magic internally to keep them exceptionally juicy.
The Traditional Braise
For the ultimate weekend culinary project, nothing beats a slow braise. After a quick initial sear to build flavor, gently nestle your meatballs into a bubbling pot of homemade San Marzano tomato marinara. Lower the heat to a bare simmer, cover the pot, and let them braise for 45 minutes to an hour. The gentle, moist cooking environment of the sauce, combined with the protective starch gel of the panade, results in a meatball so tender you can literally cut it with a spoon.
Troubleshooting Common Meatball Disasters
Even with the magic of milk-soaked bread, things can occasionally go sideways. Here is how to diagnose and fix the most common beginner mistakes.
The “Falling Apart” Dilemma
If your meatballs are crumbling and disintegrating into your sauce, you have a binding issue. While the panade helps retain moisture and prevents tough protein bonds, you still need an egg to act as a structural binder. The proteins in the egg white coagulate when heated, providing a delicate scaffolding that holds the meatball together. Ensure you are using one large egg per pound of meat. Additionally, you may have made your panade too wet; if your bread paste was swimming in unabsorbed milk, it will make the meat mixture too loose to hold its shape.
The “Bland and Boring” Tragedy
A panade dilutes the flavor of the meat slightly, which means you must season aggressively. Ground meat requires a surprising amount of kosher salt to taste properly balanced. A good rule of thumb is one teaspoon of Diamond Crystal kosher salt (or half a teaspoon of Morton kosher salt) per pound of ground meat. Furthermore, do not skip the umami boosters: a generous handful of finely grated Parmigiano-Reggiano or Pecorino Romano, fresh minced parsley, and a dash of Worcestershire sauce will elevate the flavor profile immensely.
The “Still Too Tough” Conundrum
If you used a panade and your meatballs are still coming out dense, you have committed one of two cardinal sins. First, you likely overmixed the meat. I cannot stress this enough: the moment the ingredients are combined, step away from the bowl. Second, you may be overcooking them. Ground beef and pork only need to reach an internal temperature of 160°F (71°C) to be perfectly safe and juicy. Don’t guess when they are done, and certainly don’t rely on a cheap dial gauge—if your meat thermometer is lying to you, you will end up overcooking them anyway. Invest in a high-quality, instant-read digital probe thermometer and pull the meatballs off the heat the second they hit their target temperature.
Final Thoughts from the Sassy Sous-Chef
Cooking is not magic; it is just applied science mixed with a little bit of intuition and a lot of common sense. By understanding how meat proteins react to heat, and by utilizing the brilliant, centuries-old technique of the panade, you have completely eliminated the risk of serving dry, rubbery ground meat ever again.
You do not need to be a Michelin-starred chef to execute this. You just need a slice of cheap bread, a splash of milk, and the confidence to know that you are completely in control of your kitchen. So throw out those toxic non-stick pans, stop overmixing your ground beef, and go make a batch of meatballs that will make your family weep with joy. You’ve absolutely got this.






