Listen, we have all been there. You march into the butcher shop or the grocery store with the best of intentions. You drop a small fortune on a pair of gorgeous, thick-cut, bone-in pork chops. They look like absolute culinary perfection sitting on your cutting board. You envision a glorious, golden-brown crust, a juicy interior, and a meal that will make you feel like an absolute kitchen god. You heat up your skillet, you gently lay the meat down, and then, tragedy strikes.
Within seconds, the edges of the meat seize up. The center of the chop violently bows upward, lifting completely off the surface of the pan. Your beautiful cut of meat has suddenly transformed into a sad, cupped bowl, steaming in its own juices instead of searing. You press down on it frantically with your spatula, desperately trying to force it back into contact with the hot metal, but the moment you let go, it springs right back up. When it comes to mastering simple weeknight dinners, time is the ultimate currency, and wasting your precious evening battling a piece of warped meat is enough to make anyone want to order takeout.
You do not need a culinary degree to fix this. You do not need a heavy meat press, and you certainly do not need to resign yourself to eating gray, steamed pork for the rest of your life. You just need a basic understanding of meat anatomy and a sharp knife. Today, we are going to dive deep into the exact science of why this frustrating phenomenon happens, and more importantly, I am going to teach you the definitive, foolproof mechanical technique to stop it in its tracks.
The Anatomy of a Culinary Disappointment
To understand why your dinner is actively rebelling against you, we have to look at the structural anatomy of the meat itself. A standard pork chop—specifically a rib chop or a loin chop—is not a uniform block of protein. It is a complex landscape made up of three very distinct biological components: the primary muscle tissue (the lean meat), the subcutaneous fat cap that runs along the outer edge, and the fascia.
The fascia is the real troublemaker here. It is a thin, incredibly tough, translucent band of connective tissue that wraps around the muscle fibers, acting as a biological glue that holds the fat cap to the lean meat. In a living animal, this connective tissue is designed to be highly elastic and resilient. In your frying pan, however, it becomes your worst enemy.
When you expose these three distinct materials—muscle, fat, and connective tissue—to high heat, they do not react the same way. They have completely different thermal conductivities and, crucially, drastically different shrinkage coefficients.
The Physics of the Curl: A Tale of Two Tissues
If you have ever wondered why your pork chops always curl into a rigid little cup the second they hit the heat, blame the unforgiving laws of thermodynamics.
When raw meat is exposed to heat, the myofibrillar proteins within the lean muscle (primarily myosin and actin) begin to denature. This process starts at around 122°F to 131°F (50°C to 55°C). As these proteins denature, they unwind and contract, squeezing out moisture. On average, the lean muscle tissue of a pork chop will shrink by about 12 to 15 percent during the cooking process.
However, the fat cap and that stubborn band of connective fascia play by a completely different set of rules. Connective tissue is heavily composed of collagen. When collagen is exposed to high, rapid heat, it violently seizes and contracts before it eventually begins to slowly melt into gelatin at much higher temperatures (around 160°F or 70°C). Because a pan-sear is a high-heat, fast-cooking method, the fascia never gets the necessary time to slowly break down and tenderize. Instead, it just shrinks.
And it shrinks dramatically. Scientific testing under controlled laboratory conditions has shown that a standard outer fat cap and its underlying fascia can shrink by up to 28 percent in length when exposed to the intense heat of a skillet.
The Bimetallic Strip Effect in Your Frying Pan
Think back to high school physics. If you take two different strips of metal with different thermal expansion rates, bond them together, and apply heat, the combined strip will forcefully bend in the direction of the metal that reacts faster.
This is exactly what is happening to your dinner. You have a massive interior circle of lean muscle trying to shrink by 15 percent, tightly bound by an outer ring of fat and fascia that is desperately trying to shrink by nearly 30 percent. Because the outer ring is shrinking twice as fast and twice as much as the meat it surrounds, it acts like a tightening belt. It squeezes the edges, pulling them inward. Since the meat has nowhere else to go to relieve this immense physical tension, it buckles upward in the center.
The Maillard Reaction: Why Flatness Equals Flavor
Why does this curling actually matter? Who cares if the meat looks a little warped on the plate? You should care, because curling is the absolute death of flavor.
Let’s talk about the Maillard reaction. I despise pretentious chef jargon, but this is a scientific term you actually need to know. The Maillard reaction is the complex chemical dance between amino acids and reducing sugars that occurs when food hits temperatures above 285°F (140°C). It is the sole reason a properly seared piece of meat tastes like a savory, complex, umami-rich masterpiece rather than a bland, boiled sponge.
For the Maillard reaction to occur rapidly and evenly, you need direct, uninterrupted, flat thermal contact between the surface of the meat and the hot metal of the pan. Even if you are diligent about preheating the pan, a warped piece of meat will never sear properly.
When your pork chop curls, the center of the meat lifts away from the cooking surface. Suddenly, you have a pocket of air trapped underneath the meat. The moisture being expelled from the contracting muscle fibers drips down into this gap, hits the hot pan, and instantly turns into steam. That steam rises up and becomes trapped under the dome of your cupped pork chop.
Water cannot exceed 212°F (100°C) before turning into gas. Since the Maillard reaction requires at least 285°F to kick in, that trapped steam guarantees that the center of your meat will never, ever brown. It will simply boil in its own juices. Infrared thermography tests have shown that the surface temperature of the cupped portion of a pork chop can drop by 15°C to 22°C compared to the flat edges, delaying the onset of crust formation by over a minute. By the time the center finally starts to take on any color, the outer edges of your chop are hopelessly overcooked, dry, and ruined.
The “No-Go” Rule: Your Toxic Pan is Ruining Your Sear
Before we get to the mechanical fix for the meat itself, we need to address the elephant in the kitchen. I have zero patience for cheap, toxic kitchenware, and I enforce a strict “No-Go” rule when it comes to terrible pans.
If you are attempting to sear a beautiful, thick-cut pork chop in a lightweight, scratched-up, peeling Teflon pan that you bought for fifteen dollars at a big-box store five years ago, you are actively sabotaging your food. Not only are you risking off-gassing mystery chemical compounds into your kitchen the second that flimsy aluminum base overheats, but you are also fighting a losing battle against thermal mass.
Cheap non-stick pans are incredibly thin. They have almost zero heat retention. The moment you drop a cold, dense piece of meat into a thin pan, the temperature of the pan plummets. It takes minutes for the burner to recover that lost heat. During those minutes, your meat is sitting in a tepid pool of its own juices, steaming rather than searing. Furthermore, the slick synthetic coating of a non-stick pan actively prevents the meat from gripping the surface, which is a crucial mechanical step in developing a deeply polymerized, crispy crust.
The Heavy-Bottomed Heroes You Actually Need
This is exactly why I constantly preach the gospel of heavy carbon steel pans for searing. If you want professional-level results in a home kitchen, you must use equipment that holds heat like a vault.
A thick cast iron skillet or a high-quality carbon steel pan has immense thermal mass. When you heat it up, it stays hot, even when a massive pork chop is introduced to the surface. It powers right through the initial temperature drop, instantly vaporizing surface moisture and kickstarting the Maillard reaction on contact.
If you prefer stainless steel, that is perfectly fine too, provided it is a heavy, multi-clad pan. Just perform the simple water drop test to ensure your stainless steel skillet is properly heated before adding your oil, and you will achieve a glorious, stick-free sear. Throw away your peeling toxic non-stick pans. Your health, and your pork chops, deserve better.
The Masterclass Technique: Scoring the Fat Cap
Now that we understand the physics of the curl and we have the right pan for the job, we can finally address the solution. How do we stop the bimetallic strip effect? How do we prevent the fat cap from squeezing the muscle into a bowl?
We sever the tension. We break the belt. We score the fat.
Scoring is a mechanical culinary technique where you make shallow, strategic cuts into the exterior surface of the meat. It is not a suggestion; it is an absolute requirement for cooking any steak or chop that features a distinct exterior band of fat and connective tissue. By physically cutting through the fascia before the meat hits the heat, you are destroying its ability to contract as a single, unified band.
When the heat hits the scored fat and it desperately tries to shrink by that 28 percent, it can’t pull the rest of the chop with it. The tension is broken into small, localized, harmless segments. The muscle remains entirely flat against the cooking surface, guaranteeing edge-to-edge contact and a flawless sear.
The Exact Mechanical Execution
Do not just hack blindly at your meat. There is a precise science to doing this correctly. If you are still using a dull knife to prep your ingredients, you are making your life infinitely harder. Grab your sharpest chef’s knife or a nimble paring knife.
- Assess the Fat Cap: Lay your raw pork chop flat on your cutting board. Look at the outer edge. You will see the white band of fat, and if you look closely where the fat meets the red muscle, you will see the thin, silvery line of the fascia.
- The Spacing: You want to make perpendicular cuts across the fat band, spaced exactly 1 inch apart along the entire perimeter of the chop. Some older recipes suggest spacing them 2 inches apart, but rigorous kitchen testing proves that a 1-inch spacing provides superior tension release without mangling the meat.
- The Depth: This is the most critical step. You must cut completely through the fat and completely through the silvery fascia, but you must stop the moment your blade touches the red muscle tissue. This usually means a cut that is about 1/4-inch deep, depending on the thickness of the fat cap.
The Golden Rules of Scoring
If you cut too shallowly and fail to sever the fascia, the meat will still curl. The fascia is the primary culprit of the tension. You must feel the blade pop through that slightly resistant connective membrane.
However, if you cut too deeply and slice aggressively into the lean muscle tissue, you are creating massive escape routes for the meat’s internal juices. Deep gashes in the muscle will cause the pork chop to bleed out its moisture into the pan, leaving you with a dry, stringy piece of meat. Precision is key. Cut the fat, sever the fascia, spare the muscle.
Beyond the Score: Preparing the Ultimate Pork Chop
Scoring the fat guarantees a flat chop, but if you want to elevate your weekend cooking project from “acceptable” to “mind-blowing,” you have to treat the meat with respect before it ever sees a stovetop.
Moisture is the Enemy of the Crust
The single biggest mistake home cooks make is taking a pork chop straight out of its plastic packaging and throwing it directly into a hot pan. Meat fresh from the package is covered in surface moisture. If you put wet meat into a hot skillet, the pan’s thermal energy is completely wasted on boiling off that surface water. You are steaming your food.
This is where the undeniable magic of dry brining completely transforms your meal. At least 45 minutes before you plan to cook—or ideally, the night before—generously season your scored pork chops with kosher salt on all sides. Place them on a wire rack set over a baking sheet, and put them in the refrigerator, completely uncovered.
The salt will initially draw moisture out of the meat through osmosis. But if you give it enough time, that salty liquid will be reabsorbed deep into the muscle fibers, seasoning the chop from the inside out and altering the protein structures so they hold onto their internal juices more effectively during cooking. Meanwhile, the cold, circulating air of the refrigerator will completely dehydrate the exterior surface of the meat. When a dry-brined chop hits a hot pan, there is no surface water to boil off. The Maillard reaction begins instantly, resulting in a crust that is shatteringly crisp and deeply flavorful.
The Temperature Myth
Let’s bust a pervasive, annoying culinary myth right now. You will read countless recipes telling you to “let the meat come to room temperature for 30 minutes” before cooking to ensure even cooking. Science has thoroughly debunked this.
Tests running internal thermal probes into thick cuts of meat have shown that sitting on a counter for 30 minutes raises the core temperature of a pork chop by a measly two or three degrees. It makes absolutely zero measurable difference in how evenly the meat cooks. It is a waste of your time. Take your dry-brined chops straight from the fridge, pat them one final time with a paper towel just to be absolutely certain they are bone-dry, and get to cooking.
The Perfect Searing Strategy
You have a perfectly scored, bone-dry, well-seasoned pork chop. Now, you need to execute the cook.
The Cold Pan Method vs. The Ripping Hot Sear
For years, the standard advice was to get your pan smoking hot, add oil, and sear the life out of the meat. While this works beautifully for a thin steak, thick-cut pork chops with thick fat caps benefit from a slightly more nuanced approach.
If the fat cap on your chop is exceptionally thick, consider starting it on its edge. Use a pair of tongs to hold the pork chop vertically, pressing the scored fat cap directly against the hot metal. Let it sit there for a minute or two. This renders out the heavy pork fat, creating a pool of liquid flavor in the pan that you can then use to sear the flat sides of the meat. It also crisps up the fat cap, turning it into a decadent, melt-in-your-mouth treat rather than a chewy, unrendered rubber band.
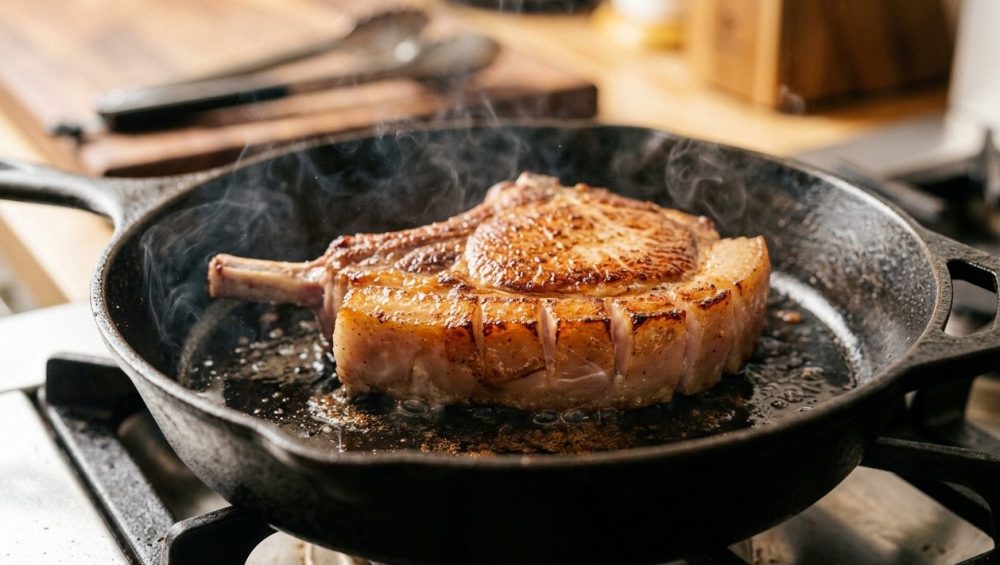
Once the fat is rendered, lay the chop flat. Because you scored it perfectly, it will lay dead flat. Drop your beautifully scored chops into a hot, seasoned cast iron skillet to begin the sear. Let it cook undisturbed for at least three to four minutes until a deep, mahogany crust forms. Do not poke it, do not prod it, and for the love of all things holy, do not press down on it with your spatula. You are just squeezing out the juices.
Basting and Rendering
Once you flip the chop to sear the second side, it is time to build flavor. Toss a generous knob of high-quality unsalted butter into the pan, along with a few smashed cloves of garlic and a sprig of fresh thyme or rosemary. As the butter melts and foams, tilt the pan slightly and use a large spoon to continuously baste the foaming, aromatic butter over the top of the pork chop.
This technique, known as arroser, does two things. First, it introduces incredible, complex, nutty flavors from the browning butter and herbs. Second, the hot butter gently cooks the meat from the top down, accelerating the cooking process and ensuring a perfectly even, gentle heat distribution.
The Grand Finale: Liquid Gold in the Pan
When the meat is done, you must remove it from the pan and let it rest on a cutting board for at least five to ten minutes. This allows the contracted muscle fibers to relax and reabsorb the internal juices. If you slice into it immediately, all that hard-earned moisture will flood out onto your cutting board.
While the meat is resting, you have a skillet full of rendered pork fat, browned butter, and dark, sticky caramelized bits stuck to the bottom of the pan. That sticky residue is called the fond, and it is pure, concentrated flavor.
Deglazing the Fond
There is a distinct culinary art to turning burnt bits into sauce. Do not you dare wash that pan. Put it back on medium heat and pour in a splash of liquid—chicken stock, dry white wine, apple cider, or even just a splash of water with a squeeze of lemon juice.
As the liquid hits the hot pan, it will instantly boil and steam. Use a wooden spoon to aggressively scrape the bottom of the skillet, releasing all of those dark, caramelized bits into the liquid. Let the liquid reduce by half until it thickens slightly, then swirl in one final cold cube of butter to give the sauce a glossy, luxurious finish. Spoon this intensely flavorful pan sauce over your rested pork chops right before serving. It takes exactly three minutes and elevates the dish to a restaurant-quality tier.
The Final Verdict on Pork Chop Perfection
Cooking a flawless, professional-level pork chop at home does not require expensive gadgets, complex chemical tenderizers, or years of culinary school. It requires a rejection of toxic, inadequate cookware, a fundamental respect for the physics of heat transfer, and the willingness to take ten seconds to properly prep your ingredients.
By taking your knife and making those simple, 1/4-inch perpendicular cuts along the fat cap, you are outsmarting the biology of the meat. You are neutralizing the bimetallic strip effect, preventing the fascia from contracting, and guaranteeing the flat, even surface contact required for a spectacular Maillard crust.
Remember, pork is a lean meat that is incredibly unforgiving if overcooked. Always rely on a fast, trusty meat thermometer to pull your pork at exactly 140 degrees Fahrenheit (60 degrees Celsius). The internal temperature will continue to rise by a few degrees as it rests, bringing it to a perfect, juicy, slightly blushing medium.
You have the knowledge. You have the technique. Now go sharpen your knife, throw away that peeling Teflon pan, and show that pork chop who is boss. Science, darling. It works every single time.