You just dropped nine dollars on a naturally leavened, ancient-grain sourdough boule from that incredible artisanal bakery downtown. You brought it home, sliced off two glorious, crackly pieces for Sunday brunch, and left the rest sitting on the kitchen counter in a paper bag. By Tuesday evening, you reach for it to accompany your pasta, only to discover that your beautiful, expensive loaf now possesses the structural integrity of a cinderblock. It is rock-hard, unyielding, and could probably be used as a blunt-force weapon in a pinch.
Your first instinct, like millions of other frustrated home cooks, is to sigh in defeat and toss it directly into the garbage can.
Stop. Put the bread down, step away from the trash bin, and listen to me very carefully.
Throwing away a premium loaf of bread just because it went hard is an absolute tragedy, a massive waste of your hard-earned money, and a fundamental misunderstanding of culinary science. You do not need a culinary degree to fix this. You do not need expensive dough conditioners or a magical proofing box. You just need to understand the basic mechanics of the food you are eating. Consider this your kitchen survival guide to performing a literal resurrection on your countertop.
We are going to take that rock-hard loaf of bread, we are going to run it directly under the kitchen faucet, and we are going to bake it. It sounds like an absolute culinary sin. It sounds like a guaranteed way to create a soggy, disgusting mess. But I promise you, this counterintuitive trick is deeply rooted in the laws of thermodynamics and molecular chemistry. By the time you finish this masterclass, you will never throw away a stale baguette again.
The Staggering, Expensive Reality of Global Bread Waste
Before we get into the molecular biology of your sourdough, we need to address the elephant in the room: our collective, disastrous habit of throwing away perfectly good food. I have zero patience for the normalization of food waste. It is an expensive, environmentally devastating practice that we accept simply because we don’t know any better.
Let’s look at the cold, hard data. In the United States alone, approximately 133 billion pounds of food are wasted annually. According to recent analysis by ReFED, an astonishing 29% of the 240 million tons in the U.S. food supply goes unsold or uneaten. That breaks down to roughly 208 pounds of food going to waste for every single person, every single year.
Bread and bakery products are among the most massive casualties in this crisis. Because fresh, preservative-free bread has an incredibly short shelf life, it is discarded at terrifying rates. Statistics show that in the U.S., about 20% of all bread purchased for the home is thrown away every year. That represents around 800 million loaves of bread ending up in landfills annually in America alone. Across the pond, the UK generates 560,000 tonnes of bakery waste every year, with a staggering 80% of that being entirely avoidable.
When you throw that stale loaf into the trash, you aren’t just wasting your own grocery budget. You are wasting the agricultural land used to grow the wheat, the massive amounts of fresh water used for irrigation, the energy required to mill the flour, and the fuel used to transport it to your local bakery. Furthermore, when that bread ends up in a landfill, it decomposes anaerobically and generates methane—a greenhouse gas that is 25 times more potent than carbon dioxide.
We have to stop treating artisanal bread as a disposable commodity. Learning how to properly revive your food is not just a neat party trick; it is a fundamental shift in how we respect our ingredients and our environment.
The Deep Science of Staling: It Is Not Just “Dried Out”
To understand why we are going to waterboard our carbohydrates, we first have to completely dismantle the biggest myth in the culinary world: the idea that bread goes stale simply because it “dries out.”
If staling were purely a matter of moisture evaporation, then sealing a fresh loaf in a completely airtight, heavy-duty plastic bag would keep it soft indefinitely. But we all know that isn’t true. Even in a hermetically sealed environment, a baguette will eventually turn into a rigid, unchewable brick. So, what is actually happening?
I despise pretentious chef-speak, but we need to use a very specific scientific term here: starch retrogradation. Don’t let the multi-syllabic jargon intimidate you. It is simply the chemical process of your bread’s molecular structure locking up and throwing a temper tantrum.
The Miracle of Gelatinization
To understand retrogradation, we have to look at what happens when the bread is originally baked. Raw bread dough is essentially a matrix of gluten proteins and starch granules (which are made up of two complex carbohydrates: linear amylose and branched amylopectin).
When you put that dough into a hot oven, the heat triggers a process called starch gelatinization. At around 150°F (65°C), the starch granules act like microscopic sponges. They rapidly absorb the surrounding moisture in the dough, swell up, and burst, creating a semi-firm, highly hydrated, elastic gel. This gelatinized matrix is exactly what gives a freshly baked loaf of bread its bouncy, tender, pillowy crumb.
Meanwhile, on the exterior of the loaf, the surface temperature exceeds 265°F (130°C), triggering the Maillard reaction. Amino acids and reducing sugars violently collide to produce melanoidins (brown pigments) and hundreds of complex, savory flavor compounds, forming that stiff, brittle, deeply browned crust we all crave.
The Inevitable Betrayal of Retrogradation
The tragic irony of bread is that the moment it comes out of the oven, the clock starts ticking on its demise. As the loaf cools and the internal vapor pressure drops, the gelatinized starch molecules begin to naturally realign and recrystallize. They are desperately trying to return to their original, rigid crystalline state.
This recrystallization happens in two distinct phases. First, the linear amylose molecules crystallize very rapidly as the bread cools down, which sets the initial firmness of the loaf. Second, the branched amylopectin molecules crystallize much more slowly over the course of several days. This slow, long-term association of amylopectin is the primary culprit behind your bread turning into a weapon.
As these starches form a tight, rigid crystalline structure, they literally squeeze the water out from within their matrix—a process known in food science as syneresis. The moisture doesn’t necessarily leave the bread; it just migrates. It moves out of the starch granules and travels outward toward the crust. This is why the inside of stale bread feels bone-dry and crumbly, while the crust loses its crispness and becomes tough, leathery, and chewy.
A quick, aggressive side note on refrigeration: If you are currently storing your fresh bread in the refrigerator, stop it immediately. The cold temperatures of a standard fridge (usually around 35°F to 40°F) provide the absolute perfect thermodynamic environment to accelerate starch recrystallization. This is precisely why your bread actually goes stale faster in the fridge than it does sitting out on the counter at room temperature. Keep it on the counter, or freeze it. Never refrigerate it.
The Counterintuitive Cure: Why We Waterboard Our Bread
So, your bread has undergone starch retrogradation. The starches have crystallized, and the moisture has migrated. How do we fix it?
We have to reverse the retrogradation. We have to force those rigid amylopectin crystals to break apart, re-absorb moisture, and re-gelatinize. And to do that, we need two things: intense heat (to bring the internal temperature back up to that 150°F / 65°C gelatinization point) and water.
If you just throw a stale, dry loaf of bread into a hot oven, you will fail. The dry, ambient heat of the oven will rapidly evaporate whatever residual moisture is left in the crust and the crumb. You won’t reverse the staling process; you will simply bake the bread a second time, effectively turning your beautiful artisanal sourdough into a giant, tooth-shattering crouton.
This is where the magic happens. We have to introduce external moisture directly to the crust. By running the stale loaf under the kitchen faucet, we saturate the leathery exterior with water. When we place that wet loaf into a hot oven, a brilliant chain reaction of thermodynamics occurs.
The intense heat of the oven rapidly converts the surface water into steam. Steam has an incredibly high latent heat of vaporization, meaning it is an exceptionally efficient conductor of thermal energy. That steam penetrates deep through the crust and into the crumb of the bread. It drives both heat and moisture directly into the center of the loaf, rapidly raising the internal temperature past the 150°F threshold.
The heat melts the crystalline structure of the retrograded starches, while the steam provides the necessary moisture for the starches to re-absorb and swell. The crumb re-gelatinizes, transforming from a crumbly, dry brick back into a soft, bouncy, steaming interior.
Simultaneously, once the surface water has fully evaporated into steam, the dry heat of the oven goes to work on the crust. It draws out the excess moisture, re-dries the exterior, and reactivates the crispness, leaving you with a loaf that genuinely tastes and feels like it was baked twenty minutes ago.
The Definitive, Step-by-Step Resurrection Protocol
We are busy people. When it comes to cooking on a weekday, time is money. I am all for elaborate, multi-day culinary projects on a Sunday afternoon, but on a Tuesday night, I need efficiency. This method is fast, foolproof, and will ensure you have stopped burning dinner every night just because your side dishes failed you.
Here is exactly how to execute the water trick without ruining your food.
Step 1: The Mold Assessment
Before we do anything, you must aggressively inspect the loaf. Starch retrogradation is a reversible chemical process; mold is a biological colonization. If you see fuzzy green, white, or blue spots anywhere on the crust or the crumb, the bread is dead. Do not try to cut around it. Mold spores possess deep, invisible root systems (mycelium) that penetrate far beyond the visible fuzzy patches. If it has mold, throw it out. If it is simply hard as a rock, proceed to Step 2.
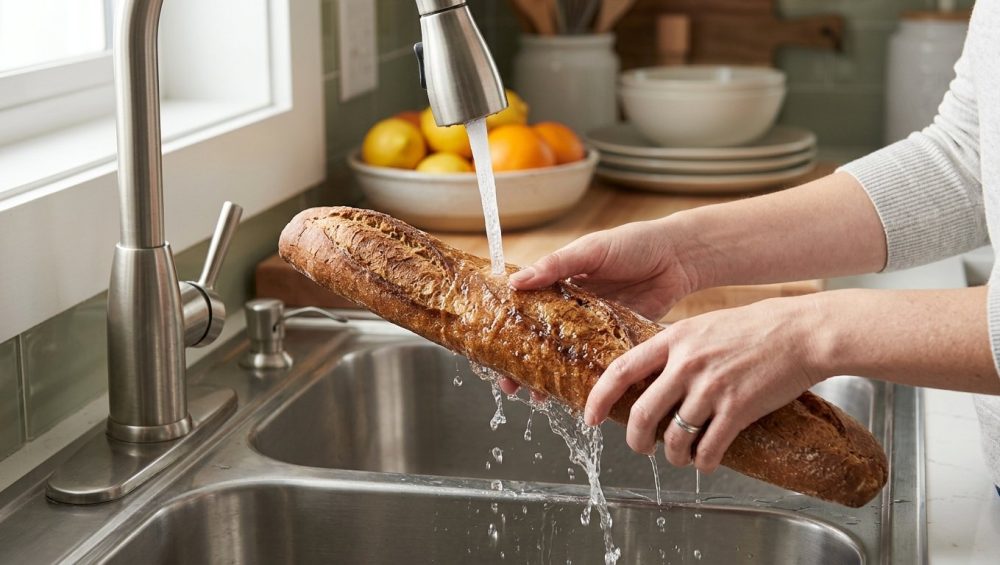
Step 2: The Drenching
Turn on your kitchen sink faucet to a lukewarm stream. Take your rock-hard loaf of bread and hold it directly under the running water. I know every instinct in your body is screaming that this is wrong, but trust the science.
You want to get the entire exterior crust wet. You do not need to hold it underwater for five minutes like you are trying to drown it, but you want a thorough, even coating of water across the top, bottom, and sides.
What if the bread is already sliced?
If you have a half-eaten baguette or a boule with an exposed, cut crumb, concentrate the water stream strictly on the hard exterior crust. Try to avoid blasting the open crumb directly with the faucet, as it can turn the exposed interior into a gummy paste. However, if a little water splashes onto the cut side, do not panic; the oven will sort it out.
Step 3: The Cold-Start Bake
Do not preheat your oven. Placing a dripping wet loaf of bread into an aggressively preheated 450°F oven can cause the exterior water to flash-evaporate too violently, scorching the crust before the thermal energy has time to penetrate the center of the loaf.
Instead, place the wet loaf directly onto the center rack of a cold oven. Turn the oven on and set the temperature anywhere between 300°F and 325°F (150°C to 160°C).
By starting in a cold oven, the bread gently warms up alongside the ambient air. The water slowly converts to steam, providing a steady, penetrating sauna for the crumb rather than a violent thermal shock.
Leave the bread in the oven for anywhere from 6 to 12 minutes, depending on the size and density of the loaf. A thin, delicate baguette might only need 6 to 8 minutes, while a dense, massive two-pound sourdough boule might need the full 12 to 15 minutes to allow the heat to reach the absolute center.
Step 4: The Tap Test
You will know the bread is resurrected by using your senses. Open the oven and carefully tap the crust with your fingernail or a wooden spoon. It should feel completely dry to the touch, rigid, and it should produce a hollow, resonant “thump” sound. If the crust still feels damp, leathery, or soft, leave it in for another 3 minutes.
Step 5: The Crucial Rest Period
When you pull the perfectly crisped loaf out of the oven, do not slice into it immediately. I know it smells intoxicating, but you must practice restraint.
The interior of that bread is currently a volatile matrix of hyper-active steam and freshly melted starch gels. If you take a serrated knife and hack into it right out of the oven, all of that trapped steam will instantly billow out into the air. Without that moisture settling back into the crumb, the starches will rapidly seize up, and the interior will turn gummy and sticky.
Let the loaf rest on a wire cooling rack for at least 5 to 10 minutes. This allows the internal vapor pressure to equalize and the gelatinized starches to stabilize. Only then should you slice into it.
Bread Typology: What Survives and What Is Doomed
Before you start aggressively soaking every baked good in your pantry, you need to understand that this scientific trick is not a universal cure-all. It works miracles on specific types of dough, and it will completely destroy others.
The Prime Candidates: Lean Doughs
This method was practically invented for lean doughs. A lean dough is any bread made from the fundamental baker’s ratio: flour, water, salt, and yeast (or natural sourdough starter). This includes rustic sourdough boules, French baguettes, ciabatta, and focaccia. Because these breads lack added fats and sugars, their starch structures are incredibly pronounced and highly responsive to the steam-and-heat retrogradation reversal. Run them under the tap with confidence.
The “Maybe” Pile: Enriched Doughs
Enriched doughs are breads that have been fortified with fats, dairy, and sugars—think brioche, challah, milk bread, and soft dinner rolls. The added lipids (fats from butter or oil) and sugars actually coat the starch granules, naturally inhibiting and slowing down the retrogradation process. This is why a brioche bun stays soft on your counter for five days while a baguette turns to stone in 24 hours.
When enriched breads eventually do go stale, you must treat them with extreme caution. Do not run a brioche bun directly under a heavy faucet; the delicate, fat-heavy crumb will turn into an irretrievable, soggy mush. Instead, lightly mist the exterior with a spray bottle of water, wrap it loosely in aluminum foil, and warm it gently at 300°F (150°C) for just 5 minutes.
The Doomed: Commercial Sliced Sandwich Bread
Do not, under any circumstances, attempt to run a slice of mass-produced, plastic-bagged supermarket sandwich bread under the faucet. Commercial breads are heavily pumped with industrial dough conditioners, vital wheat gluten, emulsifiers, and preservatives specifically engineered to chemically prevent staling for weeks. If a slice of commercial bread has actually managed to go hard, its structural integrity is already compromised. Wetting it will instantly dissolve it into a depressing, wet paste. Put it in the toaster, or throw it away.
The “No-Go” Rule: Stop Ruining Your Food With Toxic, Flimsy Gear
As your resident Sassy Sous-Chef, I am implementing a strict, non-negotiable rule right here, right now. If you choose to place your wet, heavy loaf of bread onto a baking sheet instead of directly on the oven rack, you must use proper equipment.
I am so incredibly tired of seeing home cooks sabotage their own meals by using cheap, toxic, poorly manufactured kitchenware. If you are still baking on those flimsy, paper-thin, mystery-metal baking sheets you bought for four dollars at a discount store a decade ago, throw them in the recycling bin immediately. You know exactly the pans I am talking about—the ones that violently pop, twist, and contort like a dying fish the second they hit 300 degrees. That dramatic thermal expansion is exactly why your baking sheets keep warping and ruining the even heat distribution required to properly steam your bread.
Furthermore, I have absolutely zero patience for cheap, peeling non-stick coatings. When you take a wet, dense loaf of bread and blast it in a hot oven on a heavily scratched Teflon pan, the extreme temperature fluctuations can degrade the chemical coating over time. We are officially banishing toxic kitchen gear from our lives, permanently.
If you want professional results, you need professional-grade, safe thermal mass. Use a heavy-duty, bare aluminum half-sheet pan (18-gauge or thicker). Better yet, leverage the magic of a baking steel or a high-quality cordierite pizza stone. These materials possess massive thermal density. When you place a wet loaf of bread onto a preheated baking steel, the steel drives consistent, radiant, aggressive heat directly into the base of the loaf, ensuring an impeccably crispy bottom crust that a flimsy warped pan could never achieve.
Troubleshooting the Resurrection: Where You Went Wrong
Even with a foolproof method, the kitchen is a chaotic place, and mistakes happen. If you attempted this resurrection and ended up ruining your dinners, let’s diagnose the failure.
Mistake 1: The Bread Came Out Soggy
If your bread emerged from the oven feeling like a wet sponge, you committed one of two sins. Either you literally submerged the bread in a bucket of water for a prolonged period, allowing the crumb to become hopelessly waterlogged, or your oven wasn’t hot enough/you didn’t leave it in long enough for the surface water to fully evaporate into steam. Next time, just a quick rinse under the tap, and trust the oven to do its job.
Mistake 2: The Brick Returned with a Vengeance
You successfully revived the bread at 6:00 PM. It was soft, crusty, and perfect. But by 8:00 PM, the leftover pieces on the cutting board had turned back into impenetrable rocks.
This is not a failure of the method; it is a harsh reality of chemistry. The reversal of starch retrogradation is strictly temporary. When you heat the bread, you re-gelatinize the starches, but you are also fundamentally driving off more total moisture from the loaf through evaporation. Once that revived bread cools back down to room temperature, it will undergo retrogradation again, but this time it will happen exponentially faster because there is even less moisture left in the system.
The golden rule of bread resurrection: Only revive exactly what you plan to eat immediately. If you have a massive boule, slice off the portion you want to eat, run just that portion under the tap (avoiding the exposed crumb as much as possible), and bake it. Leave the rest of the stale loaf alone until you are ready for it. And if your leftover pieces ultimately turn into hard bricks for a second time, accept defeat. At that point, their only destiny is to be pulverized in a food processor to make breadcrumbs.
The Weekday Warrior’s Desperation Shortcut
I am a realist. I know that sometimes it is 7:30 PM on a Wednesday, the pasta is already plated, the kids are screaming, and you simply do not have 15 minutes to wait for an oven to slowly steam a baguette. You need a shortcut that will transform your daily meals without adding stress to your evening.
Enter the microwave.
I generally despise the microwave for bread, as it destroys the crust, but in a true culinary emergency, it can reverse starch retrogradation in seconds. Take a single stale slice or a small chunk of bread. Do not run it under the faucet. Instead, take a paper towel, run the towel under the tap, and wring it out until it is just slightly damp. Wrap the bread entirely in the damp paper towel.
Place it in the microwave and heat it on medium power for exactly 10 to 15 seconds. The damp paper towel creates an instant, localized micro-steamer. The electromagnetic waves rapidly heat the water molecules, driving steam into the crumb and instantly re-gelatinizing the starches.
The bread will emerge incredibly soft, hot, and pliable. However, there are two massive caveats to this shortcut. First, you will have absolutely zero crust. The Maillard reaction cannot occur in a microwave, so the exterior will be soft and chewy. Second, the retrogradation window is aggressively accelerated. You have approximately three minutes to eat that bread before the starches violently seize up, turning the slice into a piece of unchewable rubber. It is a desperate, effective fix for a busy weeknight, but the oven method remains the true, dignified art of the kitchen.
Stop Tossing, Start Steaming
You do not need a Michelin star to cook like an expert, and you certainly don’t need to accept food waste as an inevitable part of home cooking. Professional-level results in a standard home kitchen are entirely achievable when you stop blindly following instructions and start understanding the scientific “why” behind your food.
Starch retrogradation is a formidable opponent, but it is not invincible. Armed with nothing more than a kitchen faucet, a reliable oven, and a basic understanding of thermodynamics, you have the power to reverse the aging process of your baked goods.
Stop throwing your hard-earned money into the trash. Stop treating beautiful, artisanal bread like a disposable commodity. The next time you encounter a nine-dollar sourdough boule that has turned into a cinderblock, don’t panic. Turn on the tap, waterboard that loaf, and eat like royalty.


