The Heartbreak of the Grainy Mess: Why Your Chocolate Hates You
Listen up, weekend warriors. We have all been there. You are standing in your kitchen, feeling like an absolute culinary deity. You have a beautiful, expensive bar of high-quality dark chocolate. You chop it up, toss it into a bowl, and start melting it down. For a glorious minute or two, it transforms into a glossy, liquid pool of velvet. You give it a gentle stir, already imagining the decadent truffles or the perfect glossy ganache you are about to create.
And then, tragedy strikes.
In the blink of an eye, your liquid gold aggressively seizes up. It loses its shine, morphs into a dull, muddy paste, and hardens into a gritty, cement-like clump that looks more like potting soil than dessert. Panic sets in. You stir faster, hoping sheer willpower will smooth it out. You crank up the heat, assuming it just needs to melt more. But the harder you try, the stiffer and more unyielding the chocolate becomes. You have just experienced the phenomenon known as seizing, and let me tell you, it is enough to make even a seasoned pastry chef want to throw a spatula across the room.
If you are tired of surviving kitchen disasters on a daily basis, it is time to stop blaming yourself and start understanding the chemistry of the ingredients you are working with. You do not need a culinary degree from Le Cordon Bleu to melt chocolate properly. You do, however, need to understand that chocolate is a diva. It is a highly complex, chemically fragile suspension that demands respect, proper technique, and absolute precision.
As a busy professional who relies on ruthless efficiency during the week, I firmly believe that time is money. Wasting a twenty-dollar batch of artisanal couverture chocolate because you were careless with a wet spoon is a mistake we are going to permanently eliminate from your repertoire today. We are going straight into the food science of why perfectly smooth chocolate suddenly seizes at the slightest touch of moisture, how to prevent it from ever happening again, and the bizarre, counterintuitive tricks you can use to rescue a ruined batch. No fluff, no pretentious chef-speak—just the hard culinary facts.
The Anatomy of Chocolate: A Microscopic Balancing Act
To understand why chocolate seizes, we have to look at what chocolate actually is on a molecular level. When you unwrap a chocolate bar, it feels like a solid, uniform block. But under a microscope, chocolate is not a single, cohesive substance. It is a highly engineered, delicate suspension.
Chocolate is primarily composed of two completely different types of matter forced to coexist. On one side, you have the dry, non-fat particles: the cocoa solids (which provide the chocolate flavor) and the sugar crystals (which provide the sweetness). On the other side, you have cocoa butter, which is the natural fat extracted from the cacao bean.
Here is the critical food science secret that explains everything: cocoa butter is hydrophobic (water-fearing), while the sugar particles are intensely hydrophilic (water-loving). During the manufacturing process, chocolate makers spend hours—sometimes days—grinding and “conching” these ingredients together until the dry sugar and cocoa particles are pulverized down to a microscopic size, completely stripped of almost all their moisture, and evenly coated in a luxurious layer of liquid cocoa butter.
When you melt a bar of chocolate, you are simply applying enough thermal energy to turn the solid cocoa butter into a liquid. Because the cocoa butter is coating all the dry particles, they slide effortlessly past one another, creating that beautifully smooth, fluid texture we all crave. It is a perfectly balanced emulsion of fat and dry solids. But this balance is incredibly fragile. Because the sugar is inherently hydrophilic, it is desperately waiting for any opportunity to grab onto moisture.
The Science of Seizing: The Hydrophilic Nightmare
So, what happens when a single drop of water accidentally falls into your bowl of melted chocolate? Total microscopic warfare.
Because water and fat (cocoa butter) repel each other, the water completely ignores the liquid fat and immediately seeks out the dry, hydrophilic sugar particles. The sugar acts like a microscopic sponge, eagerly absorbing the water. But there is a massive problem: there is not enough water to fully dissolve the sugar.
Instead of dissolving, the water acts as a glue. Food science expert Harold McGee famously explained that this tiny amount of moisture wets the millions of sugar and cocoa particles just enough to create sticky patches of syrup. These sticky syrup patches act like a powerful adhesive, causing the dry particles to instantly clump together into massive, jagged boulders.
Because the particles are no longer smoothly coated in lubricating cocoa butter, the friction inside the bowl skyrockets. The cocoa butter is squeezed out and separates, leaving you with a stiff, gritty, seized mess.
The statistics on this are frankly terrifying for home bakers. In controlled food safety lab tests, it was found that just a 3% to 4% water content by weight is enough to cause a catastrophic seizure. For high-cacao dark chocolate, the threshold is even lower. Because dark chocolate contains less sugar, there are fewer hydrophilic sites to absorb the moisture, meaning it can seize with as little as 1.5% water by weight. To put that into perspective, a single drop of water from an incompletely dried silicone spoon introduces enough moisture to seize 50 grams of chocolate.
If you have ever had your silicone spatulas taste like soap, it means they are porous and retaining unwanted liquids—which is exactly the kind of hidden moisture that will ruin your chocolate the second you start stirring.
The “No-Go” Rule: Why Toxic Cookware is Sabotaging Your Kitchen
Before we get into the precise mechanics of melting chocolate safely, we need to have a serious, brutally honest conversation about the equipment you are using. I have zero patience for cheap, toxic kitchenware, and if you are trying to melt delicate chocolate in a scratched, peeling non-stick pan, you are setting yourself up for failure and potential health risks.
We are actively banishing toxic kitchen gear from our homes. For decades, the cookware industry has pushed cheap non-stick pans coated with polytetrafluoroethylene (PTFE), commonly known as Teflon. PTFE is a synthetic fluoropolymer that belongs to a family of chemicals known as PFAS (per- and polyfluoroalkyl substances). These are notoriously referred to as “forever chemicals” because they simply do not break down in the environment or in the human body.
When you use a scratched Teflon pan as the base for a makeshift double boiler, you are not just risking uneven heat distribution; you are potentially leaching microscopic plastic particles into your food. Furthermore, if that cheap pan accidentally boils dry or overheats (exceeding 500°F), it begins to break down and release toxic fumes. In 2024 and 2025, there has been a documented rise in cases of “Teflon flu,” a condition formally known as polymer fume fever, which causes chills, headaches, and chest tightness after inhaling the emissions from overheated non-stick coatings.
If you are constantly dealing with your ruining your nonstick pans because the coating is flaking off into your sauces, throw them in the trash immediately. You cannot master the culinary arts with gear that actively fights against you.
To melt chocolate flawlessly, you need safe, high-quality, non-reactive equipment. Your best option is a heavy-bottomed, multi-clad stainless steel saucepan paired with a tempered glass or stainless steel mixing bowl that nests perfectly on top. Stainless steel offers unparalleled temperature control without the risk of toxic chemical off-gassing. If you are serious about cooking, investing in proper beginner kitchen tools like a high-quality double boiler setup is non-negotiable.
The Foolproof Prevention Protocol: Mastering the Bain-Marie
Now that your kitchen is free of toxic hazards, let us master the traditional method of melting chocolate: the double boiler, or bain-marie. When executed correctly, this method provides the gentle, indirect, ambient heat required to slowly melt cocoa butter without scorching the delicate cocoa solids. When executed poorly, it is a one-way ticket to Seize City.
Step 1: The Perfect Fit
The biggest mistake amateur bakers make is using a bowl that does not fit snugly over their saucepan. If the bowl is too small, it will wobble, and steam will violently escape from the sides of the pot. Steam is just vaporized water. If that steam billows up and condenses on the inside of your bowl, it will drip down into your chocolate, instantly introducing that dreaded 3% moisture threshold and seizing the entire batch. Your bowl must rest securely on the rim of the saucepan, creating a tight seal that traps the steam underneath.
Step 2: The Water Level Rule
Fill the bottom saucepan with no more than one to two inches of water. The bottom of your mixing bowl must absolutely never touch the surface of the water. If the bowl touches the water, you are no longer using gentle, indirect steam heat; you are aggressively boiling your chocolate through conduction. This will cause the chocolate to rapidly overheat. Overheated chocolate separates, becoming muddy and burnt.
Step 3: The Simmer, Not the Boil
Place the saucepan on the stove and bring the water to a gentle, rolling simmer—not a violent, roaring boil. Once it is simmering, turn the heat down to low, or turn it off completely if you are working with very small batches. Place your bowl of finely chopped chocolate on top.
Step 4: The Temperature Sweet Spot
Different types of chocolate require different handling because they have vastly different ratios of cocoa butter, cocoa solids, and sugar.
- Dark Chocolate: Because it has the highest concentration of cocoa solids and less sugar, it requires slightly more heat to melt smoothly. You want to bring dark chocolate to a temperature of 113°F to 120°F (45°C to 48°C).
- Milk Chocolate: The addition of milk powder and extra sugar lowers the melting point significantly. Aim for 105°F to 115°F (40°C to 45°C).
- White Chocolate: White chocolate contains zero cocoa solids; it is pure cocoa butter, milk powder, and sugar. It is incredibly fragile and prone to seizing at just a 0.5% water threshold due to the extreme hygroscopicity of the lactose. Never let white chocolate exceed 110°F.
Step 5: The Wipe Down
When your chocolate is melted and glossy, carefully lift the bowl off the saucepan. Immediately wipe the entire underside of the bowl with a dry kitchen towel. Condensation will have formed on the bottom of the bowl, and if you carelessly carry it over to your countertop, a single drop of that water could easily slide down the side and splash right into your pristine chocolate.
The Weekday Shortcut: Microwaving Without the Mess
I am a realist. While the double boiler is the gold standard for weekend baking projects, there are Tuesday nights when you just need melted chocolate immediately to drizzle over some fruit, and you do not have the time or the patience to babysit a pot of simmering water. Time is money, and the microwave is the ultimate shortcut for curing weeknight cooking anxiety.
However, the microwave is a brutal, unforgiving machine. It heats food by exciting water and fat molecules with electromagnetic radiation, which can cause intense, localized hot spots. If you just throw a bowl of chocolate chips into the microwave on full power for two minutes, you will pull out a smoking, scorched, unrecoverable disaster.
Here is the professional protocol for microwaving chocolate safely:
- Chop It Fine: Never try to melt giant blocks. Chop your chocolate into uniform, pea-sized pieces using a sharp knife. If you are tired of struggling with dull blades, it might be time to understand why you need a bench scraper to transfer your ingredients without ruining your knife edges.
- The 50% Power Rule: This is absolutely non-negotiable. You must lower your microwave’s power level to 50%. Blasting chocolate at 100% power will fry the cocoa butter instantly.
- The 30-Second Interval: Microwave the chocolate for exactly 30 seconds. Take it out and stir it with a bone-dry silicone spatula. It will not look melted at all after the first interval. Stir it anyway. This redistributes the heat and prevents hot spots.
- Repeat and Observe: Put it back in for another 20 to 30 seconds at 50% power. Stir again. As the chocolate begins to melt, reduce the intervals to 15 seconds.
- Rely on Residual Heat: Stop microwaving when the chocolate is about 80% to 90% melted. The residual heat trapped in the bowl and the already-melted liquid will be more than enough to gently melt the remaining stubborn chunks as you continue to stir.
A quick warning: ensure your bowl is truly microwave-safe. Some cheap plastic or ceramic bowls actually leach microscopic moisture vapor when heated rapidly. In lab tests, certain bowls released enough trapped moisture during microwaving to instantly seize the chocolate inside them. Stick to high-quality tempered glass. And if you have ever had a cheap glass baking dish shattered in the oven or microwave, you know exactly why investing in thermal-shock-resistant borosilicate glass is crucial.
The Rescue Mission: How to Actually Fix Seized Chocolate
Alright, despite your best efforts, the worst has happened. A stray drop of water fell off your whisk, or your kitchen was too humid, and your beautiful bowl of dark chocolate has seized into a grainy, stiff, unworkable paste. Your first instinct is probably to throw it in the trash and start over.
Stop. Do not throw it away. You can actually save it.
The food science behind rescuing seized chocolate is wildly counterintuitive. To fix chocolate that has been ruined by a tiny amount of water, you actually have to add more water. Alternatively, you can add more fat. The method you choose depends entirely on what you plan to do with the chocolate afterward.
Rescue Method 1: The Boiling Water Trick (The Emulsion Inversion)
This sounds like absolute madness. If water caused the problem, why on earth would we add more water to fix it?
Remember the science we discussed earlier: the chocolate seized because a tiny amount of water acted as a glue, wetting the sugar particles just enough to make them sticky, but not enough to actually dissolve them.
To fix this, we are going to force a phase inversion. By adding a significant amount of boiling water, we provide enough liquid volume to completely dissolve all of those clumped-up sugar crystals. Once the sugar is fully dissolved into a liquid syrup, the fat (cocoa butter) can distribute itself evenly throughout the water, turning the mixture into a smooth, fluid emulsion. You are essentially turning your seized chocolate into a water-based ganache.
How to execute the fix:
- Keep your seized chocolate over the warm (off-heat) double boiler.
- Boil a kettle of water. It must be boiling hot. Adding cold water will cause thermal shock and make the cocoa butter harden instantly.
- Add exactly one teaspoon of boiling water to the seized chocolate and whisk vigorously.
- At first, it might look worse. Keep whisking.
- If it is still clumpy, add another teaspoon of boiling water and whisk again. The general scientific ratio required to force this emulsion inversion is roughly 1 tablespoon of boiling water for every 2 ounces (56 grams) of chocolate.
- Suddenly, like magic, the gritty clumps will dissolve, and the mixture will transform into a glossy, smooth, fluid sauce.
If your arm gets tired from whisking, you can utilize the legendary food science trick popularized by Harold McGee: use an immersion blender. The sheer mechanical force of the blender blades will aggressively shear the fat and water molecules together, forcing them to emulsify in seconds and restoring the smooth texture.
The Catch: Because you have introduced a massive amount of water, this chocolate is no longer pure. It can never be tempered again, and it will not set up into a hard, snappy shell. You cannot use this rescued chocolate for dipping strawberries or making molded truffles. However, it is absolutely perfect for baking into brownies, folding into a chocolate mousse, drizzling over ice cream as a hot fudge sauce, or making a rich hot cocoa.
Rescue Method 2: The Fat Lubrication Trick
What if you absolutely need your chocolate to harden? What if you were planning to coat a batch of cake pops, and you cannot afford to dilute the chocolate with water?
If you need the chocolate to set up firmly, you must use the fat rescue method. Instead of dissolving the sugar clumps with water, we are going to lubricate the dry particles with extra fat so they can slide past each other once again.
How to execute the fix:
- Keep the seized chocolate warm over the double boiler.
- You need a fat that is solid at room temperature but melts easily, or a highly refined neutral oil. The best options are pure cocoa butter (if you happen to have it), clarified butter (ghee), vegetable shortening, or a neutral vegetable oil. Do not use regular butter, as American butter contains about 15% to 18% water, which will only make the seizing worse!
- Add the fat in very small increments. The golden ratio is approximately 1 tablespoon of fat for every 6 ounces of seized chocolate.
- Stir gently and continuously until the fat melts and coats the gritty particles, loosening the mixture back into a fluid state.
The Catch: While this method allows the chocolate to harden when cooled, the texture and mouthfeel will be slightly altered. It might feel a bit softer or slightly greasier than purely tempered chocolate, but it is infinitely better than throwing your expensive ingredients in the garbage.
Common Rookie Mistakes That Sabotage Your Chocolate
Even if you understand the science, it is easy to let bad habits sneak into your workflow. If you want to master the art of the home kitchen, you need to rigorously audit your prep process. Here are the most common pitfalls that lead to seized chocolate:
1. The Wooden Spoon Trap
Wooden spoons are fantastic for stirring heavy stews, but they are the mortal enemy of melted chocolate. Wood is highly porous and naturally retains moisture from the air and from previous washings. Even if a wooden spoon feels dry to the touch, the ambient heat of the melted chocolate can draw hidden moisture out of the wood grain and directly into your bowl, causing an instant seizure. Always use a seamless, high-quality silicone spatula or a stainless steel whisk.
2. The Condensation Lid
Never, ever put a lid over a bowl of warm, melting chocolate. As the chocolate heats up, any trace amounts of natural moisture will vaporize. If there is a lid on the bowl, that vapor will hit the cool lid, condense into water droplets, and rain right back down into your chocolate. Let the chocolate breathe.
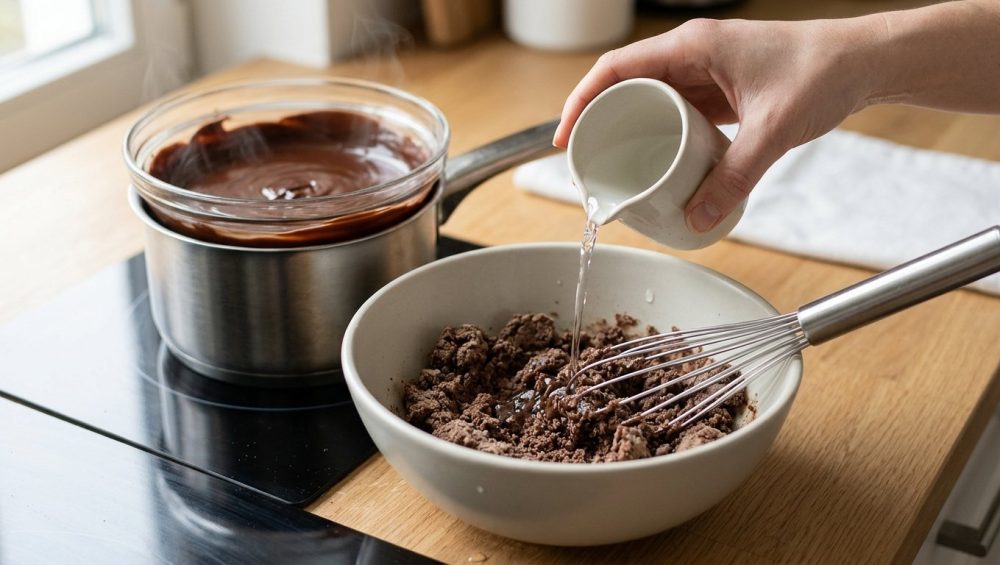
3. The Cold Liquid Shock
Many recipes for ganache or fudge call for adding cream, milk, or liqueurs to melted chocolate. If you pour a cold liquid directly into a bowl of hot melted chocolate, two disastrous things happen. First, the sudden drop in temperature causes the cocoa butter to rapidly crystallize and harden. Second, the localized concentration of water in the cold liquid acts as a seizing agent before it has time to properly emulsify. If a recipe calls for adding liquid, you must heat the liquid to at least 110°F to 115°F before slowly whisking it into the chocolate.
Final Thoughts: Embrace the Chemistry
Cooking is not magic; it is applied thermodynamics and chemistry. The moment you stop viewing kitchen failures as personal shortcomings and start viewing them as predictable chemical reactions, you unlock a completely new level of culinary confidence.
You now know exactly why chocolate acts like a stubborn diva. You know that the hydrophilic sugar particles are constantly at war with the hydrophobic cocoa butter. You know how to build a proper, non-toxic double boiler setup, and you know the exact mathematical ratios of boiling water and fat required to reverse a catastrophic seizure.
Having the right knowledge and the right essential kitchen tools for beginners transforms baking from a stressful chore into a highly rewarding hobby. So the next time your chocolate decides to throw a gritty, clumpy temper tantrum, do not panic. Do not throw it away. Calmly assess the situation, grab your boiling water or your vegetable oil, and show that emulsion exactly who is boss. Happy melting.


