Listen up, weekend culinary hobbyists. You have been lied to for years. For decades, the professional culinary elite have gatekept the secret to perfect, sky-high, shatteringly flaky biscuits behind a wall of intimidating techniques and specialized, overpriced equipment. They want you to believe that unless you have the inherently cold hands of a French pastry chef and a kitchen that looks like a sterile, temperature-controlled laboratory, you are doomed to bake sad, dense hockey pucks. I am here to tell you that is absolute garbage. You do not need a culinary degree to bake like an expert, and you certainly do not need to decode pretentious recipe jargon just to get a decent weekend breakfast on the table.
The secret to bakery-quality, mind-blowing biscuits does not lie in a fancy pastry blender, a marble slab, or years of grueling culinary school. It lies in a humble, cheap, entirely accessible tool you probably already have sitting in your bottom drawer right now: a standard stainless steel box grater. Yes, you heard me. The definitive, foolproof, undisputed secret to the flakiest biscuits of your entire life is to simply grate your frozen butter.
Baking is often touted as an exact science, which scares off a lot of everyday home cooks. But science does not have to be a stressful, rigid ordeal. By understanding the simple thermodynamics of cold fat and the mechanics of steam-leavening, you can bypass years of trial and error. We are going to break down exactly why this functional hack works on a molecular level, and how it will permanently transform your baking game.
The Science of Steam-Leavening: Why Butter is a Liquid in Disguise
Why does grating frozen butter work so miraculously well? To understand the magic, we need to talk about food science—without the snoozefest. Biscuits rely on a physical reaction known as steam-leavening. Unlike a loaf of sourdough bread, which relies on yeast to slowly burp out carbon dioxide over several hours, or a pound cake that relies entirely on chemical leaveners like baking powder and baking soda, a truly flaky pastry relies on water rapidly converting to vapor.
Here is the reality check: butter is not a solid block of pure fat. It is a highly delicate emulsion. Commercially produced butter in the United States is composed of roughly 80% butterfat, 1% to 2% milk solids, and a crucial 15% to 17% water. European-style butters might push that fat content slightly higher to 82% or 84%, but there is always a significant, necessary water component trapped inside that fat matrix.
When you place a properly made biscuit into a screaming hot oven, that trapped water rapidly heats up. At 212°F (100°C), the water trapped inside those little pockets of butter boils and turns into steam. Because steam occupies significantly more physical volume than liquid water, it violently expands, pushing the surrounding layers of dough upward and creating those gorgeous, cavernous, flaky pockets we all crave.
But here is the catch: this thermodynamic miracle only works if the butter remains entirely solid until the exact moment it hits the intense heat of the oven. If your butter melts on the kitchen counter while you are prepping, or if it melts from the ambient heat of your hands while you are clumsily trying to pinch it into the flour, that water prematurely releases and integrates into the surrounding dough. The result? Absolutely zero steam pockets. No flakiness. Just a greasy, dense, tragic lump of baked flour. If you want to eliminate kitchen chaos and guarantee success, you need a foolproof method to keep that fat ice-cold.
The Thermodynamics of Pastry Dough: Beating the Heat
Let us talk thermodynamics, because temperature control is the single most critical factor in pastry making. The melting point of butter is incredibly low. Depending on the exact water content and the diet of the cows it came from, butter begins to noticeably soften and melt between 90°F and 95°F (32°C to 35°C). Your hands, assuming you are a living, breathing human being, are sitting right around 98.6°F.
Do the math. Every single second you spend physically touching that butter, you are actively destroying your biscuits. Traditional recipes haughtily instruct you to “cut” the butter into the flour using two knives or to gently rub it in with your fingertips. Unless you literally have ice water running through your veins, your fingertips are melting the fat. It is an incredibly inefficient, frustrating process that almost always results in overworked, overly warm dough.
By utilizing frozen butter, you are buying yourself a massive thermodynamic insurance policy. Frozen butter sits at a cozy 0°F (-18°C). When you grate it, the friction of the metal grater will inevitably generate a tiny bit of heat, but because the core temperature of the butter is so exceptionally low, it remains entirely solid throughout the process. The shreds of butter stay perfectly intact, ready to be coated in flour and suspended in the dough, waiting patiently for their moment to explode into steam in the oven.
The Flour Factor: Understanding Wheat Proteins and Tenderness
Before we get to the grating technique, we must address the canvas of our masterpiece: the flour. Not all flour is created equal, and the protein content of your flour directly correlates to the potential tenderness of your final product.
Wheat flour contains proteins that, when hydrated, form gluten. Hard red winter wheat, which is typically used to mill bread flour, has a high protein content of roughly 12% to 14%. Standard all-purpose flour, which most home cooks have in their pantry, sits right around 10% to 11.5%. Pastry flour, on the other hand, is milled from softer wheat and sits around 8% to 9%.
Southern-style biscuits are globally famous for their unmatched, melt-in-your-mouth tenderness. This is largely because they are traditionally made using flour milled exclusively from soft red winter wheat (like the iconic White Lily brand), which clocks in at a remarkably low 8.5% protein. Lower protein means less potential for gluten formation. If you can get your hands on a low-protein pastry flour or a Southern-style biscuit flour, use it. If you only have standard all-purpose flour, do not panic. The frozen butter grating technique is so highly effective at preventing toughness that it will easily compensate for the slightly higher protein content of everyday flour.
The Arch-Nemesis of Tenderness: Gluten Over-Development
Now we must address the absolute arch-nemesis of a tender biscuit: gluten. Gluten is not inherently evil; it is the structural backbone of a chewy sourdough boule or a stretchy, magnificent Neapolitan pizza crust. But in a delicate pastry setting, gluten is the enemy.
Gluten is a complex protein network formed when two specific proteins found in wheat flour—gliadin and glutenin—come into contact with water and are subjected to mechanical agitation (mixing or kneading). Gliadin provides the dough with extensibility, allowing it to stretch without tearing, while glutenin provides elasticity, giving it structural strength and the ability to bounce back.
When you overwork biscuit dough, you violently encourage these proteins to form long, strong, highly elastic chains. This is exactly what you want when you are baking a crusty baguette, but it is a literal death sentence for a delicate pastry. Over-developed gluten results in a tough, chewy, bread-like texture rather than a tender, crumbly crumb.
Furthermore, temperature plays a massive role in how quickly and aggressively this network forms. Cold temperatures actively inhibit the formation of the gluten network. By keeping your ingredients ice-cold, you are chemically preventing the gliadin and glutenin from linking up too aggressively.
This is where the grating technique proves its ultimate, undeniable superiority. When you grate frozen butter, you instantly create hundreds of tiny, uniform shreds of fat. When you toss these shreds into your cold flour, the fat rapidly coats the flour particles. This fat-coating acts as a physical, waterproof barrier, preventing the water (from your buttermilk) from fully hydrating the proteins, thereby severely limiting gluten development. You achieve perfect, uniform fat distribution in a matter of seconds, requiring virtually zero mechanical mixing. Less mixing equals less gluten. Less gluten equals a flawless biscuit.
The “No-Special-Gear” Revolution: A Rant Against Toxic Kitchenware
Let me take a brief, highly necessary detour to talk about kitchen equipment, because I have zero patience for the culinary industry’s obsession with selling you single-use gadgets that you absolutely do not need. The “pastry blender” is one of the worst offenders in modern consumer kitchenware.
If you are not familiar, a pastry blender is a U-shaped hand tool with a handle and a series of curved metal wires or blades, specifically designed to cut fat into flour. Here is the brutally honest truth: most pastry blenders on the market today are absolute garbage. They are manufactured using cheap, flimsy mystery metals that bend, warp, and snap the second they encounter genuinely cold butter. Worse yet, they almost always feature cheap plastic or rubberized handles coated in toxic, synthetic materials that inevitably begin to peel, flake, and degrade after a few runs through the dishwasher.
I have a strict, non-negotiable “No-Go” rule when it comes to toxic gear in my kitchen. I refuse to use equipment that sheds microplastics into my food or utilizes mystery non-stick coatings that off-gas under high heat. You should be actively banishing toxic kitchen gear from your home immediately. You do not need a flimsy, peeling, chemically dubious pastry blender to make incredible biscuits.
What you actually need are durable, multi-purpose, essential kitchen tools that will survive a lifetime of heavy use. A high-quality, heavy-gauge stainless steel box grater is inexpensive, practically indestructible, completely food-safe, and infinitely more effective at distributing fat than any specialized pastry gadget ever invented. It is a multi-tasking workhorse that you will use for shredding cheese, grating vegetables, zesting citrus, and, yes, executing perfectly flaky biscuits. Stop wasting your hard-earned money and kitchen drawer space on single-use junk.
The Definitive Masterclass: Grating Your Way to Perfection
Alright, enough theory and ranting. Time is money, and we need to get breakfast on the table. It is time to get our hands dirty (but not too dirty, because remember, body heat is the enemy). Here is the definitive, exhaustive, step-by-step masterclass on executing the grated frozen butter technique.
Step 1: The Deep Freeze Protocol
Do not just put your butter in the refrigerator and call it a day. The average home refrigerator sits around 37°F (3°C). That is simply not cold enough to withstand the friction of a grater without smearing. You need to place your sticks of butter in the freezer for an absolute minimum of 30 to 45 minutes before you begin. Ideally, you should just keep a permanent stash of high-quality, unsalted butter in your freezer at all times so you are always prepared for a spontaneous weekend baking project.
While you are at it, place your large mixing bowl and your stainless steel box grater in the freezer as well. A room-temperature glass or metal bowl will immediately begin sapping the cold out of your ingredients the second they touch. We are intentionally building a fortress of cold.
Step 2: Preparing and Aerating the Dry Ingredients
In your deeply chilled bowl, thoroughly whisk together your dry ingredients. For a standard, highly reliable batch, this typically means 2 to 2.5 cups of all-purpose (or pastry) flour, 1 tablespoon of baking powder, 1/4 teaspoon of baking soda, and 1 teaspoon of kosher salt.
Do not skip the whisking. Whisking not only evenly distributes the chemical leavening agents—preventing horrific, bitter pockets of concentrated baking soda in your final product—but it also mechanically aerates the flour, breaking up clumps and lightening the final texture of the dough.
Step 3: The Rapid Grating Process
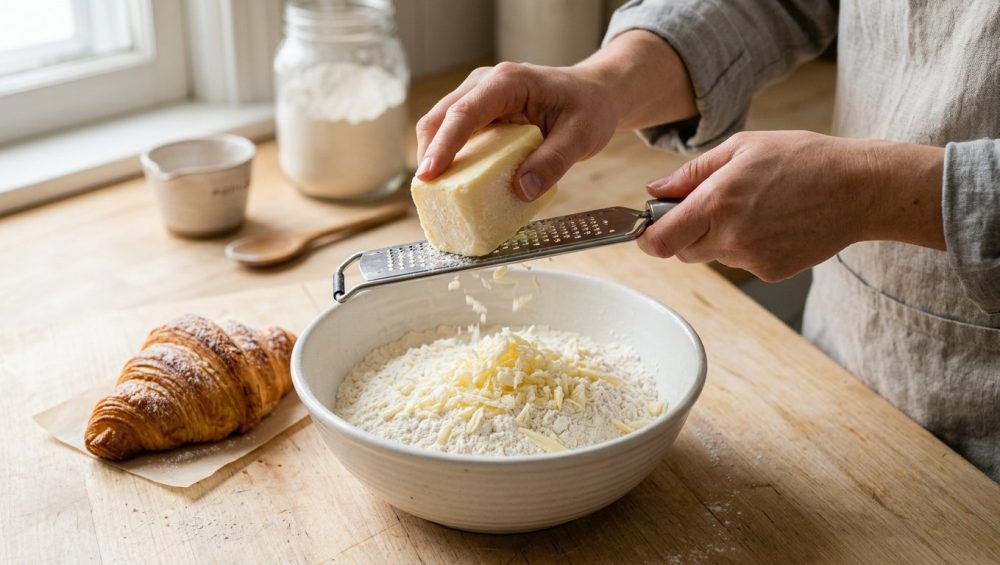
Remove your frozen butter and your chilled box grater from the freezer. Using the side of the grater with the largest teardrop-shaped holes, rapidly grate the frozen butter directly onto a cutting board, or, if you are coordinated enough, straight into the bowl of dry ingredients.
You must work quickly and efficiently. Hold the stick of butter by the paper wrapper to physically insulate it from the heat of your bare hand. If the butter starts to slip, or if your hand gets uncomfortably cold, wrap a thick paper towel around the end you are gripping. Grate the entire stick (usually 8 tablespoons or 1/2 cup) into a glorious, uniform mountain of frozen butter shreds.
Step 4: Tossing, Not Rubbing
Immediately transfer the grated butter into the chilled flour mixture. Do not, under any circumstances, use your warm hands to mix it. Instead, use a silicone spatula or a large wooden spoon to gently toss the butter shreds in the flour, exactly like you are tossing a delicate salad.
Your goal here is to individually coat every single shred of butter in a thin layer of flour. This prevents the shreds from clumping back together into a single, massive block of fat, and as we discussed earlier, it coats the flour proteins in fat, actively inhibiting gluten development. The mixture should look like coarse, sandy crumbles with distinct, highly visible pieces of fat evenly distributed throughout.
Step 5: The Acidic Hydration Station
Create a wide well in the center of your flour and butter mixture. It is time to pour in your liquid. For the ultimate tangy flavor and tender crumb, ice-cold buttermilk is absolutely non-negotiable.
Why buttermilk? It comes back to chemistry. Baking soda (sodium bicarbonate) is a base. It needs an acid to react and produce carbon dioxide gas. Buttermilk provides a heavy dose of lactic acid, typically sitting at a pH of around 4.5. When this acid meets the alkaline baking soda, a rapid neutralization reaction occurs, producing CO2 bubbles that get trapped in the dough, providing a massive secondary lift alongside the steam from the butter. Furthermore, the lactic acid actively works to further tenderize the gluten strands.
Pour in roughly 3/4 cup to 1 cup of your ice-cold buttermilk. Again, keep your hands out of the bowl. Use your spatula to gently fold the mixture together just until a shaggy, messy, highly unkempt dough begins to form. Do not overmix. If there is still a little bit of dry, unincorporated flour at the absolute bottom of the bowl, that is perfectly fine. It will hydrate during the folding process.
Step 6: The Lazy Lamination Fold
Turn the shaggy dough out onto a lightly floured, cool countertop. This is where we create those mind-blowing, pull-apart layers that rival professional bakeries. We are going to borrow a highly technical method from croissant making called lamination, but we are going to execute the lazy, highly efficient home-cook version.
Pat the dough out into a rough, thick rectangle. Do not use a rolling pin; your hands (used briefly, gently, and sparingly) are more than sufficient. Fold the rectangle in thirds, exactly like you are folding a business letter to fit into an envelope. Rotate the dough 90 degrees, gently pat it out into a rectangle again, and fold it in thirds one more time. You have just effortlessly created multiple distinct, alternating layers of dough separated by paper-thin sheets of flour-coated butter.
If the dough is stubbornly sticking to your counter, do not panic and do not aggressively rip it. This is the perfect time to utilize your kitchen’s unsung hero, the stainless steel bench scraper, to cleanly lift and fold the dough without transferring a single degree of heat from your hands.
The Thermodynamics of the Oven: Achieving Maximum Lift
Once your dough is folded and gently patted down to about a 1-inch thickness, it is time to cut your biscuits. Use a sharp, metal biscuit cutter. Press straight down into the dough and pull straight up. Do not twist the cutter. Twisting smears the dough and pinches the edges shut, effectively locking the layers together so they cannot rise.
These biscuits need to go into a screaming hot oven. I am talking 425°F (218°C) or even 450°F (232°C). Why so aggressively hot? Because we need intense thermal shock. We need the ambient heat to instantly penetrate the dough, melting the butter and vaporizing the water into steam before the gluten structure has a chance to fully set, dry out, and solidify. If you bake biscuits at a sluggish, cowardly 350°F, the butter will slowly melt and leak out onto your baking sheet in a sad puddle, leaving you with dry, dense bricks.
Speaking of baking sheets, make sure you are using heavy-duty, uncoated, commercial-grade aluminum half-sheet pans. Flimsy, cheap grocery store pans will violently warp under high heat. If you are constantly wondering why your baking sheets keep warping in the oven, it is because thin, poor-quality metal expands unevenly when subjected to rapid temperature changes. Similarly, if you hear loud, terrifying popping noises and wonder why your baking sheets pop, it is due to that exact same thermal stress on cheap materials. Invest in thick aluminum.
Place your cut biscuits on the pan so that their edges are just barely touching each other. This is a brilliant, highly effective structural hack. When biscuits touch, they physically support each other as they rise, forcing the expansion upward rather than sprawling outward. This results in significantly taller, fluffier biscuits with incredibly soft, tender sides.
Finally, do not grease the pan. If you want the bottoms to crisp up perfectly, bake them on bare metal or unbleached parchment paper. I cannot stress this enough: cooking spray is the enemy of good pastry. The aerosolized propellants and emulsifiers in commercial cooking sprays will scorch onto your pans under high heat, leaving a sticky, polymerized residue that is impossible to clean and will absolutely ruin the delicate flavor of your biscuits.
Troubleshooting Common Beginner Biscuit Disasters
Even with the foolproof grating method, things can occasionally go sideways if you lose focus or cut corners. Let us aggressively troubleshoot the most common rookie mistakes, because diagnosing and fixing errors is just as important as following the recipe in the first place.
Disaster 1: The Butter Melted Anyway
If your kitchen is sweltering in the middle of July, or if you got distracted by a phone call mid-prep, your grated butter might start to soften. If the dough feels warm, sticky, or greasy before it goes into the oven, stop immediately. Do not bake it. Place the entire bowl or the cut biscuits into the freezer for 15 minutes to re-chill the fat matrix. Baking warm dough guarantees failure.
Disaster 2: The Biscuits Are Tough and Chewy
You over-mixed the dough. The grating technique is specifically designed to minimize handling, but if you aggressively kneaded the dough like it was a rustic sourdough loaf, you developed way too much gluten. Next time, mix only until the dough barely holds together. It should look messy, ragged, and shaggy, not smooth and uniform. If you want foolproof modern recipes to actually work for you, you must learn to trust the shaggy dough phase. Step away before you ruin it.
Disaster 3: The Biscuits Did Not Rise
There are three main culprits here. First, your baking powder might be expired. Baking powder loses its chemical potency over time; test it by dropping a spoonful into hot water to see if it violently bubbles. If it just sits there, throw it in the trash. Second, you twisted the biscuit cutter, sealing the edges shut. Always press straight down. Third, your oven was simply not hot enough to generate the required steam. Buy a cheap oven thermometer to ensure your appliance is actually hitting 425°F.
Beyond Biscuits: Expanding Your Pastry Arsenal
Once you fully master the grated frozen butter technique, you have unlocked the foundational secret to almost all flaky pastries. This is not just a neat party trick for Sunday morning biscuits; it is a universal law of baking science that you can apply across your entire culinary repertoire.
Scones
Scones are essentially the biscuit’s slightly sweeter, denser, British cousin. They utilize the exact same fat-in-flour suspension method. By grating frozen butter into your scone dough instead of rubbing it in, you guarantee a tender, crumbly texture that pairs perfectly with a cup of coffee, completely avoiding the dry, chalky, throat-clogging texture of mass-produced coffee shop scones.
Pie Crusts
Traditional pie crust recipes are notorious for causing home cooks intense, paralyzing anxiety. The vague mandate to leave “pea-sized” chunks of butter in the flour is subjective and stressful. Grating the butter entirely eliminates the guesswork. The uniform shreds of frozen fat distribute flawlessly throughout the flour, ensuring a beautifully laminated crust that shatters perfectly when you slice into it.
Gluten-Free Baking
If you are diving into the incredibly complex, often frustrating world of modern gluten free baking, the grating technique is an absolute lifesaver. Gluten-free flours inherently lack the structural integrity and elasticity of wheat flours, making them highly prone to crumbling into dust. By ensuring perfect, even fat distribution through grating, you provide much-needed moisture, distinct layering, and physical lift to doughs that might otherwise turn out dense, flat, and unpalatable.
The Final Bite
Baking is undeniably a science, but it absolutely does not have to be a stressful, rigid, joyless ordeal. By understanding the simple thermodynamics of cold fat, the mechanics of steam-leavening, and the protein structures of wheat flour, you can bypass years of expensive culinary training and produce professional-level results in your own home kitchen.
The grated frozen butter technique is the ultimate testament to the philosophy that working smarter, not harder, always yields the best results. It saves you precious time, it heavily minimizes the risk of overworking your dough, and most importantly, it guarantees a towering, flaky, melt-in-your-mouth biscuit every single time you turn on the oven.
So, throw away that useless, flimsy pastry blender. Banish the toxic, single-use gadgets from your kitchen drawers. Put a stick of high-quality butter in your freezer right now, grab your trusty stainless steel box grater, and get ready to bake the absolute best biscuits of your life. You’ve got this.


