The Reality Check: You Don’t Need a Second Mortgage to Stock a Kitchen
Let’s get one thing straight right out of the gate: the culinary industry is running a massive, highly lucrative grift on beginners. If you walk into any big-box home goods store, you will be immediately assaulted by towering displays of 20-piece cookware sets, 15-piece knife blocks, and single-use gadgets designed to do exactly one thing (I’m looking at you, strawberry hullers and avocado slicers). It is overwhelming, it is incredibly expensive, and frankly, it is mostly garbage.
You do not need a culinary degree to cook mind-blowing food, and you certainly do not need a kitchen that looks like a Williams-Sonoma showroom. What you need is a curated arsenal of high-quality, durable, and highly functional tools.
As someone who learned to cook by trial, error, and setting off the smoke detector on countless Tuesday nights, I can tell you that the secret to professional-level results at home isn’t a $5,000 stove. It’s technique, timing, and having gear that actually works with you instead of against you. Weeknights are about survival and efficiency; weekends are for elaborate culinary projects. To navigate both, you need tools that save you time, perform flawlessly, and don’t poison your food with cheap, peeling chemical coatings.
Consider this your definitive, no-nonsense masterclass in stocking a beginner kitchen. We are skipping the fluff, ignoring the pretentious chef-speak, and focusing entirely on what you actually need to dominate your kitchen. Grab a glass of wine, take a deep breath, and let’s build your culinary toolkit.
The Holy Trinity of Knives: Ditch the 15-Piece Block
If there is one hill I will happily die on, it is this: never, under any circumstances, buy a pre-packaged knife block. You will end up paying for a half-dozen blades you will never use (what even is a tomato knife?), and the quality of the steel is almost always compromised to keep the price point attractive. You only need three knives to conquer 99% of the tasks in a home kitchen.
The Anatomy of a Good Knife
Before we talk about the specific blades, let’s establish some basic vocabulary so you don’t get swindled. You want a knife made of “high-carbon stainless steel.” This hybrid material gives you the razor-sharp edge retention of carbon steel with the rust resistance of stainless. You’ll hear the term “tang”—this refers to the metal of the blade extending down into the handle. A “full tang” knife is generally better balanced and more durable, though some modern synthetic-handled knives (like the legendary Victorinox Fibrox) skip the full tang and still perform brilliantly.
The Chef’s Knife: Your Culinary Excalibur
The 8-inch chef’s knife is the absolute workhorse of your kitchen. If you only have the budget to splurge on one item, make it this. You will use it for chopping onions, slicing meat, mincing garlic, and crushing herbs.
For beginners, you have two main style choices: German or Japanese. German knives (like Wüsthof or Zwilling) are heavier, have a thicker blade, and feature a pronounced curve (the “belly”) that allows for a rocking chopping motion. They are rugged and forgiving. Japanese knives (like Mac or Global) are lighter, have a thinner blade, and a straighter edge designed for precise, up-and-down slicing.
Regardless of which you choose, you must learn the “pinch grip.” Do not hold the handle like a tennis racket. Pinch the base of the actual blade between your thumb and index finger, wrapping your remaining fingers around the handle. This gives you ultimate control, turning the knife into an extension of your arm. A sharp, well-balanced chef’s knife will literally shave ten minutes off your weekday prep time.
The Paring Knife: For the Fiddly Bits
Your chef’s knife is too unwieldy for off-board work. Enter the paring knife. This is a small, 3-to-4-inch blade used for tasks that require surgical precision: peeling an apple, hulling strawberries, deveining shrimp, or scoring a piece of meat. Because you are generally using this knife in the air rather than against a cutting board, edge retention isn’t as critical as it is for your chef’s knife. Save your money here; a $10 plastic-handled paring knife from a restaurant supply brand will serve you just as well as a $100 forged one.
The Serrated Bread Knife: Not Just for Carbs
The third member of the holy trinity is the serrated knife, usually 9 to 10 inches long. Yes, it is essential for slicing through crusty sourdough without crushing the delicate crumb inside, but its utility goes far beyond bread. Those jagged teeth are perfect for biting into anything with a tough exterior and a soft interior. Think ripe tomatoes, thick-skinned melons, or leveling a delicate sponge cake.
Here is the secret the knife industry doesn’t want you to know: serrated knives are notoriously difficult and expensive to sharpen. Even professional chefs treat them as disposable. Do not drop big money on a serrated knife. Buy a highly-rated, affordable model with a comfortable grip, and fully expect to replace it every five to ten years when it eventually goes dull.
Cutting Boards: Where the Magic (and the Chopping) Happens
Your cutting board is the foundation of your kitchen prep. It protects your countertops, but more importantly, it protects the edge of your chef’s knife.
The Crime of Glass and Stone Boards
Let me be unequivocally clear: if you own a glass, marble, or granite cutting board, you are committing a crime against your knives. These materials are harder than the steel of your blade. Every time you chop on them, you are microscopically rolling and dulling the edge of your knife. A dull knife requires you to use more force, making it significantly more likely to slip and send you to the emergency room. Glass boards are also terrifyingly slippery. Throw them away, or use them as cheese platters. They are not cutting surfaces.
Wood vs. Plastic: The Great Bacterial Debate
For decades, the conventional wisdom was that plastic cutting boards were safer for raw meat because they are non-porous and can be thrown in the dishwasher. However, extensive scientific research—most notably by Dr. Dean Cliver at UC Davis—turned this assumption on its head.
When you score a plastic board with a sharp knife, you create microscopic gouges. Bacteria from raw meat get trapped in these deep plastic crevices, and dishwashers often fail to reach and sanitize them fully. Worse, as the plastic degrades, you end up ingesting microplastics with your perfectly chopped vegetables.
Wood, on the other hand, is naturally porous. Capillary action draws bacteria down beneath the surface of the wood, where they are trapped, deprived of moisture, and eventually die. Wood is naturally antimicrobial. Furthermore, wood is relatively soft, meaning it absorbs the impact of your knife, keeping your blade sharper for much longer.
Board Maintenance: Treat Your Wood Right
For your primary prep station, invest in a large, heavy wooden board. “Edge-grain” boards are affordable and durable, while “end-grain” boards (which look like a checkerboard) are the gold standard because the wood fibers separate to let the knife edge pass, then self-heal. Yes, wood requires a tiny bit of maintenance. You cannot put it in the dishwasher. You wash it with hot, soapy water, dry it immediately, and once a month, you rub it down with food-grade mineral oil to keep it from cracking. It takes three minutes, and the board will outlive you.
For raw chicken and fish, keep one relatively cheap, thin plastic board on hand so you can easily sanitize it, but replace it the moment it becomes heavily deeply scarred.
Cookware: The Non-Toxic Revolution
We need to have a serious talk about what happens when metal gets hot. The cookware industry is flooded with cheap, toxic garbage that will warp after three uses and leach mystery chemicals into your weekday stir-fry. I have a strict “no-go” rule on toxic gear. We are building a kitchen that is safe, highly efficient, and built to last.
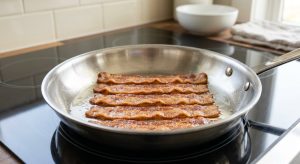
The Stainless Steel Skillet: The Indestructible Workhorse
If you want to cook like a pro, you need to master the stainless steel skillet. A 10-inch or 12-inch stainless pan is your primary weapon for searing meats, sautéing vegetables, and building pan sauces.
You must look for “tri-ply” or “fully clad” stainless steel. Stainless steel on its own is a terrible conductor of heat; it will give you hot spots that burn your food. Aluminum, however, is a fantastic heat conductor, but it reacts with acidic foods (like tomatoes) and leaches metallic flavors. The solution? Cladding. High-quality pans sandwich a thick core of aluminum between two layers of indestructible, non-reactive stainless steel.
The Sassy Sous-Chef Tip: Beginners are terrified of stainless steel because “everything sticks to it.” Food only sticks to stainless steel if you lack technique. You must preheat the pan before adding oil. Use the “water drop test” (the Leidenfrost effect): flick a droplet of water into the dry, heating pan. If it sizzles and evaporates, it’s not hot enough. If it forms a perfect bead and dances across the surface like a mercury marble, the pan is ready. Add your oil, add your protein, and do not touch it until it releases naturally. That golden-brown crust you just created? That’s the Maillard reaction, and it is the foundation of flavor.
The Cast Iron Pan: Your Great-Grandmother Was Right
A 10.25-inch or 12-inch heavy cast iron skillet is mandatory. Cast iron is a poor conductor of heat (it takes a long time to get hot), but it has unparalleled heat retention and high emissivity. This means once it gets blazing hot, it stays blazing hot, even when you drop a massive, cold ribeye steak into it.
Cast iron requires “seasoning,” which sounds intimidating but is just basic chemistry. When you rub the pan with a thin layer of oil and heat it past its smoke point, the oil undergoes polymerization, transforming from a liquid fat into a hard, slick, naturally non-stick plastic-like coating. A well-seasoned cast iron pan can slide an egg just as well as Teflon, but it will last for five generations instead of five months.
The Enameled Dutch Oven: The Ultimate Multitasker
For soups, stews, braises, deep-frying, and baking artisan sourdough bread, you need a heavy pot with a tight-fitting lid. Enter the enameled cast iron Dutch oven (aim for the 5.5 to 6-quart size).
The cast iron core provides that incredible heat retention, allowing for low, slow, perfectly even simmering on the stovetop or in the oven. The enamel coating means you don’t have to worry about acidic ingredients eating away at the seasoning of bare cast iron. Yes, premium brands from France cost as much as a car payment, but there are plenty of highly reputable, affordable brands that will give you 95% of the performance for 20% of the price.
The Non-Stick Conundrum: A Hill I Will Die On
This is where I get incredibly strict. Traditional non-stick pans are coated with PTFE (Polytetrafluoroethylene), commonly known by the brand name Teflon. Historically, the manufacturing of these pans involved PFOA and PFOS—toxic “forever chemicals” (PFAS) that build up in the human body and the environment, linked to a horrifying array of health issues.
While PFOA has largely been phased out of modern pans, the replacements are chemical cousins that are highly questionable. More importantly, PTFE coatings degrade. If you heat a traditional non-stick pan past 500°F (which happens very quickly on a gas stove), the coating begins to break down and off-gas toxic fumes that can literally cause “polymer fume fever” in humans and are famously fatal to pet birds. Furthermore, the moment you scratch that coating with a metal spatula, it begins flaking off into your food.
If you absolutely must have a non-stick pan for cooking delicate eggs or fish on a Tuesday morning before work, buy a ceramic-coated pan. Ceramic coatings are sand-based (sol-gel) and free of forever chemicals. However, you must accept reality: no non-stick pan is a “buy it for life” item. The non-stick properties of ceramic will degrade after one to two years of regular use. Treat it as a consumable. Never spend more than $40 on a non-stick pan, never use metal utensils on it, and never wash it in the dishwasher.
For the brave, skip the non-stick entirely and invest in a Carbon Steel skillet. It requires seasoning like cast iron but is lighter and more maneuverable, favored by restaurant kitchens worldwide.
The Saucepan and the Stockpot: Boiling Point
To round out your cookware, you need a 2-to-3-quart saucepan (for making rice, boiling eggs, or heating up a quick marinara) and a large 8-to-12-quart stockpot.
For the saucepan, stick with tri-ply stainless steel so you don’t scorch delicate sauces. For the stockpot, which you will primarily use for boiling large volumes of water for pasta or making bone broths, a cheaper disc-bottom stainless steel pot (where only the base has the aluminum core) is perfectly acceptable. You don’t need heat conductivity up the tall sides of a pot filled with water.
Bakeware: Because Weekends are for Carbs (and Roasting)
Bakeware isn’t just for baking cookies; it is the backbone of savory roasting. The same rules of heat conductivity apply here.
Heavy-Duty Aluminum Half-Sheets
Do not buy flimsy, dark-colored “cookie sheets” from the grocery store. Dark metal absorbs heat aggressively and will burn the bottoms of your cookies and vegetables before the tops are cooked. Flimsy metal will violently warp with a loud “BANG” the moment it goes into a 400°F oven, launching your perfectly arranged Brussels sprouts into the abyss.
You need two commercial-grade, heavy-gauge (18-gauge) bare aluminum “half-sheet” pans (roughly 18 by 13 inches), complete with rolled rims. Aluminum conducts heat beautifully and evenly. You will use these for roasting whole chickens, baking sheet-pan dinners on a lazy Wednesday, and, yes, baking cookies. Buy a wire cooling rack that fits perfectly inside the half-sheet; this elevates meat to allow air circulation, giving you an even roast and crispy skin.
The 9×13 Baking Dish
Every home cook needs a vessel for casseroles, lasagnas, enchiladas, and brownies. A standard 9×13-inch baking dish is the universal standard. You have a choice between glass, ceramic, and metal.
Glass and ceramic are insulators. They take a long time to heat up, but once hot, they stay hot. This is perfect for casseroles that you want to keep warm on the dinner table. Metal heats up and cools down quickly, making it better for brownies or cakes where you want the cooking process to stop immediately once removed from the oven. For a beginner, a high-quality, thermal-shock-resistant glass or ceramic 9×13 dish is the most versatile starting point.
The Gadget Drawer: Tools That Actually Earn Their Keep
Most kitchen gadgets are solutions in search of a problem. You don’t need a garlic press; you have a chef’s knife. You don’t need a banana slicer; again, you have a knife. But there are a few hand tools that are absolutely non-negotiable for efficiency and precision.
The Digital Kitchen Scale: Precision Without Pretense
If you want to bake, or if you simply want your savory recipes to turn out exactly the same way every time, you must stop measuring by volume (cups) and start measuring by weight (grams).
Here is a horrifying fact for beginners: a “cup” of all-purpose flour can weigh anywhere from 120 grams to 160 grams depending on whether you scooped it aggressively or spooned it lightly. That is a 30% variance in your primary ingredient. Your cookies are failing because you are accidentally adding a massive surplus of flour. A digital kitchen scale costs $15. It eliminates extra measuring cups (meaning fewer dishes to wash), and it guarantees absolute accuracy. Put your bowl on the scale, press “tare” to zero it out, pour your ingredient, and repeat. It is the ultimate time-saver.
Spatulas: The Extensions of Your Arms
You need two types of spatulas, and neither of them is the rigid plastic monstrosity that came free with your old college frying pan.
First, the Silicone Spatula. Also known as a rubber scraper, this is for folding batters, scrambling eggs, and scraping every last drop of expensive sauce out of a bowl. Ensure you buy one that is one solid piece of silicone (so bacteria can’t hide where the handle meets the head) and is heat-resistant up to 600°F so it doesn’t melt into your caramel.
Second, the Fish Spatula (or slotted turner). This is an offset, incredibly thin, flexible, slotted metal spatula. Despite the name, it is not just for fish. The razor-thin edge slides effortlessly under delicate fried eggs, heavy burgers, and roasted vegetables without tearing them. Because it is metal, you can only use it on your stainless steel or cast iron pans, not your non-stick.
Tongs: The Kitchen Tweezers
Tongs are the heat-proof extensions of your fingers. You want sturdy, spring-loaded, stainless steel tongs with scalloped edges for grip. Buy a 9-inch pair for standard stovetop maneuvering and a 12-inch pair for reaching into deep ovens or manning a hot grill. Avoid tongs with silicone tips unless you are exclusively using non-stick pans; the silicone makes them clumsy and ruins your ability to firmly grip heavy items like a whole roasted chicken.
The Microplane: The Secret Weapon for Instant Flavor
Originally designed as a woodworking tool, the Microplane (a brand name for a photo-etched rasp grater) revolutionized the home kitchen. Unlike cheap stamped-metal graters that tear and mash ingredients, a Microplane features hundreds of razor-sharp, photo-etched teeth that effortlessly shave ingredients into a fine snow.
This is your secret weapon for weekday flavor. In ten seconds, you can grate fresh parmesan into a fluffy cloud, zest a lemon without hitting the bitter white pith, or turn a clove of garlic and a knob of ginger into a fine paste for a stir-fry. It extracts maximum essential oils and flavor with zero effort.
The Science of Heat: Stop Guessing if It’s Raw
Cooking is fundamentally the application of heat to food. If you cannot measure that heat, you are flying blind.
The Instant-Read Thermometer
The biggest mistake beginners make is cutting into a beautiful steak to “check if it’s done,” releasing all the carefully retained juices onto the cutting board. The second biggest mistake is relying on the “poke test” (comparing the firmness of the meat to the base of your thumb), which is culinary astrology and completely unreliable unless you have cooked 10,000 steaks.
You must buy a high-quality digital instant-read thermometer. The best models use thermocouple technology, placing a microscopic sensor at the very tip of the probe that reads the internal temperature in under two seconds. This tool will instantly cure your fear of undercooking chicken and save you from the tragedy of overcooking an expensive prime rib.
The Mechanics of Carryover Cooking
Once you have a thermometer, you must learn the law of carryover cooking. Heat travels from the outside of the food to the inside. When you take a piece of meat off the stove or out of the oven, the intense heat trapped in the outer layers continues to drive inward.
A thick chicken breast or a steak will rise in temperature by 5 to 10 degrees after you remove it from the heat source. A large turkey or roast can rise by 15 degrees. If you want your steak perfectly medium-rare (135°F), you must pull it off the heat at 125°F to 130°F and let it rest. Your thermometer is the only way to manage this scientific reality.
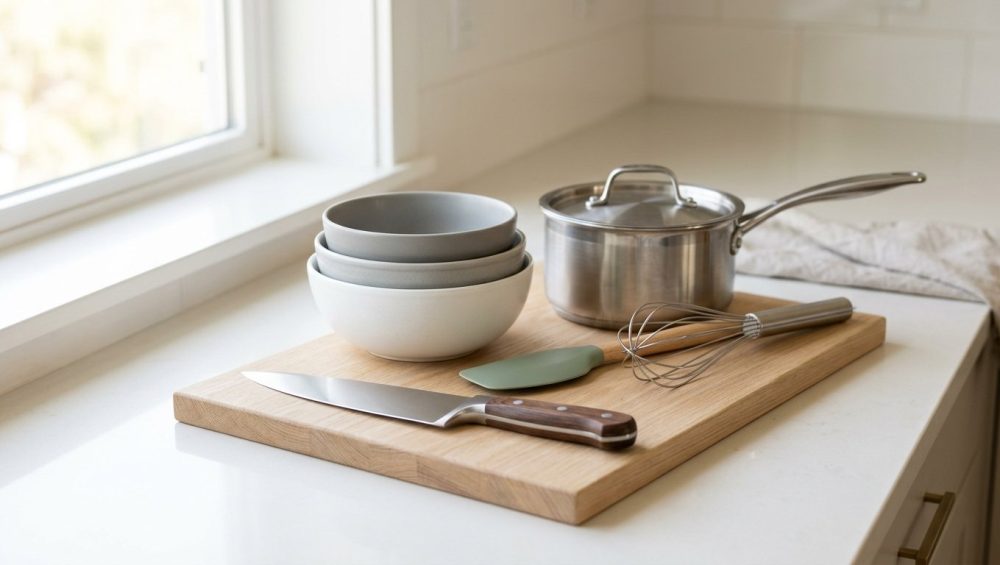
Prep Bowls and Storage: Mise En Place for the Masses
“Mise en place” is a French culinary phrase that translates to “everything in its place.” It means prepping, chopping, and measuring all your ingredients before you ever turn on the stove. It is the difference between a relaxing cooking experience and a chaotic, smoke-alarm-inducing panic.
Nesting Mixing Bowls
To achieve proper mise en place, you need vessels. Buy a set of lightweight, nesting stainless steel mixing bowls. Glass bowls are heavy, slippery when covered in oil, and will eventually shatter when you inevitably drop them. Stainless steel is indestructible, lightweight, and can be placed over a pot of simmering water to act as a double boiler for melting chocolate.
Glass Storage Containers: Ditch the Flimsy Plastic
We already discussed the microplastic issue with cutting boards; the same applies to food storage. Cheap plastic containers stain, warp in the microwave, retain the smell of last week’s curry, and leach endocrine-disrupting chemicals (like BPA and phthalates) into your food when heated.
Invest in a matching set of high-quality borosilicate or tempered glass storage containers with locking silicone-seal lids. They are oven-safe, microwave-safe, dishwasher-safe, and stack neatly in your fridge. Because they are transparent, you can actually see what leftovers you have, drastically reducing food waste.
Small Appliances That Actually Save Time
If you are a weekend warrior who survives weekdays on efficiency, small appliances are your best friend. But counter space is premium real estate, so we only invite tools that offer massive returns on investment.
The Immersion Blender: The Weeknight Unsung Hero
Traditional stand blenders are fantastic for smoothies, but they are a nightmare to clean. Pouring hot, chunky soup into a standard blender is a recipe for a volcanic explosion of boiling liquid all over your kitchen ceiling (due to steam expansion).
Enter the immersion blender (or stick blender). This handheld motor with a blade on the end can be plunged directly into your hot Dutch oven to purée a butternut squash soup right on the stove. It takes ten seconds to rinse the attachment clean. Furthermore, if you place it in a tall, narrow jar with an egg, some oil, a squirt of mustard, and a splash of lemon juice, the immersion blender will emulsify it into perfect, thick, homemade mayonnaise in exactly thirty seconds. It is cheap, compact, and brilliant.
The Food Processor: Your Personal Sous-Chef
If you hate chopping vegetables, grating cheese, or kneading dough, a food processor is worth its weight in gold. While a knife is great for an onion or two, if a recipe calls for shredding two pounds of carrots, slicing five potatoes for a gratin, or grating a block of sharp cheddar (never buy pre-shredded cheese; it is coated in anti-caking agents like cellulose that ruin its ability to melt), the food processor does the job in literal seconds.
A good food processor relies on a heavy base and a razor-sharp blade. It is the ultimate time-buying machine for the busy home cook, allowing you to whip up pesto, hummus, pie dough, and salsa faster than you can find your car keys to drive to the grocery store.
The Final Verdict: Building Your Arsenal Over Time
Stocking a kitchen is not a race, and it is certainly not a competition to see who can spend the most money. The beauty of this curated list is that it scales with you.
Start with the absolute non-negotiables: an 8-inch chef’s knife, a heavy wooden cutting board, a 12-inch tri-ply stainless steel skillet, and an instant-read thermometer. With just those four tools, you can conquer the vast majority of recipes in existence. As your skills grow, your confidence builds, and your paycheck allows, you can slowly add the cast iron, the Dutch oven, the Microplane, and the food processor.
Cooking at home is one of the most empowering, creative, and vital skills you can develop. It gives you absolute control over your health, your budget, and your palate. By refusing to settle for toxic, flimsy gear and instead investing in the time-tested, functional essentials, you are setting yourself up for a lifetime of culinary triumphs. Now, put down the takeout menu, sharpen your knife, and get to work. You’ve absolutely got this.